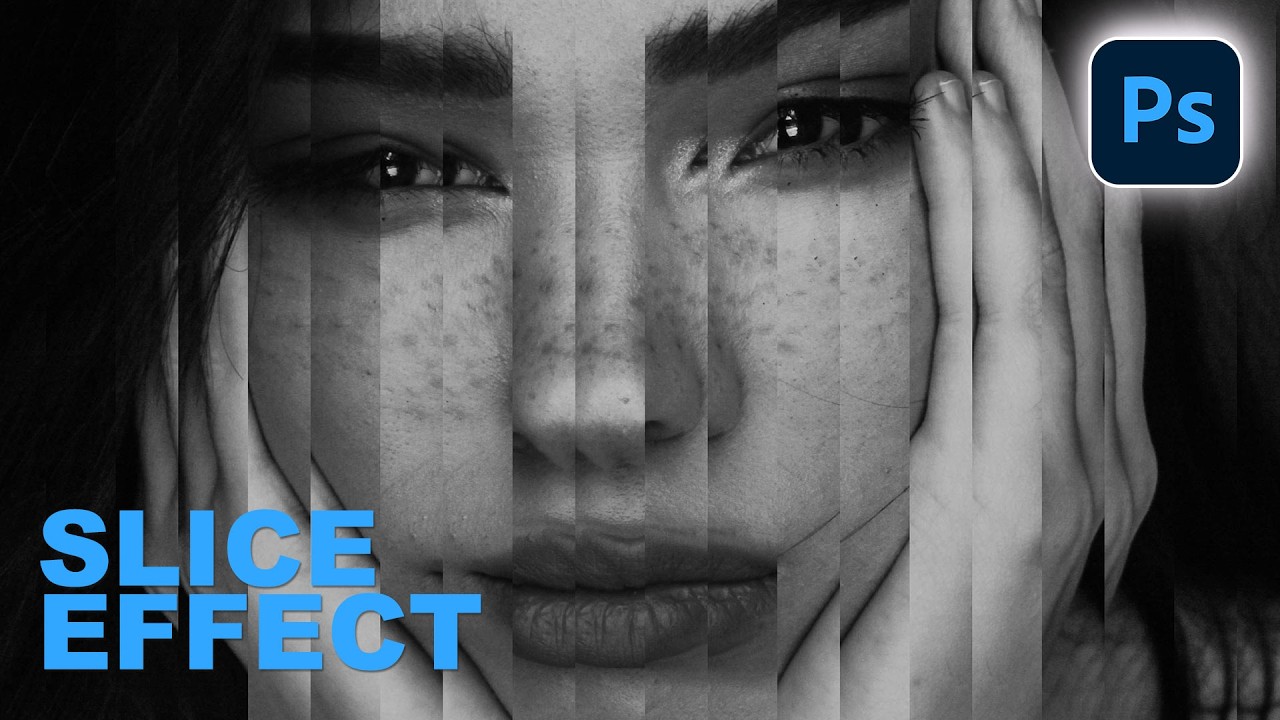
There’s a specific kind of embarrassment that hits when someone shows you a technique you’ve never heard of and you realize you’ve been doing it the hard way for years. I’ve been freelancing in Photoshop long enough that I thought I had a pretty solid handle on the non-destructive workflow stuff. Then I watched Aaron Nace’s latest PHLEARN tutorial on building a portrait slice effect from scratch and immediately learned about “step and repeat,” a technique I had somehow never encountered. No AI assists, no plugins, no generative credits burning through your cloud allowance. Just Photoshop doing exactly what it’s supposed to do.
The slice effect itself is one of those visuals that looks like it took forever but is actually built on a surprisingly logical foundation. You’re essentially creating a series of vertical bars, using them as a layer mask, then offsetting one copy of your image to create the illusion that the portrait has been cut into strips and shifted. The result looks like something out of a high-end editorial shoot. And the technique Aaron walks through in Watch the full tutorial on YouTube is fully non-destructive, which means you can go back and change anything at any point. That alone sold me.
Here’s the full breakdown so you can follow along without pausing the video every ten seconds.
Step 1: Convert Your Background Layer and Duplicate It
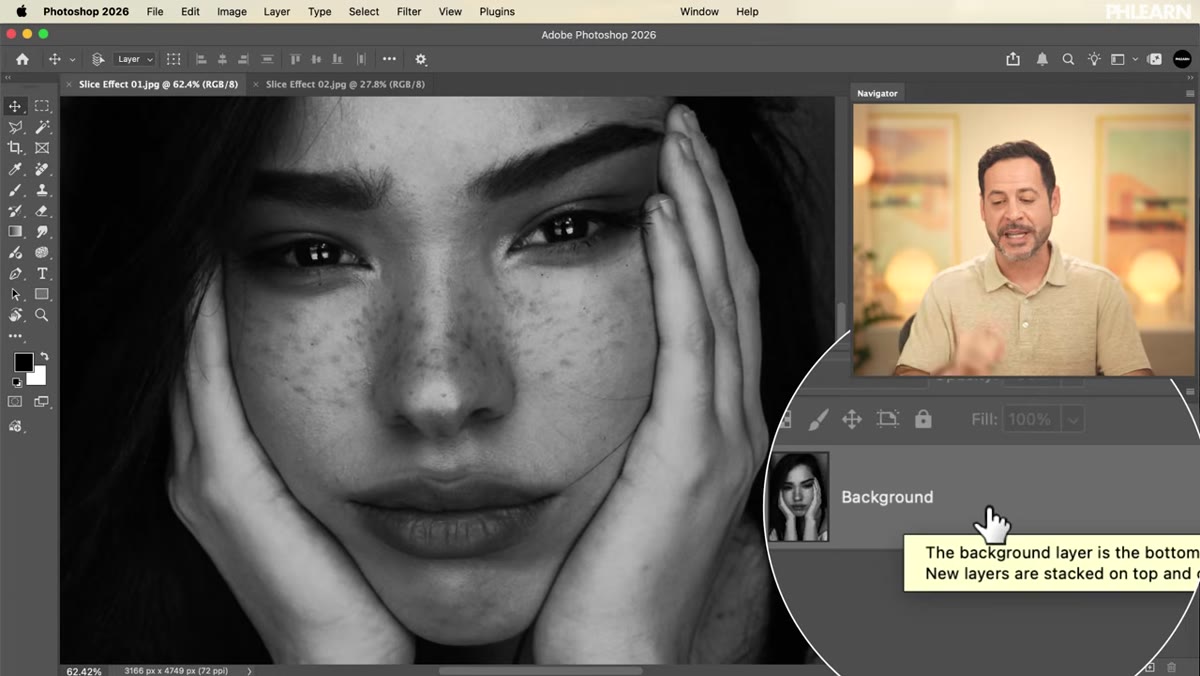 Layers panel showing background layer with lock icon
When you open a photo in Photoshop, it lands as a locked background layer. That lock icon isn’t just decorative. It means you can’t move it, transform it, or apply certain effects without unlocking it first. Double-click the layer, accept the “New Layer” dialog that pops up, and it converts to a regular editable layer called Layer 0.
Layers panel showing background layer with lock icon
When you open a photo in Photoshop, it lands as a locked background layer. That lock icon isn’t just decorative. It means you can’t move it, transform it, or apply certain effects without unlocking it first. Double-click the layer, accept the “New Layer” dialog that pops up, and it converts to a regular editable layer called Layer 0.
Once that’s done, duplicate it. Either right-click and choose Duplicate Layer, or use the shortcut Cmd/Ctrl + J. You should now have Layer 0 and Layer 0 Copy sitting in your panel. These two copies of your image are the foundation the whole effect is built on. Don’t skip this step thinking you’ll just work from one layer. You need both.
Step 2: Create a New Empty Layer for Your Bars
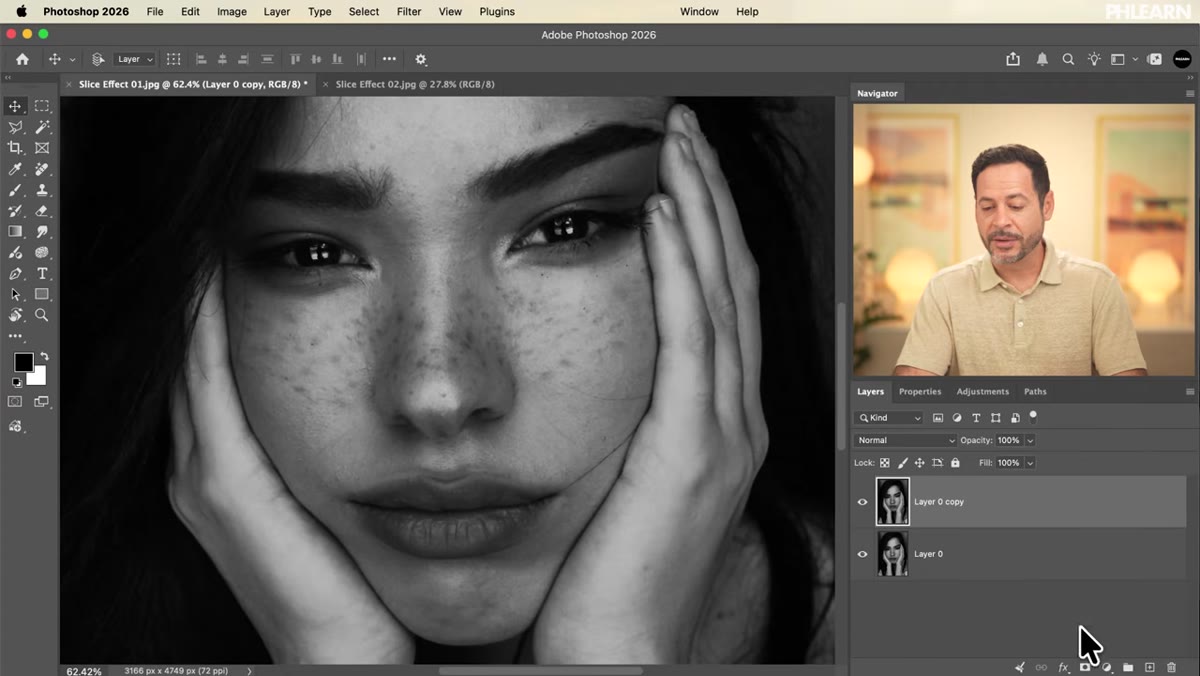 New blank layer created above both photo layers
Click the new layer icon at the bottom of the Layers panel to create a fresh, empty layer sitting above both of your photo layers. This is where you’ll draw your vertical bars. It’s important to keep these bars on their own separate layer so they stay editable and independent from your images.
New blank layer created above both photo layers
Click the new layer icon at the bottom of the Layers panel to create a fresh, empty layer sitting above both of your photo layers. This is where you’ll draw your vertical bars. It’s important to keep these bars on their own separate layer so they stay editable and independent from your images.
Grab the Rectangular Marquee Tool from the toolbar. You’re going to draw a tall, narrow vertical selection on the canvas. The exact width is up to you. Thinner bars give a tighter, more dramatic slice look. Wider bars feel bolder and more graphic. You can always change this later, so don’t overthink it at this stage.
Step 3: Fill the Selection with White
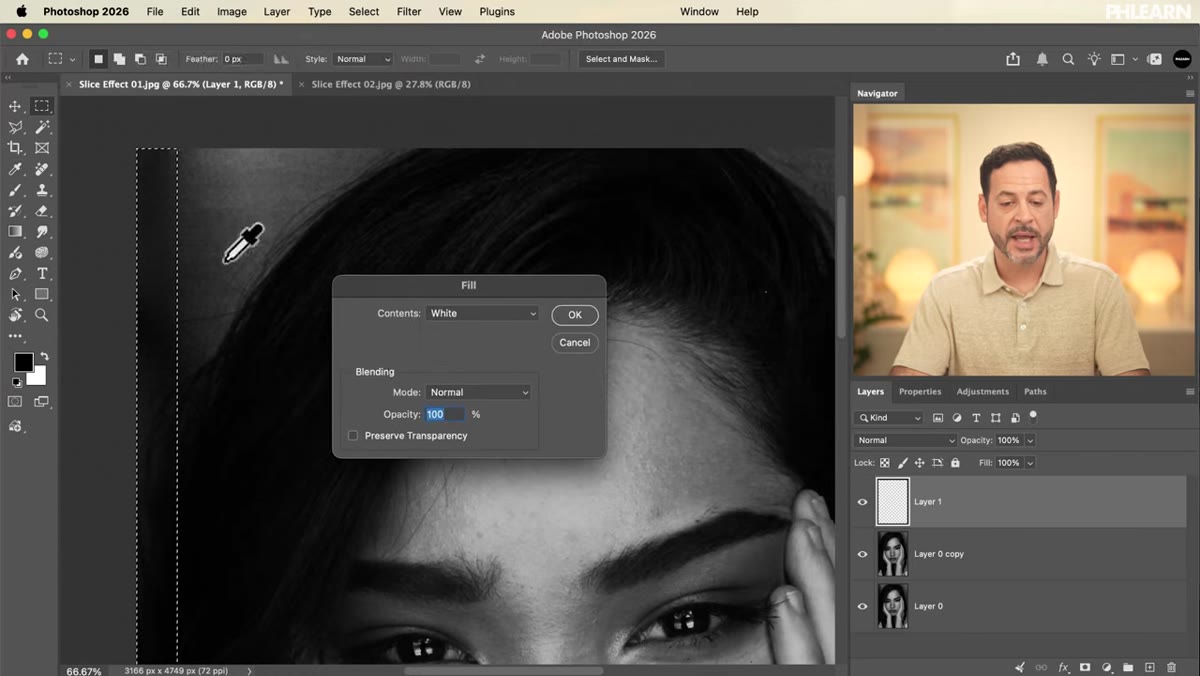 Edit Fill dialog with White selected as contents
With your rectangular selection still active on the new empty layer, go to Edit and choose Fill. In the Fill dialog, click the Contents dropdown and select White. Hit OK. You should now see a single white vertical stripe on your canvas.
Edit Fill dialog with White selected as contents
With your rectangular selection still active on the new empty layer, go to Edit and choose Fill. In the Fill dialog, click the Contents dropdown and select White. Hit OK. You should now see a single white vertical stripe on your canvas.
White matters here because of how layer masks work. When this stripe eventually becomes part of a mask, white means visible and black means hidden. You’re essentially pre-building your mask logic right now by filling with white. Deselect when you’re done (Cmd/Ctrl + D).
Step 4: Use “Step and Repeat” to Duplicate the Bar Across the Canvas
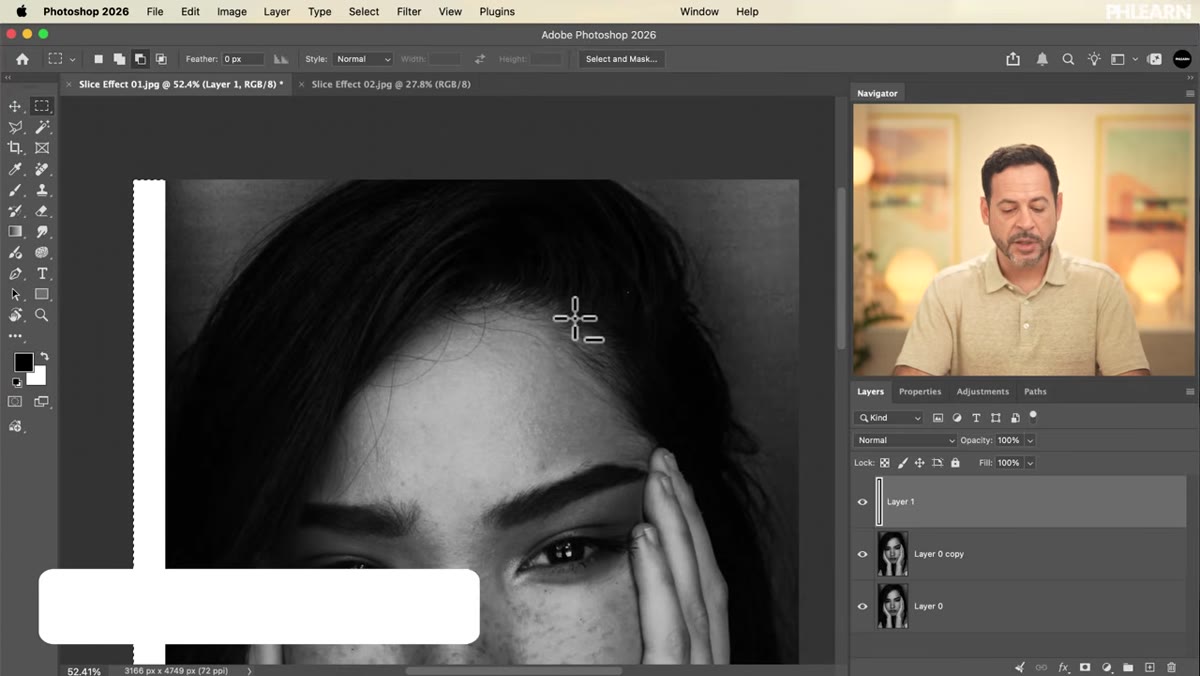 Transform handles appearing around the white bar after shortcut
Here’s the part that made me wish someone had told me about this ten years ago. “Step and repeat” is not in any menu. It’s a keyboard-driven technique that most Photoshop users never stumble onto naturally. You just have to know it.
Transform handles appearing around the white bar after shortcut
Here’s the part that made me wish someone had told me about this ten years ago. “Step and repeat” is not in any menu. It’s a keyboard-driven technique that most Photoshop users never stumble onto naturally. You just have to know it.
On Mac, press Option + Cmd + T. On Windows, it’s Alt + Ctrl + T. This activates Free Transform but with a twist. It creates a copy of your layer content that you can transform independently. Move the new copy horizontally to where you want your next bar to appear, then press Enter to confirm. Now here’s the magic part: press Cmd/Ctrl + Shift + Alt/Option + T repeatedly. Each press repeats the exact same transformation again, generating another copy at the same interval. Keep hitting it until you have bars covering the full width of your canvas. Evenly spaced, perfectly consistent, done in about ten seconds.
Step 5: Merge the Bars and Convert Them Into a Layer Mask
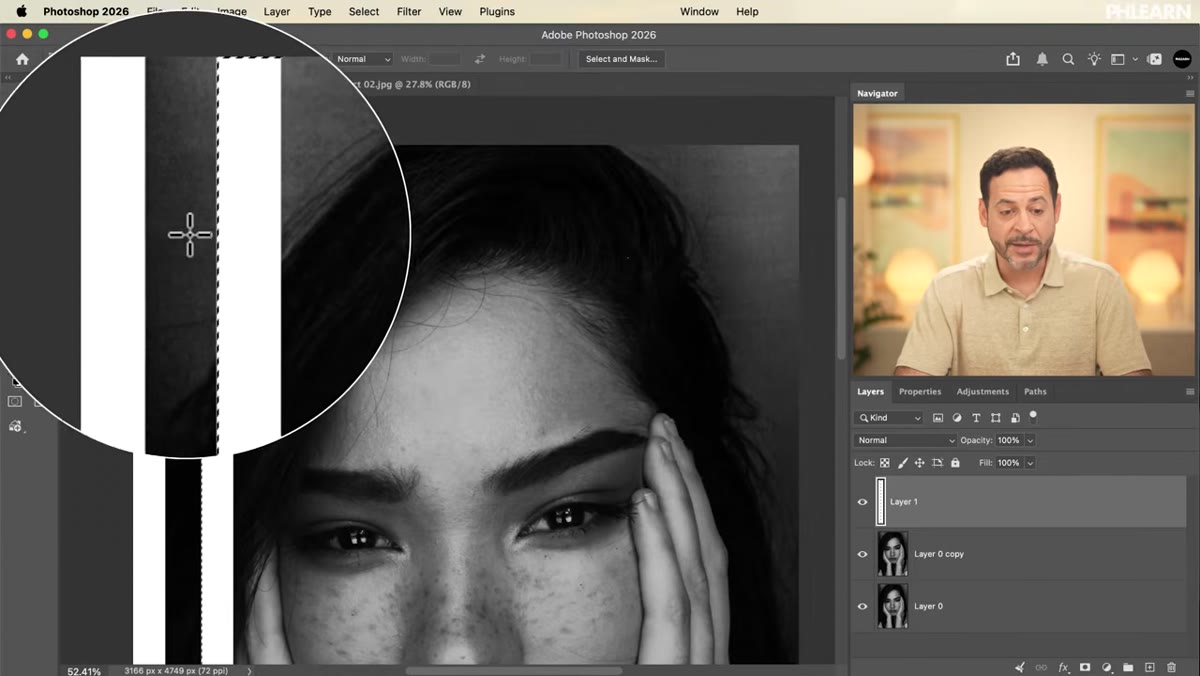 All white bars visible across the full canvas width
Once your bars span the full canvas, merge all the bar layers together into one. Select them all and use Cmd/Ctrl + E to merge. You should have a single layer of evenly-spaced white stripes sitting above your two photo layers.
All white bars visible across the full canvas width
Once your bars span the full canvas, merge all the bar layers together into one. Select them all and use Cmd/Ctrl + E to merge. You should have a single layer of evenly-spaced white stripes sitting above your two photo layers.
Now for the non-destructive part. Select your top photo layer (Layer 0 Copy). Hold Alt/Option and click the Add Layer Mask button at the bottom of the Layers panel. This adds a black mask that hides everything. Then, with that mask thumbnail selected, drag your white bars layer into the mask using a technique Aaron demonstrates, or simply copy the bars layer content and paste it directly into the mask channel. The stripes define exactly where the top photo layer is visible. This is the core structure of the whole effect.
Step 6: Offset the Top Layer to Create the Slice Effect
 Portrait showing displaced slice effect after layer shift
With the mask applied, select the image thumbnail (not the mask thumbnail) of your top photo layer. Use the Move Tool to shift it horizontally. Because the mask is pinned to the canvas but the image content is moving independently, you’ll see the sliced portions shift sideways while the alternating strips from the layer underneath stay in place. This creates that graphic, editorial displacement look.
Portrait showing displaced slice effect after layer shift
With the mask applied, select the image thumbnail (not the mask thumbnail) of your top photo layer. Use the Move Tool to shift it horizontally. Because the mask is pinned to the canvas but the image content is moving independently, you’ll see the sliced portions shift sideways while the alternating strips from the layer underneath stay in place. This creates that graphic, editorial displacement look.
The amount you shift it is a creative decision. A subtle offset looks almost glitchy. A dramatic offset reads more like a deliberate graphic design choice. Aaron demonstrates two distinct looks in the tutorial, and having both PSD templates available from the PHLEARN download link means you can reverse-engineer the exact settings he used.
My Take: Where This Fits Into Actual Client Work
I’ve started using this technique as a quick concept option to throw into mood boards when a client wants something that feels “designed” rather than straight photography. The fact that it’s fully non-destructive means I can show two or three variations without duplicating the entire document. The step and repeat shortcut specifically is something I’ve now applied to other problems entirely, like creating evenly-spaced guide elements or pattern work. Once you understand the logic, it shows up everywhere.
The one thing I’d add is to experiment with the bar width relative to your subject’s face. If your bars are too narrow compared to the features in the portrait, the effect reads as texture rather than slicing. Wider bars that land on recognizable features like eyes or the jaw line make the displacement more readable and more striking.
The single most important thing this tutorial taught me is that some of the best Photoshop techniques aren’t hidden behind menus or new AI features. They’re keyboard shortcuts that have existed for years and just never made it into the beginner tutorials most people learned from. Step and repeat is one of those. Once you use it once, you’ll wonder how you got along without it.
Watch the full tutorial on YouTube and grab the free PSD templates from the PHLEARN download link in the video description.
Comments
Leave a Comment