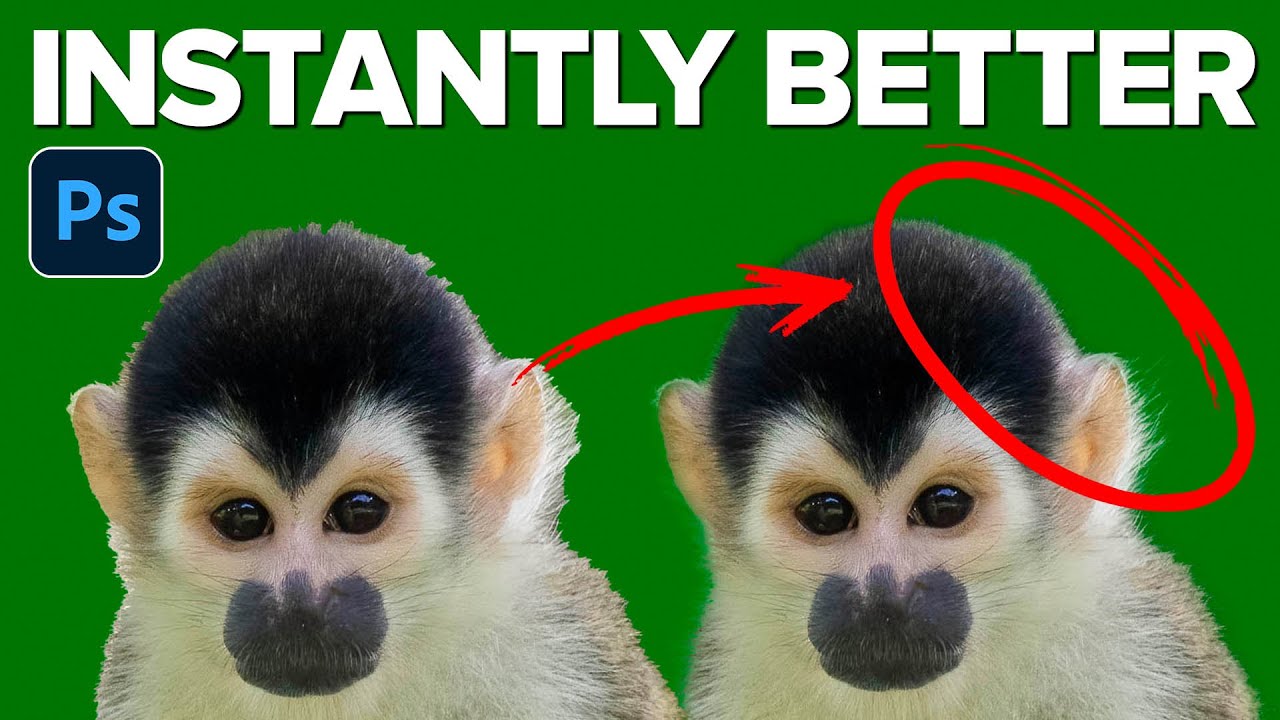
There’s a specific kind of frustration that comes from spending twenty minutes cleaning up a selection with a tiny brush, zoomed in at 400%, while a deadline quietly creeps up behind you. I’ve been there more times than I’d like to count. Messy edges, fur that looks like it was cut out with safety scissors, hair that’s somehow both over-selected and under-selected at the same time. It’s one of those parts of the job where you know the tool should be smarter than it’s acting.
Which is why when I came across Watch the full tutorial on YouTube from Matt Kloskowski, I did a genuine double-take at my screen. Sitting in my usual corner booth with my second coffee going cold, I watched him reveal a preference setting that I had walked right past for who knows how long. The fix takes about ten seconds to apply. The results are legitimately not close.
The core issue is this: Photoshop’s Select Subject tool has two processing modes, and the one it defaults to is the worse one. That’s not me being dramatic. That’s just what the side-by-side comparisons in Matt’s video show, clearly and repeatedly. Knowing where to flip that switch is the whole game here.
Step 1: Understand What Select Subject Actually Does By Default
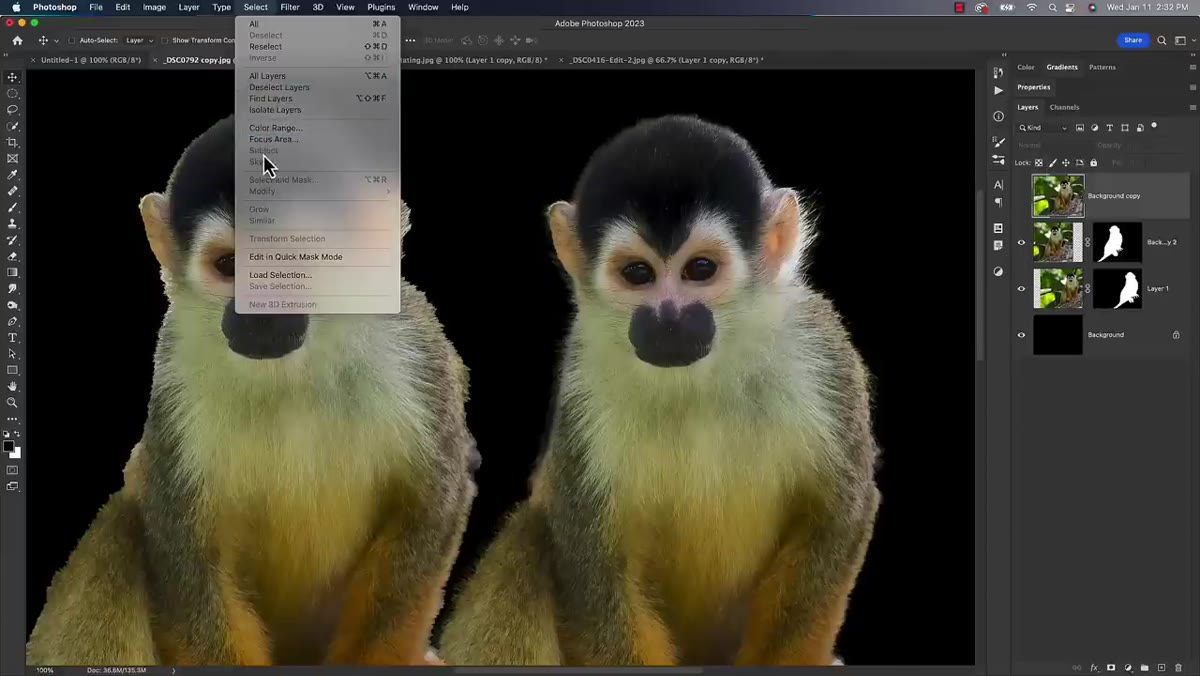 Select Subject tool location shown under the Select menu
Select Subject has been around in Photoshop for a while now, and most of us have a complicated relationship with it. It works, sort of. It identifies the main subject and throws a selection around it, which is genuinely useful as a starting point. But “starting point” is exactly the problem - it almost always needs follow-up work in Select and Mask, or you end up painting corrections by hand. The default behavior runs the selection process on your local device, which is fast but limited in what it can analyze.
Select Subject tool location shown under the Select menu
Select Subject has been around in Photoshop for a while now, and most of us have a complicated relationship with it. It works, sort of. It identifies the main subject and throws a selection around it, which is genuinely useful as a starting point. But “starting point” is exactly the problem - it almost always needs follow-up work in Select and Mask, or you end up painting corrections by hand. The default behavior runs the selection process on your local device, which is fast but limited in what it can analyze.
That device-based processing is fine for simple subjects with clean edges. The moment you introduce fur, feathers, flyaway hair, or complex overlapping shapes, it starts to struggle. And for a lot of us, those are exactly the photos that need good selections in the first place.
Step 2: Find the Hidden Cloud Processing Option in the Toolbar
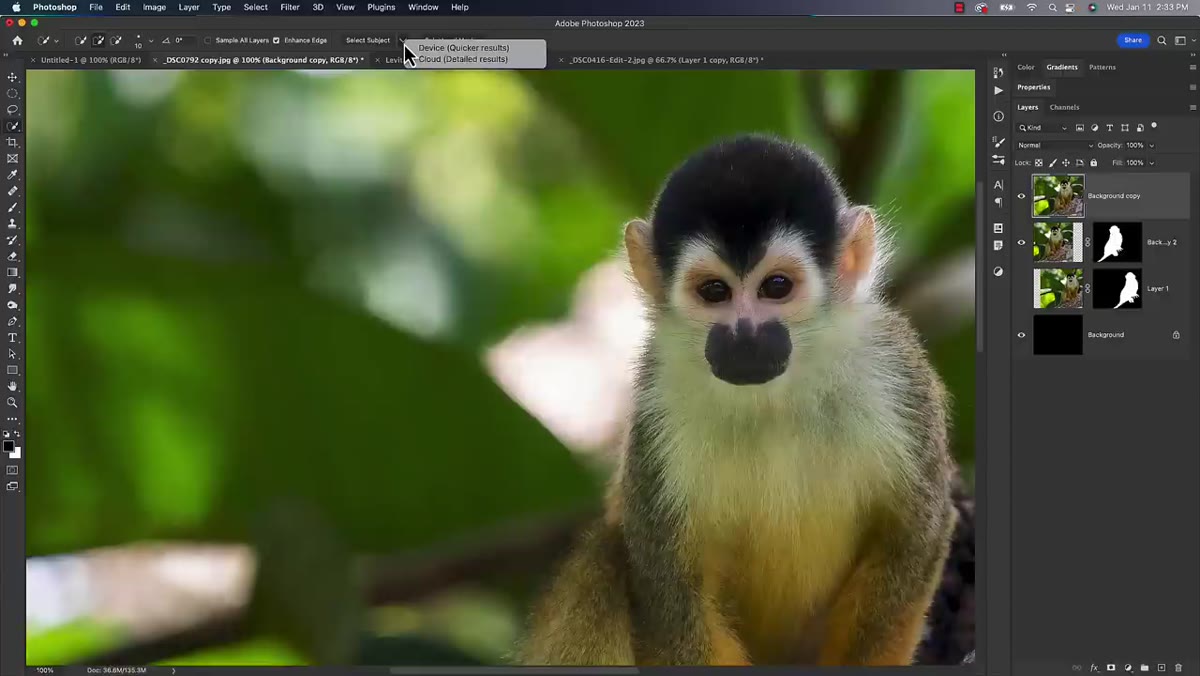 Arrow dropdown next to Select Subject button showing Device and Cloud options
Here’s where it gets interesting. When you have the Object Selection tool or the Quick Selection tool active, a “Select Subject” button appears in the options bar at the top of the screen. Right next to that button is a small dropdown arrow. Click it, and you’ll see two options: Device and Cloud. The Cloud option sends the image data to Adobe’s servers for processing, which gives it access to significantly more computational power and a more sophisticated model.
Arrow dropdown next to Select Subject button showing Device and Cloud options
Here’s where it gets interesting. When you have the Object Selection tool or the Quick Selection tool active, a “Select Subject” button appears in the options bar at the top of the screen. Right next to that button is a small dropdown arrow. Click it, and you’ll see two options: Device and Cloud. The Cloud option sends the image data to Adobe’s servers for processing, which gives it access to significantly more computational power and a more sophisticated model.
Matt compared Device versus Cloud on a dog photo with thick fur, and the difference was stark enough that it actually made me laugh a little. The device version missed chunks of the fur and left soft, mushy edges. The cloud version came back with something that looked like a careful, manual selection. Edges crisp, fur strands preserved, minimal cleanup needed.
Step 3: Notice the Problem - It Always Resets to Device
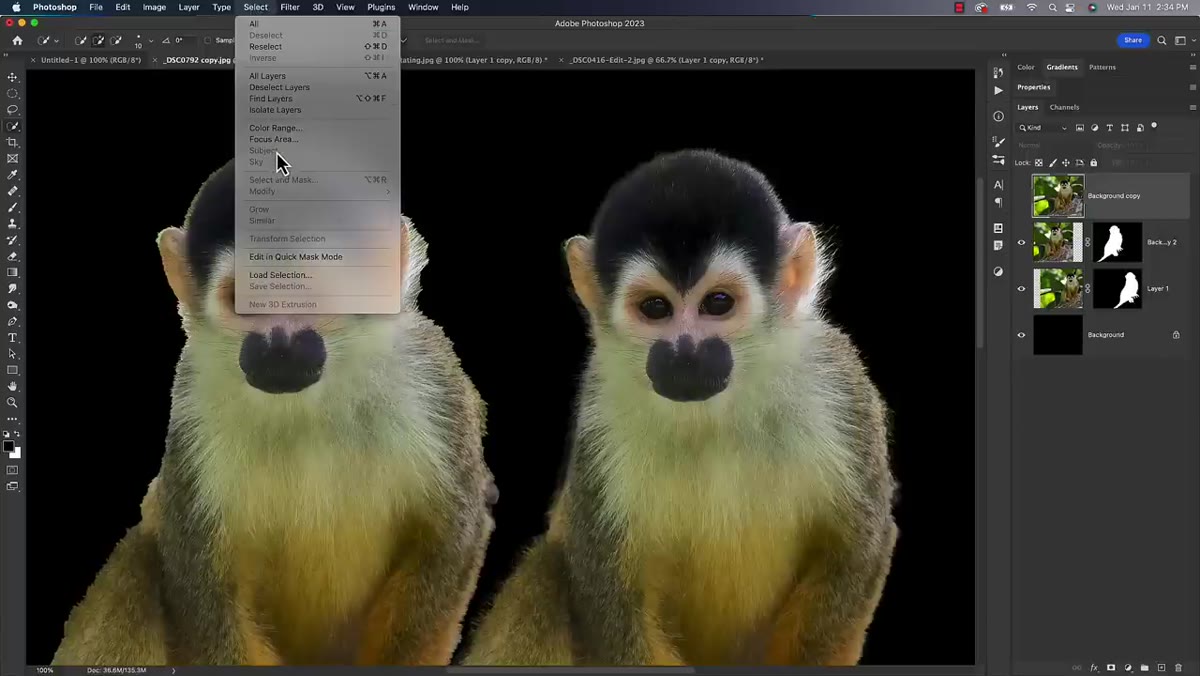 Select Subject defaulting back to Device mode in the dropdown
Here’s the annoying part. Even after you manually switch to Cloud in that dropdown, Photoshop doesn’t remember your preference. Next time you go to Select > Subject from the menu bar, it quietly defaults back to Device. And if you’re using the menu route rather than the toolbar button, you won’t even see the dropdown option at all. There’s no cloud option in the menu. You’d have to remember to grab a selection tool first, switch the dropdown, and then run the selection. Every. Single. Time.
Select Subject defaulting back to Device mode in the dropdown
Here’s the annoying part. Even after you manually switch to Cloud in that dropdown, Photoshop doesn’t remember your preference. Next time you go to Select > Subject from the menu bar, it quietly defaults back to Device. And if you’re using the menu route rather than the toolbar button, you won’t even see the dropdown option at all. There’s no cloud option in the menu. You’d have to remember to grab a selection tool first, switch the dropdown, and then run the selection. Every. Single. Time.
This is the kind of workflow friction that quietly adds up over months. It’s not catastrophic on its own, but it means a lot of people have been using the slower, less accurate version of this tool purely out of habit and a missing signpost.
Step 4: Open Photoshop Preferences and Go to Image Processing
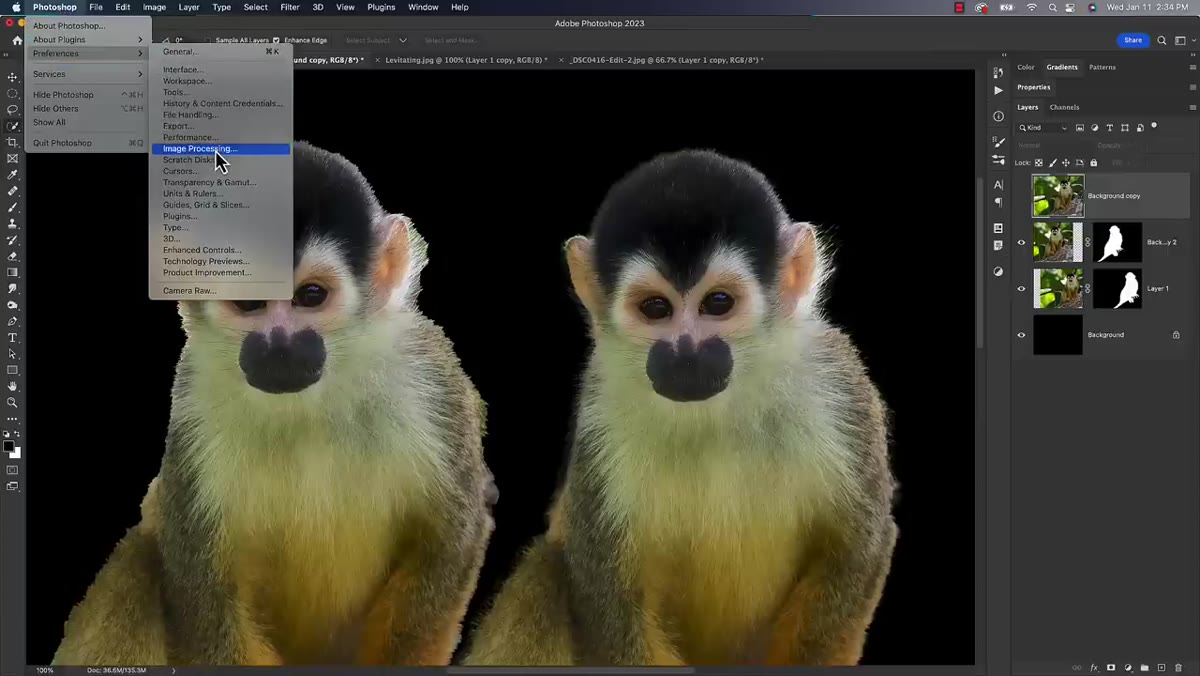 Photoshop Preferences panel open, navigating to Image Processing section
The fix lives in Photoshop’s Preferences. On a Mac, that’s Photoshop > Settings > Preferences. On a PC, it’s under the Edit menu. Once you’re in Preferences, look for the Image Processing section in the sidebar. It’s not the most obvious category name for a selection-related setting, which is probably why so many people have never stumbled across it.
Photoshop Preferences panel open, navigating to Image Processing section
The fix lives in Photoshop’s Preferences. On a Mac, that’s Photoshop > Settings > Preferences. On a PC, it’s under the Edit menu. Once you’re in Preferences, look for the Image Processing section in the sidebar. It’s not the most obvious category name for a selection-related setting, which is probably why so many people have never stumbled across it.
Inside Image Processing, you’ll see a Select Subject option with a dropdown to choose your default processing mode. Switch it from Device to Cloud, hit OK, and you’re done. That’s the whole thing. From this point on, whether you use the menu route or the toolbar button, Photoshop will use cloud processing for Select Subject without you having to think about it again.
Step 5: Test It and Verify It’s Working
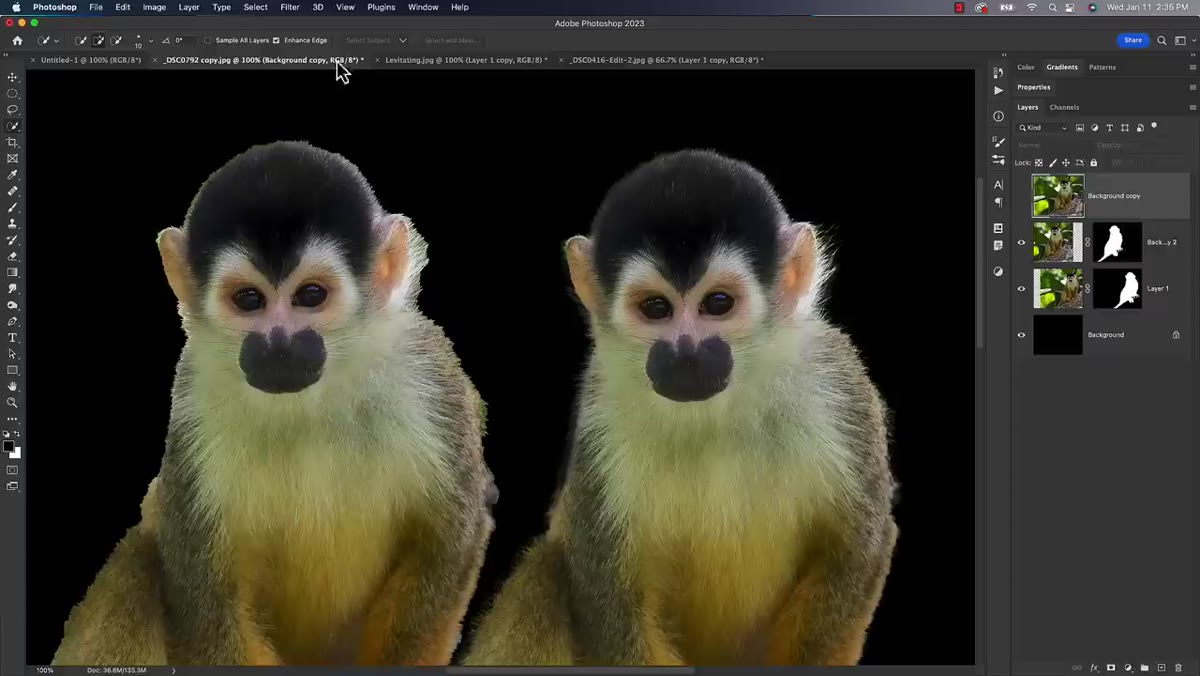 Select Subject run using Cloud processing on a detailed subject
Run a test on something with complex edges. A pet with fur, a bird, a person with windblown hair, anything that would have previously sent you straight into Select and Mask with a brush tool. With Cloud set as the default, the processing takes a few extra seconds compared to device mode - maybe five to ten seconds versus one or two - but what comes back is a meaningfully better selection. Matt showed this on multiple images including a dog, a figure for a levitation composite, and an eagle mid-flight. The eagle example was particularly convincing - feather-by-feather detail that device mode just couldn’t match.
Select Subject run using Cloud processing on a detailed subject
Run a test on something with complex edges. A pet with fur, a bird, a person with windblown hair, anything that would have previously sent you straight into Select and Mask with a brush tool. With Cloud set as the default, the processing takes a few extra seconds compared to device mode - maybe five to ten seconds versus one or two - but what comes back is a meaningfully better selection. Matt showed this on multiple images including a dog, a figure for a levitation composite, and an eagle mid-flight. The eagle example was particularly convincing - feather-by-feather detail that device mode just couldn’t match.
Cloud isn’t perfect in every case. On simpler images the difference is smaller, and occasionally it might clip a small detail that device mode happened to catch. But across a realistic variety of subject types, cloud is almost always equal to device and frequently much better.
My Take: Where This Actually Saves Time in Real Projects
I do a fair amount of composite work - putting people or objects against new backgrounds, building layered scenes from multiple shots. The selection phase used to be the tax I paid before I could get to the fun part. Now I’m starting with a cloud selection and often doing minimal cleanup before I’m into the actual creative work.
Where I’d add a small caveat: if you’re on a slower connection or working with large files, the cloud processing can feel sluggish. I’ve also noticed it occasionally hiccups if you’re offline, which is not ideal when you’re working from a coffee shop with questionable WiFi. In those situations, knowing you can flip back to Device temporarily is worth keeping in mind. But as a default setting for day-to-day use? Cloud wins, and it’s not particularly close.
The single most important thing here isn’t the cloud option itself - it’s knowing that a preference exists to make it permanent. A setting you have to manually change every session might as well not exist. Buried in Image Processing preferences is a one-time fix that quietly upgrades every selection you make from here on out. Go change it right now, before you open another photo.
Watch the full tutorial on YouTube to see Matt’s side-by-side comparisons across multiple image types - the visual difference is worth seeing with your own eyes.
Comments
Leave a Comment