There’s a specific kind of Tuesday afternoon misery that comes from manually painting a selection around a subject with a detailed, wispy, complicated edge. Hair. Fur. Wedding veils. If you’ve spent forty-five minutes with the Quick Selection tool only to end up with a result that looks like your subject was cut out with safety scissors, you know exactly what I’m talking about. The good news is that if your source photo has a blurred background, caused by shallow depth of field, you’re sitting on a selection shortcut that most people scroll right past in the Select menu.
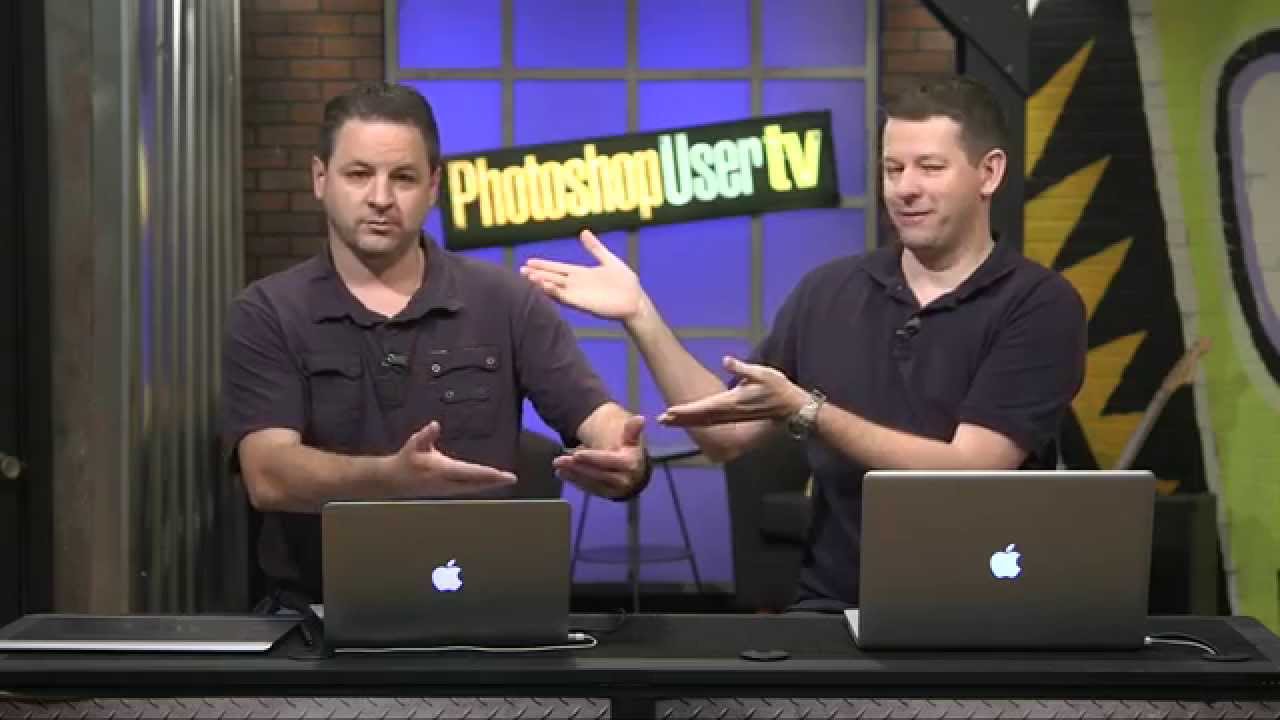
I came across this technique in a KelbyOne tutorial hosted by Pete Collins and Cory Barker, episode 385 of Photoshop User TV. Watch the full tutorial on YouTube — it’s worth your time. The segment that stuck with me covers the Focus Area selection tool, which showed up as part of a Creative Cloud update that also gave almost every Adobe app a refresh. Photoshop got the most love out of all of them, and Focus Area is one of the standout additions. Here’s how it actually works in practice.
Step 1: Pick the Right Image
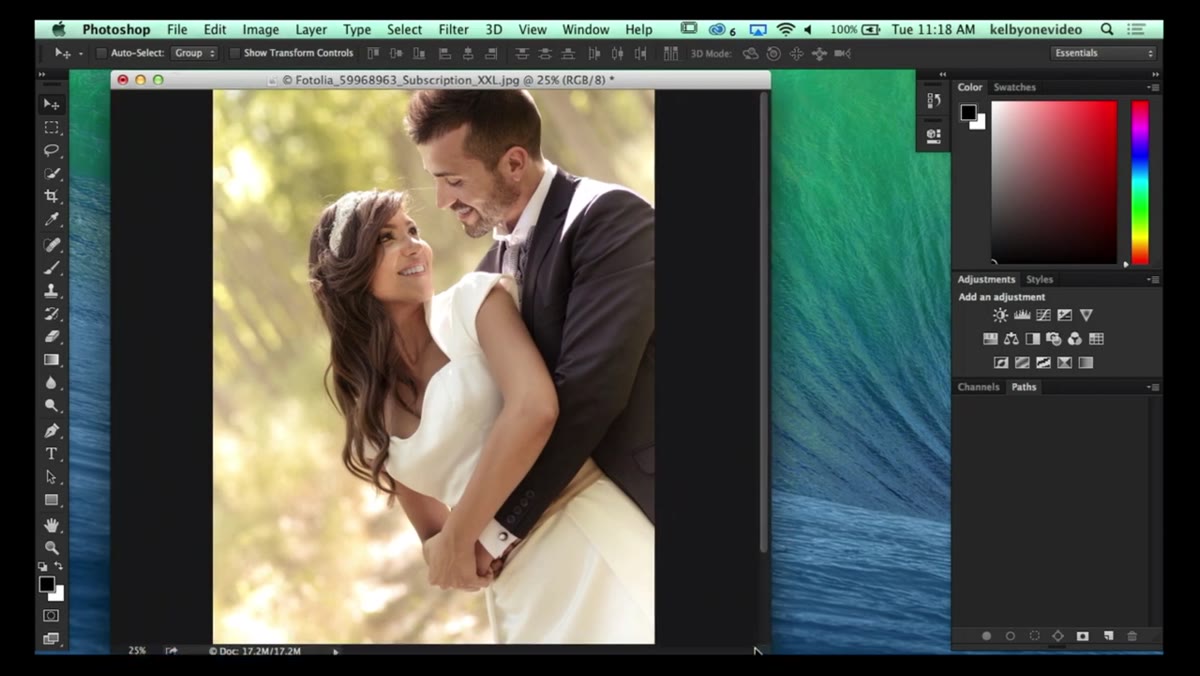 Wedding photo with blurred background open in Photoshop
Focus Area is not magic for every photo. It works by analyzing sharpness across the image and selecting the pixels that are in focus while ignoring the soft, blurry ones. That means the technique is purpose-built for shots taken with a wide aperture: portraits, product shots, anything where the subject is crisp and the background melts away. The tutorial uses a wedding photo where the couple is sharp and the background has a generous blur. If your image has a busy, sharp background, this tool is going to struggle and you’ll be better off with Select Subject or a manual mask.
Wedding photo with blurred background open in Photoshop
Focus Area is not magic for every photo. It works by analyzing sharpness across the image and selecting the pixels that are in focus while ignoring the soft, blurry ones. That means the technique is purpose-built for shots taken with a wide aperture: portraits, product shots, anything where the subject is crisp and the background melts away. The tutorial uses a wedding photo where the couple is sharp and the background has a generous blur. If your image has a busy, sharp background, this tool is going to struggle and you’ll be better off with Select Subject or a manual mask.
Check your photo before you commit. If you can clearly see the difference in sharpness between your subject and the background just by looking at it, Focus Area will likely give you a strong starting point.
Step 2: Open the Focus Area Dialog
 Select menu open with Focus Area option highlighted
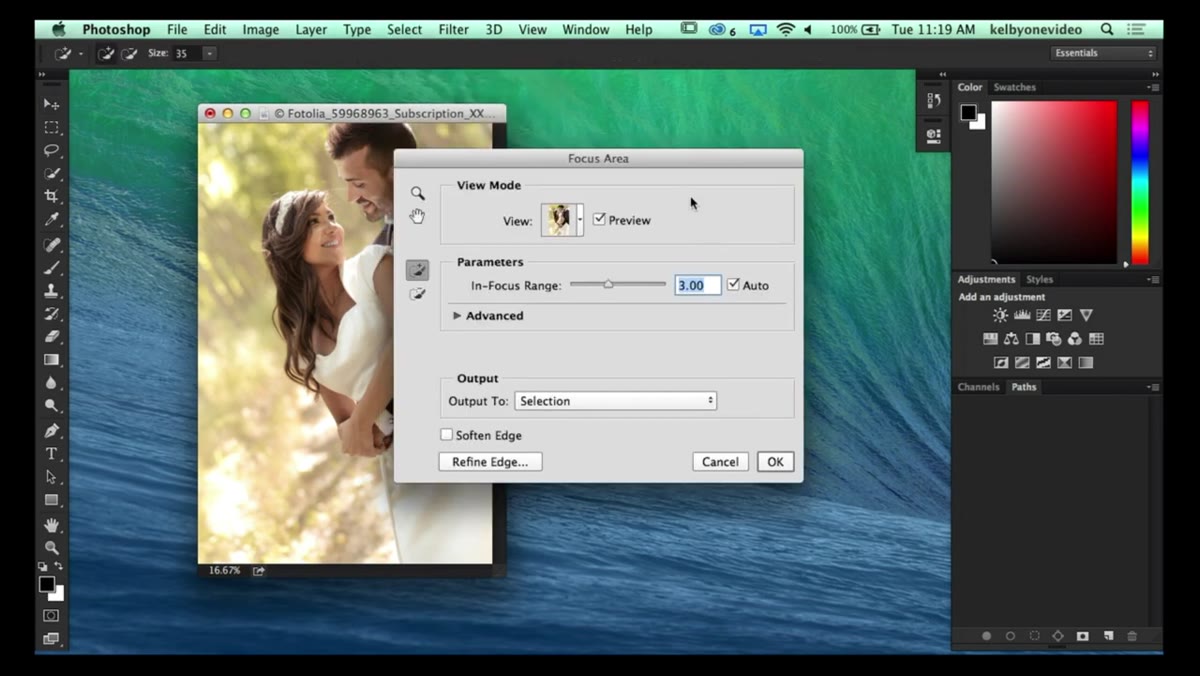
Go to Select > Focus Area. That’s it. Photoshop will open a dialog that will look familiar if you’ve spent any time in Refine Edge. You get a preview of the selection, a few brush tools on the left, and output options at the bottom. Critically, there’s a direct link to Refine Edge right inside the dialog, which means you can go from Focus Area straight into edge refinement without bouncing between menus.
Select menu open with Focus Area option highlighted
Go to Select > Focus Area. That’s it. Photoshop will open a dialog that will look familiar if you’ve spent any time in Refine Edge. You get a preview of the selection, a few brush tools on the left, and output options at the bottom. Critically, there’s a direct link to Refine Edge right inside the dialog, which means you can go from Focus Area straight into edge refinement without bouncing between menus.
When the dialog first opens, Photoshop automatically analyzes the image and takes an initial pass at the selection. Depending on your image, this first result might be surprisingly good or it might be noticeably incomplete. Either way, expect to do some manual cleanup with the brush tools.
Step 3: Extend the Selection with the Add Brush
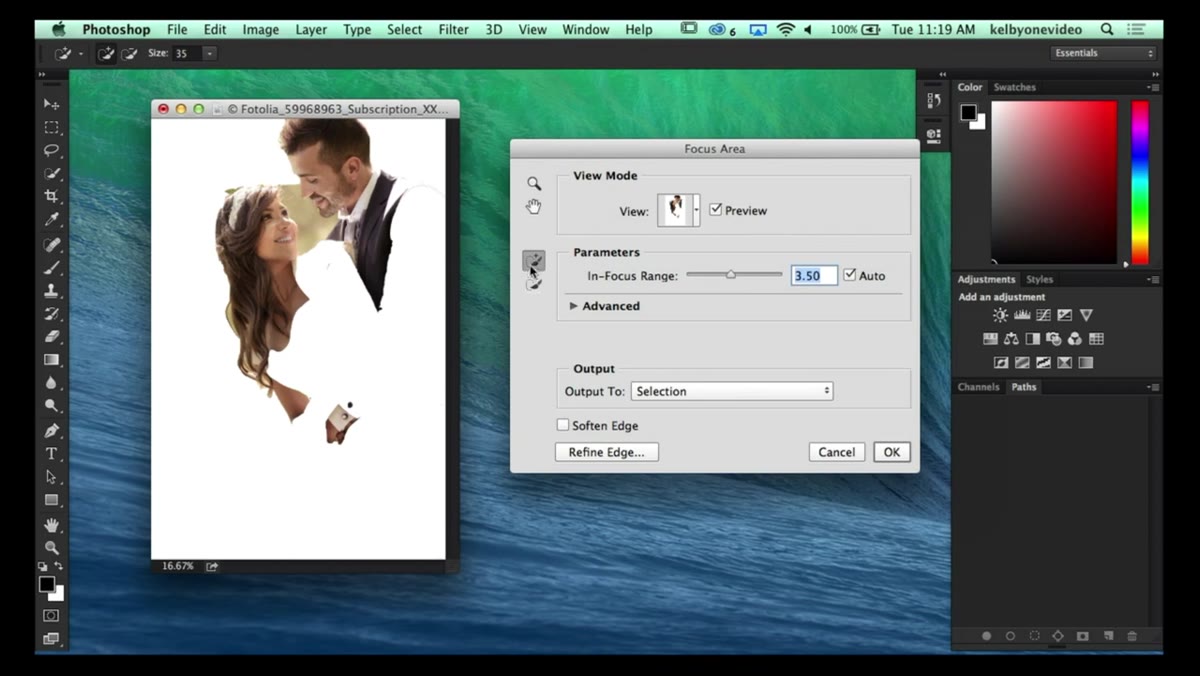 Plus brush tool active, painting over subject area to add to selection
On the left side of the Focus Area dialog you’ll see two brush tools: a plus sign and a minus sign. The plus brush adds areas to the selection and the minus brush removes them. The key insight here, and this is the part that saves you a ton of time, is that you don’t need to paint every pixel of your subject. You just need to drag loosely over an area and Photoshop reads the sharpness data within that stroke to decide what belongs in the selection.
Plus brush tool active, painting over subject area to add to selection
On the left side of the Focus Area dialog you’ll see two brush tools: a plus sign and a minus sign. The plus brush adds areas to the selection and the minus brush removes them. The key insight here, and this is the part that saves you a ton of time, is that you don’t need to paint every pixel of your subject. You just need to drag loosely over an area and Photoshop reads the sharpness data within that stroke to decide what belongs in the selection.
Paint a rough stroke across the parts of your subject that got missed in the initial auto-selection. The tool figures out where the sharp edges are and hugs them. In the tutorial, Cory drags loosely across the groom’s suit and the selection snaps to the figure cleanly without needing precise, careful brushwork. It’s a fundamentally different workflow from painting masks manually.
Step 4: Remove Unwanted Background That Snuck In
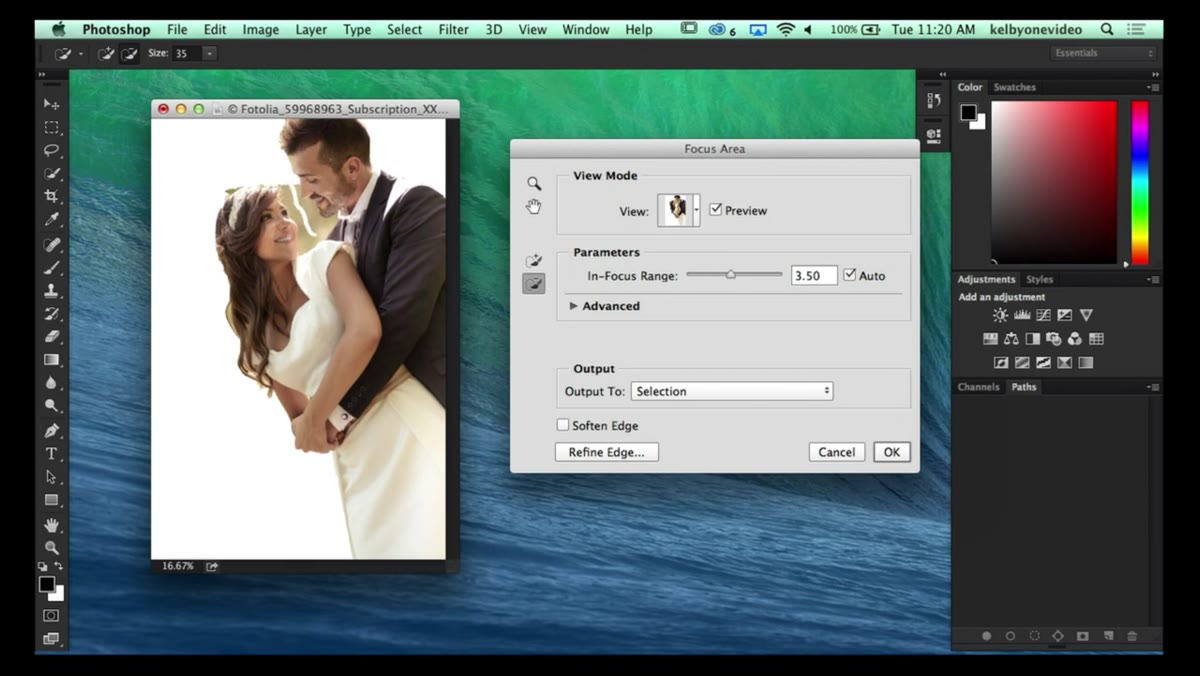 Minus brush removing background area selected between subjects’ faces
Any area of the background that accidentally got included in the selection gets removed the same way, just with the minus brush. Again, loose strokes are fine. In the wedding photo, there was a sliver of background visible between the couple’s faces that the auto-selection picked up. A single stroke with the minus brush across that area and Photoshop drops it from the selection.
Minus brush removing background area selected between subjects’ faces
Any area of the background that accidentally got included in the selection gets removed the same way, just with the minus brush. Again, loose strokes are fine. In the wedding photo, there was a sliver of background visible between the couple’s faces that the auto-selection picked up. A single stroke with the minus brush across that area and Photoshop drops it from the selection.
Work around the edges of your subject methodically, adding and subtracting as needed. The preview inside the dialog updates in real time so you can see exactly what you’re working with. Don’t obsess over perfection at this stage. Focus Area is about getting you 85 to 90 percent of the way there. The fine edge work happens next.
Step 5: Send It to Refine Edge for the Finish
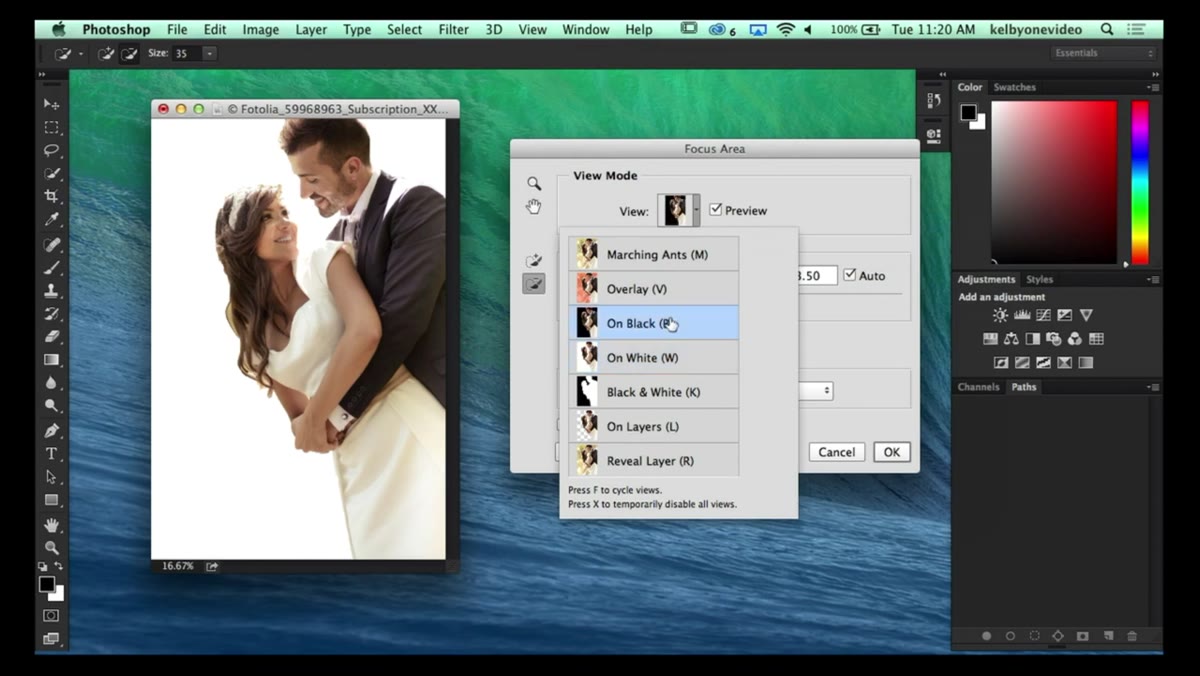 Refine Edge button visible at bottom of Focus Area dialog
Once you’re satisfied with the rough selection, hit the Refine Edge button inside the dialog. This hands your selection off to the Refine Edge workspace where you can use the Smart Radius and the Refine Edge brush to clean up complex edges like hair or the wisps of a veil. The transition between Focus Area and Refine Edge is seamless, which means the whole workflow stays inside one connected pipeline rather than requiring you to jump around.
Refine Edge button visible at bottom of Focus Area dialog
Once you’re satisfied with the rough selection, hit the Refine Edge button inside the dialog. This hands your selection off to the Refine Edge workspace where you can use the Smart Radius and the Refine Edge brush to clean up complex edges like hair or the wisps of a veil. The transition between Focus Area and Refine Edge is seamless, which means the whole workflow stays inside one connected pipeline rather than requiring you to jump around.
From Refine Edge, output your result as a Layer Mask and you’ve got a non-destructive extraction that you can adjust at any point. Stack your subject over a new background, check the edges, and go back into the mask if anything needs tweaking.
What I’d Add From My Own Experience
The Focus Area tool changed how I approach stock photo compositing, which I do a lot of for client social content. The one thing I’d flag that the tutorial doesn’t dwell on is noise. Heavy ISO noise in the background can confuse the sharpness detection and cause the tool to grab chunks of the background it shouldn’t. If you’re working with a noisy image, run a very light noise reduction pass on the background (using a duplicate layer or a smart filter) before opening Focus Area. It gives the algorithm cleaner sharpness data to work from and the initial auto-selection gets dramatically better.
Also worth noting: the parameter slider inside the dialog (labeled something like “In-Focus Range”) lets you dial in how strict the sharpness threshold is. If the tool is cutting into your subject’s softer features, like the edge of someone’s hair on a slightly windy day, nudge that slider down to cast a wider net and then clean up with the minus brush.
The single most important thing to take from Focus Area is this: it’s not a replacement for every selection method, but for any image with genuine depth-of-field separation, it’s the fastest path from full photo to isolated subject in Photoshop. Stop fighting images with manual masks when the camera already did half the work for you.
Watch the full tutorial on YouTube to see Pete and Cory walk through the tool live, including a second tip in the episode about grid lines that’s handy for layout work.
Comments
Leave a Comment