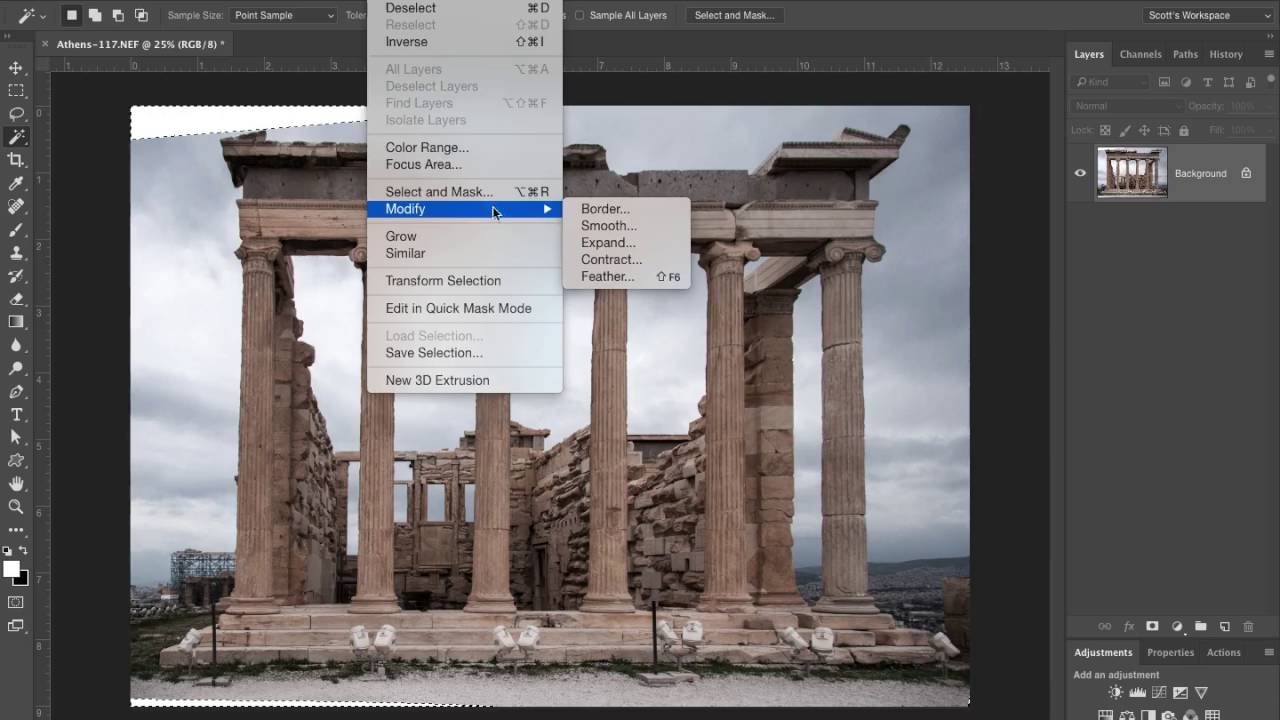
I have a folder on my hard drive called “salvage.” It’s full of photos I liked enough to keep but never liked enough to actually edit. Bad perspective, warped buildings, that particular kind of flat, sad look a photo gets when the camera did its best and still kind of failed. For a long time I just accepted that some shots were unfixable without a ton of manual fussing. Then I started paying closer attention to how working photographers actually move through Camera Raw, and a lot of those “salvage” files started looking a lot more promising.
Watch the full tutorial on YouTube
In this KelbyOne tutorial, Scott Kelby walks through a real-world architectural rescue using a RAW file shot back in 2008 on a Nikon D300 at 18mm. That wide angle is doing the image absolutely no favors. The building bows outward, the perspective is tilted, and the whole thing looks like it was photographed through a fishbowl. What’s useful here isn’t just the end result but the order of operations. Kelby makes it clear that sequence matters, and watching him move through Camera Raw with that logic in mind is genuinely instructive.
Step 1: Open the Image in Camera Raw
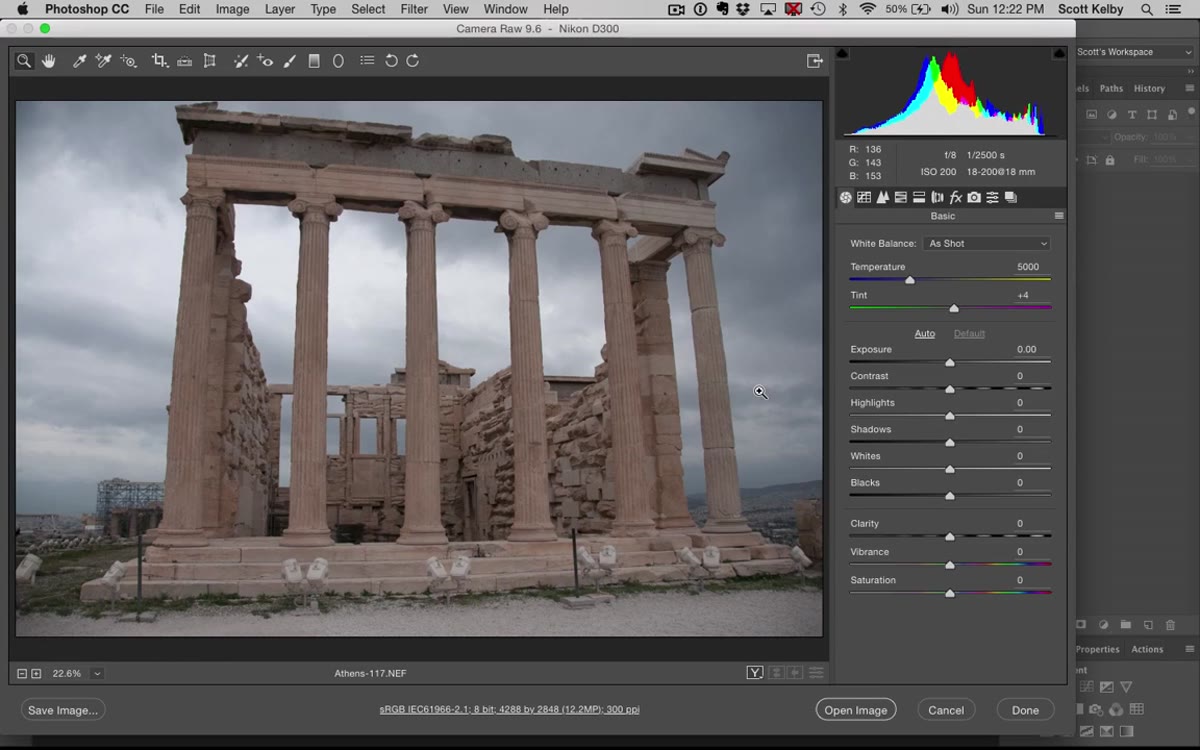 Flat architectural RAW photo open in Camera Raw
Whether you’re working with a RAW file, a JPEG, or a TIFF, Camera Raw handles all three. If you’re opening a JPEG or TIFF, you can access Camera Raw through Filter > Camera Raw Filter in Photoshop. RAW files will open there automatically. The starting point here is an image with obvious lens distortion, the kind where a column that should be perfectly straight looks like it’s gently leaning toward you. Identifying that problem before you touch any sliders is actually important. Know what’s broken before you start fixing it.
Flat architectural RAW photo open in Camera Raw
Whether you’re working with a RAW file, a JPEG, or a TIFF, Camera Raw handles all three. If you’re opening a JPEG or TIFF, you can access Camera Raw through Filter > Camera Raw Filter in Photoshop. RAW files will open there automatically. The starting point here is an image with obvious lens distortion, the kind where a column that should be perfectly straight looks like it’s gently leaning toward you. Identifying that problem before you touch any sliders is actually important. Know what’s broken before you start fixing it.
Step 2: Enable Lens Profile Corrections
 Lens Corrections panel with Enable Profile Corrections checkbox
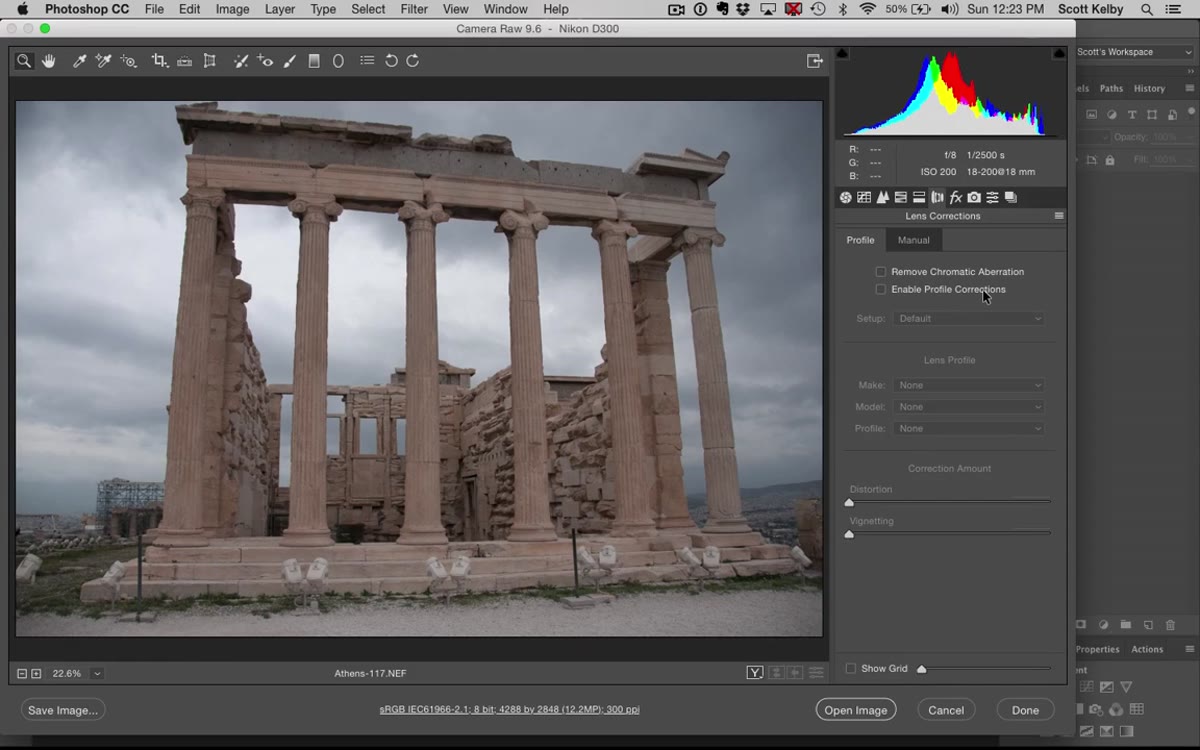
Head to the sixth tab in Camera Raw, the Lens Corrections panel. The first checkbox you’ll see is “Enable Profile Corrections.” Click it. What Camera Raw does here is read the EXIF data embedded in your photo, figures out which lens and camera body you used, and then applies a built-in correction profile to compensate for that lens’s known distortion characteristics. It sounds like a minor thing until you toggle it on and off a few times and watch a bowing column snap back into something resembling a straight line. The effect on wide-angle architectural shots especially is dramatic. This should honestly be the first thing you do on any photo with a strong foreground element or straight lines.
Lens Corrections panel with Enable Profile Corrections checkbox
Head to the sixth tab in Camera Raw, the Lens Corrections panel. The first checkbox you’ll see is “Enable Profile Corrections.” Click it. What Camera Raw does here is read the EXIF data embedded in your photo, figures out which lens and camera body you used, and then applies a built-in correction profile to compensate for that lens’s known distortion characteristics. It sounds like a minor thing until you toggle it on and off a few times and watch a bowing column snap back into something resembling a straight line. The effect on wide-angle architectural shots especially is dramatic. This should honestly be the first thing you do on any photo with a strong foreground element or straight lines.
Step 3: Use Guided Upright to Fix Perspective
 Guided Upright tool active, first line being drawn on image
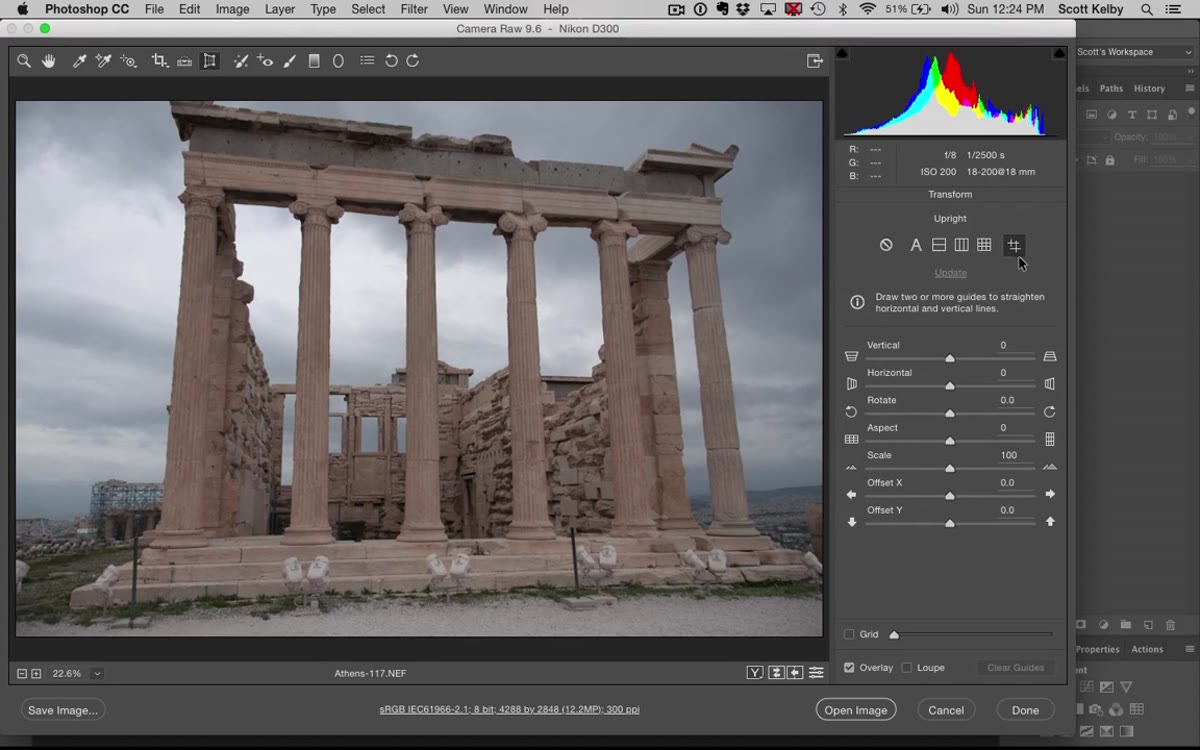
This is where it gets genuinely fun. Still inside the Lens Corrections tab, look for the Upright section and select the Guided Upright option, which gives you a drawing tool you use directly on the image. The idea is simple: you draw lines over elements that should be straight but aren’t, and Camera Raw uses those as reference points to recalculate the perspective for the whole image.
Guided Upright tool active, first line being drawn on image
This is where it gets genuinely fun. Still inside the Lens Corrections tab, look for the Upright section and select the Guided Upright option, which gives you a drawing tool you use directly on the image. The idea is simple: you draw lines over elements that should be straight but aren’t, and Camera Raw uses those as reference points to recalculate the perspective for the whole image.
The key thing Kelby points out is that nothing happens after your first line. You need to draw at least two guide lines before Camera Raw has enough information to make a correction. Draw along a roofline, a column edge, a window frame, anything that has a known vertical or horizontal orientation. After the second or third line, you’ll see the image shift and straighten. It won’t look perfect after line one, and that can feel like it isn’t working. It is. Just keep drawing.
Step 4: Adjust Scale to Recover Cropped Edges
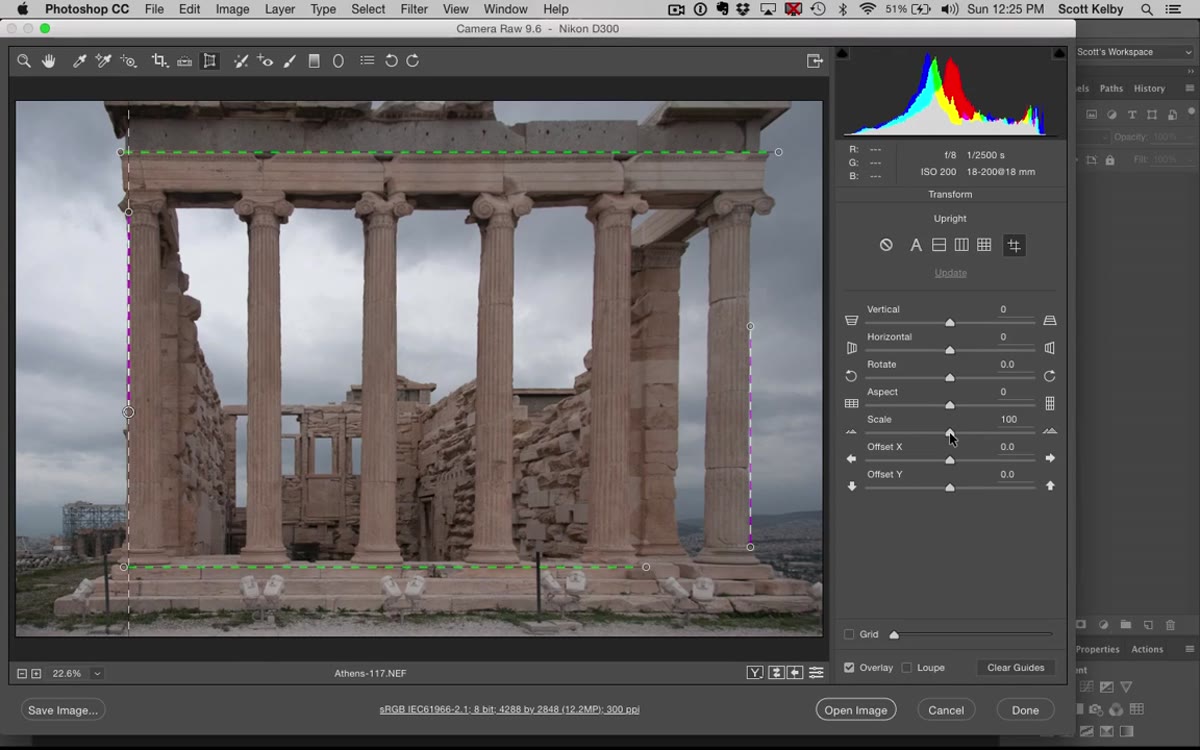 Scale slider being dragged left, revealing roof edge of building
After Guided Upright does its thing, you’ll almost certainly lose some of the image edges. The transformation has to push pixels around to correct the perspective, and that often clips corners or cuts off a roofline. Camera Raw handles this by cropping the result automatically, which is helpful for previewing but not always what you actually want.
Scale slider being dragged left, revealing roof edge of building
After Guided Upright does its thing, you’ll almost certainly lose some of the image edges. The transformation has to push pixels around to correct the perspective, and that often clips corners or cuts off a roofline. Camera Raw handles this by cropping the result automatically, which is helpful for previewing but not always what you actually want.
Find the Scale slider in the Transform section and drag it down. This zooms the corrected image out within the frame, which brings back those clipped edges at the cost of revealing empty canvas space around the borders. That empty space isn’t a problem at this stage. The goal here is just to preserve the content you need, especially anything structural like the top of a building, so you have something to work with when you take the image into Photoshop proper.
Step 5: Crop to Taste
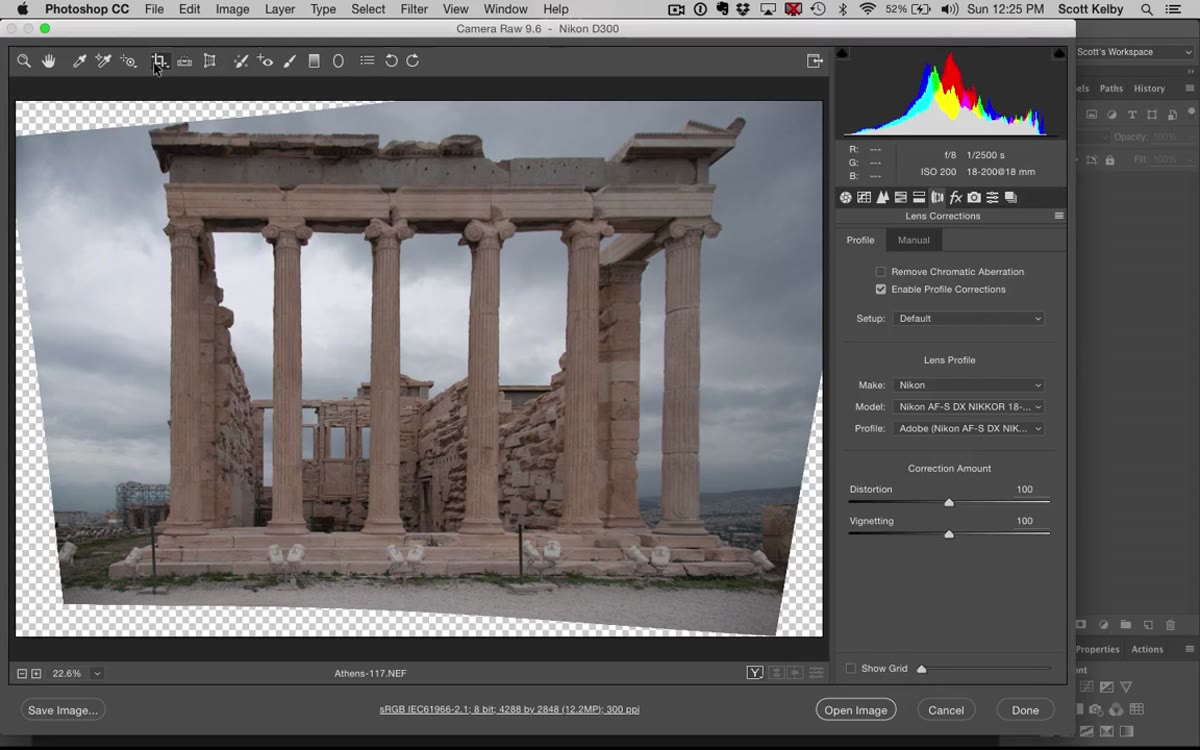 Crop tool selected, being dragged across the image in Camera Raw
Once you’ve recovered the edges you need with the scale adjustment, grab the Crop tool from the Camera Raw toolbar at the top. You can crop right here before handing the image off to Photoshop, or you can open it as a Smart Object and crop later with more flexibility. Either way, this is the moment to decide what the final frame looks like. If your Guided Upright lines did their job well, the building should be sitting straight and your horizon should be level. If something still feels slightly off, now is the time to catch it rather than after you’ve done all your tonal work.
Crop tool selected, being dragged across the image in Camera Raw
Once you’ve recovered the edges you need with the scale adjustment, grab the Crop tool from the Camera Raw toolbar at the top. You can crop right here before handing the image off to Photoshop, or you can open it as a Smart Object and crop later with more flexibility. Either way, this is the moment to decide what the final frame looks like. If your Guided Upright lines did their job well, the building should be sitting straight and your horizon should be level. If something still feels slightly off, now is the time to catch it rather than after you’ve done all your tonal work.
What I’d Add: Don’t Skip the Enable Profile Step First
I learned this one by doing it in the wrong order. If you jump straight to Guided Upright without enabling the lens profile correction first, the correction it calculates is based on a distorted starting point. The math is working against already-warped geometry. Kelby specifically flags this in the tutorial and he’s right. The profile correction and the Guided Upright tool work together. The profile removes the optical distortion inherent to the lens, and then Guided Upright handles the perspective shift caused by the shooting angle. They’re solving different problems. Run them in sequence and both tools perform significantly better than either would alone.
The other thing I’d add, especially for anyone shooting architectural work regularly, is to save a Camera Raw preset with “Enable Profile Corrections” already checked. Open any architectural shot, apply the preset, and you’ve already got the foundation laid before you’ve done anything else. Fifteen seconds saved every single time adds up.
Perspective correction is one of those things that looks complicated but has a remarkably simple workflow once you understand the sequence: lens profile first, Guided Upright second, scale to recover, crop to finish. Kelby’s tutorial makes that order feel obvious in retrospect, which is the mark of a well-structured walkthrough. If you’ve got a folder of architectural or travel shots sitting in “salvage” the way I did, start there.
Watch the full tutorial on YouTube
Comments
Leave a Comment