Sharpening is one of those things I either forgot to do entirely or obliterated like I had a personal grudge against the image. For a long time my workflow was basically “crank the clarity slider and pray.” It worked until it didn’t, and “didn’t” usually meant a client deliverable that looked like it was printed through a chain-link fence. Not great for business.
I came across this Kelvin Designs tutorial on image sharpening and it filled in a lot of gaps I didn’t even know I had. Watch the full tutorial on YouTube before or after reading this walkthrough. Kelvin covers multiple sharpening methods across different images, but I’m breaking down the Unsharp Mask technique in detail here because it’s the one I reach for most in day-to-day work, and it’s the one most people either skip or misuse.
The thing about Unsharp Mask is the name makes it sound like the opposite of what it does, which trips people up immediately. It sharpens. The name comes from a darkroom technique that’s decades old, but the mechanic in Photoshop is straightforward once you understand what each slider is actually controlling. Kelvin explains this clearly, and once it clicked for me, I stopped treating sharpening like a mystery and started treating it like a finishing tool I could actually trust.
Step 1: Open Your Image and Zoom to 100%
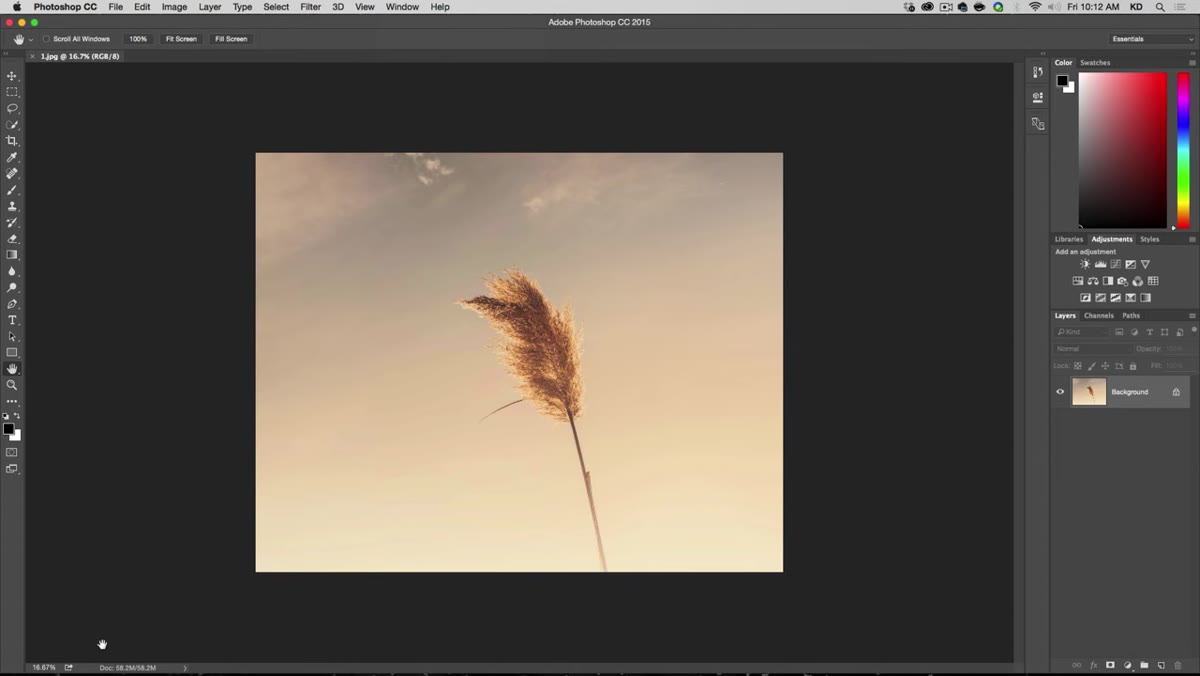 Zooming in to 100% view in Photoshop
Before you sharpen anything, zoom to 100%. Hit Command + (plus) on Mac or Control + on PC until the percentage in the bottom-left corner reads 100. This is non-negotiable. Sharpening at a zoomed-out view is like trying to tune a guitar while standing in a parking lot down the street from it. You need to see the actual pixels to judge whether what you’re doing is working or wrecking.
Zooming in to 100% view in Photoshop
Before you sharpen anything, zoom to 100%. Hit Command + (plus) on Mac or Control + on PC until the percentage in the bottom-left corner reads 100. This is non-negotiable. Sharpening at a zoomed-out view is like trying to tune a guitar while standing in a parking lot down the street from it. You need to see the actual pixels to judge whether what you’re doing is working or wrecking.
Kelvin starts here for exactly this reason, and it’s a habit worth building permanently. At anything under 50%, Photoshop is averaging pixels to display the image and you’re not seeing the real effect of the filter.
Step 2: Duplicate the Layer and Convert to Smart Object
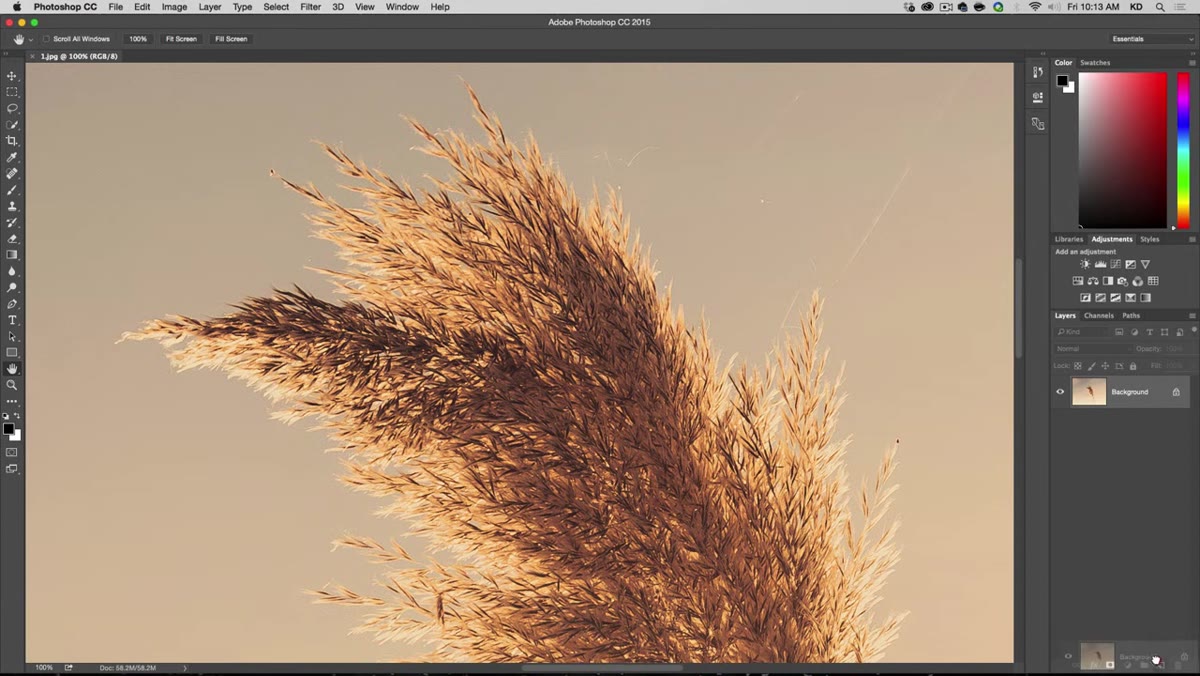 Dragging layer to New Layer icon in the Layers panel
Drag your base layer down to the New Layer icon in the Layers panel to duplicate it. Then right-click on the duplicate and choose “Convert to Smart Object.” This two-second setup saves you from a world of pain later.
Dragging layer to New Layer icon in the Layers panel
Drag your base layer down to the New Layer icon in the Layers panel to duplicate it. Then right-click on the duplicate and choose “Convert to Smart Object.” This two-second setup saves you from a world of pain later.
Converting to a Smart Object means any filter you apply sits on top of the layer as an editable entry, not baked in permanently. If you sharpen too aggressively and only notice three steps later, you can double-click the filter entry and dial it back. I learned about Smart Objects the hard way after deleting a client’s work that I’d flattened before sharpening. Now I convert before I do almost anything in Photoshop. Take the extra two seconds.
Step 3: Open Unsharp Mask
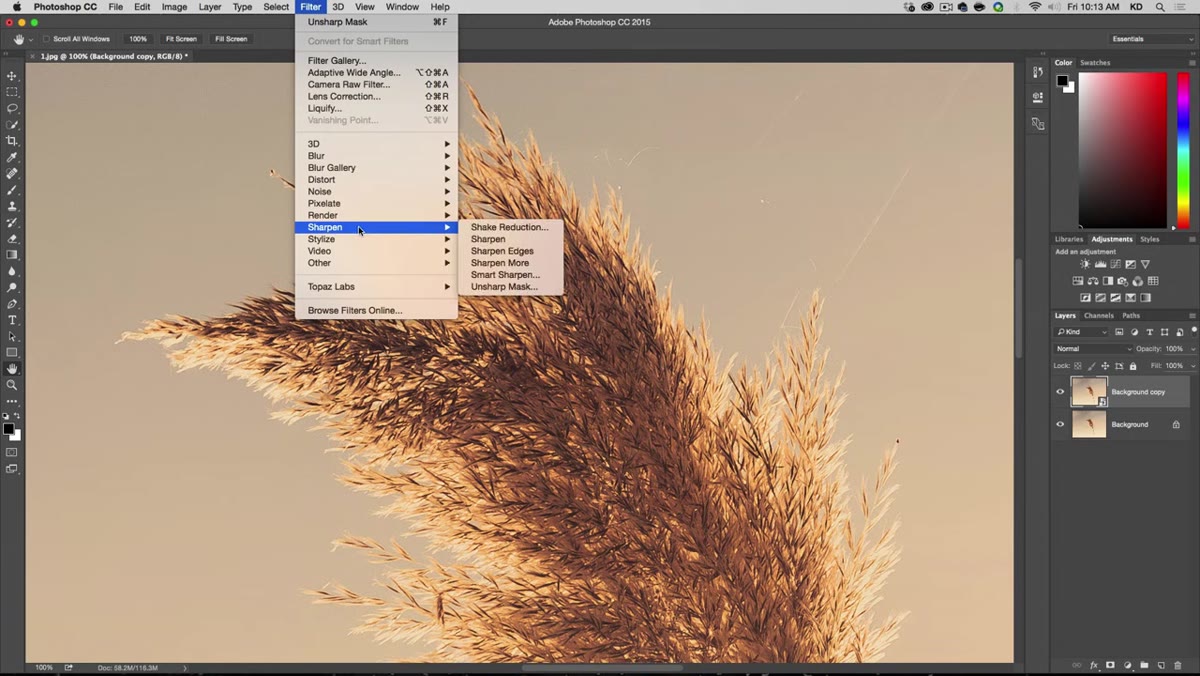 Navigating Filter menu to Sharpen, Unsharp Mask
Go to Filter, then Sharpen, then Unsharp Mask. The dialog box that opens has three sliders: Amount, Radius, and Threshold. These three control everything, and understanding what each one does is the difference between professional sharpening and the crunchy disaster look you see on over-processed stock photos.
Navigating Filter menu to Sharpen, Unsharp Mask
Go to Filter, then Sharpen, then Unsharp Mask. The dialog box that opens has three sliders: Amount, Radius, and Threshold. These three control everything, and understanding what each one does is the difference between professional sharpening and the crunchy disaster look you see on over-processed stock photos.
Keep the Preview checkbox ticked so you can see changes on your canvas as you move the sliders. You should be toggling that preview on and off constantly while you work.
Step 4: Set Your Starting Values
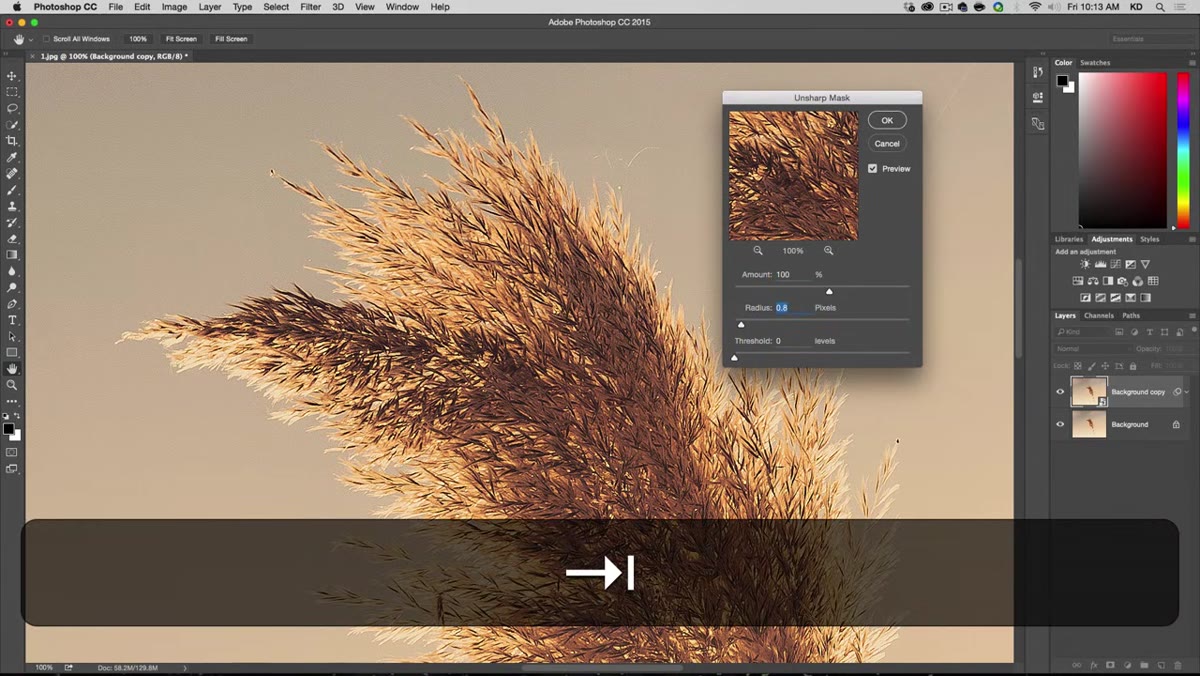 Unsharp Mask dialog box with Amount and Radius sliders visible
Kelvin’s starting point is Amount at 100 and Radius at 0.3. This is a conservative baseline, and it’s a good one. At these values the sharpening is subtle enough that you’re not immediately blowing out edge detail, but you’ll start to see the image come into focus as you compare before and after by clicking the preview toggle.
Unsharp Mask dialog box with Amount and Radius sliders visible
Kelvin’s starting point is Amount at 100 and Radius at 0.3. This is a conservative baseline, and it’s a good one. At these values the sharpening is subtle enough that you’re not immediately blowing out edge detail, but you’ll start to see the image come into focus as you compare before and after by clicking the preview toggle.
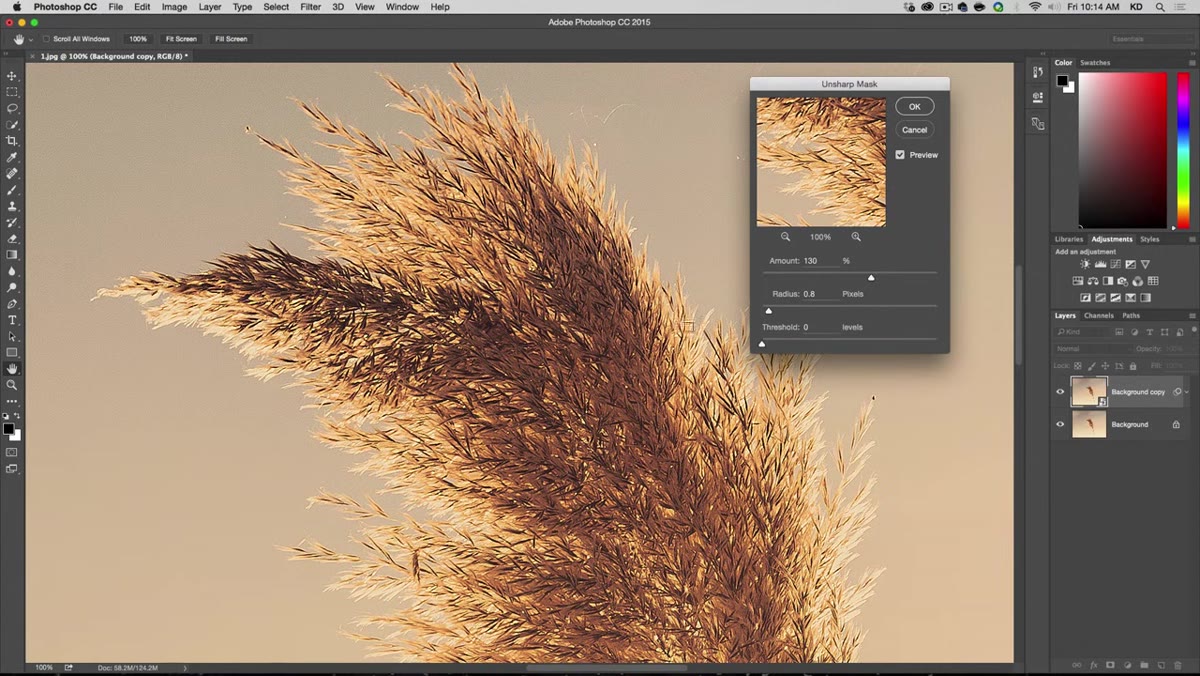
From here, adjust based on the image. For a photo with a lot of fine detail, Kelvin moves Amount up to around 130 and bumps Radius to about 0.8. These aren’t magic numbers, they’re a range. The point is to add clarity without making the image look like it was rendered in a video game from 2003. If you can see halos forming around edges, you’ve gone too far.
Step 5: Understand What Each Slider Does
 Radius slider being adjusted showing edge halo effect
Amount controls intensity. How strong is the sharpening effect along edges? Kelvin keeps this between 100 and 150 for most images. Going higher than 150 starts to introduce noise and artifacts, especially in areas with smooth gradients like sky or skin.
Radius slider being adjusted showing edge halo effect
Amount controls intensity. How strong is the sharpening effect along edges? Kelvin keeps this between 100 and 150 for most images. Going higher than 150 starts to introduce noise and artifacts, especially in areas with smooth gradients like sky or skin.
Radius controls the thickness of the sharpened edge line. Keep this small. A high Radius value is what creates that glowing, over-processed HDR look that was everywhere in 2009 and hasn’t aged well. For high-resolution images you can go slightly thinner on the Radius because there’s more pixel information defining each edge. For lower resolution images, nudge it up just slightly. Threshold Kelvin keeps at zero for most use cases, which means the filter applies to all edges regardless of contrast difference. Leave it there unless you’re sharpening portraits and need to protect smooth skin tones from getting crunchy.
Step 6: Compare Before and After, Then Commit
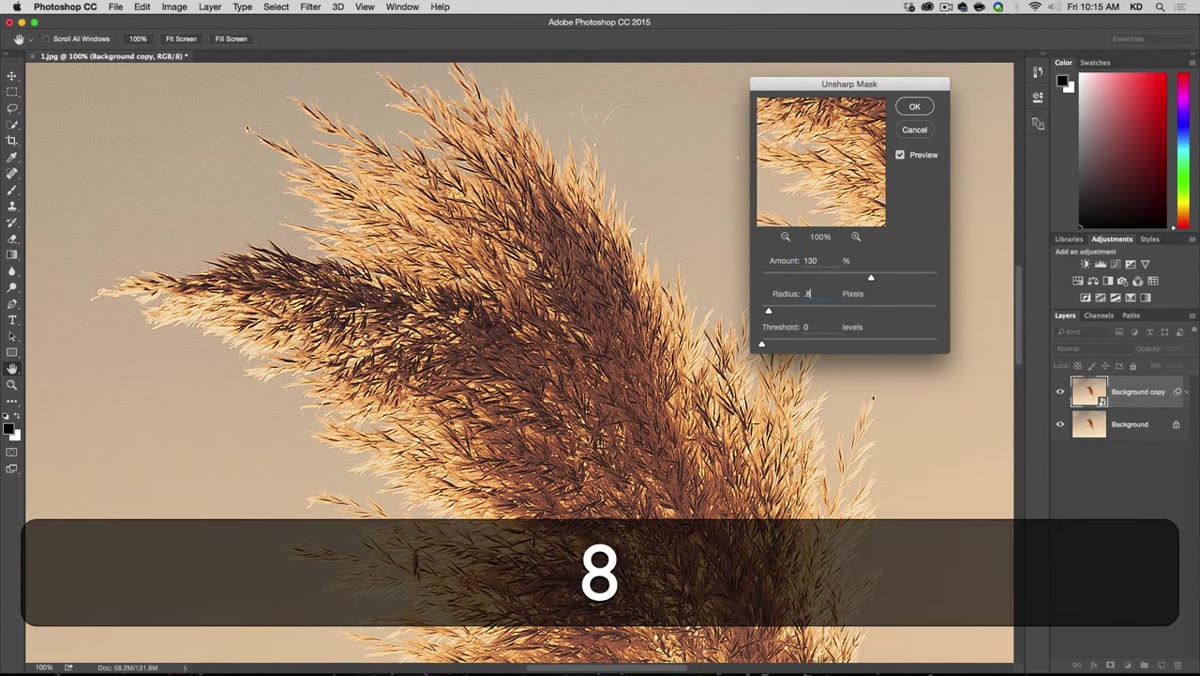 Before and after comparison with final Unsharp Mask settings applied
Use the spacebar to grab the Hand tool and pan around the image while the dialog is open. Check multiple areas, not just the most detailed part of the frame. Kelvin lands on 130 for Amount and 0.8 for Radius on his example image, which gives a noticeable but clean result.
Before and after comparison with final Unsharp Mask settings applied
Use the spacebar to grab the Hand tool and pan around the image while the dialog is open. Check multiple areas, not just the most detailed part of the frame. Kelvin lands on 130 for Amount and 0.8 for Radius on his example image, which gives a noticeable but clean result.
Hit OK when you’re satisfied. Because you’re working on a Smart Object, the Unsharp Mask filter will appear as a sub-entry under the layer in the Layers panel. If you decide the effect is too strong, double-click that entry to reopen the dialog and pull the values back. No destructive change has been made to the original pixels. That’s the entire point of this setup.
What I’d Add From Personal Experience
Unsharp Mask works best as a finishing step, not a fix-it tool. If your image is seriously out of focus, sharpening is going to enhance the blur just as much as any real detail, and you’ll end up with a crisp-looking blurry image, which is somehow worse than just a blurry image. Use it to add the final edge definition to a photo that’s already reasonably sharp but needs that last 10%.
I also like to add a layer mask to the Smart Object after sharpening and brush out any areas where the effect is too visible, like smooth backgrounds or skin. Kelvin doesn’t cover that in this particular segment but it pairs naturally with the non-destructive setup he demonstrates. The Smart Object does the heavy lifting, and the mask gives you precision.
The single most important thing here is the Smart Object step. Everything else you can feel your way through with trial and error, but sharpening destructively on a flattened layer is a habit that will eventually cost you real work. Set up the Smart Object, apply Unsharp Mask conservatively, and adjust from there.
Watch the full tutorial on YouTube to see Kelvin walk through additional sharpening methods and different problem images. There’s more in there worth your time.
Comments (2)
Quality content like this is rare. Keep it up.
This is going in my reference folder. Incredibly useful.
Leave a Comment