There’s a specific flavor of frustration I know too well: you brighten a photo, and suddenly everything looks like it’s been left out in the Texas sun for three days. The thing you actually wanted to pop, say a product, a piece of clothing, a neon sign, gets lost in the wash because you were editing the whole image instead of just the part that needed it. For a long time, my answer was to mess around with the HSL panel, nudge a slider, and hope for the best. It’s a blunt instrument. It’s the equivalent of seasoning a steak by dumping the salt shaker in the general direction of the plate.
In this Matt Kloskowski tutorial, he walks through a genuinely better approach using Color Range masking inside Lightroom and Photoshop Camera Raw. Watch the full tutorial on YouTube before or after you read this, either order works. The technique lets you click directly on a color in your image, build a mask from it, and then apply targeted adjustments like exposure, contrast, saturation, or even a hue shift, to only that color. It’s the kind of workflow that makes you feel like you actually know what you’re doing.
The other thing worth knowing upfront: this works identically in Lightroom and in Photoshop’s Camera Raw filter. If you shoot raw, you’re already in Camera Raw when you open the file. If you’re working with a JPEG or a flattened file in Photoshop, just go to Filter, Camera Raw Filter, and you’ve got the same tools available.
Step 1: Start with a Global Edit, Then Recognize When You Need a Mask
 Brightening the full photo causes the background to wash out
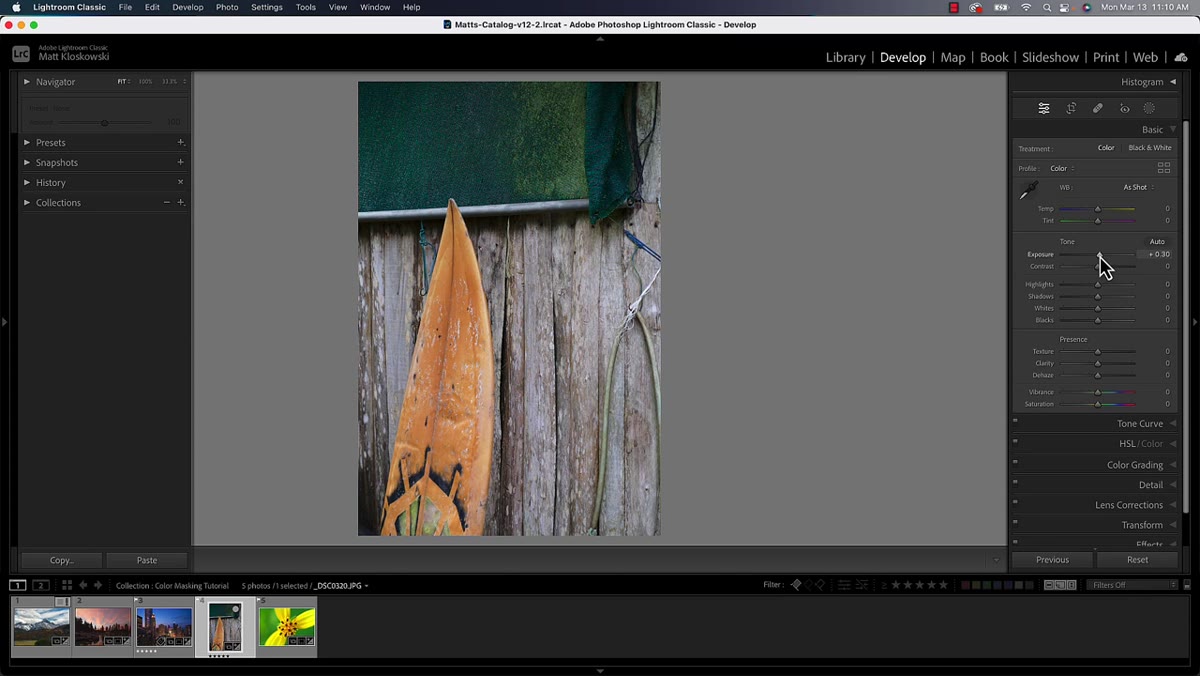
Matt’s approach here is practical and matches how I actually work. Do your basic global edits first, a little brightness, maybe some contrast, and then notice when something starts to break. In the tutorial, brightening the overall photo made the background compete with the surfboard he was trying to highlight. That’s your cue. When the whole image gets pushed in a direction that hurts one specific area, you don’t need more global adjustments, you need a mask.
Brightening the full photo causes the background to wash out
Matt’s approach here is practical and matches how I actually work. Do your basic global edits first, a little brightness, maybe some contrast, and then notice when something starts to break. In the tutorial, brightening the overall photo made the background compete with the surfboard he was trying to highlight. That’s your cue. When the whole image gets pushed in a direction that hurts one specific area, you don’t need more global adjustments, you need a mask.
Step 2: Open the Masking Panel and Select Color Range
 Masking panel open with Color Range option visible
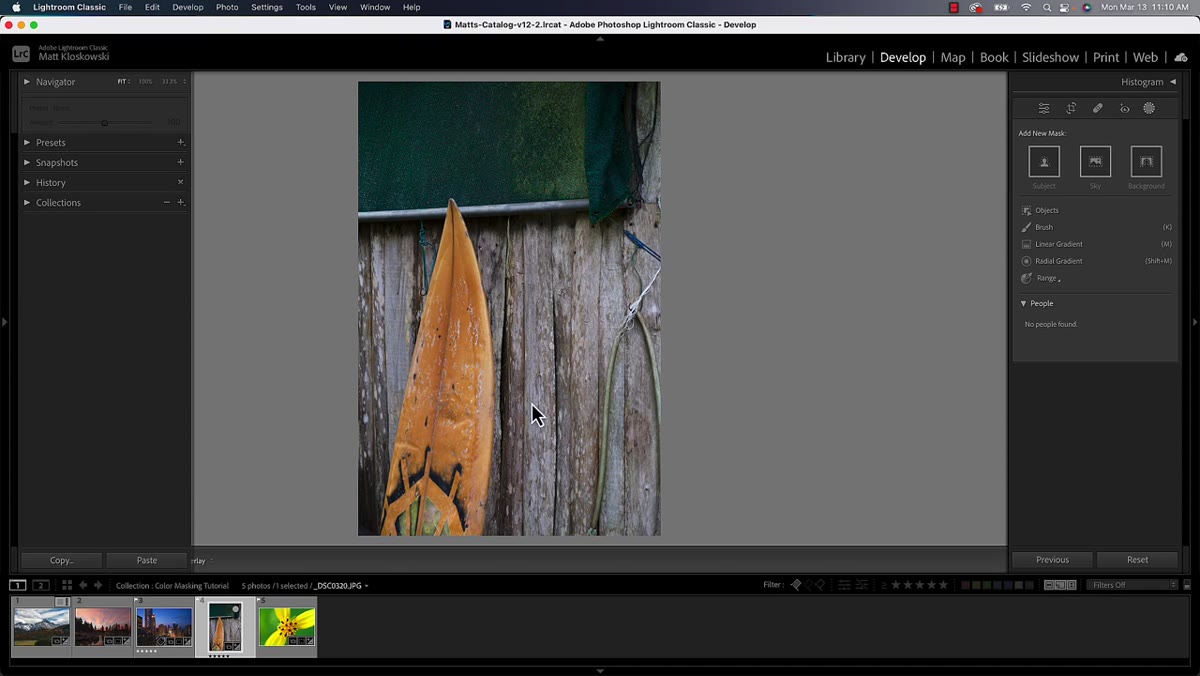
In Lightroom, the masking tools live on the right side of the interface. In Camera Raw inside Photoshop, you’ll find the same panel in roughly the same spot. Open it up and scroll down to the section labeled “Range.” Inside that, you’ll find “Color Range.” Click it. Your cursor will turn into an eyedropper, and the software is now waiting for you to tell it what color to work with.
Masking panel open with Color Range option visible
In Lightroom, the masking tools live on the right side of the interface. In Camera Raw inside Photoshop, you’ll find the same panel in roughly the same spot. Open it up and scroll down to the section labeled “Range.” Inside that, you’ll find “Color Range.” Click it. Your cursor will turn into an eyedropper, and the software is now waiting for you to tell it what color to work with.
Step 3: Click on the Color You Want to Target
 Clicking the surfboard selects the yellow tones with a red overlay
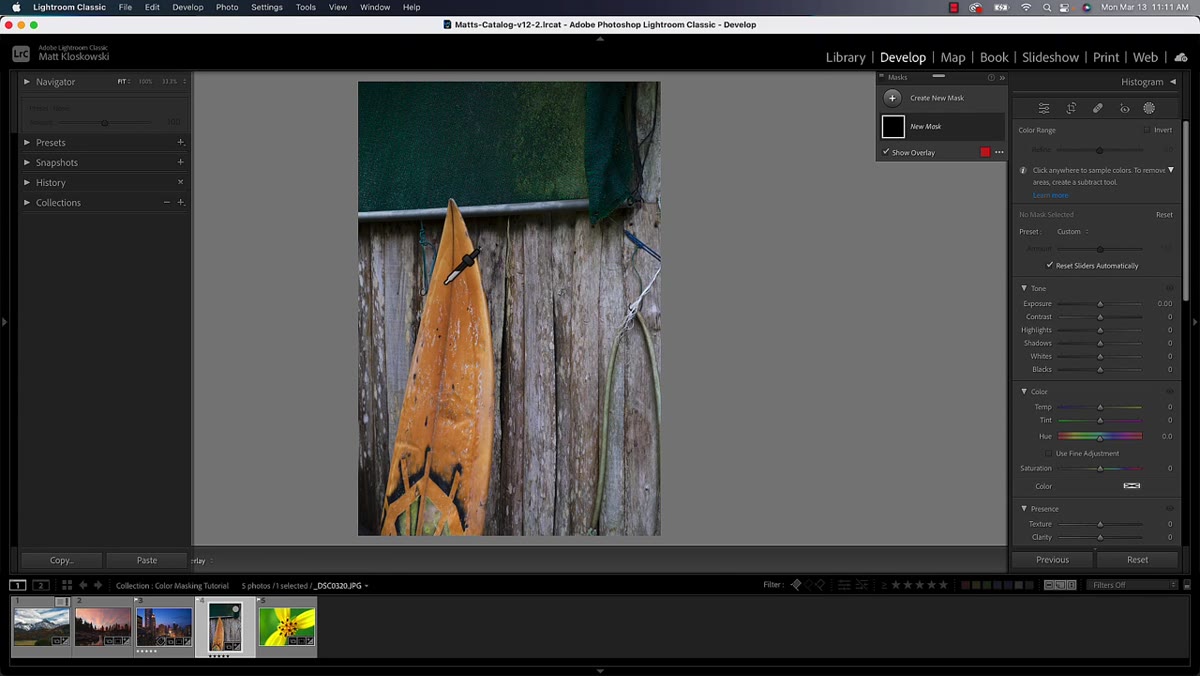
Click directly on the color in your image that you want to isolate. Matt clicks on a yellow surfboard, and the mask immediately picks up the yellows in that area. The selected zone shows up as a red overlay by default, so you can see exactly what’s been grabbed. Don’t expect perfection on the first click, that’s fine, we’ll refine it. The point is that one click already does a better job than manually hunting for the right HSL hue slider.
Clicking the surfboard selects the yellow tones with a red overlay
Click directly on the color in your image that you want to isolate. Matt clicks on a yellow surfboard, and the mask immediately picks up the yellows in that area. The selected zone shows up as a red overlay by default, so you can see exactly what’s been grabbed. Don’t expect perfection on the first click, that’s fine, we’ll refine it. The point is that one click already does a better job than manually hunting for the right HSL hue slider.
Step 4: Add to the Selection with Shift-Click
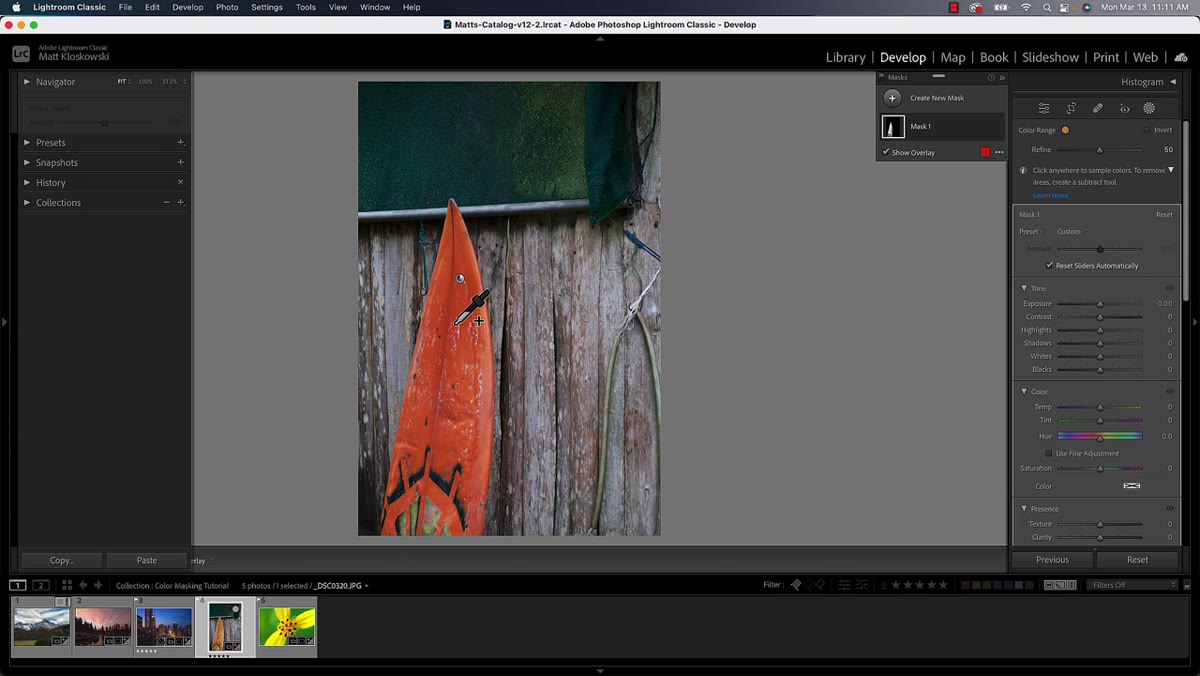 Shift-clicking additional areas to expand the color selection
If your initial click didn’t grab everything you wanted, hold Shift and click on other parts of the same color in the image. You’ll see a small plus symbol next to the eyedropper to confirm you’re adding to the selection. Keep an eye on the red overlay as you do this. If you start seeing the mask bleed into areas you don’t want, that’s your signal to stop. You can always add less and paint in the remaining areas manually rather than overselect and have to clean up a mess.
Shift-clicking additional areas to expand the color selection
If your initial click didn’t grab everything you wanted, hold Shift and click on other parts of the same color in the image. You’ll see a small plus symbol next to the eyedropper to confirm you’re adding to the selection. Keep an eye on the red overlay as you do this. If you start seeing the mask bleed into areas you don’t want, that’s your signal to stop. You can always add less and paint in the remaining areas manually rather than overselect and have to clean up a mess.
Step 5: Switch Your Mask Preview if the Red Overlay Isn’t Cutting It
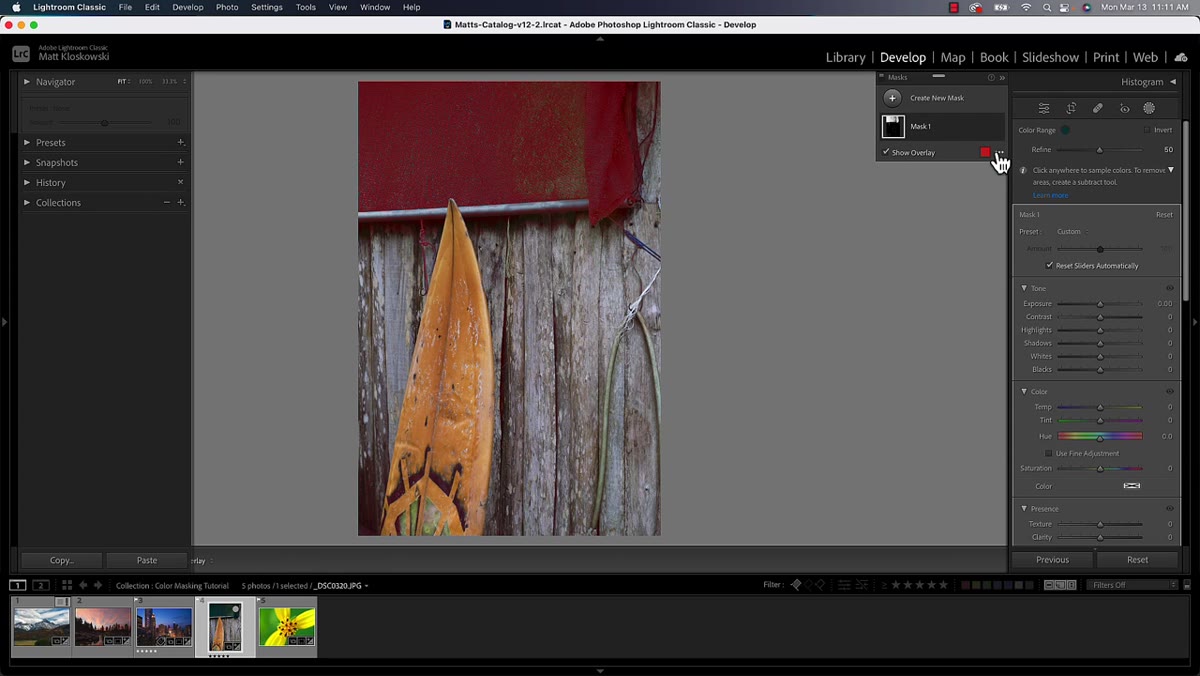 Switching mask view to white-on-black for clearer selection visibility
Red overlays on certain colors (anything warm, for obvious reasons) can make it genuinely hard to see what’s selected. Matt’s fix: click the pop-out menu in the masking panel and switch to “White on Black.” Now your selection shows up as white against a black background, exactly like a traditional layer mask in Photoshop. It’s much easier to spot edge problems or gaps in your selection this way. I flip between views constantly when I’m doing detailed work.
Switching mask view to white-on-black for clearer selection visibility
Red overlays on certain colors (anything warm, for obvious reasons) can make it genuinely hard to see what’s selected. Matt’s fix: click the pop-out menu in the masking panel and switch to “White on Black.” Now your selection shows up as white against a black background, exactly like a traditional layer mask in Photoshop. It’s much easier to spot edge problems or gaps in your selection this way. I flip between views constantly when I’m doing detailed work.
Step 6: Apply Your Targeted Adjustments
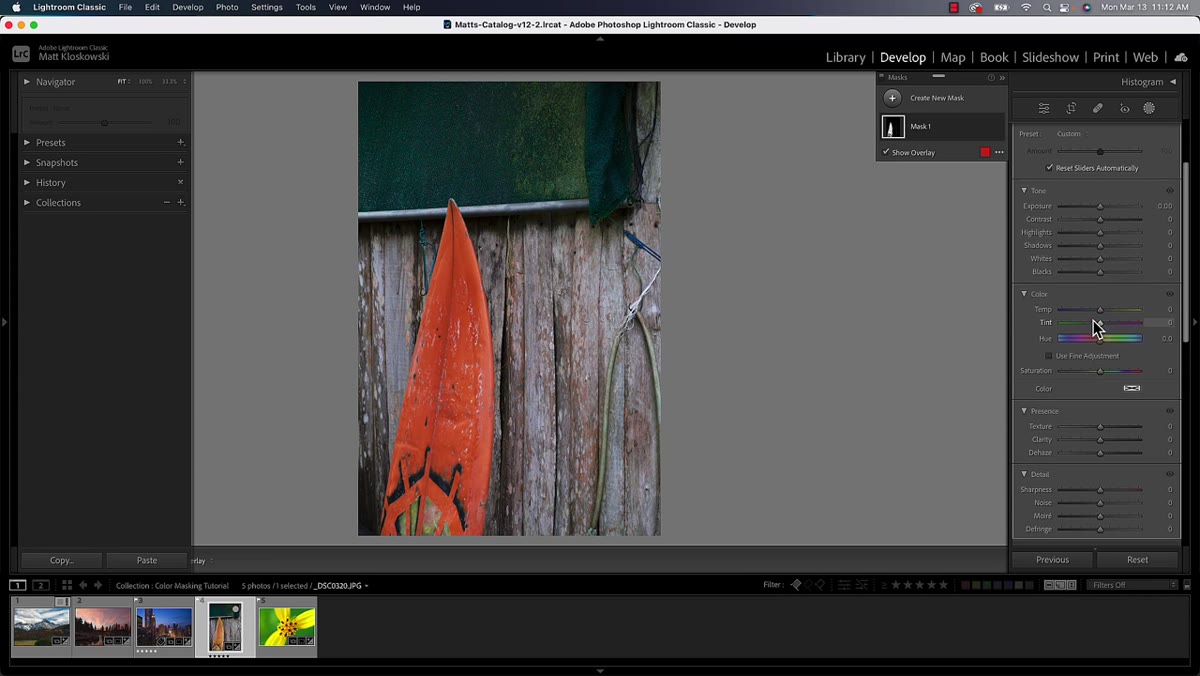 Adjusting exposure, contrast, and saturation sliders on the masked color
Once you’re happy with the mask, this is where the fun starts. The adjustment sliders you see, exposure, contrast, texture, saturation, hue, all apply only to the color you’ve masked. Matt bumps the exposure up to make the surfboard brighter, adds contrast, layers in some texture to make it feel crisper, and then pushes saturation to make the color richer. The background stays exactly where it was. This is the part that feels like a cheat code the first time you do it.
Adjusting exposure, contrast, and saturation sliders on the masked color
Once you’re happy with the mask, this is where the fun starts. The adjustment sliders you see, exposure, contrast, texture, saturation, hue, all apply only to the color you’ve masked. Matt bumps the exposure up to make the surfboard brighter, adds contrast, layers in some texture to make it feel crisper, and then pushes saturation to make the color richer. The background stays exactly where it was. This is the part that feels like a cheat code the first time you do it.
Step 7: Duplicate and Invert the Mask to Edit Everything Else
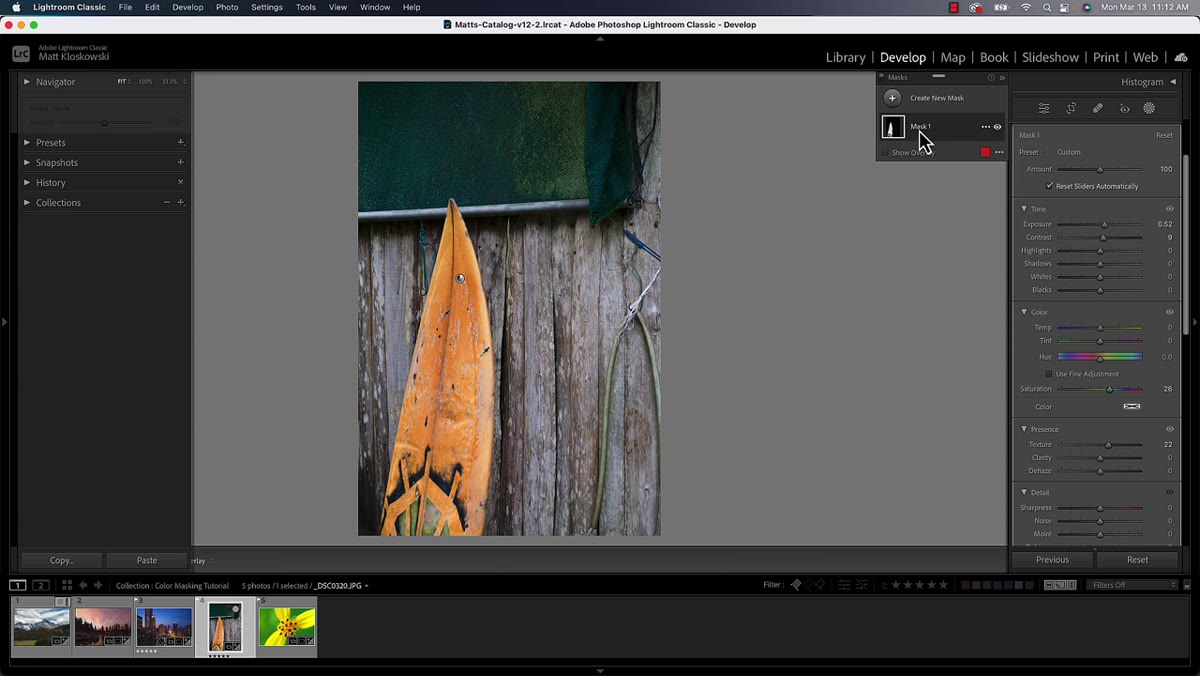 Duplicate and Invert Mask option selected in the masking panel
Here’s a move that saves serious time. Once you have your color mask built, click the pop-out menu on that mask and choose “Duplicate and Invert Mask.” Lightroom and Camera Raw will create a second mask that covers everything the first one doesn’t. In the tutorial, Matt uses this to darken the background slightly, which makes the surfboard pop without touching it at all. You’ve already done the hard selection work, so getting the inverse is free.
Duplicate and Invert Mask option selected in the masking panel
Here’s a move that saves serious time. Once you have your color mask built, click the pop-out menu on that mask and choose “Duplicate and Invert Mask.” Lightroom and Camera Raw will create a second mask that covers everything the first one doesn’t. In the tutorial, Matt uses this to darken the background slightly, which makes the surfboard pop without touching it at all. You’ve already done the hard selection work, so getting the inverse is free.
A Note from My Actual Workflow
I spent three days once building a composite where every color in a product shot needed individual treatment. I was doing it the slow way, hand-painting masks in Photoshop for each element, when a friend pointed out I could have used Color Range masking from the jump and gotten 80% of the way there in ten minutes. Reader, I did not take it well.
What I’ll add to Matt’s walkthrough: Color Range masking works especially well as a starting point, not necessarily a final answer. For clean-edged subjects, it’s often enough on its own. For anything with complex edges or colors that overlap with the background, use the Color Range mask to get your initial selection, then drop into Photoshop and refine it with a layer mask from there. Think of it as doing the tedious color-hunting automatically, and then you clean up the 10% it got wrong.
The single biggest shift this technique creates is moving you from editing globally and hoping for the best, to editing specifically and getting what you actually wanted. That’s the whole game. Click on the color, refine the mask, push your adjustments, and move on. Watch the full tutorial on YouTube to see Matt demonstrate the whole thing in real time, including a few extra examples that show where the tool shines and where it has limits.
Comments (1)
I tried this on a client project yesterday and the results were way better than expected.
Leave a Comment