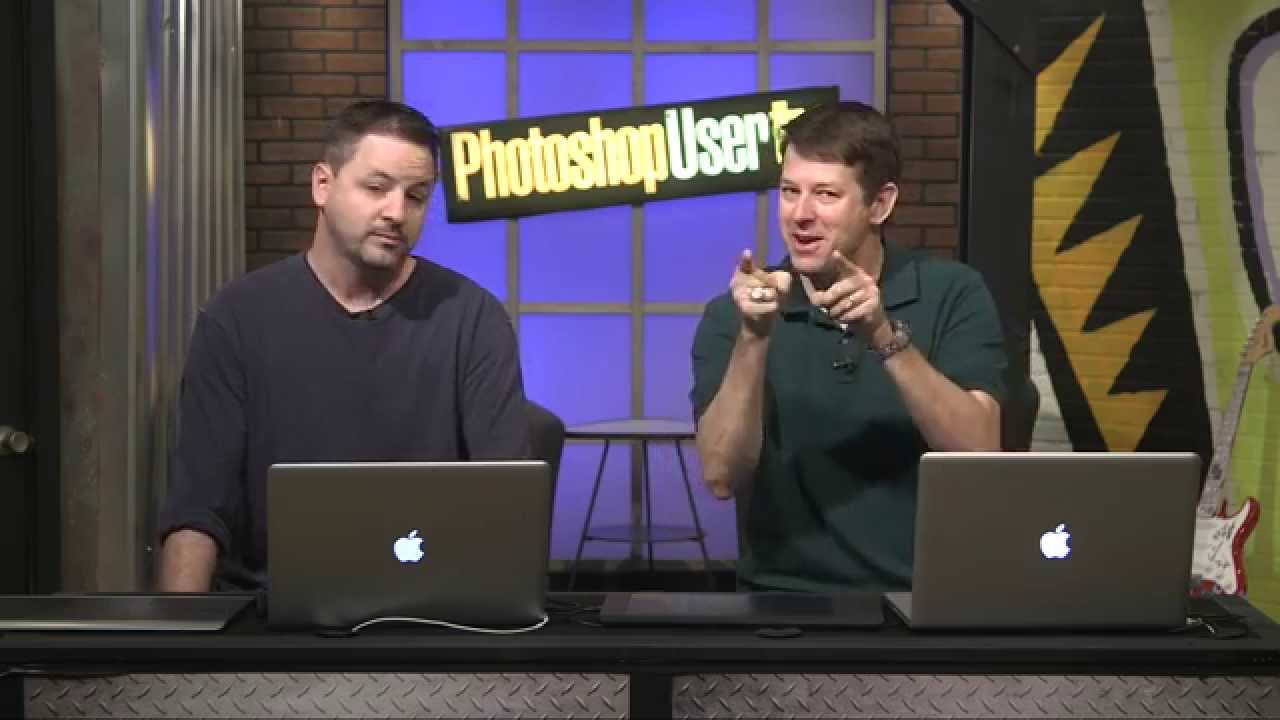
There’s a specific kind of frustration that comes from spending forty-five minutes on a selection, zooming out, and realizing the edges look like you traced the thing with a bar of soap. Quick Select is great. Magic Wand has its moments. But when you’re cutting out something with hard, defined edges, like a car, a plane, a pair of glasses, a product shot, the fuzzy selection tools will consistently let you down. I learned this the hard way on a composite job where I tried to cut out a motorcycle using Refine Edge alone. The client could see every stray pixel. Not my finest hour.
In this KelbyOne tutorial from Photoshop User TV (Episode 371), Pete Collins walks through his exact workflow for cutting out a commercial aircraft using the Pen Tool and, more importantly, explains why a Vector Mask is almost always the better choice over a standard pixel mask once the path is done. It’s a tutorial aimed at people who already know the Pen Tool exists but keep avoiding it because it feels slow. Pete’s argument, and I agree with it completely, is that the time you invest on the front end pays you back when the edit needs to change later.
Watch the full tutorial on YouTube
Step 1: Commit to the Pen Tool for Hard-Edged Subjects
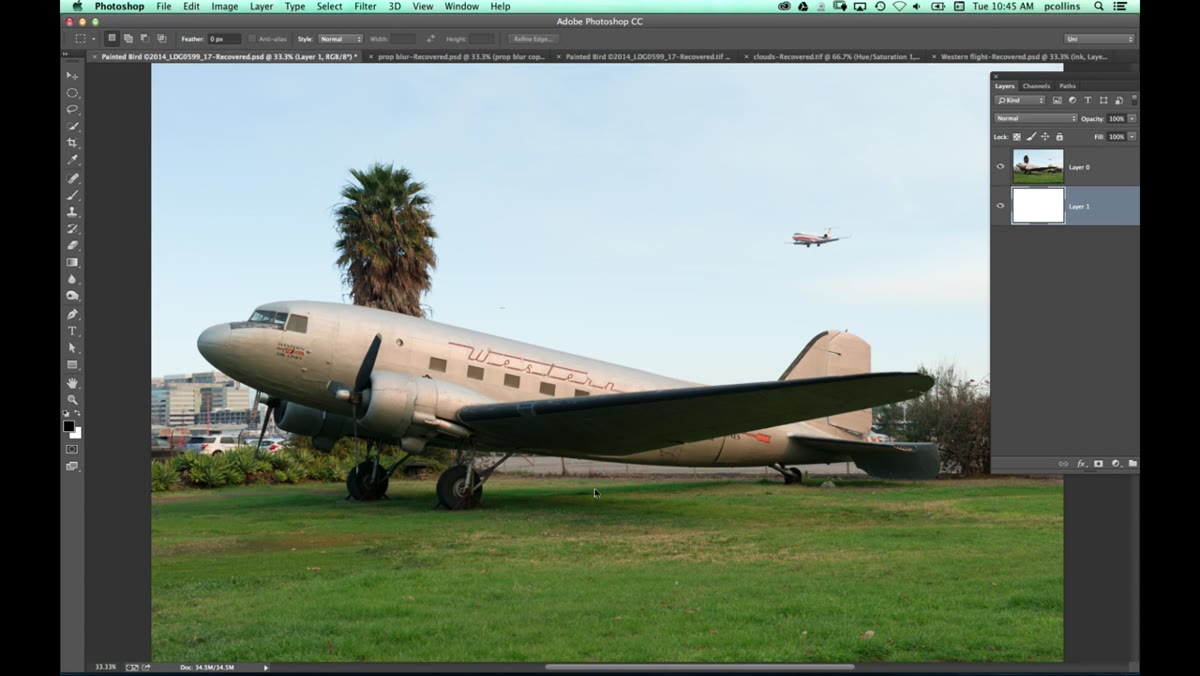 Pete explaining pen tool choice for hard-edged objects
Before you even open the Paths panel, you need to make a decision: is this the right tool for this subject? Pete is clear about this. If your subject has hair, fur, or complex organic edges, you are in Refine Edge territory. But if it has clean, manufactured lines, stop reaching for Quick Select out of habit. The Pen Tool is the right call, and the sooner you accept that, the faster your cutouts will get.
Pete explaining pen tool choice for hard-edged objects
Before you even open the Paths panel, you need to make a decision: is this the right tool for this subject? Pete is clear about this. If your subject has hair, fur, or complex organic edges, you are in Refine Edge territory. But if it has clean, manufactured lines, stop reaching for Quick Select out of habit. The Pen Tool is the right call, and the sooner you accept that, the faster your cutouts will get.
Open your image, grab the Pen Tool (P), and start placing anchor points around the outline of your subject. Don’t try to follow curves with dozens of tiny straight-line clicks. Place fewer points and use the curve handles to follow the contour. Fewer points means a cleaner, smoother path.
Step 2: Build the Path Around the Entire Subject
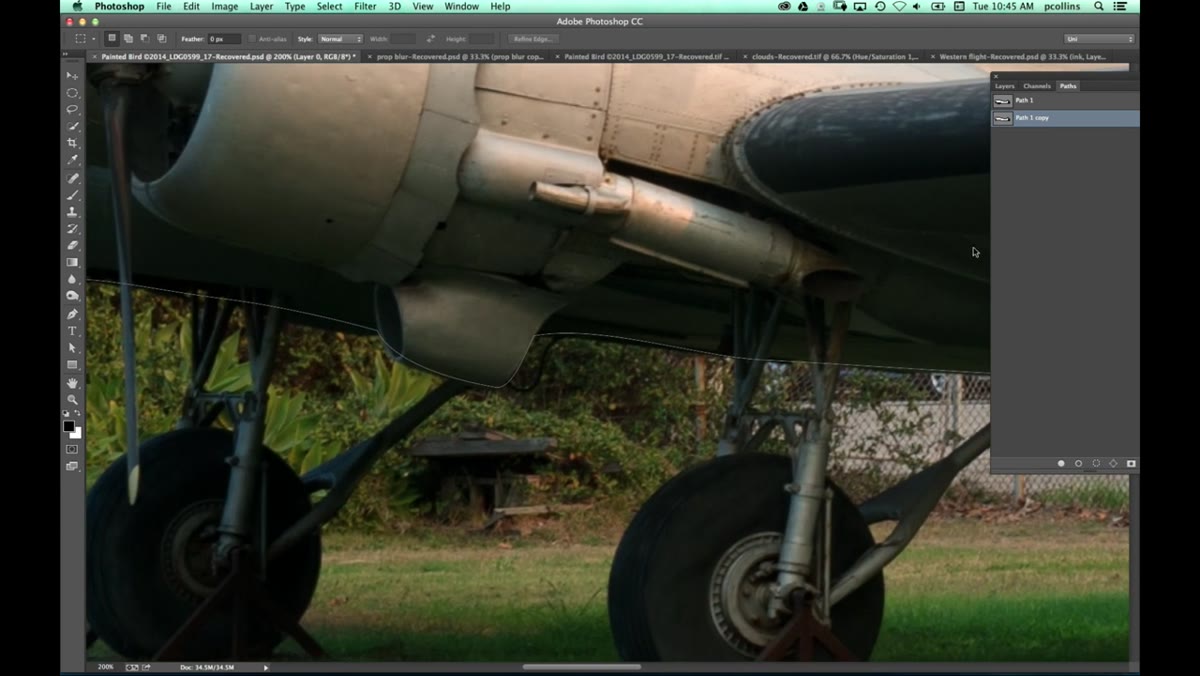 Completed pen path around airplane with wheel detail visible
Pete shows a completed path around a full airplane, including the wheels and landing gear, and points out that it represents a significant investment of time. That’s not a warning, that’s the pitch. The path is the asset. Everything downstream depends on it being accurate, so work at 200-300% zoom and take the time to get anchor points sitting exactly on the edge of your subject.
Completed pen path around airplane with wheel detail visible
Pete shows a completed path around a full airplane, including the wheels and landing gear, and points out that it represents a significant investment of time. That’s not a warning, that’s the pitch. The path is the asset. Everything downstream depends on it being accurate, so work at 200-300% zoom and take the time to get anchor points sitting exactly on the edge of your subject.
Two paths are actually visible in his Paths panel: one that includes the wheels and one that skips them. If your subject has interior cutout areas, like the space between landing gear struts or the inside of a car’s wheel arch, you create a second subpath for each hole. Both paths work together when converted to a selection, subtracting the interior areas automatically.
Step 3: Use Command/Ctrl to Adjust Points Without Switching Tools
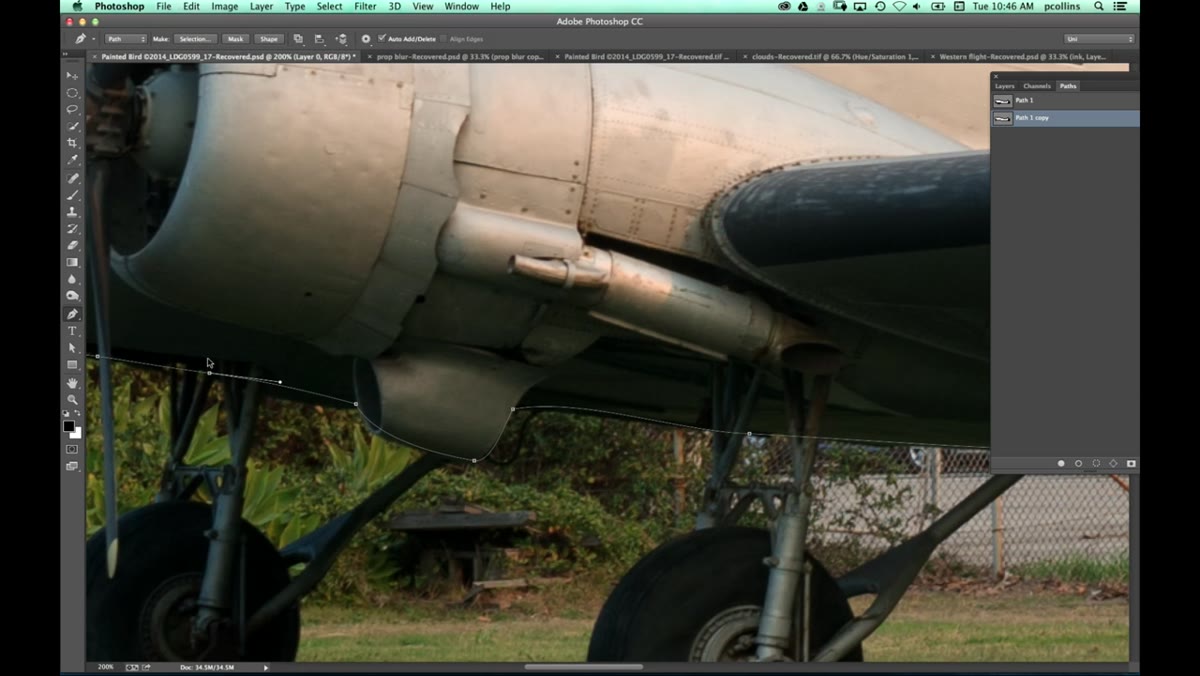 Pete holding Command to switch to direct selection and nudge anchor points
One of the workflow details Pete drops here that a lot of beginners miss: you don’t have to manually switch to the Direct Selection Tool to move anchor points. While the Pen Tool is active, hold Command (Mac) or Ctrl (PC) and you temporarily get the Direct Selection Tool. Click an anchor point, drag it, adjust the curve handles, then let go and you’re back to placing new points.
Pete holding Command to switch to direct selection and nudge anchor points
One of the workflow details Pete drops here that a lot of beginners miss: you don’t have to manually switch to the Direct Selection Tool to move anchor points. While the Pen Tool is active, hold Command (Mac) or Ctrl (PC) and you temporarily get the Direct Selection Tool. Click an anchor point, drag it, adjust the curve handles, then let go and you’re back to placing new points.
This keeps you in a rhythm. You’re not constantly going back to the toolbar or hitting keyboard shortcuts to toggle between tools. Place a point, hold Command to nudge it into position, let go, place the next point. Once you build that muscle memory, the Pen Tool stops feeling slow.
Step 4: Convert the Path to a Vector Mask
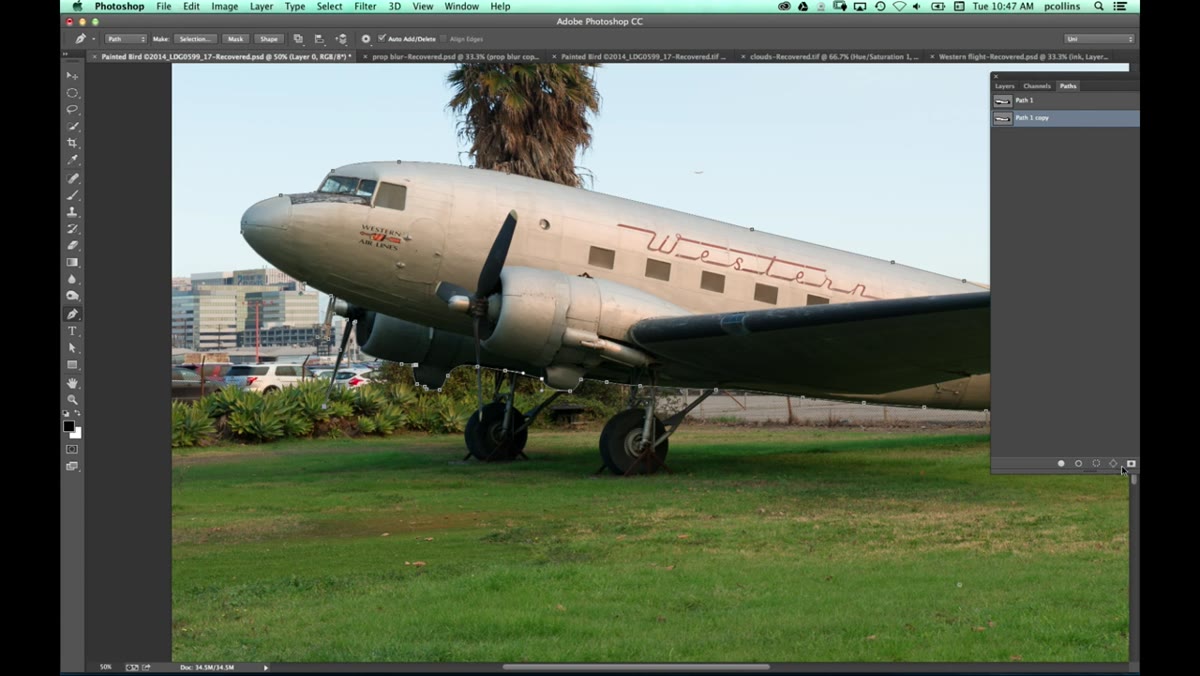 Pete clicking the path panel button to create vector mask from path
Once your path is closed and you’re happy with it, go to the Paths panel. At the bottom of the panel, you’ll see an icon that lets you load the path as a selection, but Pete’s move here is better: click the icon that adds the path directly as a layer mask. This creates a Vector Mask on the layer, not a standard pixel mask.
Pete clicking the path panel button to create vector mask from path
Once your path is closed and you’re happy with it, go to the Paths panel. At the bottom of the panel, you’ll see an icon that lets you load the path as a selection, but Pete’s move here is better: click the icon that adds the path directly as a layer mask. This creates a Vector Mask on the layer, not a standard pixel mask.
The difference matters. A regular pixel mask is a greyscale bitmap. Once you paint on it, you’re committing to pixels. A Vector Mask keeps the path live and editable. You can see the vector mask thumbnail in the Layers panel sitting to the right of the layer thumbnail, and that path is still fully adjustable at any time.
Step 5: Edit the Vector Mask On the Fly
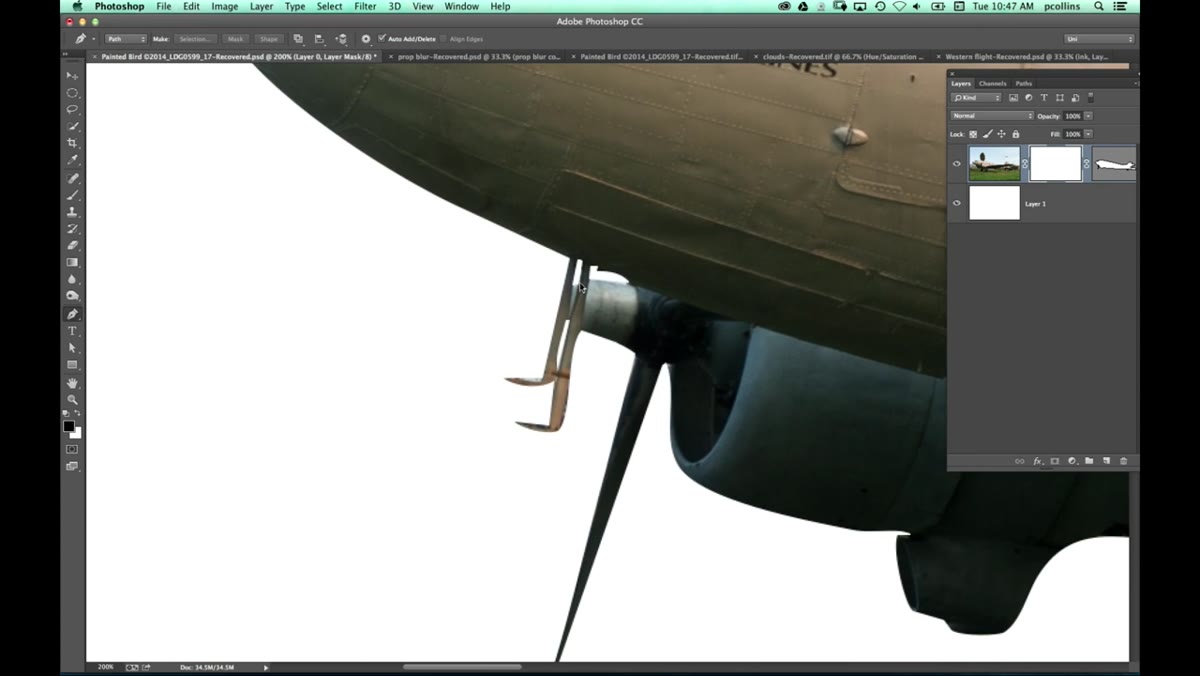 Pete selecting and deleting extra anchor points directly on the vector mask
This is the part that changed how I work. With a standard pixel mask, if you mask something incorrectly, you paint over the mistake in black or white and hope for the best. With a Vector Mask, you just go back into the path and fix the anchor points directly. Pete demonstrates this by removing some extra anchor points near the nose of the plane, and the mask updates in real time as he deletes them.
Pete selecting and deleting extra anchor points directly on the vector mask
This is the part that changed how I work. With a standard pixel mask, if you mask something incorrectly, you paint over the mistake in black or white and hope for the best. With a Vector Mask, you just go back into the path and fix the anchor points directly. Pete demonstrates this by removing some extra anchor points near the nose of the plane, and the mask updates in real time as he deletes them.
To edit the mask, click on the Vector Mask thumbnail in the Layers panel to make it active, then use the Direct Selection Tool or the Pen Tool to manipulate the path. Add points, delete points, move curve handles. The mask follows the path exactly. No repainting, no guessing.
Step 6: Use Mask Density to Blend the Edge
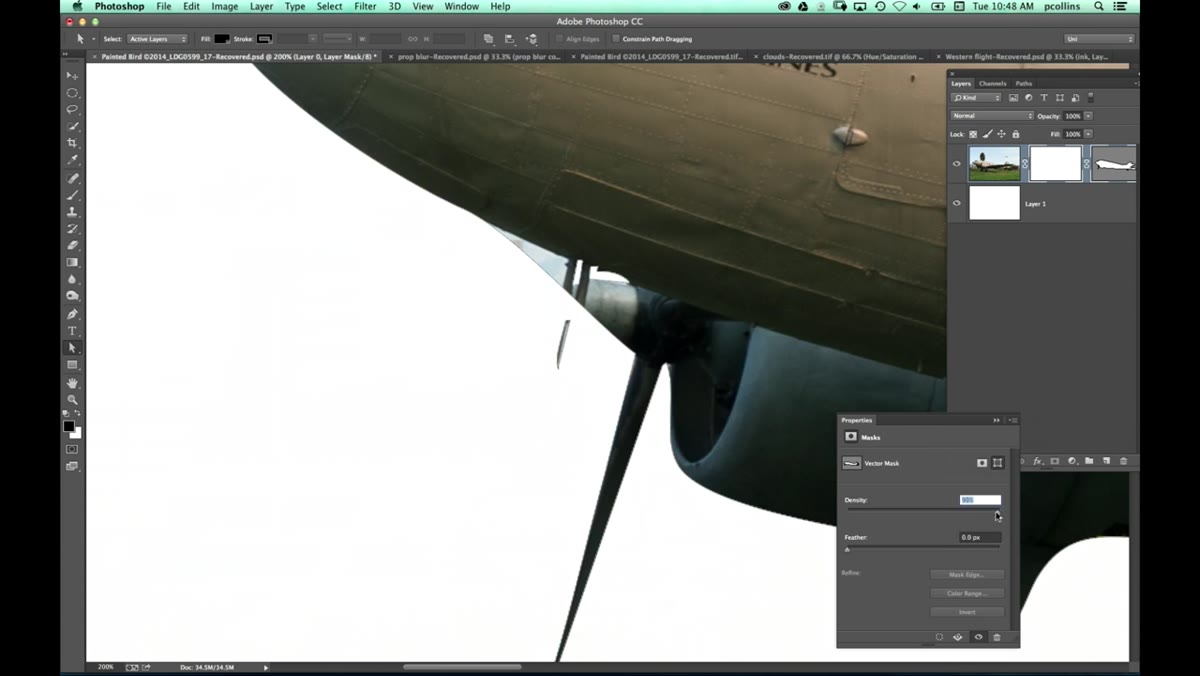 Mask Properties panel showing Density slider being reduced
Double-clicking the Vector Mask thumbnail opens the Properties panel for that mask. One of the controls in there is Density, which works like an opacity slider for the mask itself. Pulling it back from 100% lets some of the background show through, which can help the subject feel more integrated into a composite rather than sitting on top of it like a sticker.
Mask Properties panel showing Density slider being reduced
Double-clicking the Vector Mask thumbnail opens the Properties panel for that mask. One of the controls in there is Density, which works like an opacity slider for the mask itself. Pulling it back from 100% lets some of the background show through, which can help the subject feel more integrated into a composite rather than sitting on top of it like a sticker.
This is subtle but worth knowing. You’re not softening the edge, you’re reducing how completely the mask hides the layer below. On a product shot against a clean background, you probably leave it at 100%. On a photo composite where you want a more natural blend, dialing it back a few percentage points can make a real difference.
One Thing I’d Add: Save Your Paths Before Converting
Pete doesn’t specifically call this out, but after getting burned a couple of times, I always save my work path before converting it to a mask. In the Paths panel, double-click the work path and give it a name. An unsaved work path gets overwritten the moment you start drawing a new path anywhere in the document. Name it, keep it, thank yourself later.
If you ever need to go back and adjust the mask on a different version of the file, the path is right there waiting. It also makes handing off files to other designers much less of a nightmare.
The single biggest takeaway from this tutorial is not a specific step, it’s the framing. The Pen Tool is not slow, it’s deliberate. The time you spend building a clean path is time you do not spend fixing bad edges, arguing with clients, or redoing the job from scratch. For anything with hard edges, it’s the right tool, and Pete Collins makes a convincing case for exactly why.
Watch the full tutorial on YouTube
Comments (2)
Quality content like this is rare. Keep it up.
I tried this on a client project yesterday and the results were way better than expected.
Leave a Comment