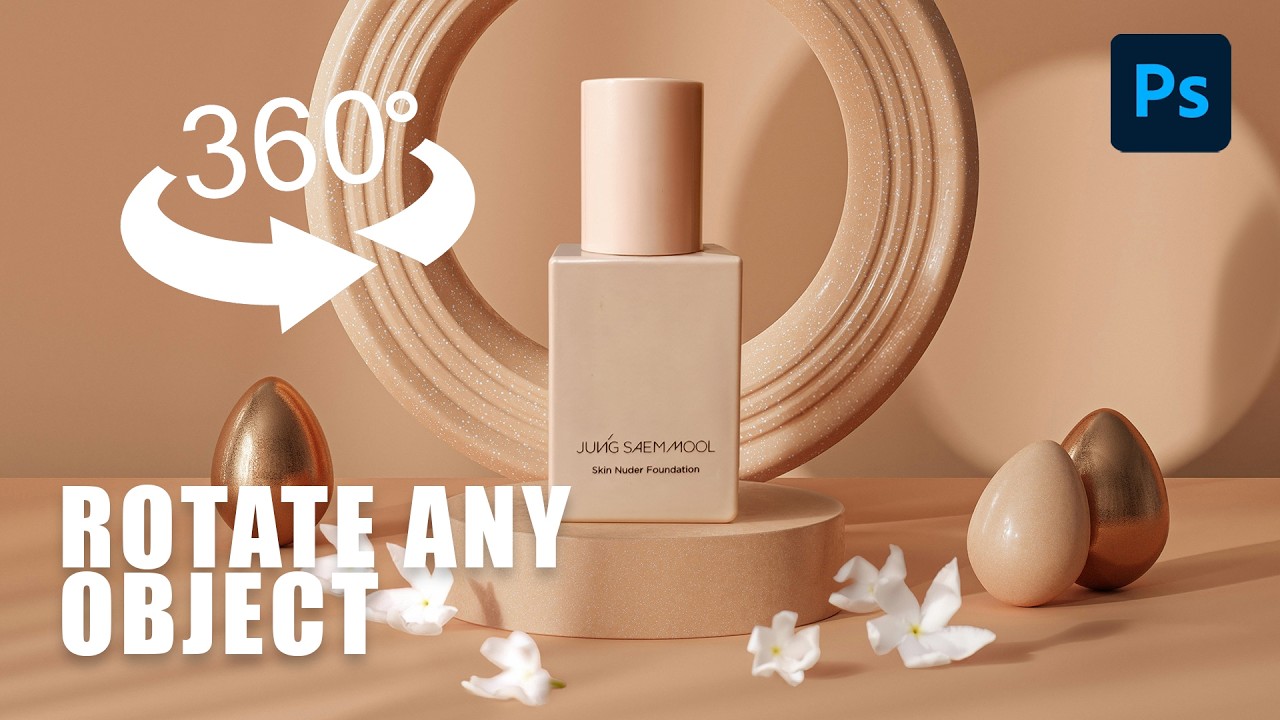
I spent three days on a composite once. Three full days, four cold coffees at the same coffee shop table, and more manual warp adjustments than I care to admit, trying to get a product shot to sit convincingly on a surface that was shot from a completely different angle. My client thought it looked great. I knew it looked like a PNG dropped on a photo because, well, it was. The perspective was just slightly wrong, the kind of wrong that you feel before you can name it.
That problem, the rotation mismatch problem, has quietly killed more composites than bad masking ever has. So when Aaron Nace over at PHLEARN dropped a tutorial showing a brand new Rotate Object tool inside Photoshop 2026, I watched the whole thing immediately. Watch the full tutorial on YouTube if you want to follow along with the actual assets, which are free to download from PHLEARN’s site. The workflow is three steps, each one solving a distinct problem, and together they produce results that would have taken me an entire afternoon to fake manually.
Here’s how the whole thing breaks down.
Step 1: Cut Your Object Out First
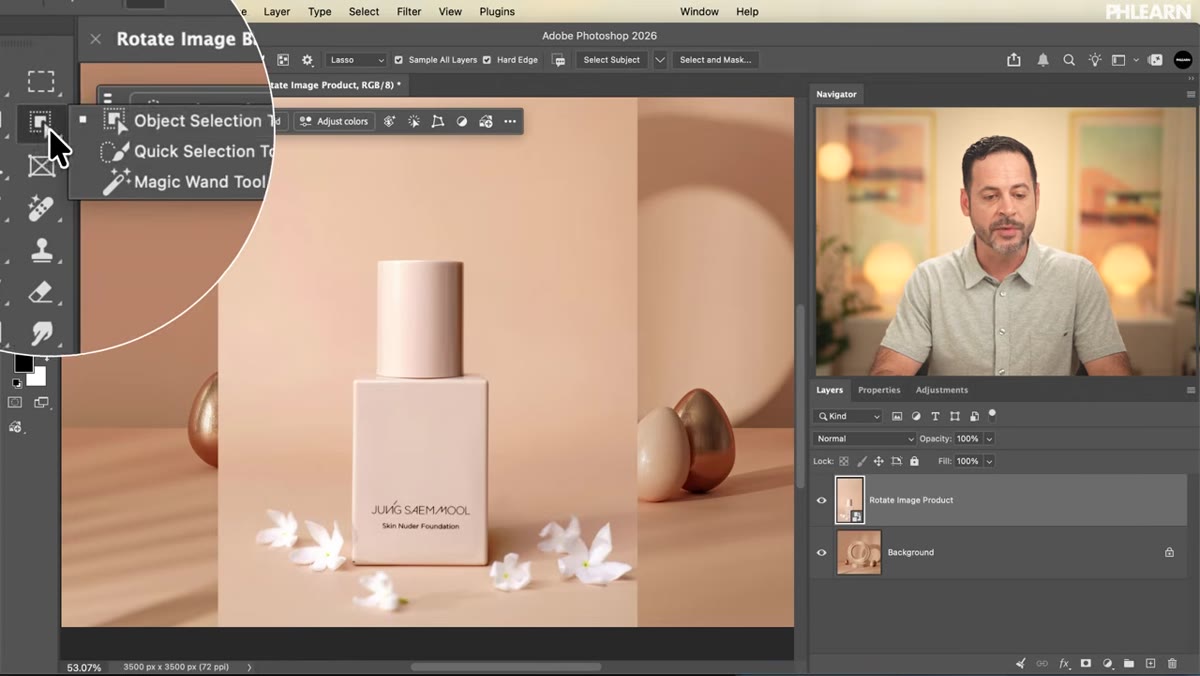 Product isolated on its own transparent layer
Before you touch any of the new AI tools, do the unglamorous work: isolate your object from its background. Aaron uses the Object Selection tool, which at this point is genuinely impressive. You hover over your subject, a pink outline appears showing what Photoshop has detected, and a single click drops a selection around it. From there, hit Ctrl/Cmd+J to duplicate just the selected area onto its own layer, then hide the original.
Product isolated on its own transparent layer
Before you touch any of the new AI tools, do the unglamorous work: isolate your object from its background. Aaron uses the Object Selection tool, which at this point is genuinely impressive. You hover over your subject, a pink outline appears showing what Photoshop has detected, and a single click drops a selection around it. From there, hit Ctrl/Cmd+J to duplicate just the selected area onto its own layer, then hide the original.
This step matters more than it sounds. The Rotate Object tool can attempt to find a subject on a busy background, but giving it a cleanly isolated object on a transparent layer removes all the guesswork and produces dramatically better results. Think of it as setting your AI tools up to succeed rather than asking them to solve two problems at once.
Step 2: Enter Transform Mode and Launch Rotate Object
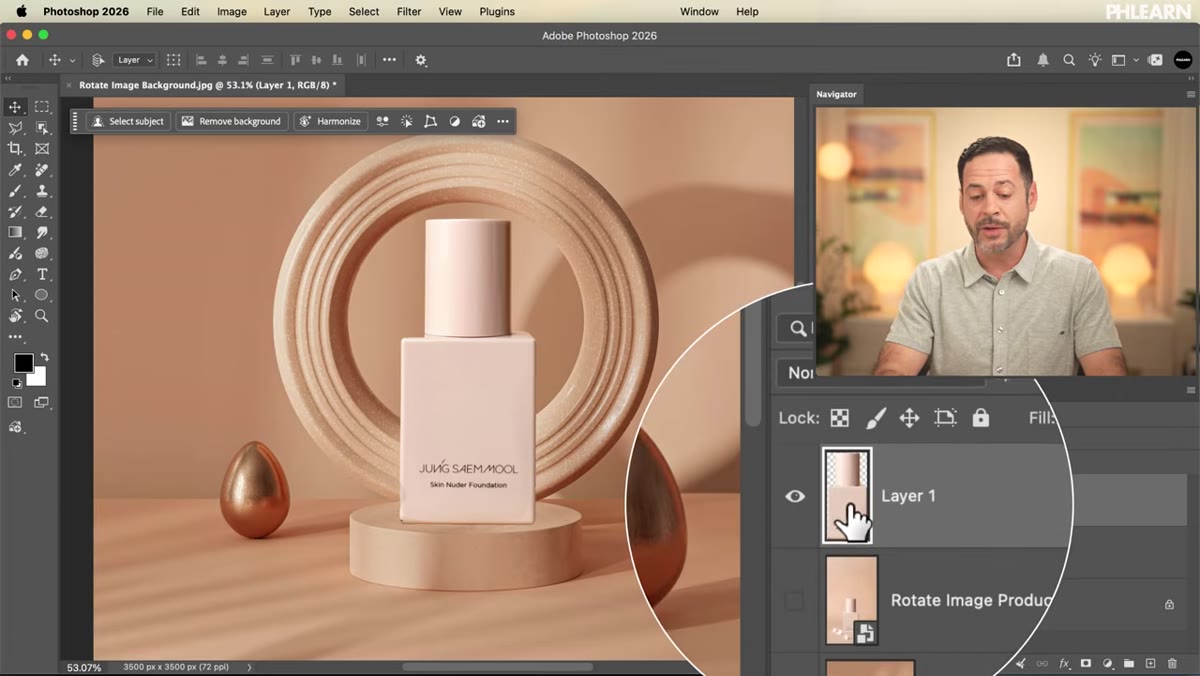 Rotate Object button visible in the contextual taskbar
With your isolated object layer selected, hit Ctrl/Cmd+T to enter the standard Free Transform mode. This is where the new tool lives. Look at the contextual taskbar running along the bottom of your canvas and you’ll see a Rotate Object button sitting alongside the usual transform options. If your contextual taskbar isn’t showing, go to Window and make sure “Contextual Taskbar” is checked.
Rotate Object button visible in the contextual taskbar
With your isolated object layer selected, hit Ctrl/Cmd+T to enter the standard Free Transform mode. This is where the new tool lives. Look at the contextual taskbar running along the bottom of your canvas and you’ll see a Rotate Object button sitting alongside the usual transform options. If your contextual taskbar isn’t showing, go to Window and make sure “Contextual Taskbar” is checked.
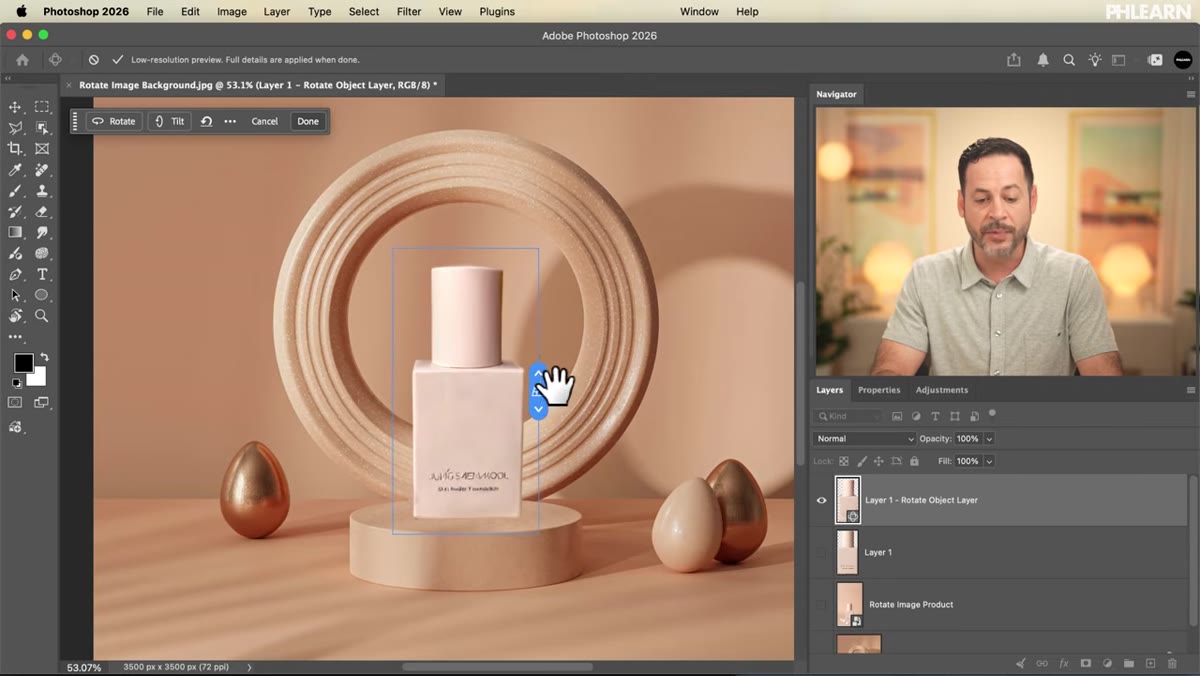
Click Rotate Object and Photoshop’s AI analyzes your subject and builds a 3D interpretation of it. The preview will look rough, almost unusably rough, and that’s normal. You haven’t applied anything yet. What you now have is a set of 3D rotation controls that let you tilt the object toward you, push it away, or spin it on a turntable. The AI is extrapolating what sides of the object it can’t actually see based on what it knows about the shape, which works better on some objects than others, but for common forms like bottles, boxes, and consumer products it’s solid.
Step 3: Match the Perspective to Your Background Scene
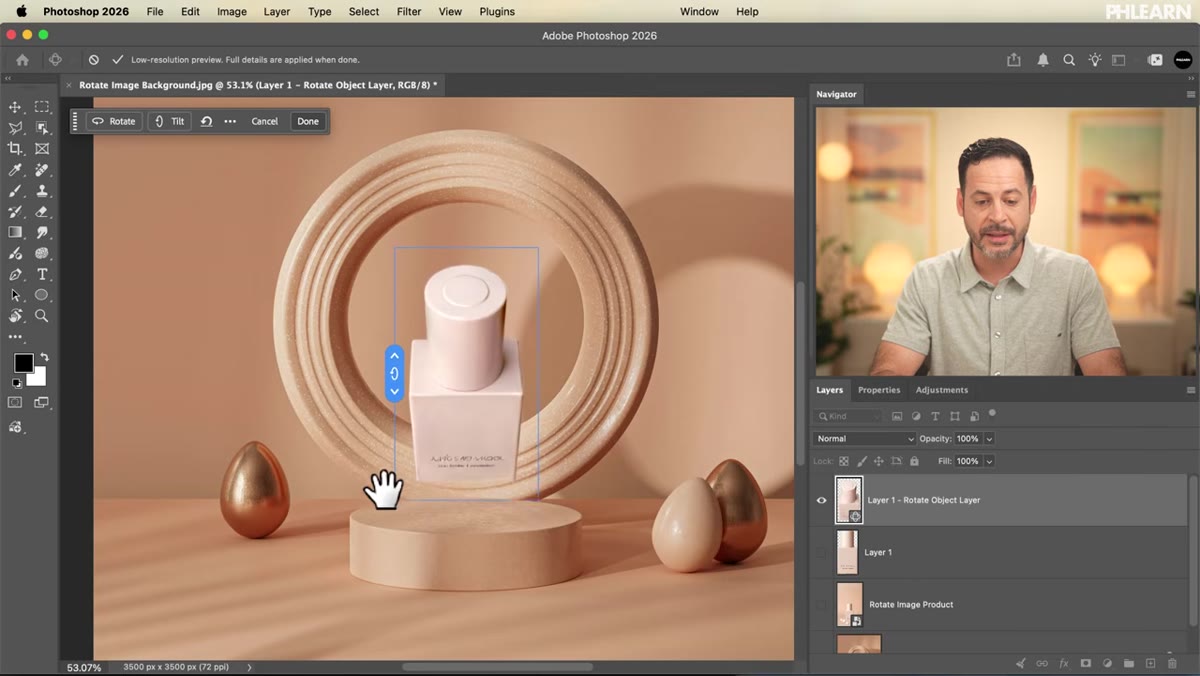 Object tilted forward to match the surface angle below it
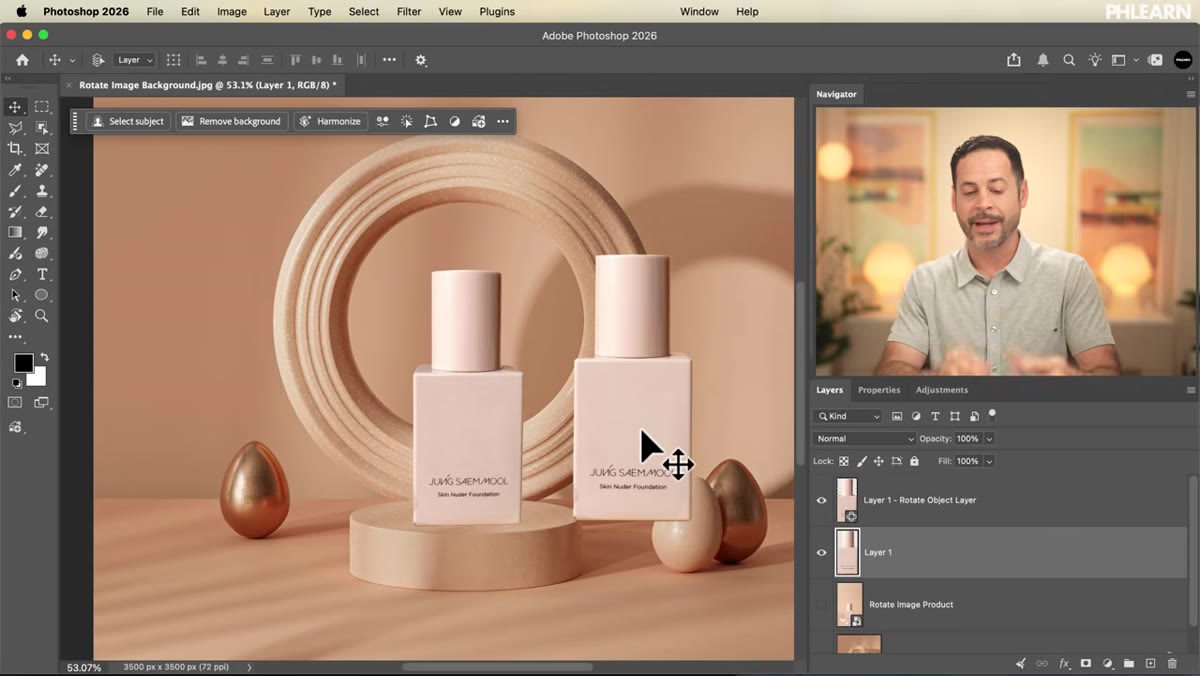
This is the actual problem-solver. In Aaron’s example, the background surface is shot from a slightly elevated angle, meaning you can see the top of it. The product photo was shot straight-on. That mismatch is exactly what kills composites. Using the tilt control in Rotate Object, he nudges the product forward to match the angle of the surface it’s supposed to be sitting on.
Object tilted forward to match the surface angle below it
This is the actual problem-solver. In Aaron’s example, the background surface is shot from a slightly elevated angle, meaning you can see the top of it. The product photo was shot straight-on. That mismatch is exactly what kills composites. Using the tilt control in Rotate Object, he nudges the product forward to match the angle of the surface it’s supposed to be sitting on.
The key is to look at the background scene and ask: where is the camera relative to the objects in this scene? If you can see the tops of things, your composite object needs to show its top too. Rotate until the angles feel consistent, then click the checkmark to apply. Photoshop renders the transformation at full quality at this point, so ignore how bad the preview looked. Applied results are significantly cleaner.
Step 4: Use Harmonize to Match the Lighting
 Harmonize tool adjusting the color grade of the composited object
A perfectly rotated object still looks fake if it’s lit differently than the scene around it. Harmonize, another AI tool in Photoshop 2026, addresses this. With your composited object layer selected, find Harmonize in your toolbar options. It analyzes the color temperature, brightness, and tonal qualities of the background and adjusts your object to match.
Harmonize tool adjusting the color grade of the composited object
A perfectly rotated object still looks fake if it’s lit differently than the scene around it. Harmonize, another AI tool in Photoshop 2026, addresses this. With your composited object layer selected, find Harmonize in your toolbar options. It analyzes the color temperature, brightness, and tonal qualities of the background and adjusts your object to match.
This is the step that makes the composite feel like the product was photographed in that space rather than dropped in later. You still have control over the intensity of the effect, so if Harmonize pushes too hard, dial it back. The goal is cohesion, not a perfect color match, because real objects in real environments have variation in how light hits them.
Step 5: Build the Shadow with Generative Fill
 Generative Fill creating a natural ground shadow beneath the object
No object sitting on a surface exists without a shadow, and a missing or unconvincing shadow is the single fastest way to break the illusion. Aaron uses Generative Fill here, not to generate the object itself, but to generate a believable shadow that conforms to the surface the object is resting on.
Generative Fill creating a natural ground shadow beneath the object
No object sitting on a surface exists without a shadow, and a missing or unconvincing shadow is the single fastest way to break the illusion. Aaron uses Generative Fill here, not to generate the object itself, but to generate a believable shadow that conforms to the surface the object is resting on.
Make a selection of the area directly beneath your object, use a Generative Fill prompt describing a natural drop shadow or contact shadow, and let Photoshop produce options. You’ll typically get a few variations to choose from. The result blends in a way that’s almost impossible to paint manually unless you have a lot of time and a good understanding of how light scatters at contact points. It respects the surface texture too, which is where painted shadows usually fail.
What I’d Add From My Own Experience
The Rotate Object tool works best on objects with clear geometry. Bottles, cans, boxes, shoes, electronics, all of these respond well because their forms are recognizable. Organic shapes, crumpled fabric, food, anything with irregular edges, will produce messier results and may need manual cleanup afterward. That’s not a criticism of the tool, it’s just physics. AI fills in what it can’t see based on pattern recognition, and irregular objects have fewer predictable patterns to work from.
I’d also suggest keeping your original isolated product layer as a hidden backup before you apply any of these transformations. Rotate Object and Generative Fill are non-destructive in spirit but the actual pixel data does change once applied. Having the clean original sitting one layer below costs you nothing and saves you from having to re-cut the mask if you want to try a different rotation angle later. Keyboard shortcut habits aside, that’s the one layer discipline I’d push hard on.
The single biggest takeaway from Aaron’s tutorial is this: the hardest part of compositing used to be the part you couldn’t really fix, perspective and rotation. Everything else, color, shadows, edges, was learnable with enough practice. Rotation meant you either had the right source photo or you didn’t. That limitation is now gone, and it changes what’s actually possible when you’re sourcing product images or working with client-supplied assets that were shot in less-than-ideal conditions.
Watch the full tutorial on YouTube and grab the free practice assets from PHLEARN’s site. Running through it once with the actual files makes the workflow click in a way that reading about it doesn’t fully replicate.
Comments (3)
This saved me so much time on my last edit. Wish I'd found this sooner.
Shared this with my photography group. Everyone loved it.
Really solid breakdown. This pairs perfectly with the business work I've been writing about.
Leave a Comment