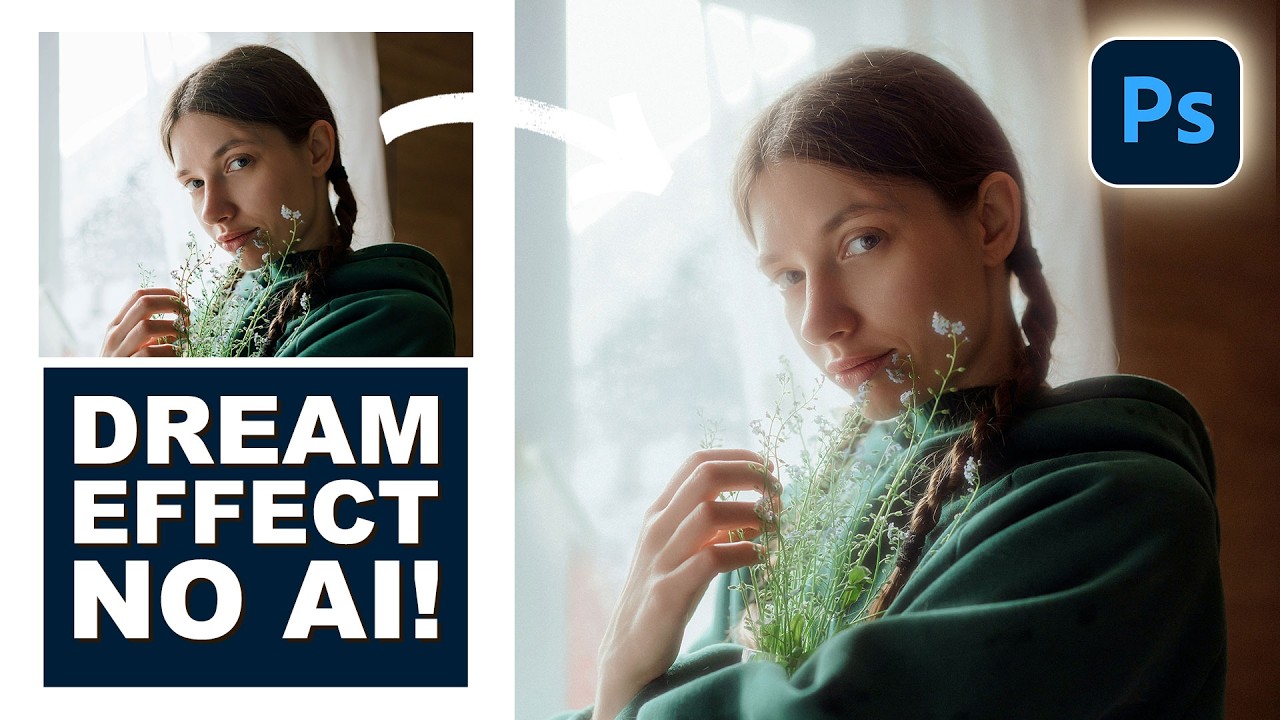
There’s a specific flavor of photo edit that I used to spend embarrassing amounts of time chasing. You’ve seen it. That soft, warm, almost-overexposed bloom around highlights that makes a photo look like it was shot on film that’s slightly too happy about itself. I kept trying to fake it by cranking up a Gaussian blur on a duplicated layer and hoping for the best. The result was always the same: muddy, flat, and sad. When I came across Watch the full tutorial on YouTube from Aaron Nace over at PHLEARN, I realized I’d been solving the right problem with completely the wrong tools.
The core issue with most DIY glow attempts is that you’re blurring everything. The shadow detail, the midtones, the carefully graded skin tones. All of it turns to soup. What Aaron’s approach does instead is isolate only the highlights first, then blur those specifically, which means the rest of your image stays intact while the bright areas get that dreamy, bloomed-out quality. It’s surgical rather than brute-force, and once you see the difference, you can’t unsee it.
What follows is my breakdown of the technique so you can follow along without pausing the video every ten seconds. I’m working in Photoshop 2025, but this works in any recent version.
Step 1: Select Your Highlights Using Color Range
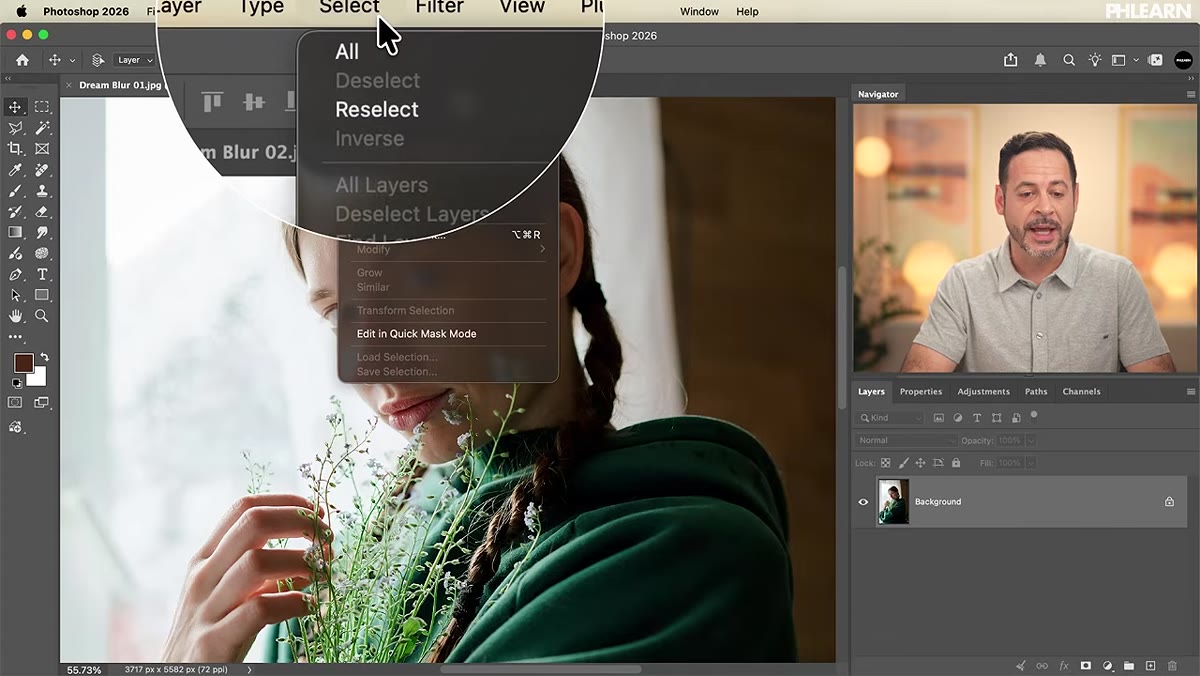 Color Range dialog open with Highlights option selected
Most people don’t know this is even possible. Go to Select > Color Range, and when the dialog opens, click the dropdown at the top that says “Sampled Colors.” Scroll down and you’ll see options including Highlights. Click it. Photoshop will generate a selection based on the brightest values in your image, which is exactly what we need.
Color Range dialog open with Highlights option selected
Most people don’t know this is even possible. Go to Select > Color Range, and when the dialog opens, click the dropdown at the top that says “Sampled Colors.” Scroll down and you’ll see options including Highlights. Click it. Photoshop will generate a selection based on the brightest values in your image, which is exactly what we need.
Before you hit OK, spend a moment with the two sliders. The Range slider controls how much of the tonal spectrum counts as “highlight.” Pull it left and you’re selecting more of the image; pull it right and you’re tightening the selection to only the brightest areas. For this effect, you want less selected, not more. If you grab too much, the glow will eat your whole image and you’ll end up with something that looks like vaseline on a lens. The Fuzziness slider adds feathering to the edges of your selection. Somewhere in the middle works well. Set your Selection Preview to Grayscale so you can actually see what you’re working with on the canvas.
Step 2: Duplicate the Highlights to a New Layer
 New highlights layer shown isolated against transparent background
With your selection active and your Background layer selected in the Layers panel, hit Ctrl+J (or Cmd+J on Mac). This lifts just the selected highlights onto a brand new layer, leaving your original image completely untouched below.
New highlights layer shown isolated against transparent background
With your selection active and your Background layer selected in the Layers panel, hit Ctrl+J (or Cmd+J on Mac). This lifts just the selected highlights onto a brand new layer, leaving your original image completely untouched below.
If you toggle the Background layer off, you’ll see what was actually captured: not white blobs, but real pixel information from your image, with the actual colors and tones from the highlights. This matters because the glow you’re about to build will carry that color information, not just white light. It’s the difference between a glow that feels like it belongs in the photo and one that looks pasted on.
Step 3: Convert the Highlights Layer to a Smart Object
 Right-click menu showing Convert to Smart Object option
Right-click on your new highlights layer in the Layers panel and choose Convert to Smart Object. This is non-negotiable. The reason is that you’re about to apply filters and change blend modes, and doing any of that destructively means you can’t adjust anything later. Smart Objects keep your filters editable, so if the glow is too intense or too subtle, you can go back and tweak without starting over.
Right-click menu showing Convert to Smart Object option
Right-click on your new highlights layer in the Layers panel and choose Convert to Smart Object. This is non-negotiable. The reason is that you’re about to apply filters and change blend modes, and doing any of that destructively means you can’t adjust anything later. Smart Objects keep your filters editable, so if the glow is too intense or too subtle, you can go back and tweak without starting over.
I learned the value of smart objects the hard way after accidentally flattening a client’s layered file thinking I’d already saved a backup. Spoiler: I had not. Now I convert to Smart Object the way some people knock on wood. Reflexively, superstitiously, and without apology.
Step 4: Set the Blend Mode and Stack Multiple Blur Layers
 Highlights layer blend mode changed to Screen in Layers panel
Change your highlights layer’s blend mode to Screen. This makes the dark areas of that layer invisible and lets only the light values affect the image, which is exactly the behavior you want for a glow.
Highlights layer blend mode changed to Screen in Layers panel
Change your highlights layer’s blend mode to Screen. This makes the dark areas of that layer invisible and lets only the light values affect the image, which is exactly the behavior you want for a glow.
Now comes the part that actually builds the bloom effect: stacking blur layers. Duplicate your Smart Object highlights layer two or three times. On each duplicate, apply a Gaussian Blur (Filter > Blur > Gaussian Blur) at a different radius. One layer might get a blur of 10px, another 40px, another 100px or more depending on your image size. The combination of a tight blur, a medium blur, and a wide blur creates a glow that has both soft edges and a concentrated bright core. Lower the opacity on the more extreme blur layers to taste. This stacking approach is what gives the effect its depth and keeps it from looking like a single flat haze.
Step 5: Fine-Tune with Camera Raw for Color and Grain
 Camera Raw Filter open with color grading and grain controls visible
Group all your glow layers together, then apply a Camera Raw Filter (Filter > Camera Raw Filter) on top, either on a merged stamp layer or as a Smart Filter on a group converted to a Smart Object. Inside Camera Raw, use the Color Grading panel to push warm tones into the highlights. A subtle orange or golden shift ties the bloom to the practical light sources in your image and makes the whole thing feel intentional rather than accidental.
Camera Raw Filter open with color grading and grain controls visible
Group all your glow layers together, then apply a Camera Raw Filter (Filter > Camera Raw Filter) on top, either on a merged stamp layer or as a Smart Filter on a group converted to a Smart Object. Inside Camera Raw, use the Color Grading panel to push warm tones into the highlights. A subtle orange or golden shift ties the bloom to the practical light sources in your image and makes the whole thing feel intentional rather than accidental.
Don’t sleep on the Grain control in the Effects panel. Adding a small amount of grain to your final result unifies the glow with the rest of the image texture. Without it, the bloom can look suspiciously clean compared to the underlying photo, especially if you’re working with images shot at any real ISO. A little grain goes a long way toward making the edit invisible.
One Thing I’d Add From My Own Experience
Aaron’s technique works beautifully as demonstrated, but if you’re applying this to portraits, keep an eye on the skin tones in your highlight selection. Faces that are well-lit will often get selected pretty aggressively by the Color Range tool, and a heavy glow on a face can start reading as overexposure rather than atmosphere. I’ve had good results creating a layer mask on the highlights layer and brushing back the glow from the face at around 50-60% opacity. You preserve the bloom in the background and on hair and rim lighting while keeping the face crisp and controlled.
The single most important thing Aaron demonstrates here is that specificity beats intensity every time. You’re not adding glow to the image. You’re adding glow to only the parts of the image that are already glowing, which is what makes the result feel photographic rather than processed.
Watch the full tutorial on YouTube to see Aaron walk through the whole process on a real image, including his specific slider values and how he handles the Camera Raw grading at the end. Worth the 10 minutes.
Comments
Leave a Comment