There’s a certain kind of Photoshop shame that hits when you’re dragging layers around by eye, nudging things pixel by pixel, hoping they “look about right.” I lived in that shame for longer than I’d like to admit. Back when I was slapping together graphics for friends (before anyone was paying me to do it), I thought the move tool and vibes were basically the whole toolkit. Spoiler: they are not. Knowing how to properly transform, scale, and align layers is the difference between a composite that looks intentional and one that looks like you assembled it during a power outage.
In this Aaron Nace (PHLEARN) tutorial, part of his excellent 30 Days of Photoshop series, the whole focus is on the Transform tool and all the practical things it lets you do with multiple elements in a single document. The project is built around donuts (yes, actual donuts) and assembling them into a composed layout plus a simple logo. It sounds light, but the techniques apply directly to any real-world compositing or design work. Watch the full tutorial on YouTube if you want to follow along with the source assets, then come back here for the breakdown.
Step 1: Get Everything Into One Document Using the Move Tool
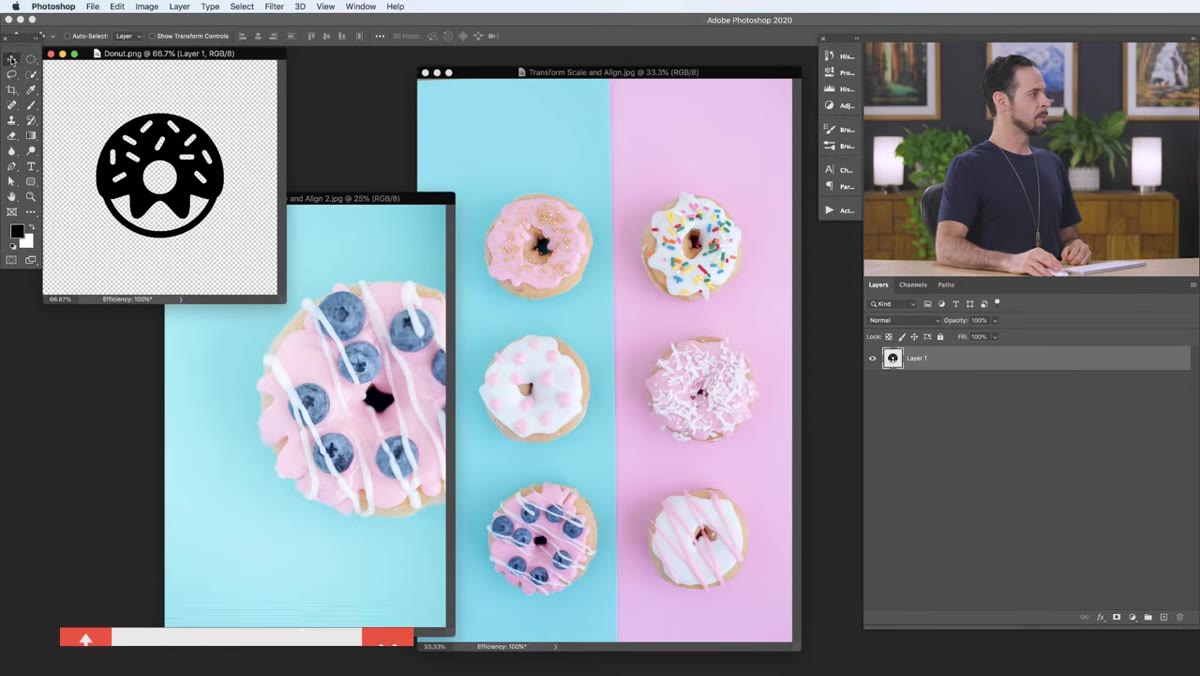 Dragging a donut image from one document into another
Before you can transform anything, it all needs to live on the same canvas. The method here is simple but worth doing correctly: open your source images as separate documents, grab the Move tool (V), then click and drag from one document window into the other. Each dragged element lands as its own layer. Once everything is in place, close the source documents. You’re working clean now.
Dragging a donut image from one document into another
Before you can transform anything, it all needs to live on the same canvas. The method here is simple but worth doing correctly: open your source images as separate documents, grab the Move tool (V), then click and drag from one document window into the other. Each dragged element lands as its own layer. Once everything is in place, close the source documents. You’re working clean now.
This sounds obvious, but the habit of keeping assets organized as separate layers from the start will save you from a world of pain later. Ask me how I know. (I deleted a client’s layered file once because I’d flattened everything into one layer “just temporarily.” There is no just temporarily.)
Step 2: Crop to Expand the Canvas, and Turn Off “Delete Cropped Pixels”
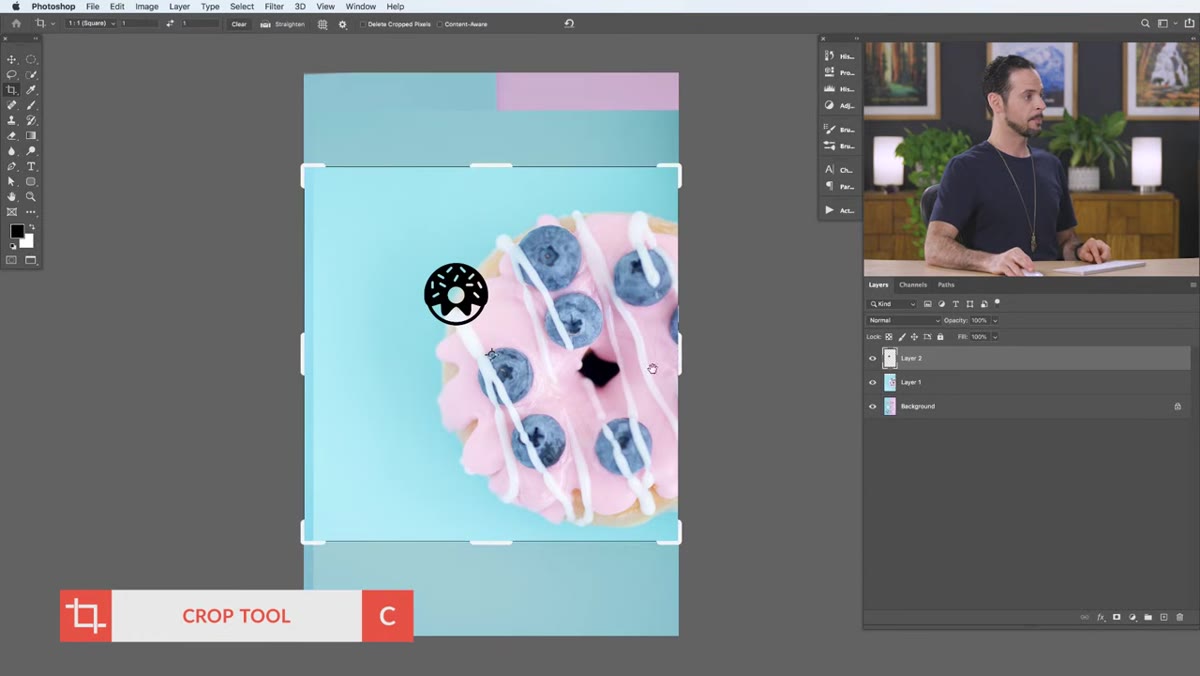 Crop tool active with Delete Cropped Pixels option unchecked in toolbar
Hit C for the Crop tool. Instead of cropping down, you’re using it to expand the canvas outward, which gives you more room to compose your layout. Hold Alt (Option on Mac) while dragging the crop handles to expand from the center. Before you commit, check the toolbar at the top and make sure “Delete Cropped Pixels” is unchecked. This is not optional advice. If that box is checked and you crop, those pixels are gone permanently. Unchecked means they’re just hidden outside the canvas boundary and you can get them back anytime.
Crop tool active with Delete Cropped Pixels option unchecked in toolbar
Hit C for the Crop tool. Instead of cropping down, you’re using it to expand the canvas outward, which gives you more room to compose your layout. Hold Alt (Option on Mac) while dragging the crop handles to expand from the center. Before you commit, check the toolbar at the top and make sure “Delete Cropped Pixels” is unchecked. This is not optional advice. If that box is checked and you crop, those pixels are gone permanently. Unchecked means they’re just hidden outside the canvas boundary and you can get them back anytime.
This single checkbox has burned people badly enough that Aaron calls it out explicitly. Make it a reflex to check before every crop.
Step 3: Turn Off Auto-Select on the Move Tool
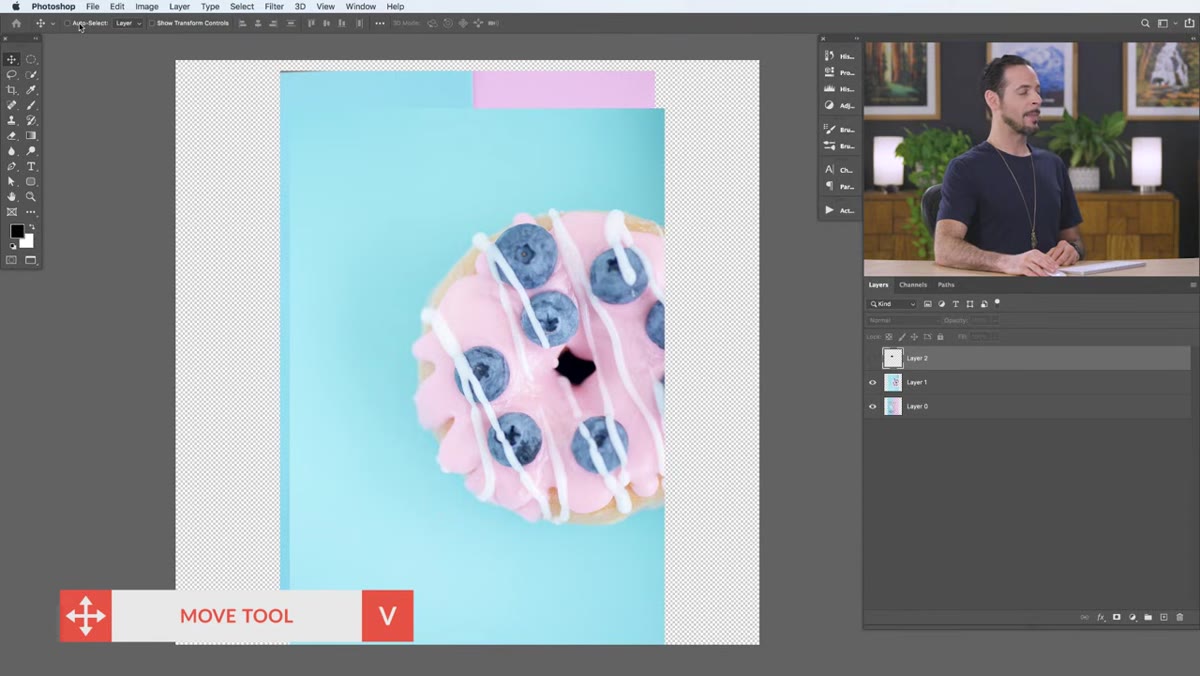 Move tool options bar with Auto-Select checkbox highlighted and unchecked
With the Move tool active, look at the options bar at the top of the screen. You’ll see a checkbox labeled “Auto-Select.” Turn it off. When Auto-Select is on, clicking anywhere on the canvas tries to automatically select whichever layer is underneath your cursor, which sounds helpful until you have ten layers and Photoshop keeps grabbing the wrong one.
Move tool options bar with Auto-Select checkbox highlighted and unchecked
With the Move tool active, look at the options bar at the top of the screen. You’ll see a checkbox labeled “Auto-Select.” Turn it off. When Auto-Select is on, clicking anywhere on the canvas tries to automatically select whichever layer is underneath your cursor, which sounds helpful until you have ten layers and Photoshop keeps grabbing the wrong one.
With Auto-Select off, you stay in control. You click a layer in the Layers panel, and that’s the layer that moves, full stop. If you do need to quickly select a layer by clicking it on the canvas, hold Ctrl (Cmd on Mac) and click. It does the same thing as Auto-Select but only when you ask for it. Keyboard shortcut people, this one’s for us.
Step 4: Open Free Transform and Learn the Top Bar Options
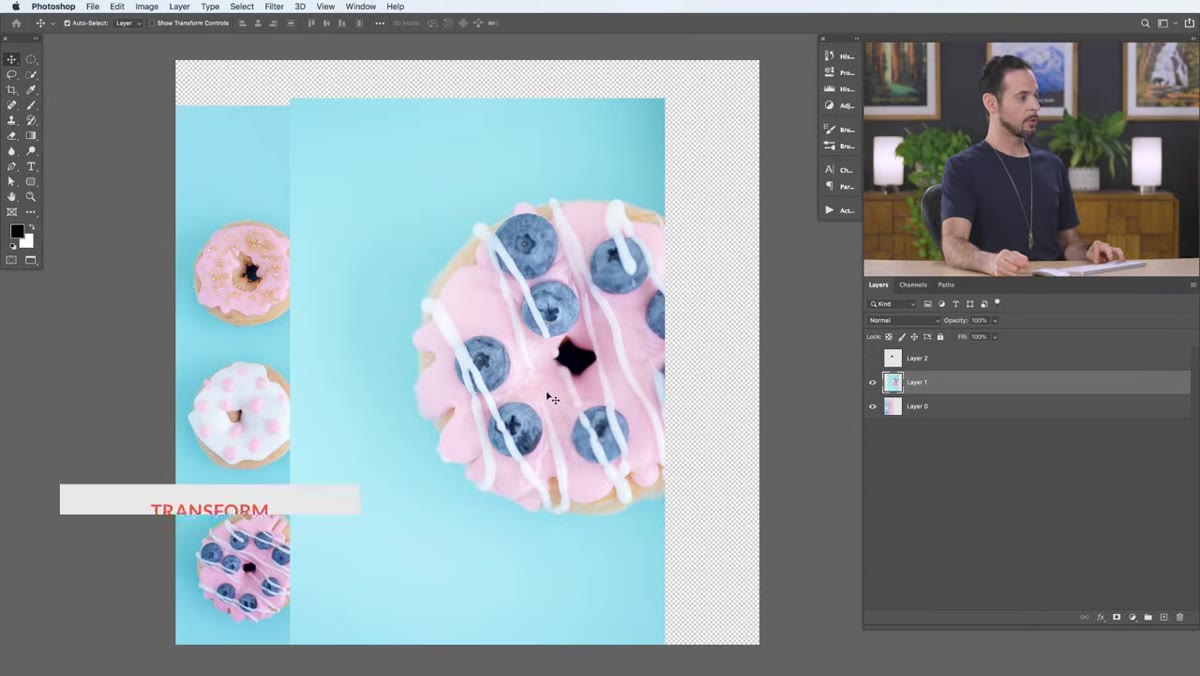 Free Transform active on a layer showing transform options in the top toolbar
Here’s where the real work starts. With any layer selected, hit Ctrl+T (Cmd+T) to enter Free Transform mode. A bounding box with handles appears around your layer, and the options bar at the top of the screen fills up with useful fields: X and Y position, width and height, rotation angle, and more. These aren’t decorative. You can type values directly into them.
Free Transform active on a layer showing transform options in the top toolbar
Here’s where the real work starts. With any layer selected, hit Ctrl+T (Cmd+T) to enter Free Transform mode. A bounding box with handles appears around your layer, and the options bar at the top of the screen fills up with useful fields: X and Y position, width and height, rotation angle, and more. These aren’t decorative. You can type values directly into them.
This is the part most people skip because dragging handles feels faster. But if you need a layer to be exactly 50% of its original size, or rotated exactly 45 degrees, typing the value is both faster and more accurate than dragging and squinting. Free Transform is not just a visual handle system. It’s a precision input panel that also happens to have visual handles.
Step 5: Scale Proportionally and Rotate with Control
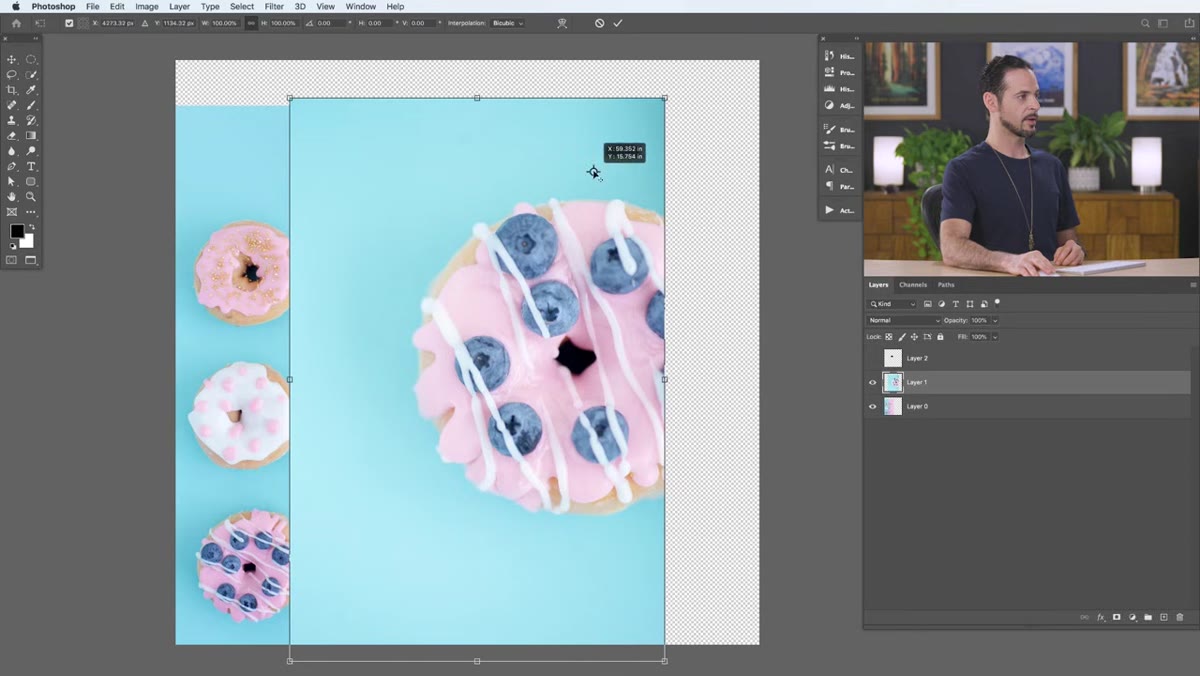 Transform handles visible on canvas with rotation cursor shown outside bounding box
Inside Free Transform, dragging any corner handle scales the layer. By default in newer versions of Photoshop, scaling is already proportional, but if you’re on an older version, hold Shift while dragging to lock the aspect ratio. To rotate, move your cursor just outside one of the corner handles until it changes to a curved double-arrow, then drag. You can also type a rotation value directly into the angle field in the options bar if you want an exact degree.
Transform handles visible on canvas with rotation cursor shown outside bounding box
Inside Free Transform, dragging any corner handle scales the layer. By default in newer versions of Photoshop, scaling is already proportional, but if you’re on an older version, hold Shift while dragging to lock the aspect ratio. To rotate, move your cursor just outside one of the corner handles until it changes to a curved double-arrow, then drag. You can also type a rotation value directly into the angle field in the options bar if you want an exact degree.
To confirm a transformation, press Enter. To cancel and undo everything you just did, press Escape. Do not click away without confirming first. Clicking elsewhere while in Transform mode usually does something weird, and “something weird” is never what you’re going for.
What I’d Add: Use Transform on Smart Objects
Here’s something the tutorial doesn’t cover but that I now consider non-negotiable. Before you start transforming layers, convert them to Smart Objects first. Right-click the layer in the Layers panel and choose “Convert to Smart Object.” Once you do that, every scale and rotation you apply is non-destructive. You can shrink something down to 10% of its size, change your mind, and scale it back up to 100% with zero quality loss.
Without Smart Objects, every time you scale something down and then back up, you’re degrading the pixels. I had a layout once where I scaled a logo down a dozen times while fiddling with the composition, then scaled it back up for the final version. It looked like it had been faxed three times. Smart Objects would have prevented the whole disaster. Make it a habit before you touch the Transform tool.
Transforms are one of those foundational skills that look simple but have real depth once you start using the numerical inputs, the alignment options, and Smart Objects together. The biggest single takeaway here: stop dragging by eye and start using the options bar fields. Precision is free, and guessing costs you time.
Watch the full tutorial on YouTube to see Aaron walk through the donut layout and logo build from start to finish. It’s part of PHLEARN’s 30 Days of Photoshop series, which is worth bookmarking if you’re working through fundamentals.
Comments
Leave a Comment