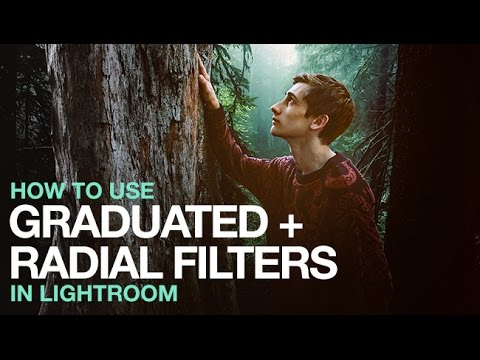
There’s a specific kind of frustration that comes from pulling your exposure slider in Lightroom and watching the entire image blow out just to save the sky. You wanted to brighten the foreground. Instead you’ve nuked everything. I spent way too long in my early freelance days doing exactly that, then compensating with a pile of overlapping masks in Photoshop, wondering why the whole thing felt like overkill. Turns out, Lightroom has had a cleaner answer built right into it the whole time.
In this Aaron Nace (PHLEARN) tutorial, Watch the full tutorial on YouTube, Aaron walks through two of Lightroom’s most underused tools: the graduated filter and the radial filter. These aren’t exotic features buried in a menu somewhere. They’re sitting right at the top of your Develop module toolbar, and once you understand what they actually do, you’ll stop reaching for global adjustments every time you need a local fix. Here’s the full breakdown.
Step 1: Get Into the Develop Module and Set a Snapshot
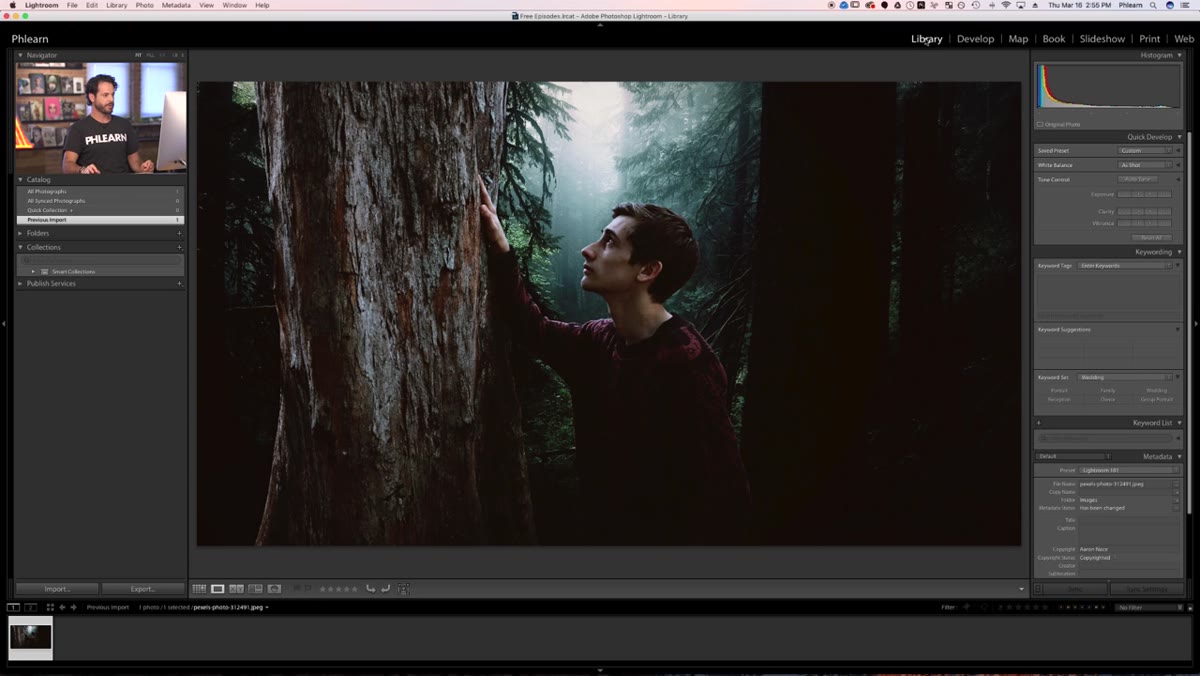 Lightroom Library module before switching to Develop
Before touching any filter, make sure you’re in the right place. Lightroom opens in the Library module by default, which is great for organizing files but useless for editing. Click Develop in the top navigation to switch over. Once you’re there, look at the left-hand panel and find the Snapshots section. Hit the plus icon and name it something like “Before.” This takes about five seconds and will save you genuine grief later. If you experiment with filters and decide you hate everything you’ve done, one click on that snapshot brings your image back to its starting state. Think of it as a manual undo that doesn’t disappear when you close the app.
Lightroom Library module before switching to Develop
Before touching any filter, make sure you’re in the right place. Lightroom opens in the Library module by default, which is great for organizing files but useless for editing. Click Develop in the top navigation to switch over. Once you’re there, look at the left-hand panel and find the Snapshots section. Hit the plus icon and name it something like “Before.” This takes about five seconds and will save you genuine grief later. If you experiment with filters and decide you hate everything you’ve done, one click on that snapshot brings your image back to its starting state. Think of it as a manual undo that doesn’t disappear when you close the app.
Step 2: Locate the Graduated and Radial Filter Tools
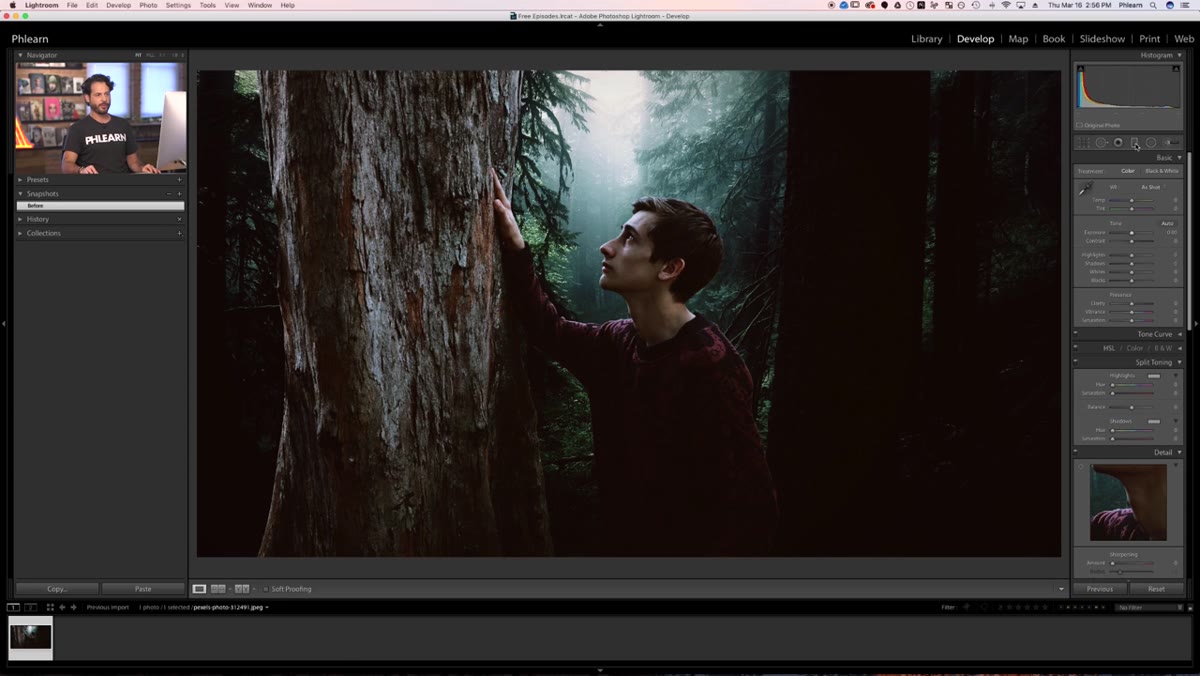 Graduated and radial filter icons in the Develop module toolbar
In the Develop module, look at the toolbar just below the histogram on the right-hand side. You’ll see a row of small icons. The graduated filter looks like a rectangle with a gradient. The radial filter looks like an oval. These are the two tools Aaron covers in the tutorial. Click the graduated filter icon to open its panel. You’ll see a familiar set of sliders: exposure, contrast, highlights, shadows, clarity, saturation, sharpness. Same controls as your basic panel, except now they only apply to the region you define. That distinction is the whole point.
Graduated and radial filter icons in the Develop module toolbar
In the Develop module, look at the toolbar just below the histogram on the right-hand side. You’ll see a row of small icons. The graduated filter looks like a rectangle with a gradient. The radial filter looks like an oval. These are the two tools Aaron covers in the tutorial. Click the graduated filter icon to open its panel. You’ll see a familiar set of sliders: exposure, contrast, highlights, shadows, clarity, saturation, sharpness. Same controls as your basic panel, except now they only apply to the region you define. That distinction is the whole point.
Step 3: Draw Your Graduated Filter
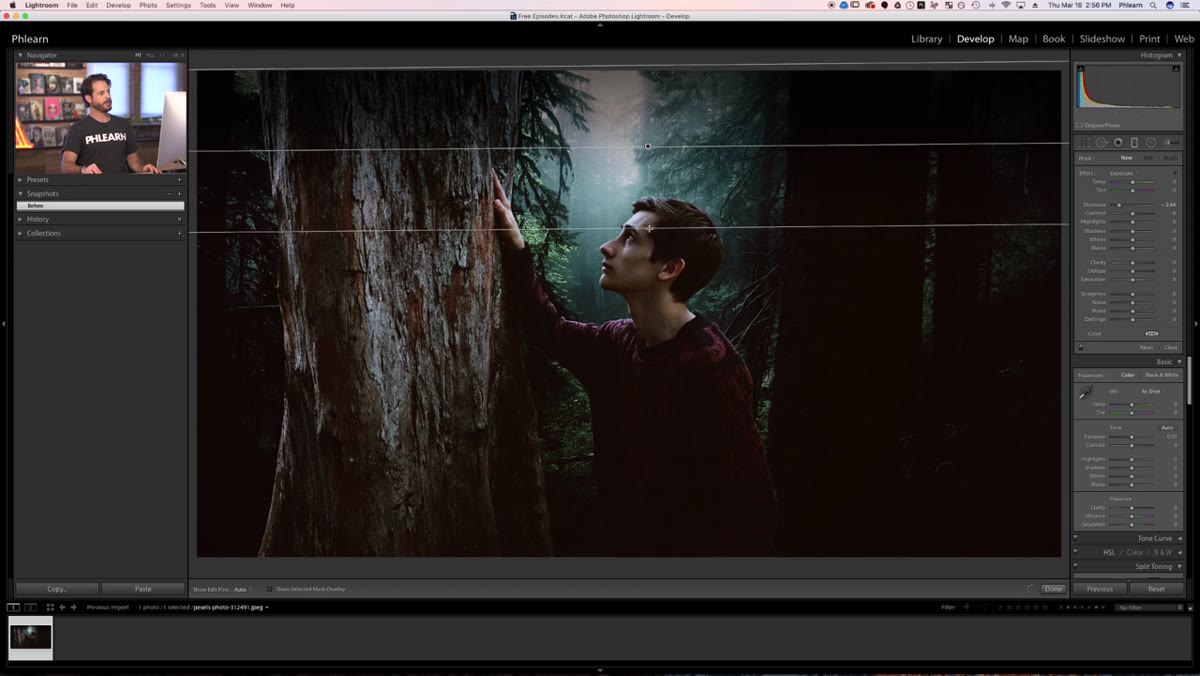 Clicking and dragging a graduated filter down from the top of the image
Click anywhere on your image and drag. If you drag from the top downward, the effect concentrates at the top and fades as it moves toward wherever you release. If you drag from the bottom up, it flips. The direction of your drag determines where the effect is strongest. Aaron demonstrates this by dragging from the top of the frame downward, which is the classic move for taming a bright sky. When you first draw the filter, Lightroom defaults to whatever settings were last used, so the result might look odd at first. Don’t panic. The filter is working. You just need to dial in your sliders next.
Clicking and dragging a graduated filter down from the top of the image
Click anywhere on your image and drag. If you drag from the top downward, the effect concentrates at the top and fades as it moves toward wherever you release. If you drag from the bottom up, it flips. The direction of your drag determines where the effect is strongest. Aaron demonstrates this by dragging from the top of the frame downward, which is the classic move for taming a bright sky. When you first draw the filter, Lightroom defaults to whatever settings were last used, so the result might look odd at first. Don’t panic. The filter is working. You just need to dial in your sliders next.
Step 4: Understand the Three Lines and How Transition Width Works
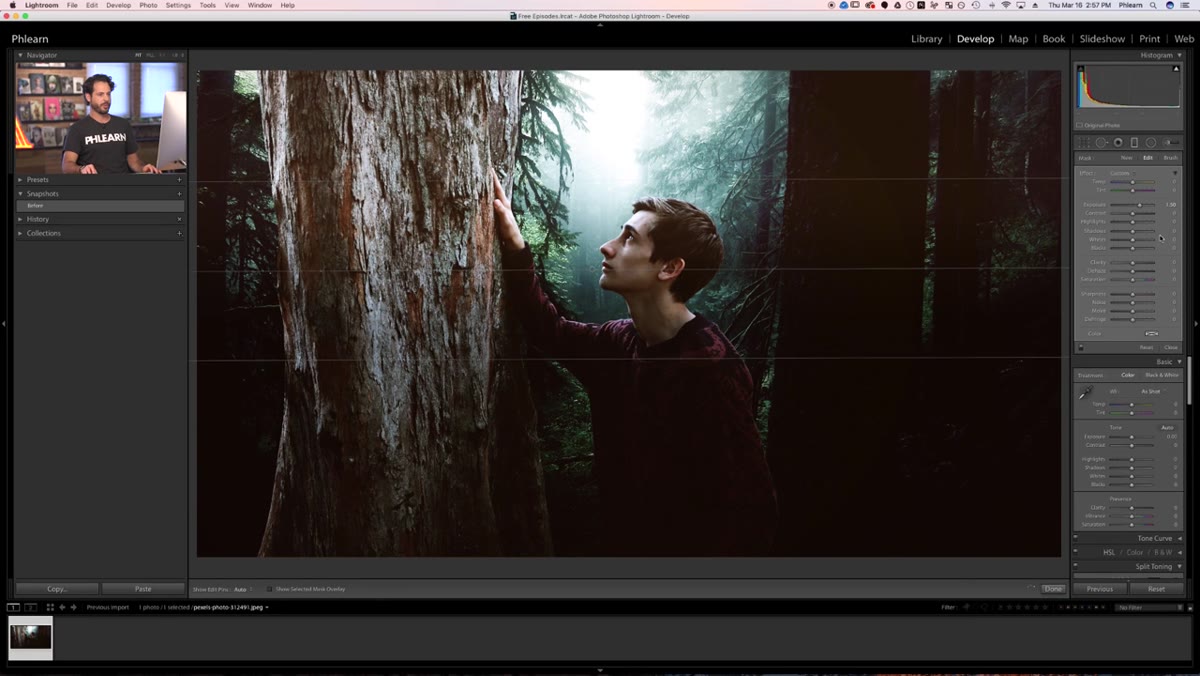 Three graduated filter lines showing the transition zone on the image
Once your filter is drawn, you’ll see three horizontal lines on the image. The top line is where the effect is at full strength. The bottom line is where the effect fades to zero. The middle line is the center handle you can drag to reposition the whole thing. The gap between the top and bottom lines controls the softness of the transition. Pull them close together and you get a hard, visible edge. Push them further apart and the effect blends gradually into the image. For skies and landscapes, a wider transition almost always looks more natural. Aaron makes this concrete by cranking the exposure way up so you can actually see where the effect starts and stops. Smart teaching move.
Three graduated filter lines showing the transition zone on the image
Once your filter is drawn, you’ll see three horizontal lines on the image. The top line is where the effect is at full strength. The bottom line is where the effect fades to zero. The middle line is the center handle you can drag to reposition the whole thing. The gap between the top and bottom lines controls the softness of the transition. Pull them close together and you get a hard, visible edge. Push them further apart and the effect blends gradually into the image. For skies and landscapes, a wider transition almost always looks more natural. Aaron makes this concrete by cranking the exposure way up so you can actually see where the effect starts and stops. Smart teaching move.
Step 5: Rotate the Filter to Fit Your Composition
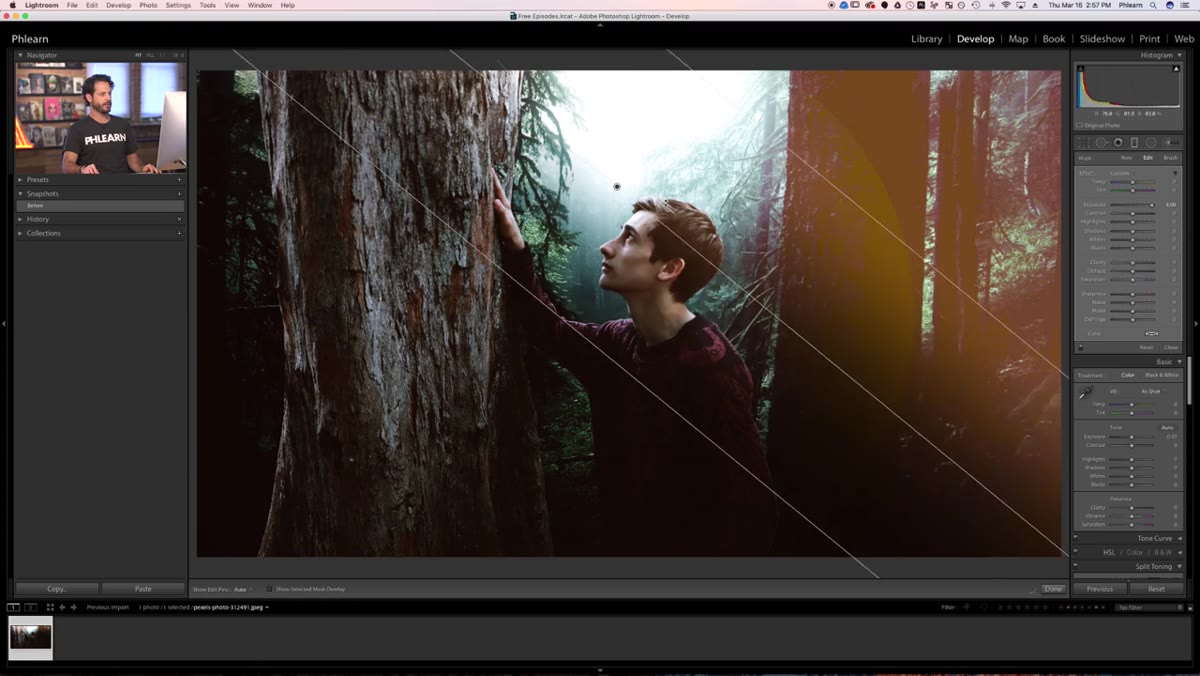 Rotating the graduated filter by hovering near the edge and dragging
Graduated filters don’t have to run horizontally. Hover your cursor near the right edge of the center line until it changes to a rotation cursor, then click and drag. You can spin the filter to any angle, which is useful when your horizon isn’t level or when light is coming in from a corner. This also opens up less obvious uses: feathering in a vignette-style darkening from one side of the frame, or adding warmth to just the left half of a portrait background. The filter is called “graduated” but it’s really just a directional mask with a soft edge. Once you start thinking of it that way, you’ll find angles for it in almost every image.
Rotating the graduated filter by hovering near the edge and dragging
Graduated filters don’t have to run horizontally. Hover your cursor near the right edge of the center line until it changes to a rotation cursor, then click and drag. You can spin the filter to any angle, which is useful when your horizon isn’t level or when light is coming in from a corner. This also opens up less obvious uses: feathering in a vignette-style darkening from one side of the frame, or adding warmth to just the left half of a portrait background. The filter is called “graduated” but it’s really just a directional mask with a soft edge. Once you start thinking of it that way, you’ll find angles for it in almost every image.
Step 6: Adjust Your Settings Inside the Filter
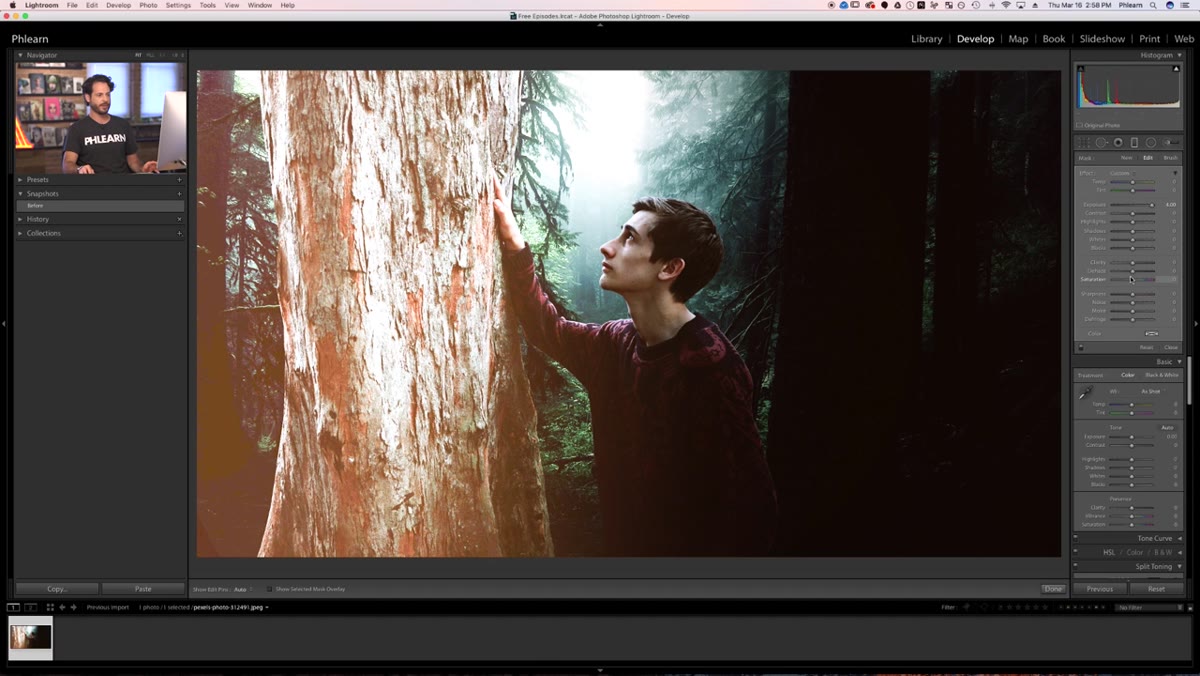 Exposure slider inside the graduated filter panel being adjusted
With your filter drawn and rotated, now you actually tune it. The sliders in the graduated filter panel work identically to the basic panel sliders, they just only affect the masked region. Aaron’s example uses exposure, but in practice I find myself reaching for highlights and shadows more than anything else. Pulling highlights down in a sky while lifting shadows in a foreground is a two-filter move that handles a huge percentage of landscape and outdoor portrait problems. You can also add clarity to a filter covering just the foreground for extra texture, without that crunchiness bleeding into your subject’s face. Stack multiple graduated filters on the same image by clicking “New” in the filter panel before drawing each one.
Exposure slider inside the graduated filter panel being adjusted
With your filter drawn and rotated, now you actually tune it. The sliders in the graduated filter panel work identically to the basic panel sliders, they just only affect the masked region. Aaron’s example uses exposure, but in practice I find myself reaching for highlights and shadows more than anything else. Pulling highlights down in a sky while lifting shadows in a foreground is a two-filter move that handles a huge percentage of landscape and outdoor portrait problems. You can also add clarity to a filter covering just the foreground for extra texture, without that crunchiness bleeding into your subject’s face. Stack multiple graduated filters on the same image by clicking “New” in the filter panel before drawing each one.
A Note From My Own Workflow
Here’s something the tutorial doesn’t cover but that I’ve found genuinely useful: the graduated filter plays very well with the Luminance Range mask. After you draw your filter, look for the “Mask” option at the bottom of the filter panel. You can restrict the filter so it only affects pixels within a certain brightness range. Draw a sky filter, then tell Lightroom to only apply it to the brighter tones, and suddenly you’re not accidentally darkening trees or buildings that poke up into the frame. It’s a small extra step that fixes the most common complaint people have with graduated filters looking fake. That one combo alone probably cut my sky correction time in half.
The core lesson here is simple but easy to skip past: global adjustments are a starting point, not a finishing tool. The graduated and radial filters exist specifically for the moments when your image has different problems in different places, which is most of the time. Master these two tools and you’ll spend less time in Photoshop patching things that Lightroom could have handled in the first pass.
Watch the full tutorial on YouTube to see Aaron walk through both filters live with a real image. It’s worth the watch.
Comments (2)
Just subscribed. If the rest of your content is this good, I'm in.
Really solid breakdown. This pairs perfectly with the retouching work I've been writing about.
Leave a Comment