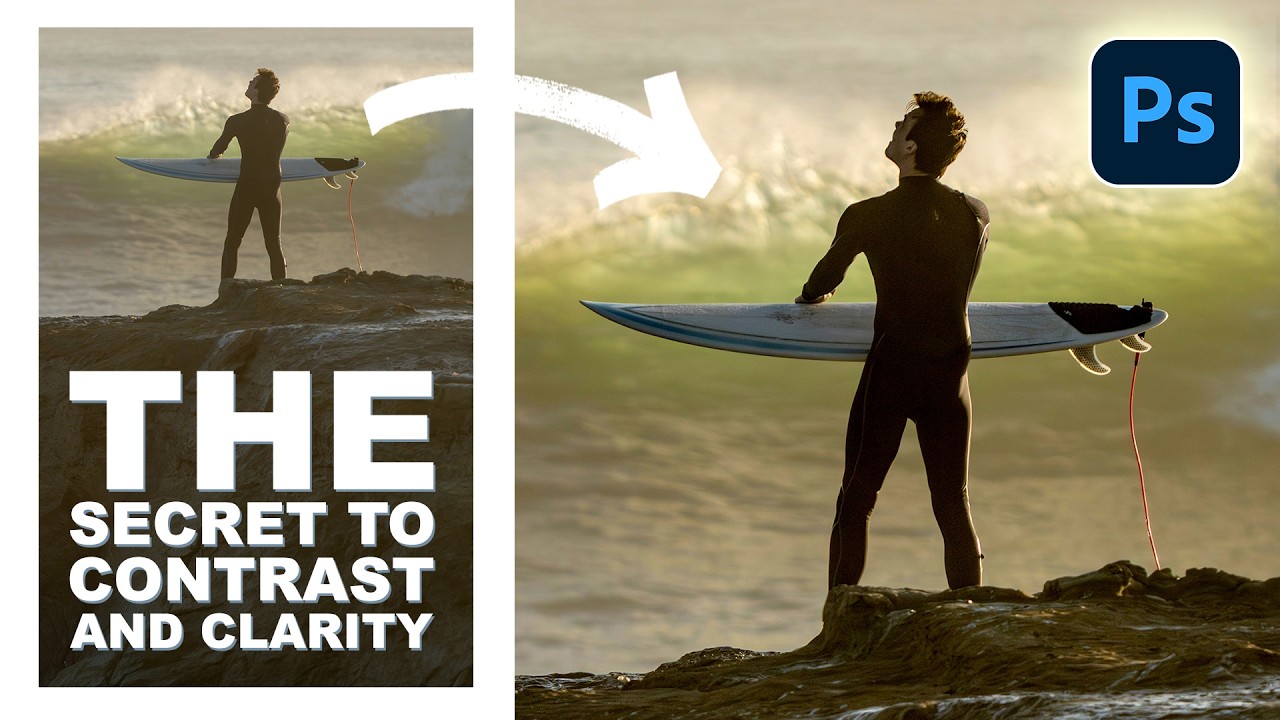
There’s a specific kind of frustration that comes from knowing a photo almost works. The composition is there, the light is interesting, but the whole thing looks flat — like someone draped a thin grey sheet over it. For years, my fix was to grab the Contrast slider in Camera Raw, drag it right, and call it a day. The result was always a little crunchy, a little over-cooked, and honestly kind of lazy. I knew I was leaving something on the table.
That changed when I watched this tutorial from Aaron Nace over at PHLEARN. Watch the full tutorial on YouTube — it’s seven minutes and worth every second. Aaron walks through a landscape photo that looks washed out and dull, then transforms it using a workflow built around two things I thought I already understood: contrast and clarity. Turns out I was using both of them wrong.
The core insight is this: contrast and clarity are not the same job, and they shouldn’t be applied the same way. Contrast is a global tonal fix. Clarity is a surgical one. Treating them identically is like using a sledgehammer to hang a picture frame. This tutorial gives you a proper workflow for both, and it uses a couple of Camera Raw features that are genuinely underused.
Step 1: Convert to a Smart Object Before You Touch Anything
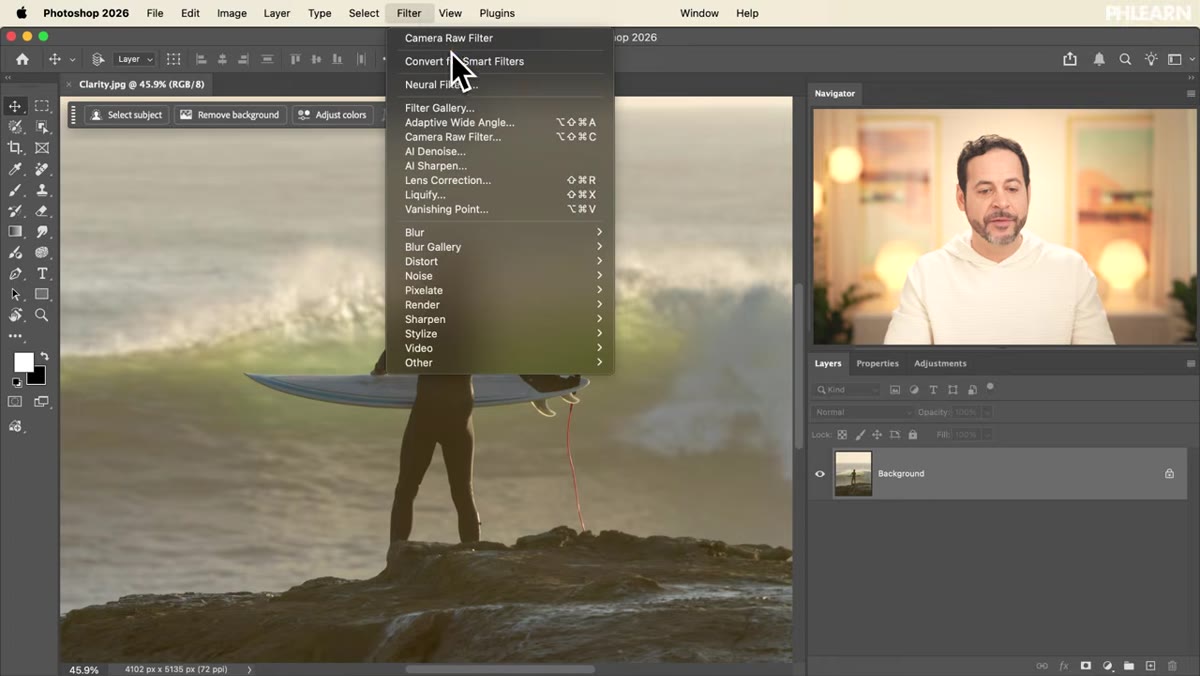 Converting background layer to Smart Object in Photoshop
Before opening Camera Raw, right-click your layer and convert it to a Smart Object (or go to Filter, then “Convert for Smart Filters”). This one move means every Camera Raw adjustment you make is non-destructive and fully editable. You can double-click back into the filter any time and change your mind. I learned this lesson the hard way early in my freelance days, and I will never, ever skip this step again. Smart Objects are not optional. They’re just good manners toward your future self.
Step 2: Open the Camera Raw Filter
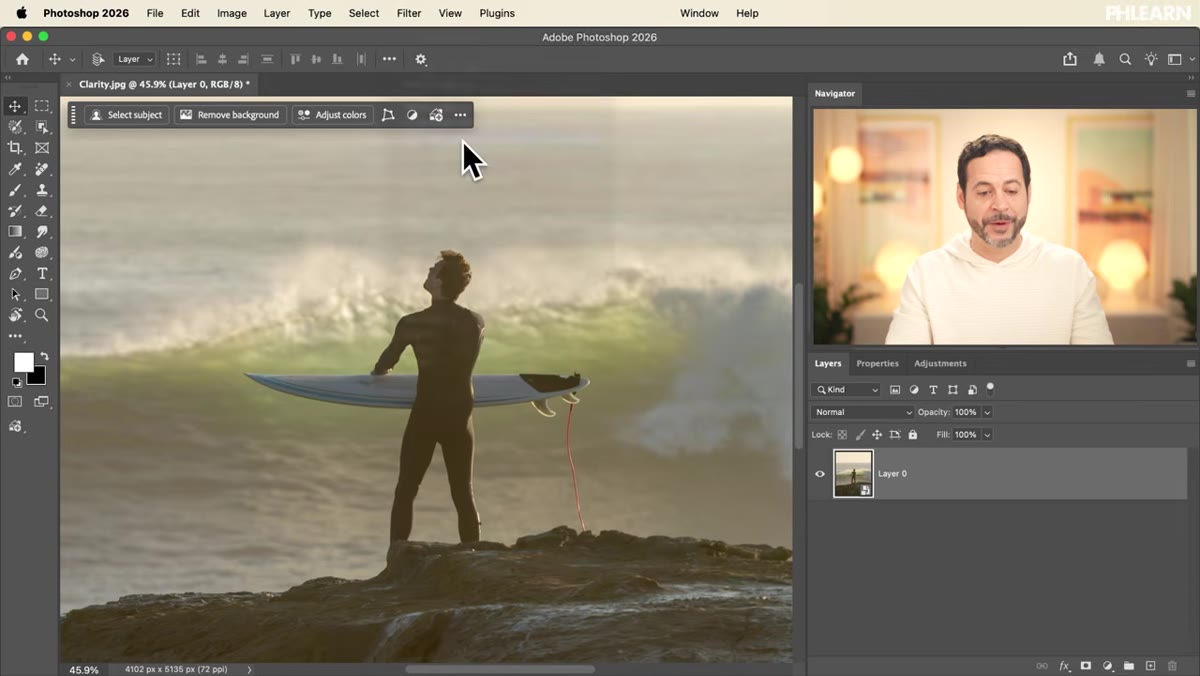 Navigating to Camera Raw filter under the Filter menu
With your Smart Object selected, go to Filter and then Camera Raw Filter. This drops you into the Camera Raw interface, which looks a lot like Lightroom’s Develop module. If you spend most of your time in Photoshop’s native adjustment layers, this interface might feel slightly foreign — but stay with it, because the tools here are genuinely superior for tonal work. Zoom into your image (Command/Ctrl +) to get a feel for what you’re working with, then zoom back out to fit the screen before you start adjusting.
Step 3: Use the Histogram Directly to Dial In Contrast
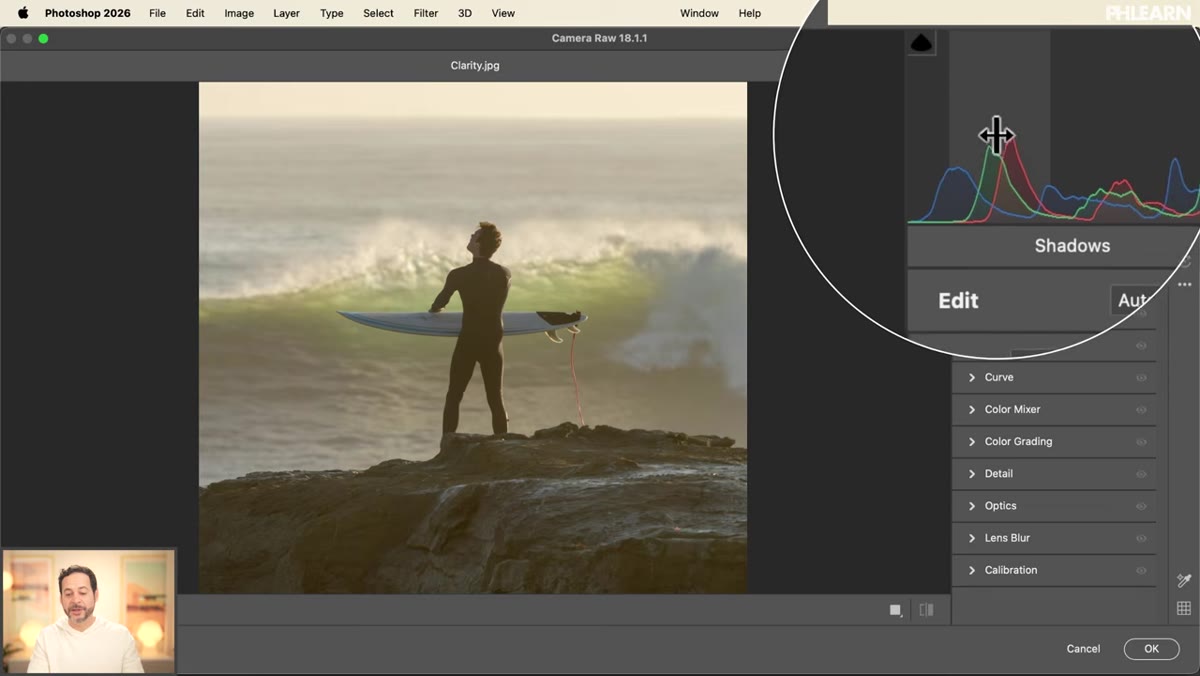 Clicking and dragging directly on the histogram in Camera Raw
Here’s the move that changed things for me. In Camera Raw, don’t touch the Contrast slider. Instead, look at the histogram in the top right corner. You can actually click and drag different regions of that histogram directly. Hover over the left side and you’ll see it label the zone (Blacks, Shadows, etc.). Drag the Blacks region to the left to push your darkest tones deeper. Drag the Shadows region left to add weight to the mid-dark areas. Work the Exposure zone to adjust the midtones, and nudge the Whites and Highlights on the right if needed.
This approach gives you independent control over every tonal zone instead of the blunt, single-slider Contrast adjustment. The result is a richer, more natural-looking image where the tones feel earned rather than pumped up. Aaron’s before and after in the video is a convincing argument for this on its own.
Step 4: Do NOT Apply Clarity to the Whole Image
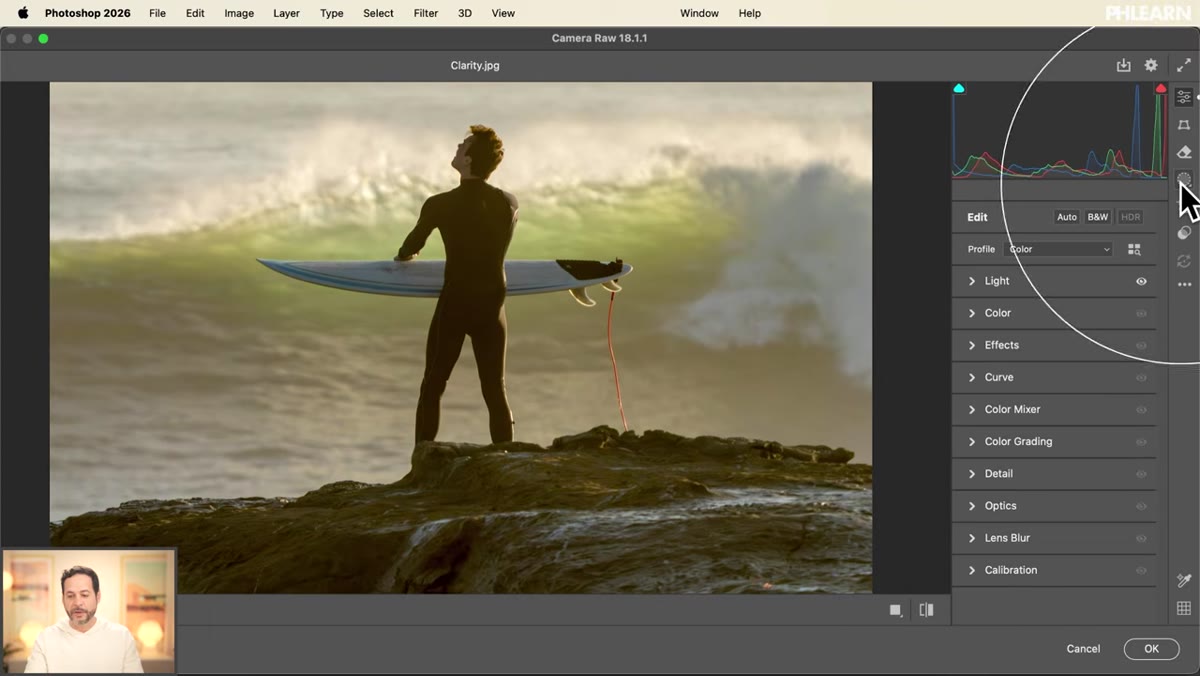
 Clarity slider visible in Camera Raw detail/effects panel
This is the part where most people go wrong, and Aaron is pretty direct about it. Clarity, which adds localized contrast to the mid-tone edges of your image, looks great in specific areas and looks fake and over-sharpened when applied globally. It draws the viewer’s eye, which means you want to point it at the parts of your image that deserve attention. The trees, the rocks, the foreground texture — not the sky, not the water, not areas that should feel soft or airy.
The fix is masking. Don’t touch the Clarity slider until you have a mask in place that limits where the effect lands.
Step 5: Create a Landscape Mask Using Camera Raw’s AI Tools
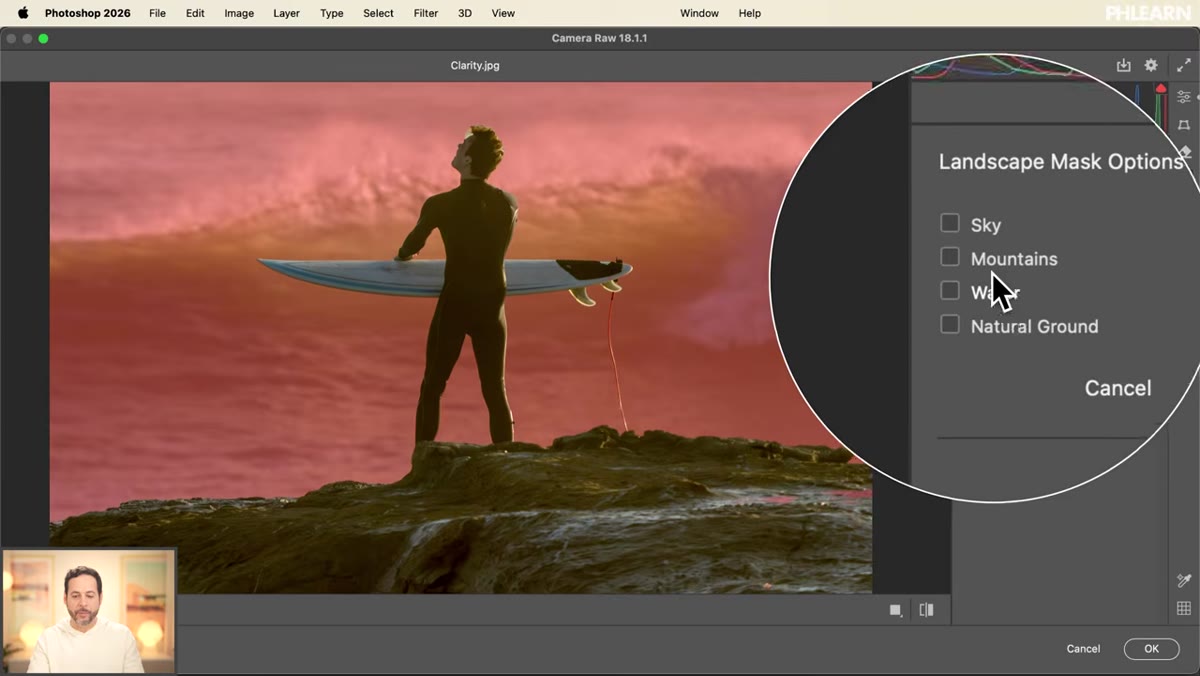
 Masking panel open with Landscape option selected in Camera Raw
In the Camera Raw interface, look for the Masking icon in the right-hand toolbar (it looks like a circle with a dotted edge). Click it to open the masking dialogue. From there, select the “Landscape” option. Camera Raw will analyze your image and automatically generate separate masks for different elements: sky, water, ground, vegetation, rocks. This is AI-powered selection and it is genuinely impressive. What used to take careful manual masking with channels or the Pen tool now takes about three seconds.
Once the masks are generated, you’ll see them listed individually. You can select just the one for the ground or rocks, and apply your Clarity boost specifically to that area.
Step 6: Apply Clarity Only to the Masked Regions
 Landscape masks listed separately for water, ground, and sky
With your landscape mask active for the areas you want to sharpen — foreground rocks, natural ground, textured surfaces – go to the detail or effects controls within the mask and increase Clarity. Aaron demonstrates this by targeting the rough, textured parts of the landscape separately from the smoother water and sky. The effect is a photo that feels sharp and detailed where your eye should land, and natural everywhere else. It guides attention without screaming.
The difference between global Clarity and masked Clarity is the difference between a photo that looks processed and one that just looks good.
One Thing I’d Add: Stack Multiple Masks for Complex Images
This workflow shines on landscapes, but for portraits or more complex composites, I often find myself stacking multiple Camera Raw masks. Camera Raw lets you add masks for subjects, backgrounds, and even luminosity ranges within the same filter session. I’ll typically use a Subject mask to protect skin tones from any Clarity boost, then use a separate mask for clothing or hair texture where a little extra edge contrast actually helps. The histogram-dragging technique for contrast works exactly the same regardless of subject matter. Learn that move first, then start layering masks as your images get more complicated.
The single most important thing this tutorial taught me is that contrast is not one adjustment. It’s a collection of tonal decisions made zone by zone, and Camera Raw’s histogram is the best interface for making them. Combine that with masked, targeted Clarity and you have a workflow that’s both faster and more precise than anything I was doing before.
Go watch Aaron walk through it himself: Watch the full tutorial on YouTube. The before and after alone is worth the seven minutes.
Comments (1)
Finally someone explains this in a way that actually makes sense.
Leave a Comment