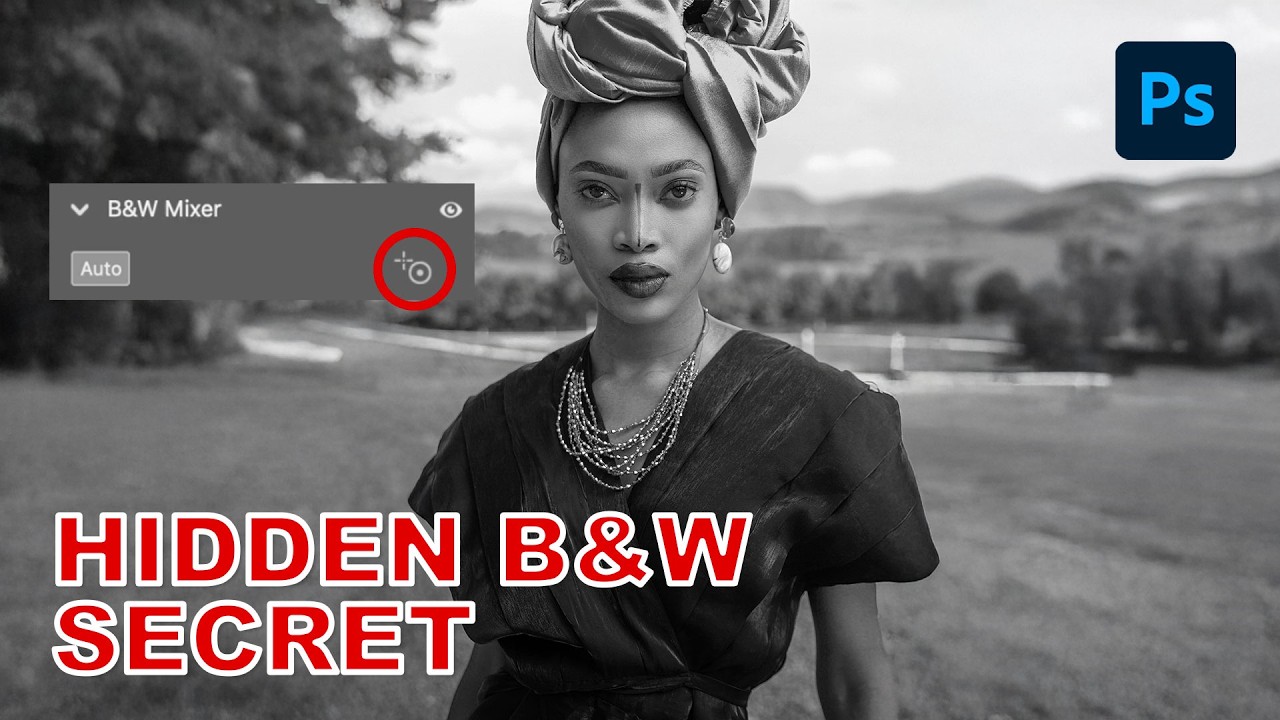
I used to convert images to black and white the same way I did everything else when I was starting out: wrong, but confidently. Desaturate the layer, maybe drag a few sliders around in Hue/Saturation, call it a day. The results looked flat, the contrast was muddy, and I had no way to go back and fix anything without starting over. I learned about non-destructive editing the hard way – the very hard way, involving a client project and a save that couldn’t be undone – and it changed how I approach basically everything in Photoshop now.
So when I came across this technique from Aaron Nace over at PHLEARN, it hit differently than most tutorials. Not because it’s complicated – it’s genuinely one of the simpler workflows I’ve seen – but because it uses Camera Raw in a way I’d completely overlooked. The black and white mixer inside Camera Raw is powerful on its own, but the way Aaron demonstrates using it directly on the image rather than fussing with individual color sliders is the kind of thing that makes you feel like you’ve been doing unnecessary work for years. Spoiler: I had been. Watch the full tutorial on YouTube if you want to follow along with the original.
Here’s the full walkthrough so you can implement it right now.
Step 1: Convert Your Layer to a Smart Object
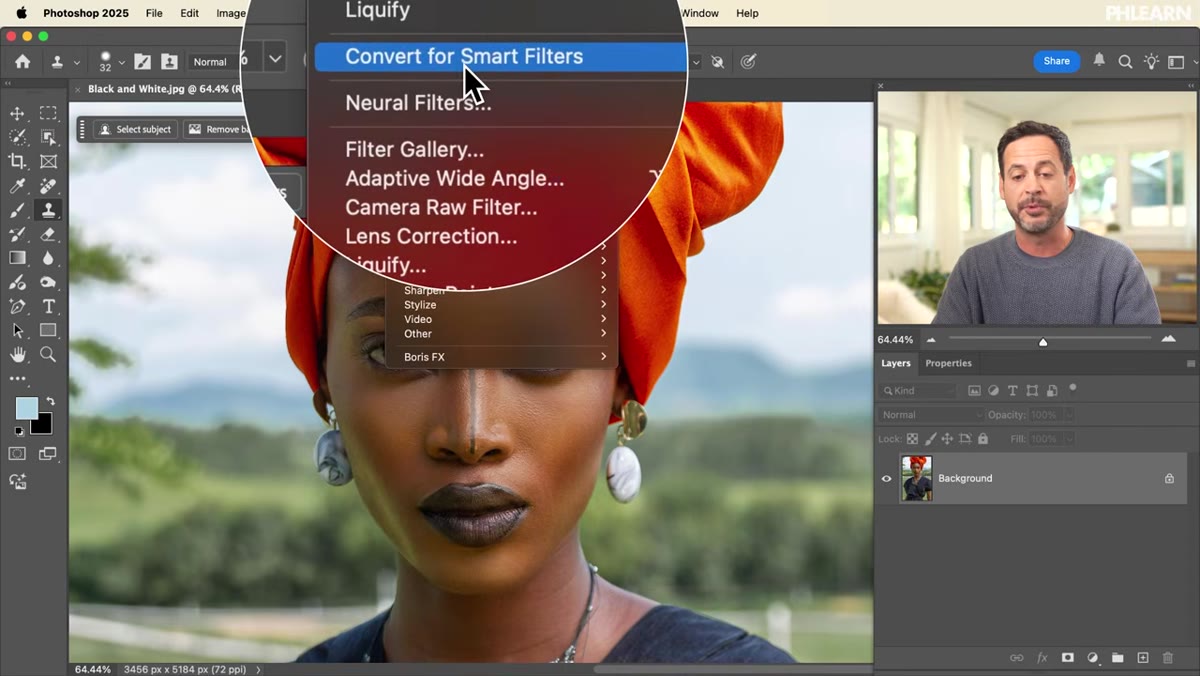 Filter menu open, “Convert for Smart Filters” option highlighted
Before you touch anything else, go to Filter > Convert for Smart Filters. This wraps your layer into a Smart Object, which is the whole reason this workflow is worth doing. Every adjustment you make through Camera Raw after this point will be editable, toggleable, and completely reversible. You can double-click back into the filter anytime and change your settings without degrading the image.
Filter menu open, “Convert for Smart Filters” option highlighted
Before you touch anything else, go to Filter > Convert for Smart Filters. This wraps your layer into a Smart Object, which is the whole reason this workflow is worth doing. Every adjustment you make through Camera Raw after this point will be editable, toggleable, and completely reversible. You can double-click back into the filter anytime and change your settings without degrading the image.
If you skip this step, you’re just baking the conversion into a flat layer and losing everything that makes this method useful. Make it a habit: Smart Object first, always.
Step 2: Open the Camera Raw Filter
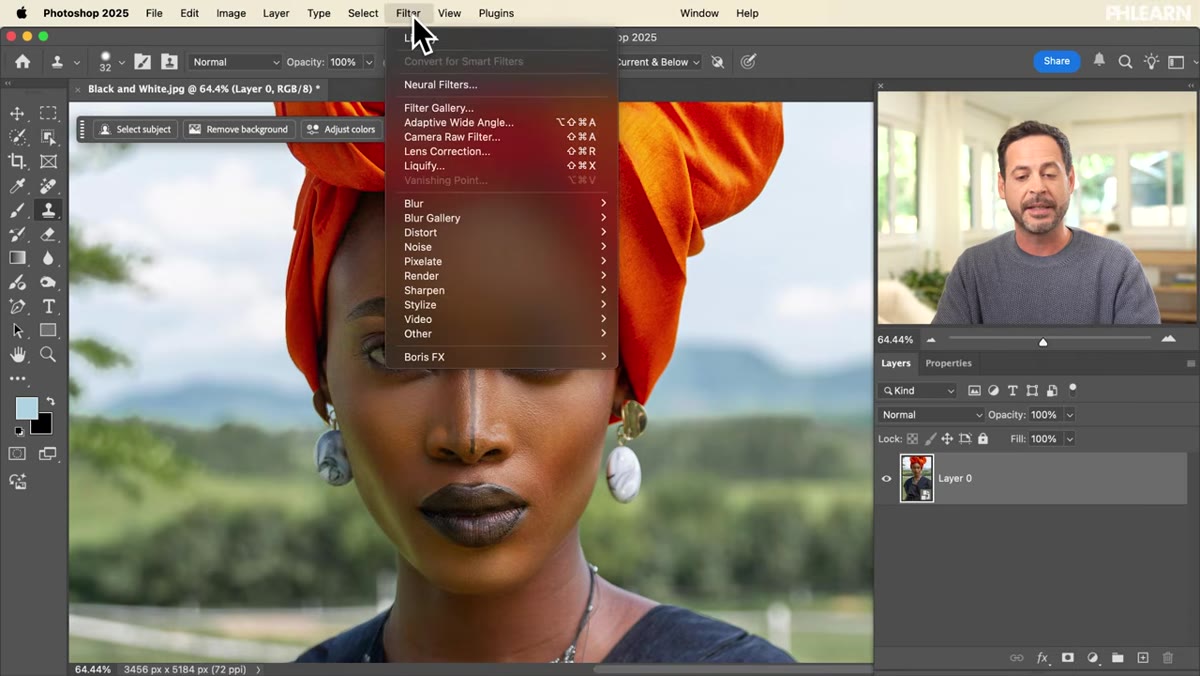 Filter menu open, “Camera Raw Filter” option highlighted
With your Smart Object selected, go to Filter > Camera Raw Filter. Camera Raw opens as a full panel, and if you haven’t spent much time in here, it can look a little overwhelming at first. Don’t worry about most of it right now. You’re looking for one specific thing.
Filter menu open, “Camera Raw Filter” option highlighted
With your Smart Object selected, go to Filter > Camera Raw Filter. Camera Raw opens as a full panel, and if you haven’t spent much time in here, it can look a little overwhelming at first. Don’t worry about most of it right now. You’re looking for one specific thing.
On the right-hand panel, look for the Black & White option – it’s one of the icons running along the top of the editing controls. Click it. The image will shift to grayscale immediately, and a new section called the Black & White Mixer will appear below.
Step 3: Hit Auto and Use It as a Starting Point
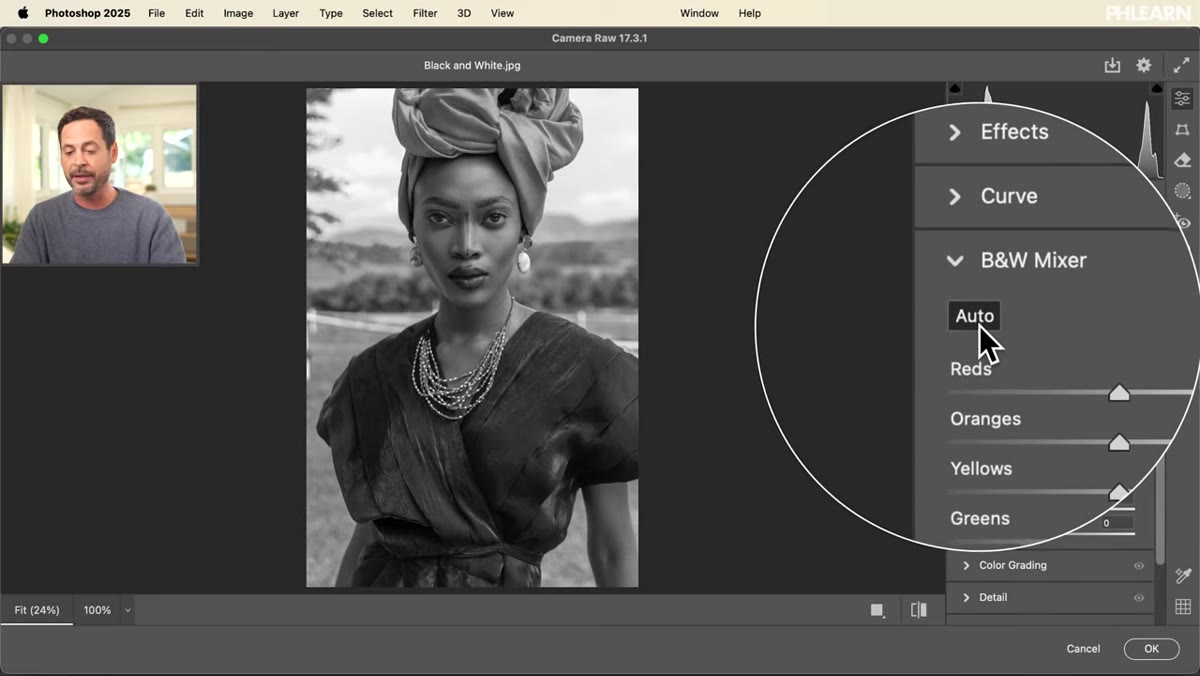 Black & White Mixer panel open with Auto button visible
Inside the Black & White Mixer, you’ll see individual sliders for different color channels: reds, oranges, yellows, greens, blues, and so on. These control how light or dark each original color renders in the final black and white image. You can drag them manually, but first – click the Auto button.
Black & White Mixer panel open with Auto button visible
Inside the Black & White Mixer, you’ll see individual sliders for different color channels: reds, oranges, yellows, greens, blues, and so on. These control how light or dark each original color renders in the final black and white image. You can drag them manually, but first – click the Auto button.
Auto analyzes the tonal content of your image and sets an initial mix that usually gets you 70-80% of the way there. It’s not magic, and it won’t nail every image, but it’s a genuinely good baseline that saves you from starting at zero. Think of it as Camera Raw’s best guess, not its final answer.
Step 4: Use the On-Image Adjustment Tool
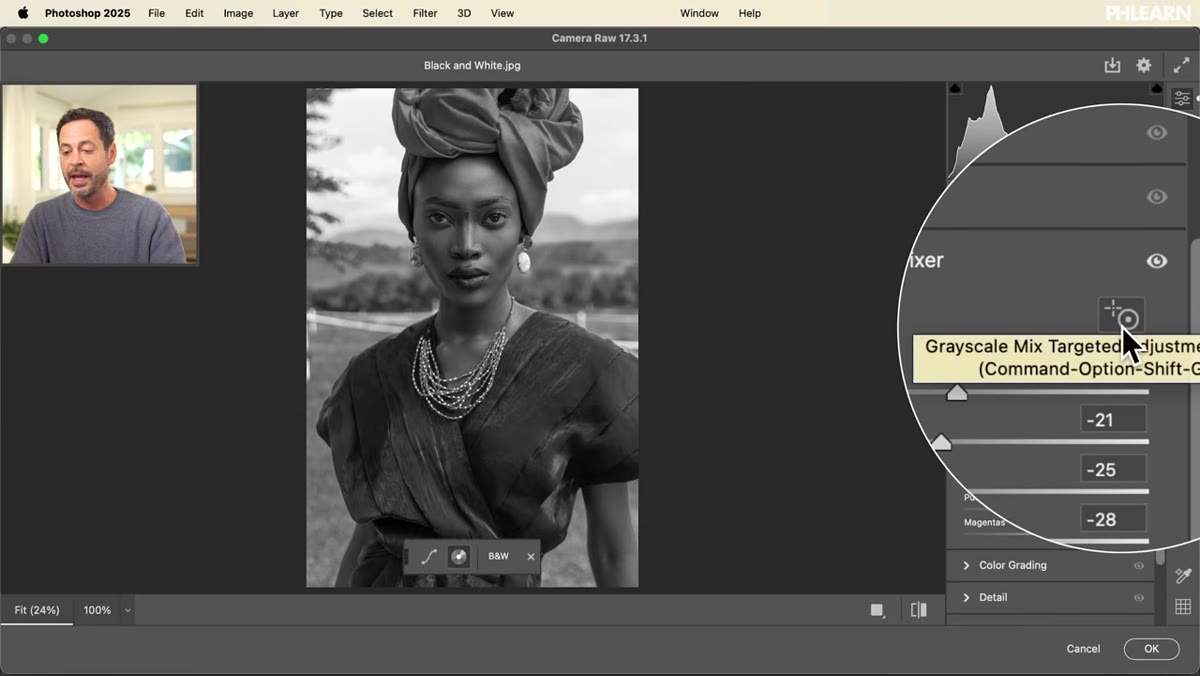 Cursor hovering over image with on-image adjustment tool active
This is the part that actually changes how you work. In the Black & White Mixer panel, look for the small target/hand icon – it activates the on-image adjustment tool. Click it, then hover your cursor over any part of your photo.
Cursor hovering over image with on-image adjustment tool active
This is the part that actually changes how you work. In the Black & White Mixer panel, look for the small target/hand icon – it activates the on-image adjustment tool. Click it, then hover your cursor over any part of your photo.
Click and drag upward on any area to make it lighter, or downward to make it darker. Camera Raw detects the dominant color under your cursor and adjusts the corresponding slider automatically. So if you drag up on a blue sky, it moves the blue channel. If you drag down on someone’s shirt, it finds the right channel for that fabric’s color and adjusts accordingly. You never have to guess which slider to touch. You just work directly on the image, which is how it should have always worked.
Spend a few minutes here. Pull up the areas that need to separate from each other tonally – background versus subject, skin versus clothing. This is where a flat conversion becomes a photograph with actual contrast and depth.
Step 5: Compare Before and After
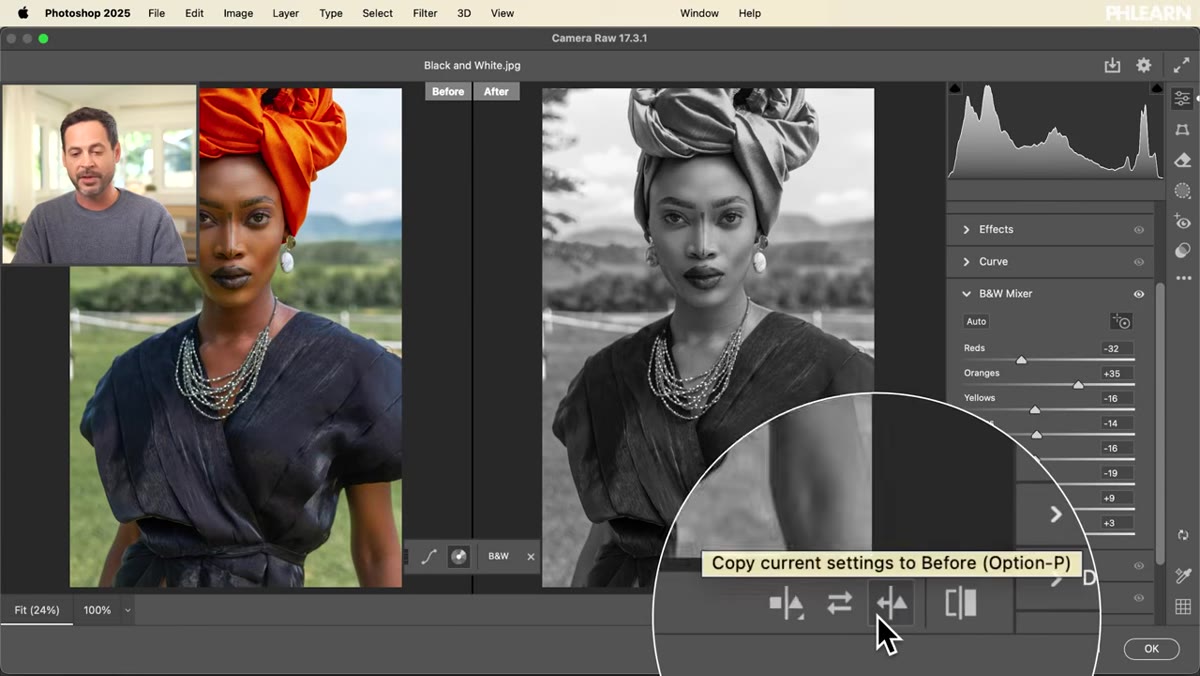 Split before/after view active inside Camera Raw
Camera Raw has a built-in comparison view. Click the before/after icon at the bottom of the panel (it looks like two overlapping rectangles) to toggle a side-by-side or split view of your original color image and your current black and white conversion.
Split before/after view active inside Camera Raw
Camera Raw has a built-in comparison view. Click the before/after icon at the bottom of the panel (it looks like two overlapping rectangles) to toggle a side-by-side or split view of your original color image and your current black and white conversion.
This is more useful than it sounds. Seeing the color version alongside your grayscale work helps you notice which areas have gone too dark or too light, and gives you a reference for whether the mood of the image is translating correctly. I usually check this a few times during the process rather than just at the end.
Step 6: Add a Color Tone (Optional)
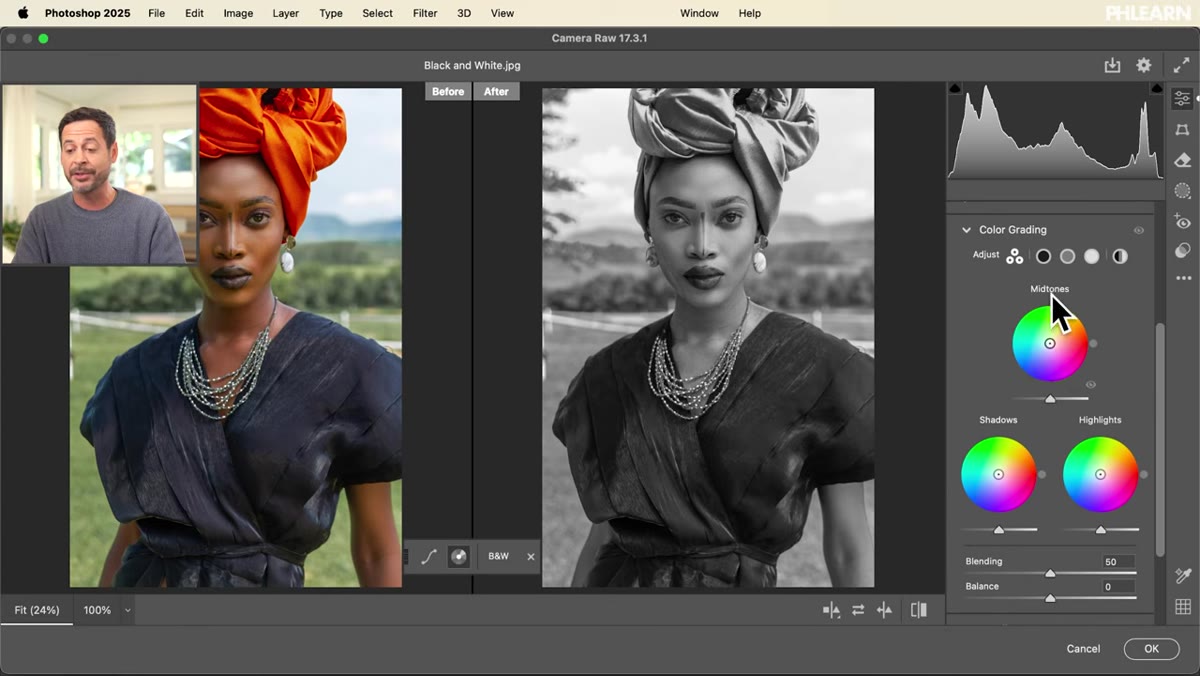 Color Grading panel open with hue and saturation controls visible
If you want to push beyond pure black and white into something with more character, close the Black & White Mixer and open the Color Grading panel. You can add color independently to your shadows, midtones, and highlights using the three-way wheels – useful for a classic split-tone look. Or click the single global color icon to add one tone across the whole image, which gets you a quick sepia or cyanotype effect.
Color Grading panel open with hue and saturation controls visible
If you want to push beyond pure black and white into something with more character, close the Black & White Mixer and open the Color Grading panel. You can add color independently to your shadows, midtones, and highlights using the three-way wheels – useful for a classic split-tone look. Or click the single global color icon to add one tone across the whole image, which gets you a quick sepia or cyanotype effect.
Adjust the Hue dial to pick your color and Saturation to control how strong it is. Keep saturation low if you want something subtle. If you decide you hate all of it and want a clean black and white again, hold Alt (Windows) or Option (Mac) and click Reset Color Grading. Everything clears instantly.
Step 7: Apply and Keep It Editable
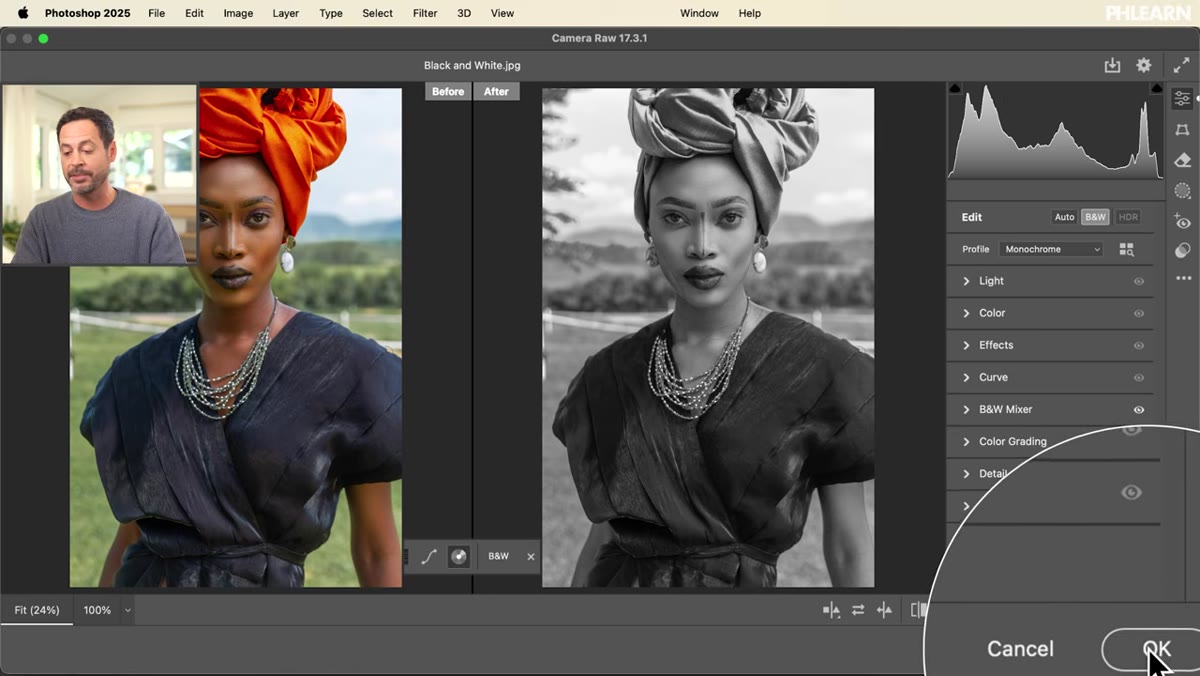 Camera Raw closed, Smart Filter visible in Layers panel
Click OK to apply the Camera Raw Filter. Back in Photoshop, you’ll see it listed as a Smart Filter under your layer in the Layers panel. The checkbox next to it lets you toggle the whole conversion on and off. If you want to go back in and tweak anything – your tonal mix, your color grade, anything – just double-click the filter name and Camera Raw reopens with all your settings exactly where you left them.
Camera Raw closed, Smart Filter visible in Layers panel
Click OK to apply the Camera Raw Filter. Back in Photoshop, you’ll see it listed as a Smart Filter under your layer in the Layers panel. The checkbox next to it lets you toggle the whole conversion on and off. If you want to go back in and tweak anything – your tonal mix, your color grade, anything – just double-click the filter name and Camera Raw reopens with all your settings exactly where you left them.
Nothing is permanent. That’s the whole point.
One Thing I’d Add: Portrait Work Specifically
For portraits, the on-image tool in Step 4 is worth slowing down on. Skin tones typically fall in the orange and yellow channels, and a small upward drag on the face can create a lot of separation between subject and background without touching the background directly. I’ve started using this as a quick way to get the subject to visually “pop” before I do any dodging and burning – it handles a lot of the heavy lifting at the global level first.
If you’re working with outdoor portraits, also check the green and blue channels. Dragging those down slightly deepens skies and foliage and gives the image that classic editorial film look without any additional work.
The biggest thing I took from this Aaron Nace tutorial isn’t any single step – it’s the workflow structure. Smart Object first, Camera Raw as a non-destructive layer, on-image adjustment instead of guessing at sliders. It’s fast, it’s flexible, and it produces better results than the manual approach I wasted years on. If you want to see Aaron walk through it himself, watch the full tutorial on YouTube.
Comments (2)
The tip about stop adjusting black white sli was the missing piece for me. Thank you.
Tried this technique this morning. Game changer for real.
Leave a Comment