
I used to charge clients by the hour for background removal. That sounds fine until you realize I was spending forty-five minutes per image painstakingly painting selections with the Quick Selection tool, cleaning up edges, swearing quietly into my cold brew. The margin on those jobs was embarrassing. So when I caught this Matt Kloskowski tutorial on Photoshop’s Select Subject tool, I felt that particular sting of “why didn’t I know this sooner.” If you’re still hand-painting every selection from scratch, this one’s going to hurt a little and then help a lot.
Select Subject shipped with Photoshop 19.1, which dropped in late January 2018. If you’ve been running updates, you probably already have it. If you’re not sure, go to Help > About Photoshop and check the version number. Anything 19.1 or later means you’re good. Anything older, go hit that Creative Cloud updater before reading another word. The feature uses Adobe’s machine learning under the hood to analyze the image and figure out what the main subject is without you telling it anything. It’s not magic, and Matt makes a point of calibrating your expectations on that front, which I appreciate. But it’s close enough to magic that it changes how fast you can work.
The real value here isn’t that Select Subject replaces your other tools. It’s that it handles the heavy lifting at the start so that when you go into Select and Mask to refine edges, you’re starting from a position of 80% done instead of 0%. For a freelancer billing fixed-price jobs, that difference is real money.
Step 1: Confirm You’re on Photoshop 19.1 or Later
 Photoshop About screen showing version 19.1
Before you touch anything else, verify your version. Go to Help > About Photoshop on Windows, or Photoshop > About Photoshop on Mac. You’re looking for version 19.1 at minimum. If you’re watching this years after the original tutorial dropped, any version after that will still have the feature, often with improvements baked in. If you’re out of date, open Creative Cloud, find Photoshop in your apps list, and update. This takes two minutes and it’s the kind of thing that pays for itself immediately.
Photoshop About screen showing version 19.1
Before you touch anything else, verify your version. Go to Help > About Photoshop on Windows, or Photoshop > About Photoshop on Mac. You’re looking for version 19.1 at minimum. If you’re watching this years after the original tutorial dropped, any version after that will still have the feature, often with improvements baked in. If you’re out of date, open Creative Cloud, find Photoshop in your apps list, and update. This takes two minutes and it’s the kind of thing that pays for itself immediately.
Step 2: Open Your Image and Grab the Quick Selection Tool
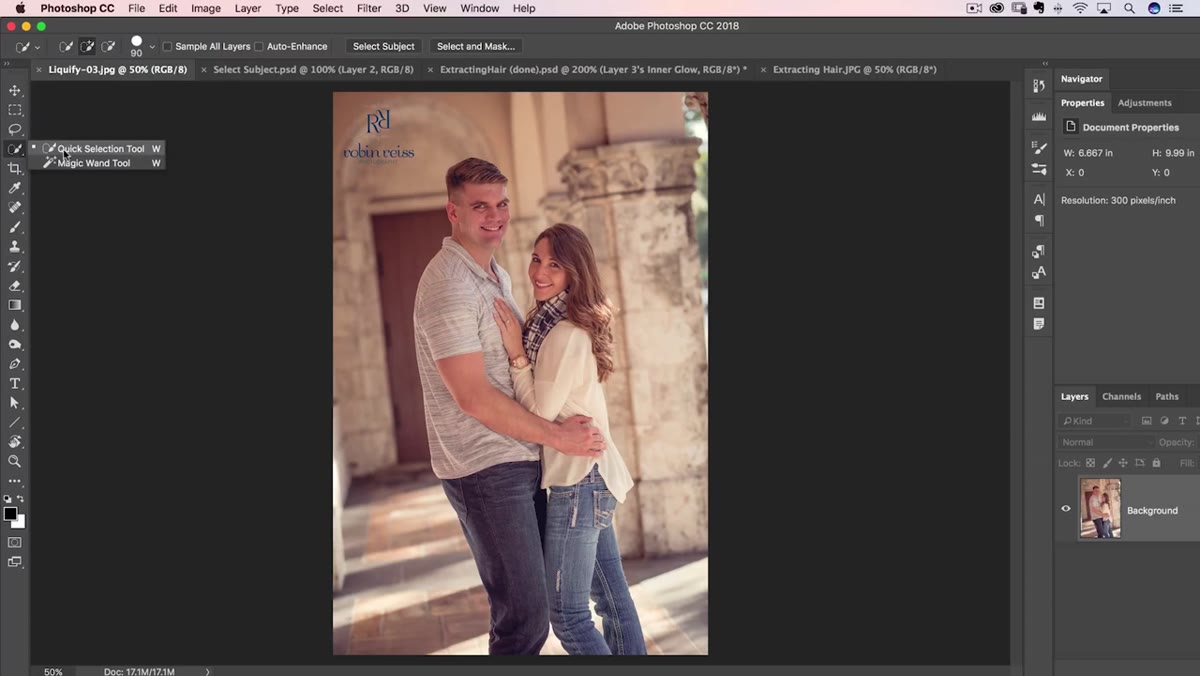 Quick Selection tool selected in the Photoshop toolbar
Open the photo you want to work with. Now grab the Quick Selection tool from the toolbar, or just press W on your keyboard. Matt is firm about keyboard shortcuts and honestly, so am I. W is one of those shortcuts that should be muscle memory at this point. You don’t have to actually paint a selection with this tool before using Select Subject, but you do need to have it active because that’s where the Select Subject button lives in the options bar at the top of the screen.
Quick Selection tool selected in the Photoshop toolbar
Open the photo you want to work with. Now grab the Quick Selection tool from the toolbar, or just press W on your keyboard. Matt is firm about keyboard shortcuts and honestly, so am I. W is one of those shortcuts that should be muscle memory at this point. You don’t have to actually paint a selection with this tool before using Select Subject, but you do need to have it active because that’s where the Select Subject button lives in the options bar at the top of the screen.
Step 3: Click “Select Subject”
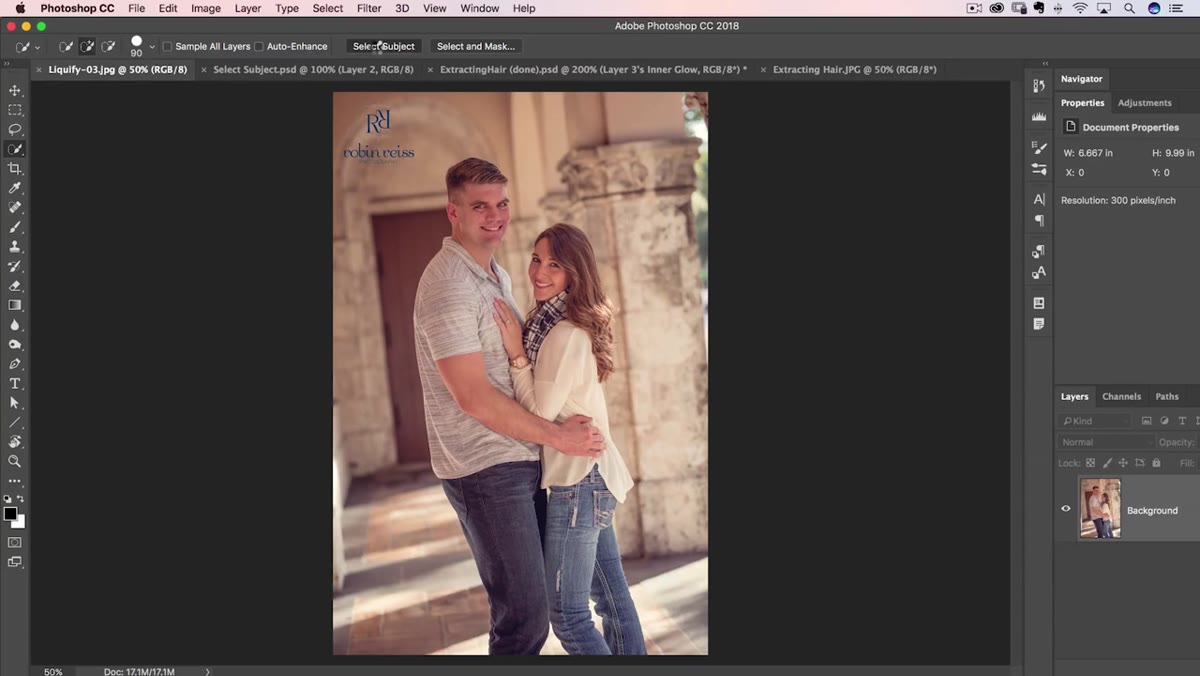 Select Subject button in the options bar, cursor hovering over it
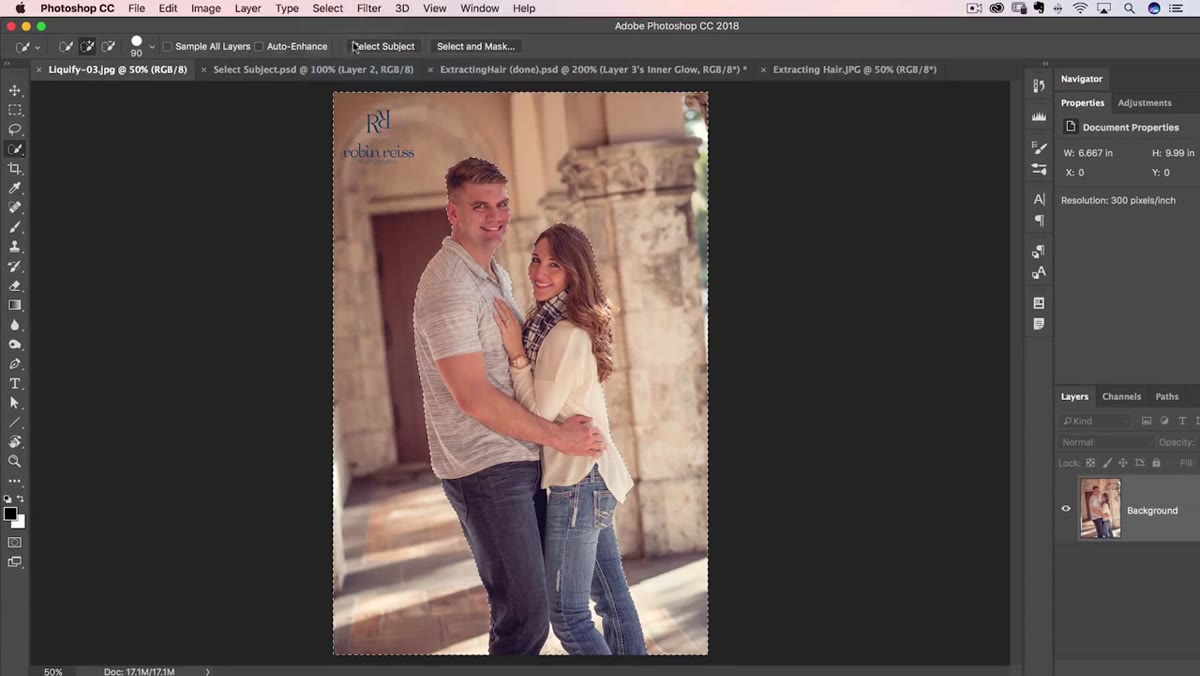
With the Quick Selection tool active, look up at the options bar running across the top of the screen. You’ll see a button that says “Select Subject.” Click it. Then wait a beat. Photoshop is doing some real computational work here, analyzing the image to identify the primary subject. On a simple photo, like a person standing against a relatively clean background, the result is genuinely impressive. Marching ants appear around the subject without you painting a single stroke. For straightforward shots, this alone gets you most of the way to a usable selection.
Select Subject button in the options bar, cursor hovering over it
With the Quick Selection tool active, look up at the options bar running across the top of the screen. You’ll see a button that says “Select Subject.” Click it. Then wait a beat. Photoshop is doing some real computational work here, analyzing the image to identify the primary subject. On a simple photo, like a person standing against a relatively clean background, the result is genuinely impressive. Marching ants appear around the subject without you painting a single stroke. For straightforward shots, this alone gets you most of the way to a usable selection.
Step 4: Evaluate What the Tool Got Right (and Wrong)
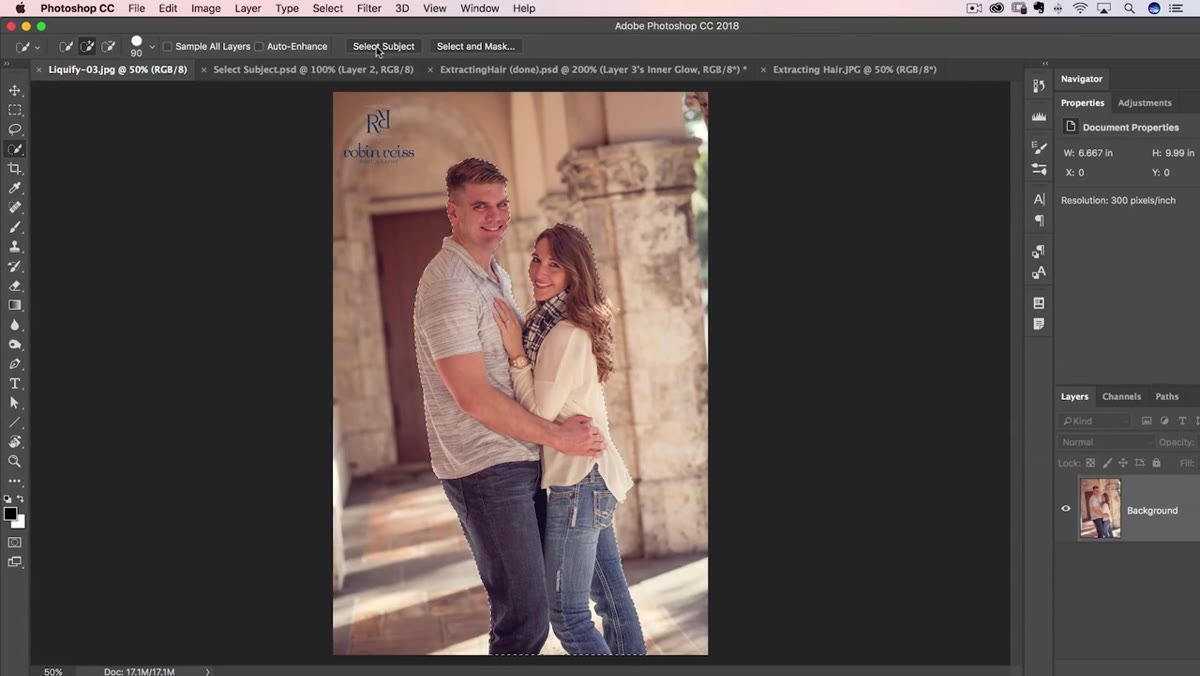 Marching ants selection around subject after Select Subject is applied
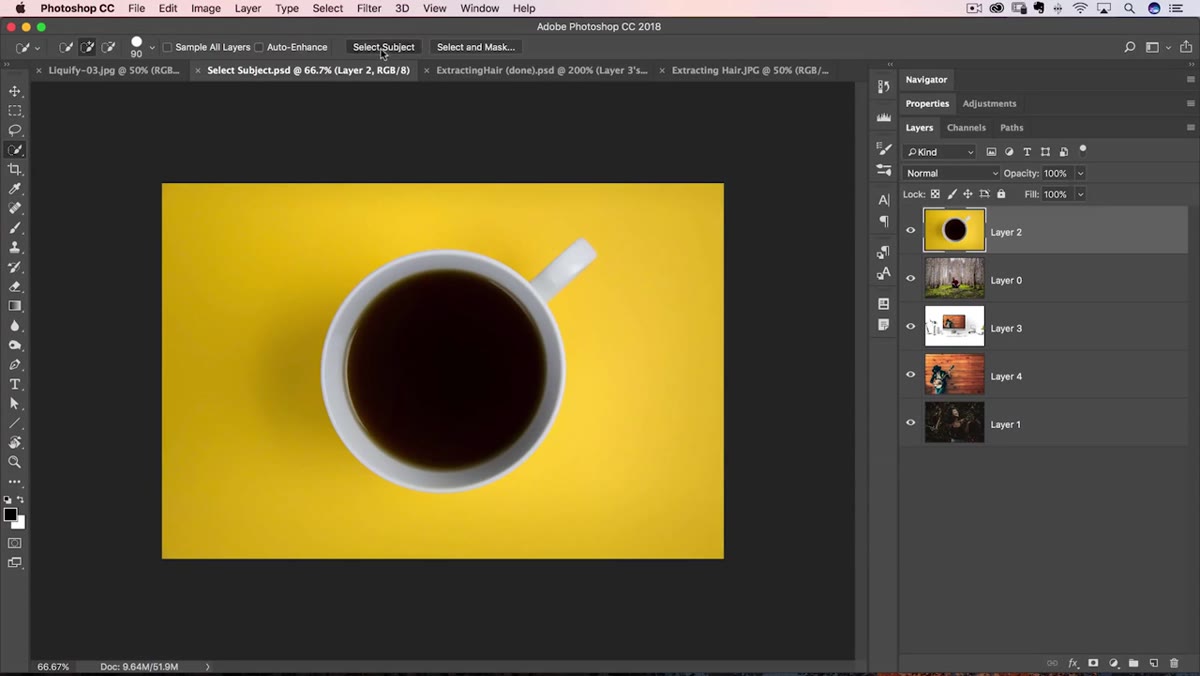
Don’t just assume the selection is perfect and move on. Zoom in and walk the edges. On simpler images with clear contrast between subject and background, Select Subject tends to nail the broad strokes but can get fuzzy on detailed areas like hair, fur, or loose fabric. On more complex images, it may pick up more than you intended, like background elements that have strong contrast or color patterns that confused the algorithm. Matt’s tutorial uses a couple of different photos to show how the results vary depending on image complexity. Understanding what you’re looking at here sets you up for smarter refinement in the next step.
Marching ants selection around subject after Select Subject is applied
Don’t just assume the selection is perfect and move on. Zoom in and walk the edges. On simpler images with clear contrast between subject and background, Select Subject tends to nail the broad strokes but can get fuzzy on detailed areas like hair, fur, or loose fabric. On more complex images, it may pick up more than you intended, like background elements that have strong contrast or color patterns that confused the algorithm. Matt’s tutorial uses a couple of different photos to show how the results vary depending on image complexity. Understanding what you’re looking at here sets you up for smarter refinement in the next step.
Step 5: Invert and Apply Background Effects (Simple Use Case)
 Inverse selection active with background blur being applied
For a straightforward use case, say you want to blur the background behind a portrait, here’s a fast workflow. After Select Subject runs, go to Select > Inverse to flip the selection so the background is selected instead of the subject. From there, go to Filter > Blur Gallery and choose Field Blur or Iris Blur depending on the look you want. Crank the blur amount to taste. This gives you a shallow depth-of-field effect on an otherwise flat image. It won’t be pixel-perfect on every strand of hair, but for social content, client drafts, or anything that won’t be printed at billboard scale, it gets the job done in about ninety seconds flat.
Inverse selection active with background blur being applied
For a straightforward use case, say you want to blur the background behind a portrait, here’s a fast workflow. After Select Subject runs, go to Select > Inverse to flip the selection so the background is selected instead of the subject. From there, go to Filter > Blur Gallery and choose Field Blur or Iris Blur depending on the look you want. Crank the blur amount to taste. This gives you a shallow depth-of-field effect on an otherwise flat image. It won’t be pixel-perfect on every strand of hair, but for social content, client drafts, or anything that won’t be printed at billboard scale, it gets the job done in about ninety seconds flat.
Step 6: Use Select and Mask for Complex Selections
 Select and Mask dialog open with Refine Edge Brush active
For anything that needs tighter accuracy, especially around hair or fine edges, don’t stop at the initial Select Subject result. With your selection active, click “Select and Mask” in the options bar. This opens a dedicated workspace with tools built specifically for edge refinement. The Refine Edge Brush Tool inside this dialog is your main weapon. Paint it along the tricky edges, particularly anywhere hair meets background, and Photoshop uses the same kind of AI-assisted processing to intelligently separate the two. The combination of Select Subject to get the initial selection and Select and Mask to clean the edges is where the real efficiency lives.
Select and Mask dialog open with Refine Edge Brush active
For anything that needs tighter accuracy, especially around hair or fine edges, don’t stop at the initial Select Subject result. With your selection active, click “Select and Mask” in the options bar. This opens a dedicated workspace with tools built specifically for edge refinement. The Refine Edge Brush Tool inside this dialog is your main weapon. Paint it along the tricky edges, particularly anywhere hair meets background, and Photoshop uses the same kind of AI-assisted processing to intelligently separate the two. The combination of Select Subject to get the initial selection and Select and Mask to clean the edges is where the real efficiency lives.
What I’d Add From My Own Work
The thing Matt doesn’t dwell on, but that has saved me more than once, is using Select Subject as a starting point for layer masks rather than destructive edits. After the selection is made, instead of immediately applying a filter or effect, I click the Layer Mask button at the bottom of the Layers panel. That converts the selection into a mask on its own layer, which means every refinement I make later is non-destructive. I can go back in, paint on the mask, tweak the edges, adjust feathering, without ever touching the original pixels. If you’re doing client work and changes are inevitable (they always are), this habit alone will save you a headache per project.
The core lesson here is that Select Subject doesn’t replace your skill set, it accelerates it. The difference between a mediocre selection and a great one is still the refinement work you do after. But starting from a smart initial selection instead of a blank canvas changes how much time that refinement actually takes. That’s the real value of understanding what the tool is doing and working with it intelligently rather than just clicking and hoping.
Watch the full tutorial on YouTube and see Matt walk through both simple and complex examples side by side. The contrast between use cases is instructive in a way that’s hard to fully communicate in text.
Comments
Leave a Comment