I’ll be honest: for a long time I treated Adobe Camera Raw like a waiting room. You know, the place you sit in before you get to the “real” work in Photoshop. Open file, nudge exposure, click “Open Image,” never look back. It wasn’t until I watched a friend turn around a badly lit portrait in about eight minutes, entirely inside Camera Raw, that I started paying closer attention to what that workspace could actually do. Turns out I’d been ignoring one of its most useful features for years: RAW brushes, also called local adjustment brush presets.
In this Kelvin Designs tutorial, Calvin walks through exactly what these brushes are, how to get them installed on a Mac, and how to put them to work on a real photograph. Watch the full tutorial on YouTube if you want to follow along with the video, but I’ve broken down every step below so you can work through it without pausing and rewinding every thirty seconds.
The short version: RAW brushes are local adjustment presets that live inside Adobe Camera Raw. Unlike global adjustments that hit the whole image, these let you paint specific corrections onto specific areas, and because they’re built for RAW files, they pull from a level of tonal information that a JPEG simply can’t compete with. If you shoot RAW and you’ve never touched these, this one’s going to sting a little.
Step 1: Find the Right Installation Folder on Mac
 Finder window showing the hidden Library folder path
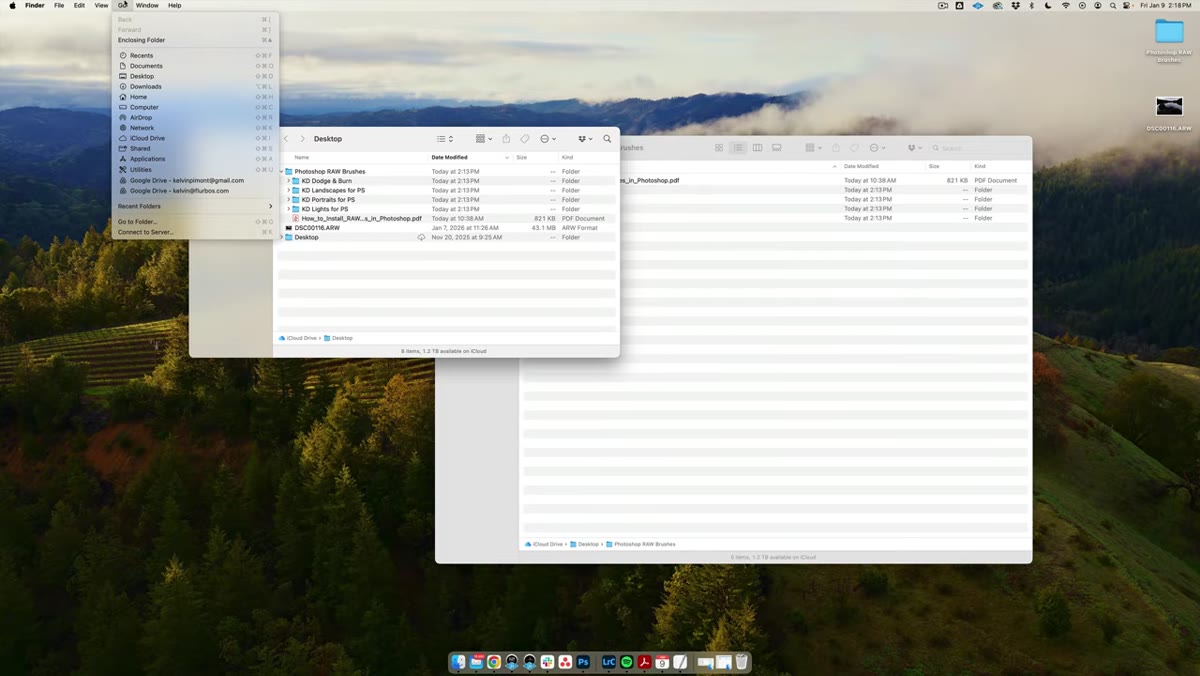
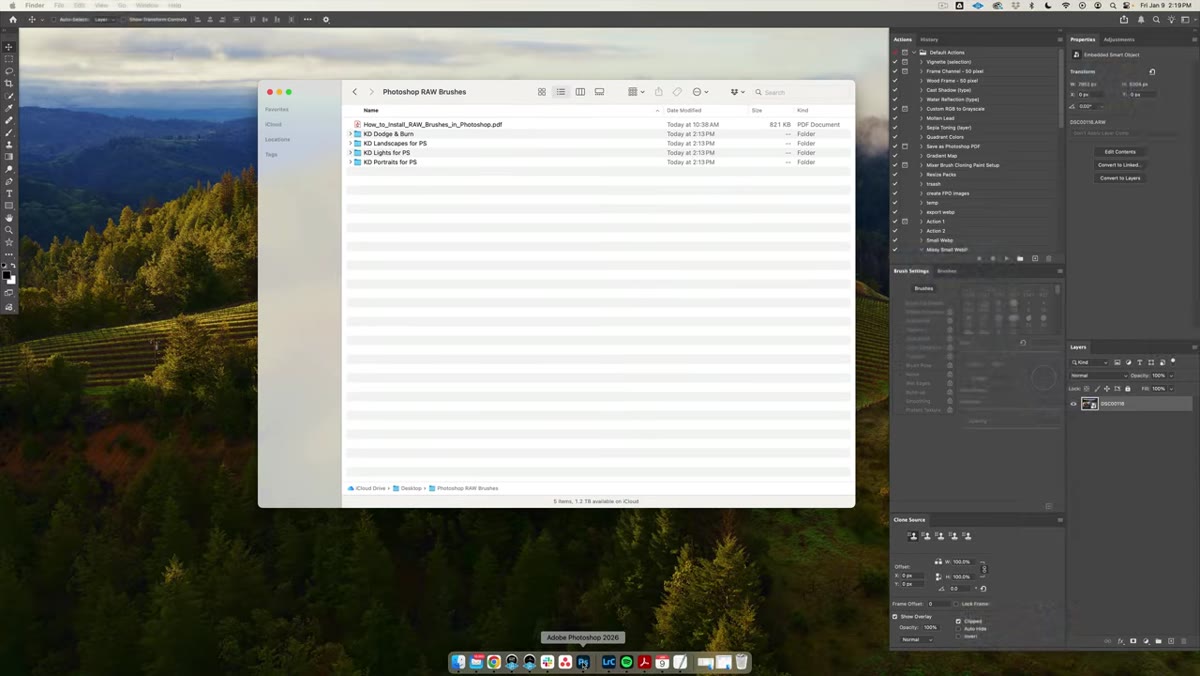
Before any of this works, you need to know where Camera Raw actually stores its brush presets. On a Mac, that location is buried inside the hidden Library folder, which is invisible by default. To get there, open a new Finder window, go to the Go menu, and hold down the Option key. You’ll see the Library option appear. Click it, then navigate to Application Support, then Adobe, then Camera Raw, and finally a subfolder called Local Corrections. That’s your destination.
Finder window showing the hidden Library folder path
Before any of this works, you need to know where Camera Raw actually stores its brush presets. On a Mac, that location is buried inside the hidden Library folder, which is invisible by default. To get there, open a new Finder window, go to the Go menu, and hold down the Option key. You’ll see the Library option appear. Click it, then navigate to Application Support, then Adobe, then Camera Raw, and finally a subfolder called Local Corrections. That’s your destination.
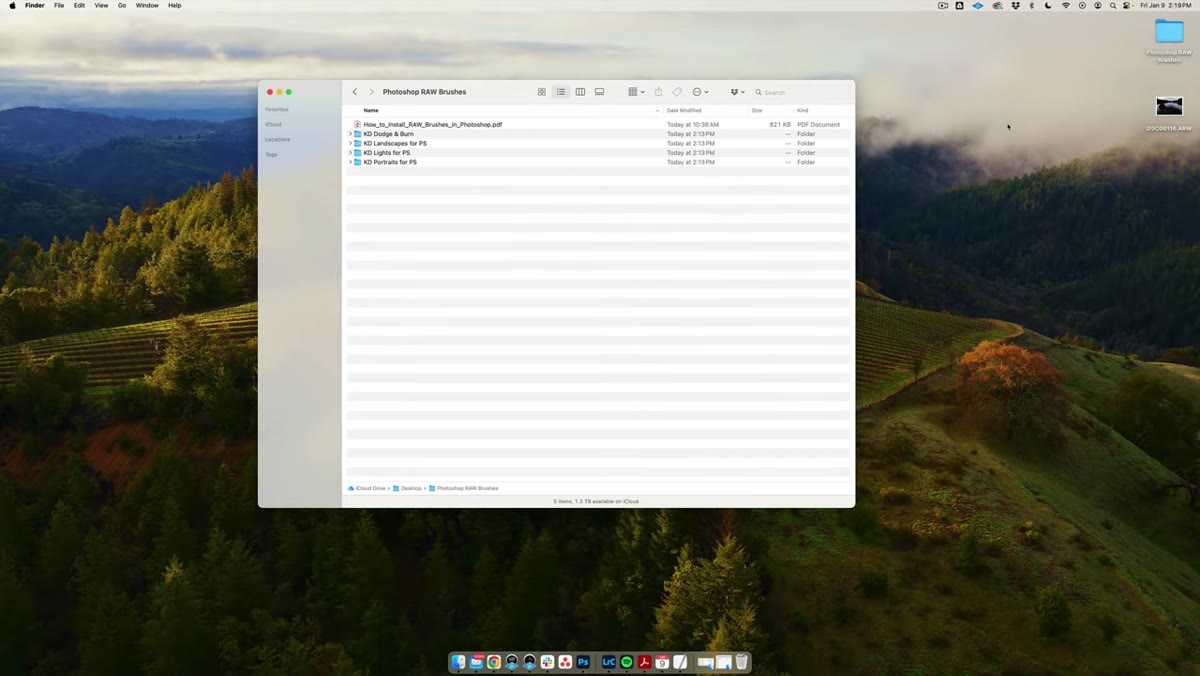
If you’ve downloaded a brush preset pack or purchased one, don’t just drag the whole folder in. Pull the individual preset files out and place them directly into that Local Corrections folder. Calvin flags this specifically because dumping a subfolder in there instead of the files themselves is a common mistake that leaves you wondering why nothing shows up.
Step 2: Restart Photoshop
 Photoshop reopening after preset installation
This one sounds obvious, but skip it and you’ll spend ten minutes wondering if you did something wrong. After copying your presets into the Local Corrections folder, do a full restart of Photoshop. Camera Raw loads its brush presets on startup, so any changes to that folder won’t register mid-session. Close it completely and reopen.
Photoshop reopening after preset installation
This one sounds obvious, but skip it and you’ll spend ten minutes wondering if you did something wrong. After copying your presets into the Local Corrections folder, do a full restart of Photoshop. Camera Raw loads its brush presets on startup, so any changes to that folder won’t register mid-session. Close it completely and reopen.
Once you’re back in, open a RAW file to get started. Calvin is clear on this point and it’s worth repeating: these brushes work on JPEGs technically, but you’re leaving a lot of their capability on the table if you do that. RAW files carry significantly more tonal data, which is what gives these local adjustments their range and subtlety.
Step 3: Do Your Global Adjustments First
 Camera Raw basic panel with exposure and tone sliders adjusted
Before reaching for the brushes, Calvin works through the global basics first, and this is the right order of operations. He brings the exposure up slightly, adds a touch of contrast, and then pulls the highlights down to recover detail in the brighter parts of the image. The shadows, which are quite dark in his example shot, get opened up considerably. The amount of information hiding in those shadows once they’re lifted is genuinely impressive and a good reminder of why shooting RAW is worth the larger file sizes.
Camera Raw basic panel with exposure and tone sliders adjusted
Before reaching for the brushes, Calvin works through the global basics first, and this is the right order of operations. He brings the exposure up slightly, adds a touch of contrast, and then pulls the highlights down to recover detail in the brighter parts of the image. The shadows, which are quite dark in his example shot, get opened up considerably. The amount of information hiding in those shadows once they’re lifted is genuinely impressive and a good reminder of why shooting RAW is worth the larger file sizes.
For white point, hold down Option while dragging the Whites slider. The screen goes black and any areas that are actually blowing out to pure white show up in color. You want to see as little of that as possible. Same technique works for the Blacks slider, except the display inverts and shows you where you’re clipping to pure black. Use these as guides, not hard rules, but they stop you from blowing things out accidentally.
Step 4: Dial in Color and Mood
 Camera Raw color panel with temperature and tint sliders being adjusted
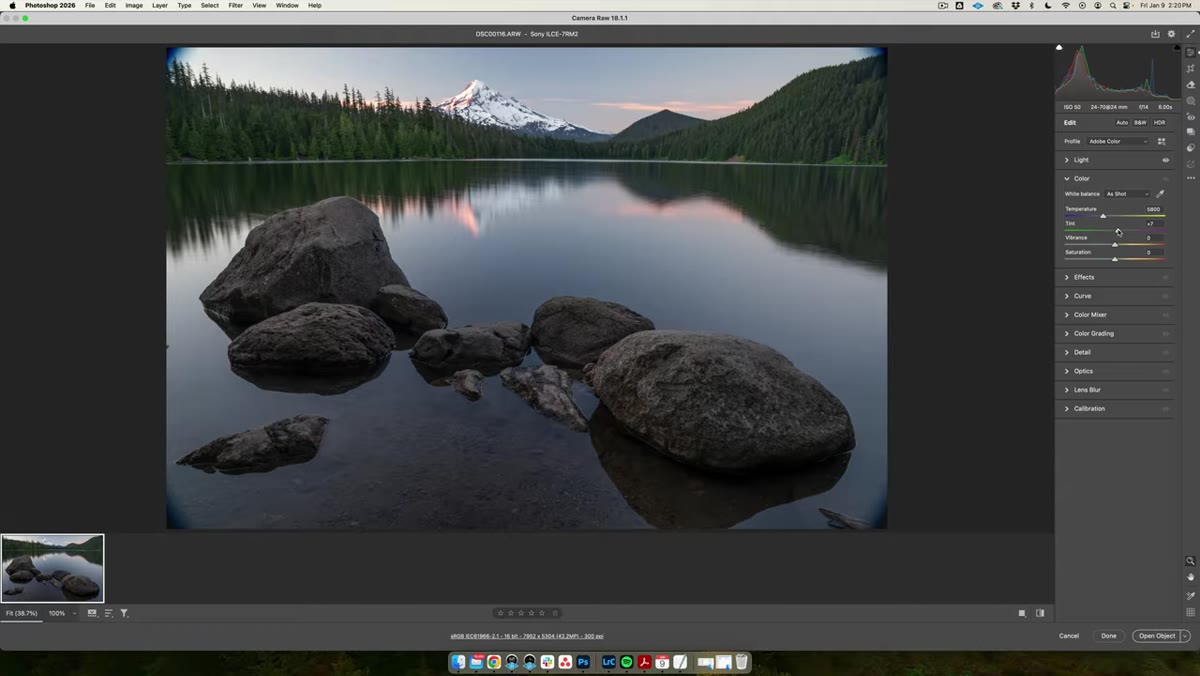
With tone sorted, Calvin moves into color. He’s working with a sunset photo and wants to lean into that warmth, so he nudges the Tint slider toward magenta and pushes Temperature slightly warmer. The key word there is slightly. It’s easy to go too far with temperature on a landscape and end up with something that looks like it was shot through an orange filter.
Camera Raw color panel with temperature and tint sliders being adjusted
With tone sorted, Calvin moves into color. He’s working with a sunset photo and wants to lean into that warmth, so he nudges the Tint slider toward magenta and pushes Temperature slightly warmer. The key word there is slightly. It’s easy to go too far with temperature on a landscape and end up with something that looks like it was shot through an orange filter.
He also brings up Vibrance and Saturation to give the colors more presence without going full Instagram filter on it. One thing he specifically avoids is Clarity. The photo involves a long exposure with soft, silky water, and cranking Clarity on that kind of shot tends to make the texture look crunchy and over-processed in a way that fights the whole atmosphere of the image. Knowing when not to apply something is just as useful as knowing how.
Step 5: Apply RAW Brushes as Local Adjustments
 Adobe Camera Raw open with Local Corrections brush tool selected
This is where the actual subject of the tutorial comes in. Once your global edits are looking solid, you can reach for the RAW brushes to handle area-specific corrections. In Camera Raw, select the Masking or local adjustment brush tool, and your installed presets will be available to choose from. Calvin’s example pack includes presets like a dodge and burn brush, which applies exposure and contrast settings tuned specifically for lightening or darkening small areas without flattening them out.
Adobe Camera Raw open with Local Corrections brush tool selected
This is where the actual subject of the tutorial comes in. Once your global edits are looking solid, you can reach for the RAW brushes to handle area-specific corrections. In Camera Raw, select the Masking or local adjustment brush tool, and your installed presets will be available to choose from. Calvin’s example pack includes presets like a dodge and burn brush, which applies exposure and contrast settings tuned specifically for lightening or darkening small areas without flattening them out.
The workflow is similar to any brush tool: select your preset, adjust the brush size and feathering, then paint over the area you want to affect. Because the preset carries its own settings baked in, you’re not starting from scratch every time you want to dodge a face or darken a busy background. That consistency is the actual time-saver here, especially if you’re processing a large batch of similar shots.
My Two Cents: Build Your Own Presets
I started creating my own Camera Raw brush presets after watching this, and it changed how I handle portrait retouching specifically. I built a skin-softening brush and a separate one for adding punch to eyes, both tuned to the kind of values I was dialing in manually every single session. The first time I used them on a real shoot delivery, I cut my processing time by probably a third.
If you download Calvin’s pack or any commercial set, treat them as a starting point rather than a final answer. Open the preset, see what sliders it’s actually touching, and adjust from there to match your own style. You’ll learn more from taking presets apart than you will from just using them out of the box.
The biggest thing this tutorial drove home for me: Adobe Camera Raw is not a waiting room. It’s a full editing environment with a feature set that a lot of Photoshop users have barely touched. RAW brushes specifically are one of those tools that feel like a small addition until you actually start using them, at which point you can’t really imagine going back to doing everything globally.
Watch the full tutorial on YouTube to see Calvin walk through the whole thing on a real image.
Comments (5)
The tip about raw brushes in photoshop are d was the missing piece for me. Thank you.
I keep coming back to this article. It's that useful.
Never thought of approaching it this way. Really creative.
Just used this on a wedding shoot edit. Client was thrilled.
Well explained. I think my audience would really benefit from this — mind if I link to it?
Leave a Comment