I used to spend an embarrassing amount of time wrestling with the Quick Selection Tool, painting over subjects pixel by pixel like I was defusing a bomb. Zoom in, paint a little, zoom out, swear, undo, repeat. It worked, but “it works” is a pretty low bar when you’re billing a client by the project and not the hour. So when Photoshop 2020 dropped the Object Selection Tool, I genuinely felt a little cheated that I hadn’t had it sooner.
In this Aaron Nace (PHLEARN) tutorial, he walks through exactly how the tool works across a few different real-world scenarios, including group shots with overlapping subjects. Watch the full tutorial on YouTube if you want to see it in action before diving into the breakdown below. The short version: you draw a loose shape around something, and Photoshop figures out where the edges actually are. It sounds too good to be true, and it kind of is, but in the best possible way.
What sold me immediately is how forgiving it is. You don’t have to be precise. You just have to be in the ballpark, and the tool handles the rest. For freelancers doing quick cutouts for social graphics or product shots, this thing is a genuine time-saver. Here’s how to use it.
Step 1: Open Your Image and Head to Select and Mask
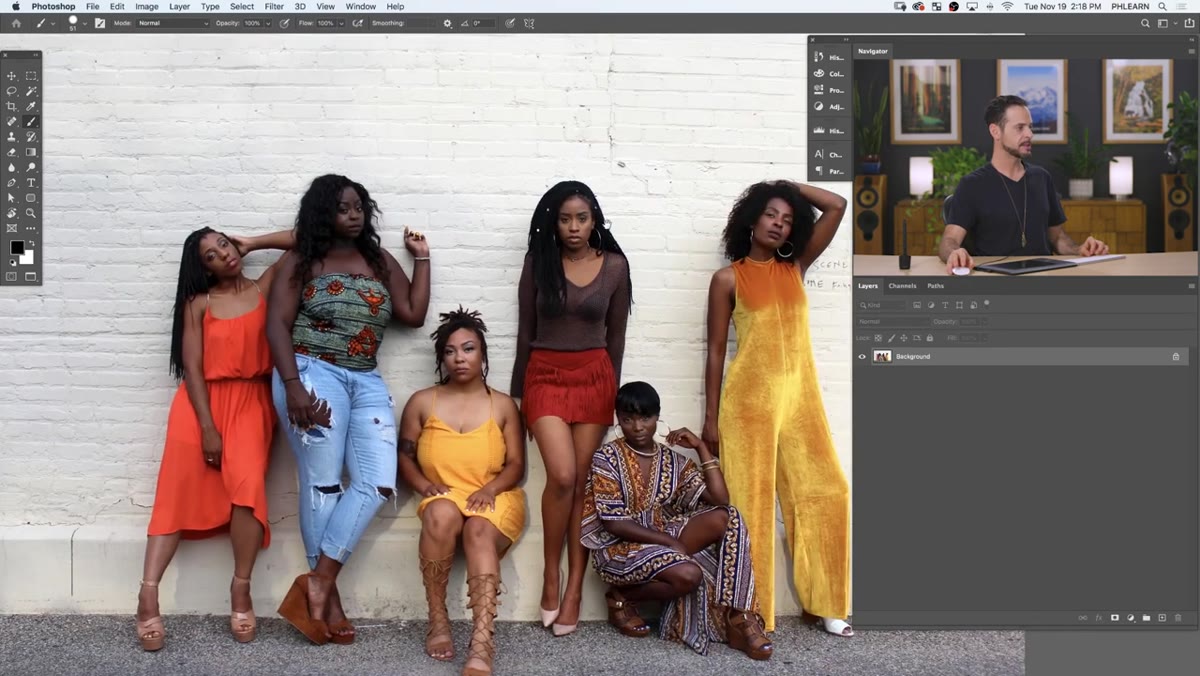 Photoshop workspace showing three sample images open
Start by opening the image you want to work with. Aaron uses a group photo where the goal is to isolate a single subject without disturbing everyone else in the frame. Once your image is open, go to Select > Select and Mask from the top menu. This is where the Object Selection Tool lives, and where you’ll do most of your work.
Photoshop workspace showing three sample images open
Start by opening the image you want to work with. Aaron uses a group photo where the goal is to isolate a single subject without disturbing everyone else in the frame. Once your image is open, go to Select > Select and Mask from the top menu. This is where the Object Selection Tool lives, and where you’ll do most of your work.
If you’ve been using Select and Mask for a while, you already know it as the refine-edge workspace. Think of it as the same room with a powerful new piece of furniture in it.
Step 2: Activate the Object Selection Tool (Shortcut: W)
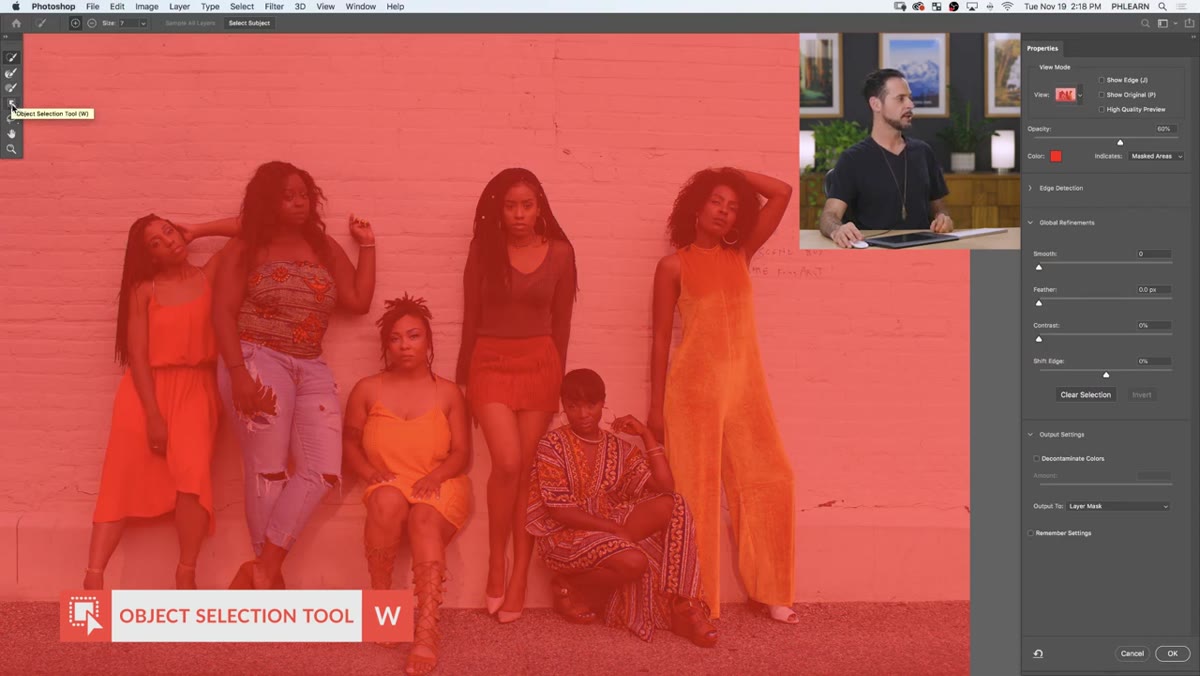 Object Selection Tool highlighted in the Select and Mask toolbar
Inside the Select and Mask workspace, look at the toolbar on the left. The Object Selection Tool is there, and the keyboard shortcut is W. Hit it and you’re ready. This is exactly the kind of shortcut that should be burned into muscle memory immediately. One key, enormous payoff.
Object Selection Tool highlighted in the Select and Mask toolbar
Inside the Select and Mask workspace, look at the toolbar on the left. The Object Selection Tool is there, and the keyboard shortcut is W. Hit it and you’re ready. This is exactly the kind of shortcut that should be burned into muscle memory immediately. One key, enormous payoff.
Once activated, check the options bar at the top. You’ll see two mode options: Rectangle and Lasso. Both work similarly, but Rectangle is the move for most cases. It’s faster to draw and Photoshop doesn’t need a tight outline to do its job.
Step 3: Check “Object Subtract” in the Options Bar
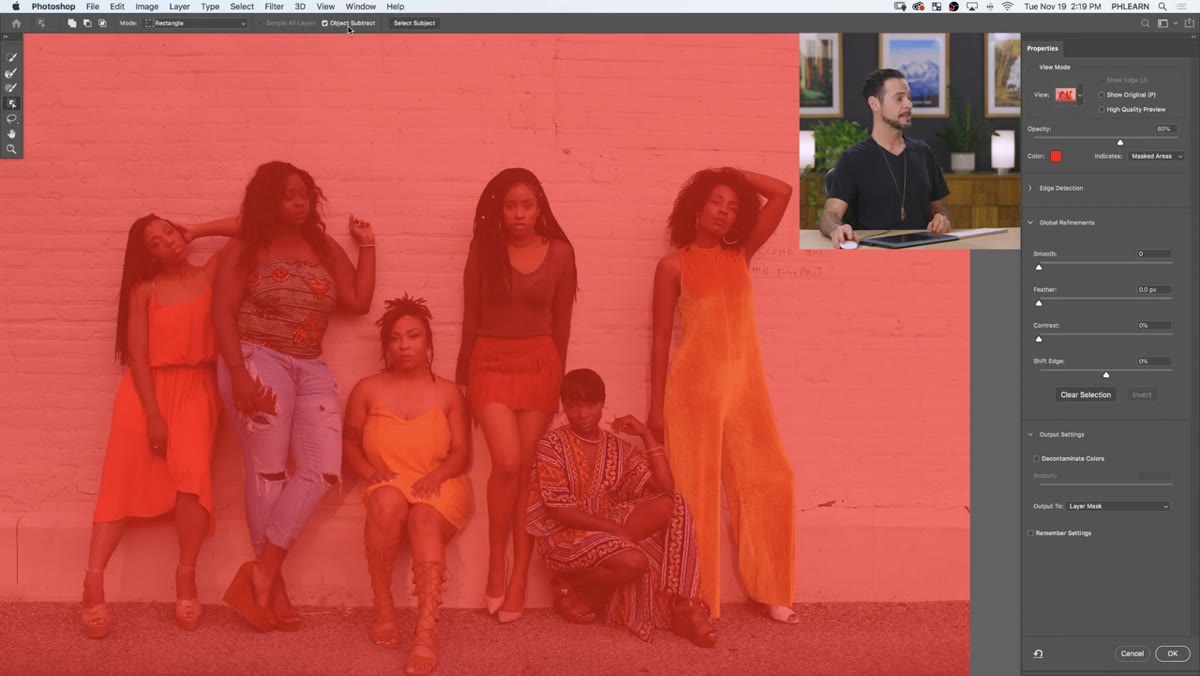 Options bar showing Object Subtract checkbox selected
Before you draw anything, make sure Object Subtract is checked in the options bar. This setting tells Photoshop to be smart about what it removes when you subtract from a selection later. It’s a small checkbox that makes a real difference when you’re working around complex or overlapping edges.
Options bar showing Object Subtract checkbox selected
Before you draw anything, make sure Object Subtract is checked in the options bar. This setting tells Photoshop to be smart about what it removes when you subtract from a selection later. It’s a small checkbox that makes a real difference when you’re working around complex or overlapping edges.
Don’t skip this step and then wonder why your subtractions look weird. I’m speaking from experience.
Step 4: Draw a Rectangle Around Your Subject
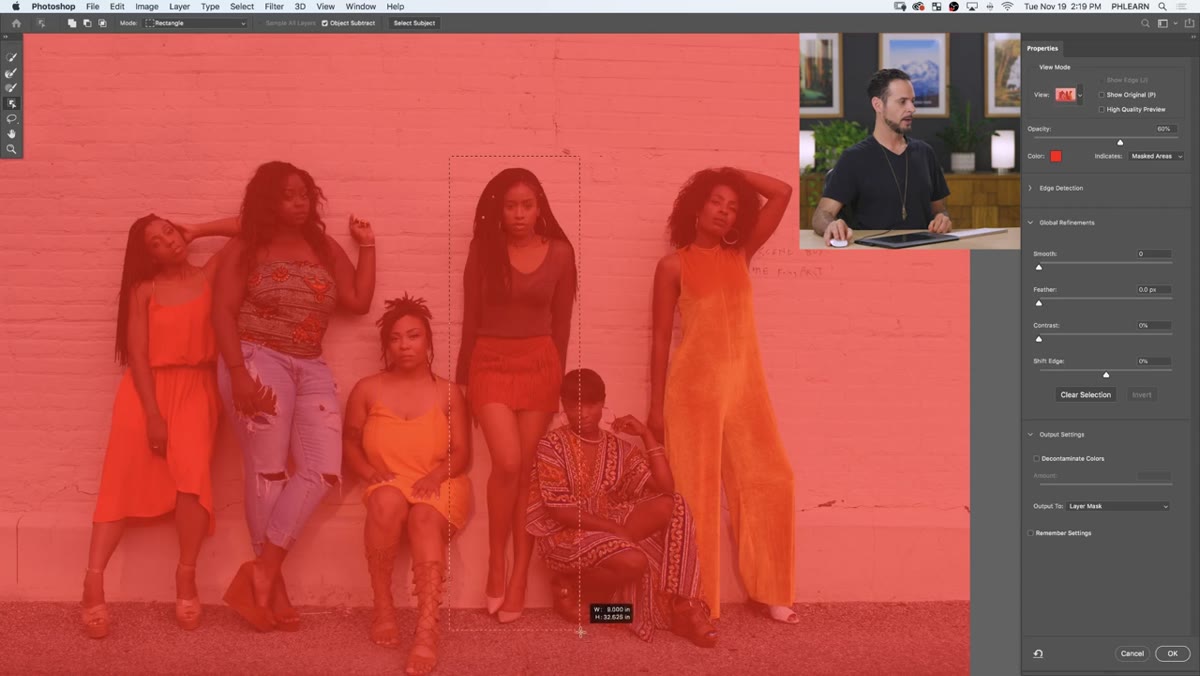 Rectangle being drawn loosely around a single subject in a group photo
Click and drag a rectangle loosely around your subject. You don’t need to hug the edges tightly. In fact, being a little generous with the selection area is fine. The whole point of this tool is that Photoshop identifies the actual object inside the box, not just the box itself.
Rectangle being drawn loosely around a single subject in a group photo
Click and drag a rectangle loosely around your subject. You don’t need to hug the edges tightly. In fact, being a little generous with the selection area is fine. The whole point of this tool is that Photoshop identifies the actual object inside the box, not just the box itself.
What Aaron demonstrates here is genuinely impressive: even with part of another person caught in the rectangle, Photoshop isolates the intended subject with clean, accurate edges. On a subject against a relatively simple background like a white wall, the results are close to what you’d get after several minutes of manual work, delivered in about three seconds.
Step 5: Add or Subtract from the Selection as Needed
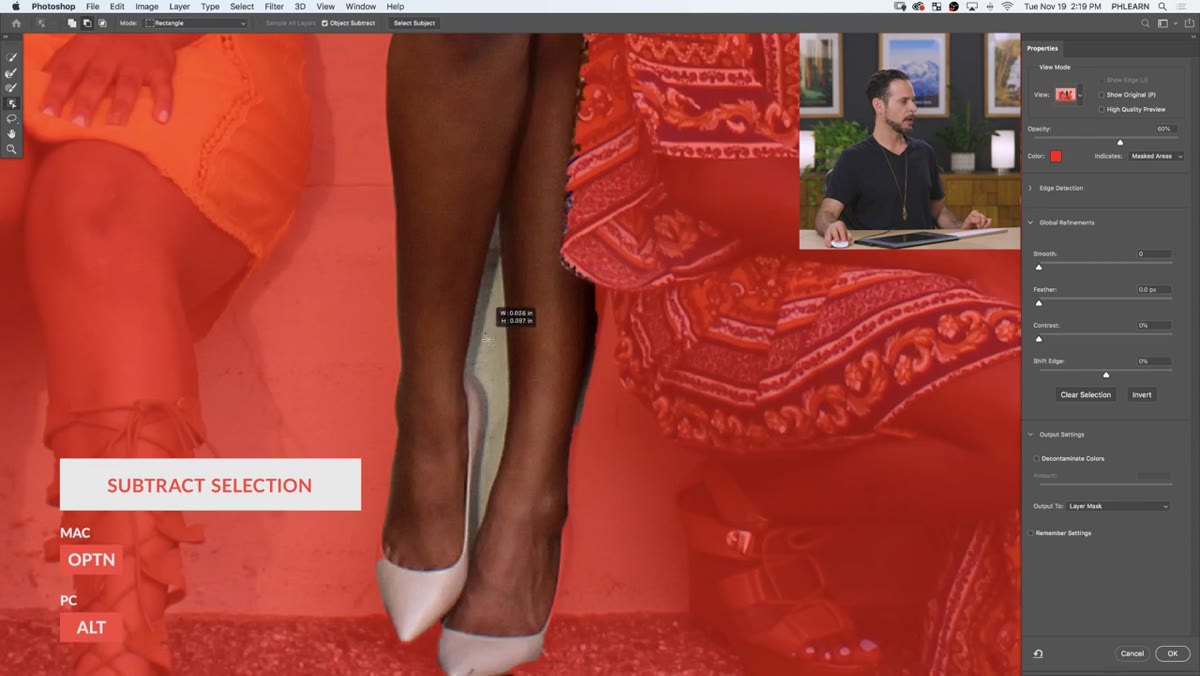 Holding Alt/Option to subtract from selection around problem area
No automatic tool gets everything right on the first pass, and this one is no exception. For areas that need adjustment, hold Alt (Windows) or Option (Mac) and draw around the region you want to remove from the selection. This activates subtract mode. For adding areas back in, just draw normally without holding any modifier key.
Holding Alt/Option to subtract from selection around problem area
No automatic tool gets everything right on the first pass, and this one is no exception. For areas that need adjustment, hold Alt (Windows) or Option (Mac) and draw around the region you want to remove from the selection. This activates subtract mode. For adding areas back in, just draw normally without holding any modifier key.
Aaron is honest here: some areas, especially where subject color blends into the background, will need a few passes. Sometimes those passes still don’t nail it. That’s not a failure of the tool, that’s just the reality of complex imagery. The tool gets you 85-90% of the way there in seconds. The remaining cleanup is still faster than starting from scratch.
Step 6: Output to a Layer Mask and Clean Up with a Brush
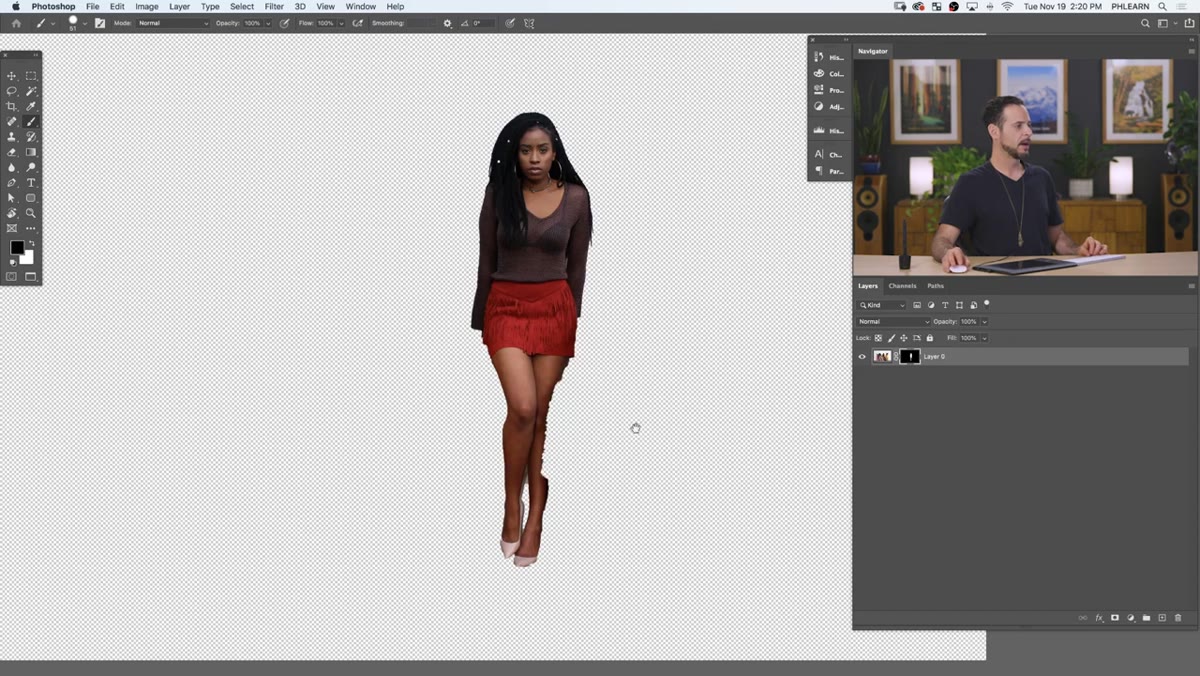 Output settings dropdown showing Layer Mask option selected
When you’re satisfied with the selection, use the Output To dropdown in the Select and Mask workspace and choose Layer Mask. Hit OK. Your subject will be isolated on its own layer with a mask attached, and you can immediately see where the edges need cleanup.
Output settings dropdown showing Layer Mask option selected
When you’re satisfied with the selection, use the Output To dropdown in the Select and Mask workspace and choose Layer Mask. Hit OK. Your subject will be isolated on its own layer with a mask attached, and you can immediately see where the edges need cleanup.
For the stubborn spots, click on the layer mask thumbnail and paint with a hard black brush to remove areas, or white to restore them. This isn’t a workaround, it’s just how masking works. The Object Selection Tool gives you a great head start; you finish the job with a brush. That combination is faster than any other approach I’ve used for quick cutouts.
What I’d Add From My Own Workflow
The tool performs best when there’s reasonable contrast between subject and background. Light subject on a white wall? Excellent results. Subject wearing colors that closely match the background? You’ll spend more time cleaning up than you saved. In those cases I still reach for the Pen Tool for the critical edges, then use the Object Selection Tool for the easier interior areas.
One thing Aaron doesn’t focus on heavily but I’d emphasize: zoom in and check your mask before moving on. Hold Shift and click on the layer mask thumbnail to view it in isolation. You’ll spot gaps and rough edges much faster that way than by eyeballing the composite. Catching those early saves you from rebuilding the mask after you’ve already built out the rest of the composition.
The single biggest takeaway from this tutorial is that precision matters less than you think when making initial selections in Photoshop 2020. The Object Selection Tool is designed to interpret your intent, not trace your cursor. Loose and fast beats slow and careful when this tool is doing the heavy lifting.
Watch the full tutorial on YouTube to see Aaron work through multiple image scenarios, including more complex compositions where the tool really gets put through its paces.
Comments
Leave a Comment