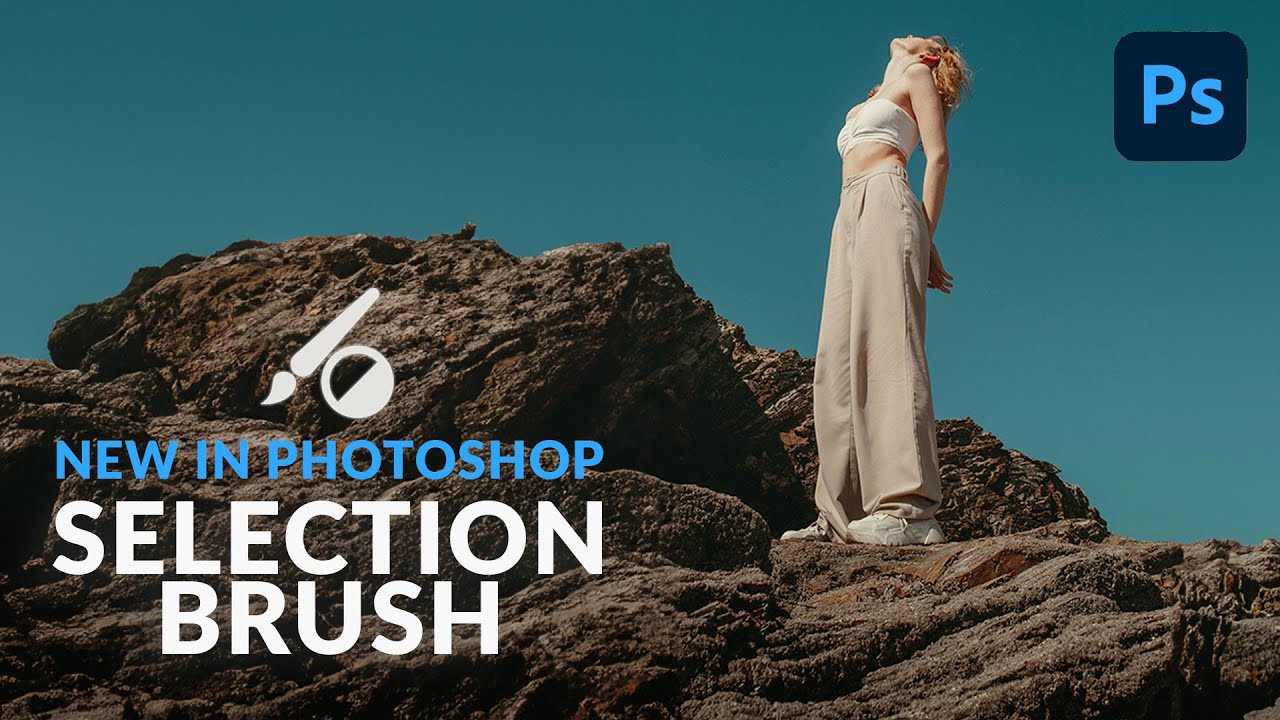
I have a complicated relationship with Photoshop selections. Quick Mask, the Pen Tool, Select and Mask, Subject Selection – I’ve used them all, argued with them all, and occasionally rage-quit because of them all. Most of the time I’m in a coffee shop trying to hit a deadline, and the last thing I need is to spend 20 minutes coaxing a lasso selection into behaving like a reasonable piece of software. So when I saw that Photoshop had shipped an entirely new selection tool – not a tweak, not a renamed button, an actual new paradigm – I paid attention.
In this Aaron Nace (PHLEARN) tutorial, Watch the full tutorial on YouTube, he walks through the brand new Selection Brush Tool and, more importantly, shows the use case that makes it genuinely click: pairing it with Generative Fill. That combo turns out to be a much faster workflow than the one most of us are using right now, and after watching it I immediately went and tested it on a client project. Here’s the breakdown.
Step 1: Find the Selection Brush Tool in Your Toolbar
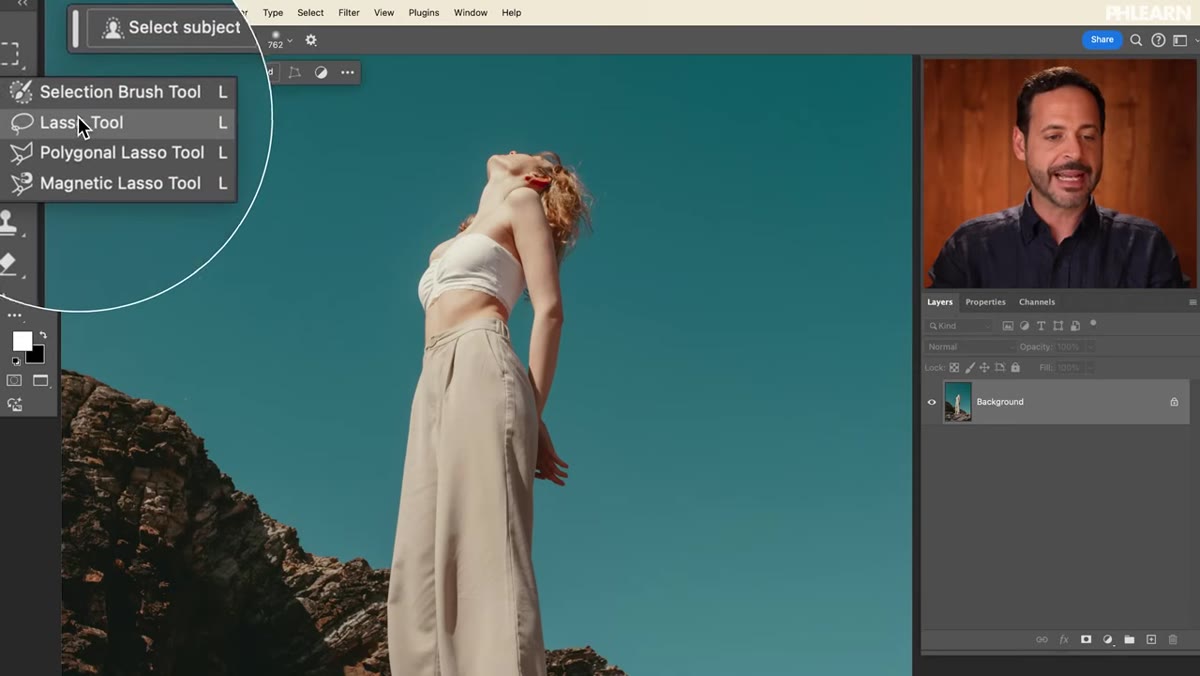 Selection Brush Tool nested inside the Lasso tools group
The Selection Brush Tool lives nested inside the Lasso Tool group – the same spot where your regular Lasso, Polygonal Lasso, and Magnetic Lasso already live. The keyboard shortcut is L, same as the other lasso tools. To cycle through all the tools in that group and land on the Selection Brush, hold Shift and press L repeatedly. Worth knowing: that same Shift-plus-shortcut logic works across every tool group in Photoshop, so if you’ve been right-clicking to find buried tools, now you don’t have to.
Selection Brush Tool nested inside the Lasso tools group
The Selection Brush Tool lives nested inside the Lasso Tool group – the same spot where your regular Lasso, Polygonal Lasso, and Magnetic Lasso already live. The keyboard shortcut is L, same as the other lasso tools. To cycle through all the tools in that group and land on the Selection Brush, hold Shift and press L repeatedly. Worth knowing: that same Shift-plus-shortcut logic works across every tool group in Photoshop, so if you’ve been right-clicking to find buried tools, now you don’t have to.
Step 2: Set Your Brush Options Before You Start Painting
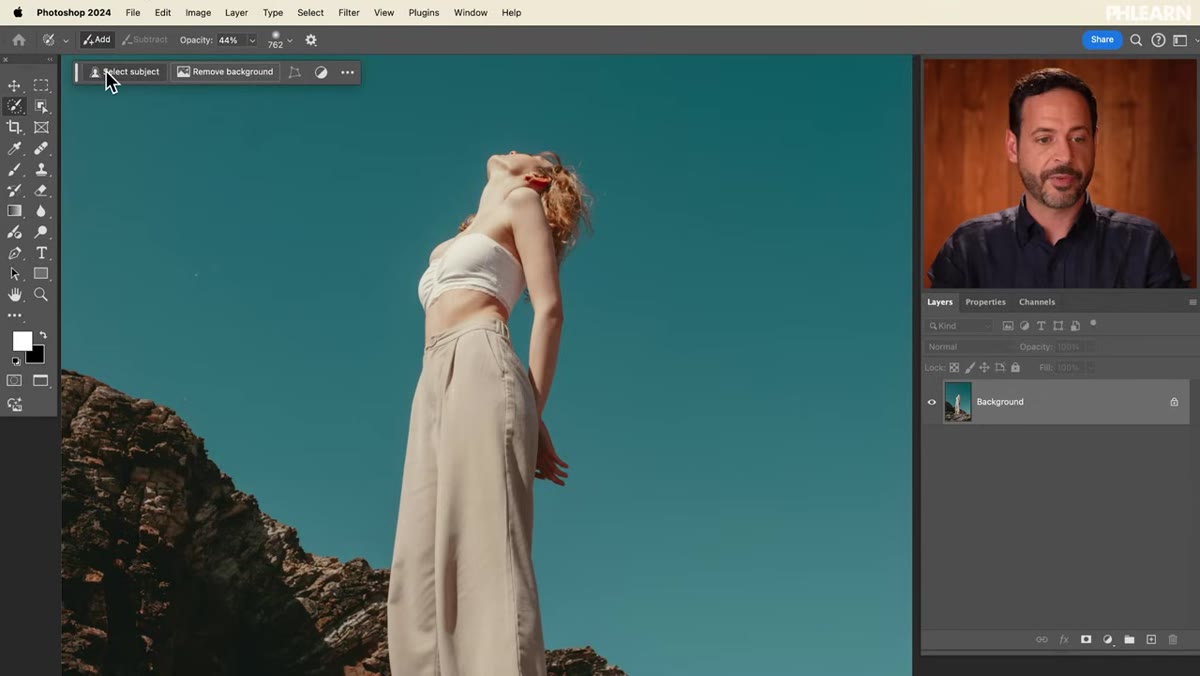 Options bar showing Add, Subtract, Opacity, Size, and Hardness controls
Once you’ve got the tool active, glance up at the Options bar. You’ll see two mode buttons: Add and Subtract. You’ll also see controls for Opacity, Brush Size, and Hardness. Aaron recommends setting Opacity to 100% straight away – anything lower means you’re painting a partial selection, which rarely does what you want when you’re working quickly. For hardness, he brings it all the way up for hard-edged selections. I’d agree with that as a default starting point. Soft edges are a choice you can make intentionally, not something you want sneaking in by accident.
Options bar showing Add, Subtract, Opacity, Size, and Hardness controls
Once you’ve got the tool active, glance up at the Options bar. You’ll see two mode buttons: Add and Subtract. You’ll also see controls for Opacity, Brush Size, and Hardness. Aaron recommends setting Opacity to 100% straight away – anything lower means you’re painting a partial selection, which rarely does what you want when you’re working quickly. For hardness, he brings it all the way up for hard-edged selections. I’d agree with that as a default starting point. Soft edges are a choice you can make intentionally, not something you want sneaking in by accident.
Brush size is controlled the same way as every other brush tool in Photoshop – open bracket to shrink it, close bracket to grow it. If you’ve got the keyboard shortcut muscle memory already wired in, this tool feels immediately natural.
Step 3: Paint Your Selection Directly on the Image
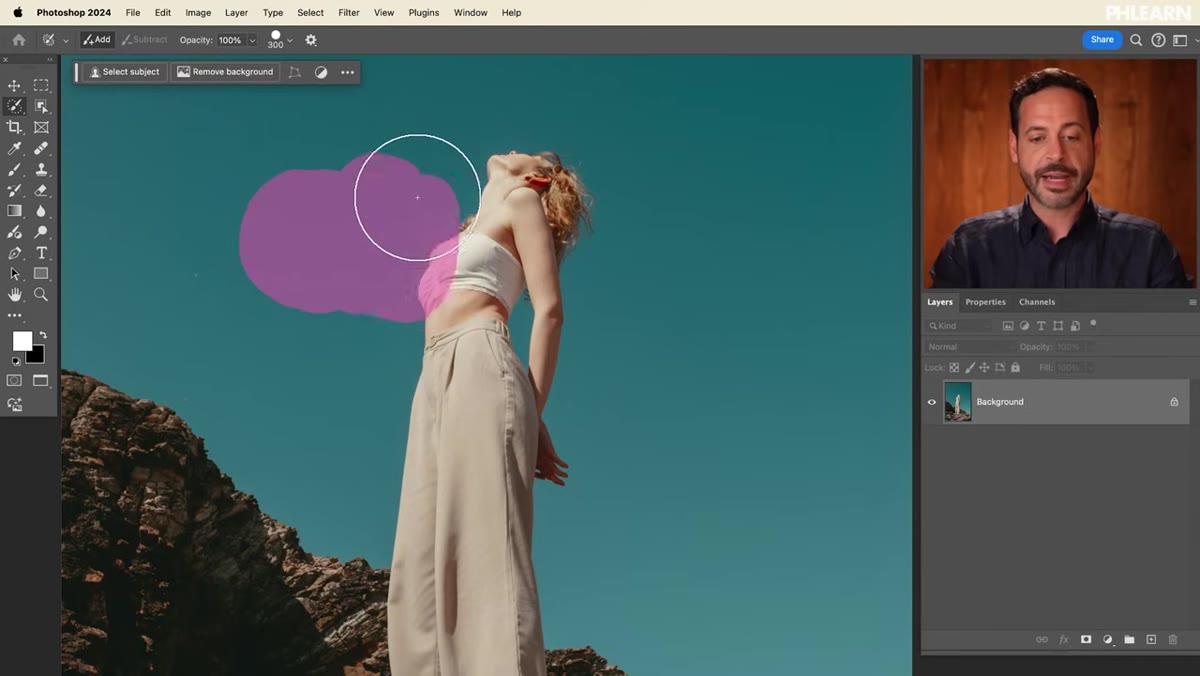 Magenta overlay appearing as brush strokes are painted over the image
Here’s where things feel different. Instead of drawing a path or clicking edges, you just paint. Wherever your brush touches becomes part of the selection. The visual feedback is an overlay – magenta by default, though you can change the color in the Options bar – that fills in as you paint. There are no marching ants while you’re working, which honestly feels a little strange at first if you’ve been using Photoshop for years. But you adjust fast.
Magenta overlay appearing as brush strokes are painted over the image
Here’s where things feel different. Instead of drawing a path or clicking edges, you just paint. Wherever your brush touches becomes part of the selection. The visual feedback is an overlay – magenta by default, though you can change the color in the Options bar – that fills in as you paint. There are no marching ants while you’re working, which honestly feels a little strange at first if you’ve been using Photoshop for years. But you adjust fast.
The overlay is purely a visual reference. The underlying selection is real, and if you apply any operation – a filter, an adjustment, anything – it will respect the painted boundaries exactly. Aaron demonstrates this by running a Gaussian Blur through the painted area, and you can see the marching ants appear at that point, just to confirm the selection is active and accurate.
Step 4: Subtract from Your Selection Using Alt or Option
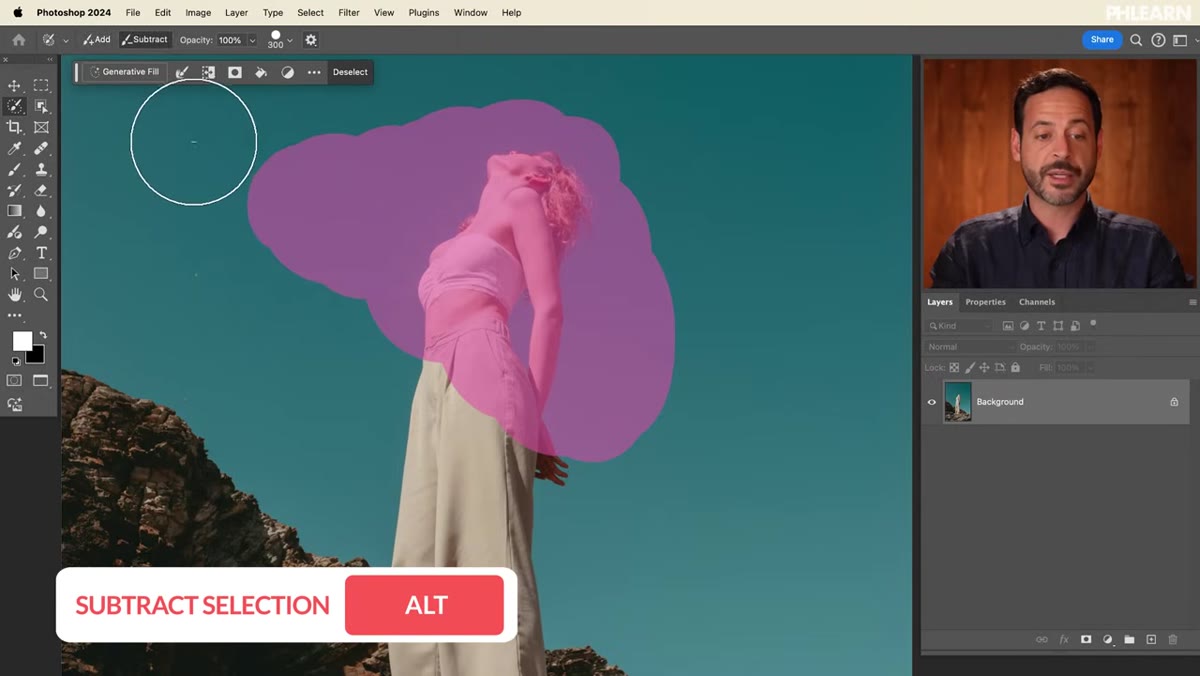 Alt/Option key held down, switching tool mode from Add to Subtract
Getting selective (sorry) about what’s included in your painted area is easy. You can click the Subtract button in the Options bar, but the faster move is to just hold Alt on Windows or Option on Mac. While that key is held, your brush switches from adding to subtracting. Release it and you’re back to adding. This is the kind of shortcut I actually care about – it keeps you in the flow instead of mousing up to the toolbar every time you need to clean up an edge.
Alt/Option key held down, switching tool mode from Add to Subtract
Getting selective (sorry) about what’s included in your painted area is easy. You can click the Subtract button in the Options bar, but the faster move is to just hold Alt on Windows or Option on Mac. While that key is held, your brush switches from adding to subtracting. Release it and you’re back to adding. This is the kind of shortcut I actually care about – it keeps you in the flow instead of mousing up to the toolbar every time you need to clean up an edge.
Step 5: Deselect When You’re Done
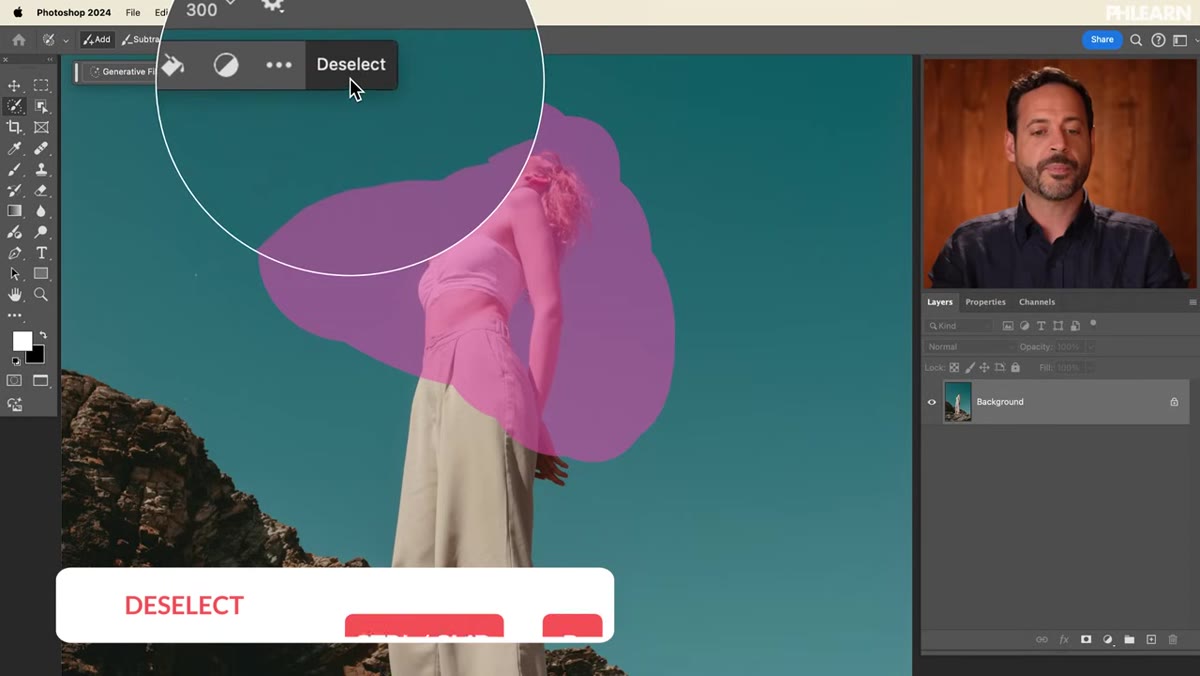 Ctrl/Cmd+D keyboard shortcut used to deselect after applying effect
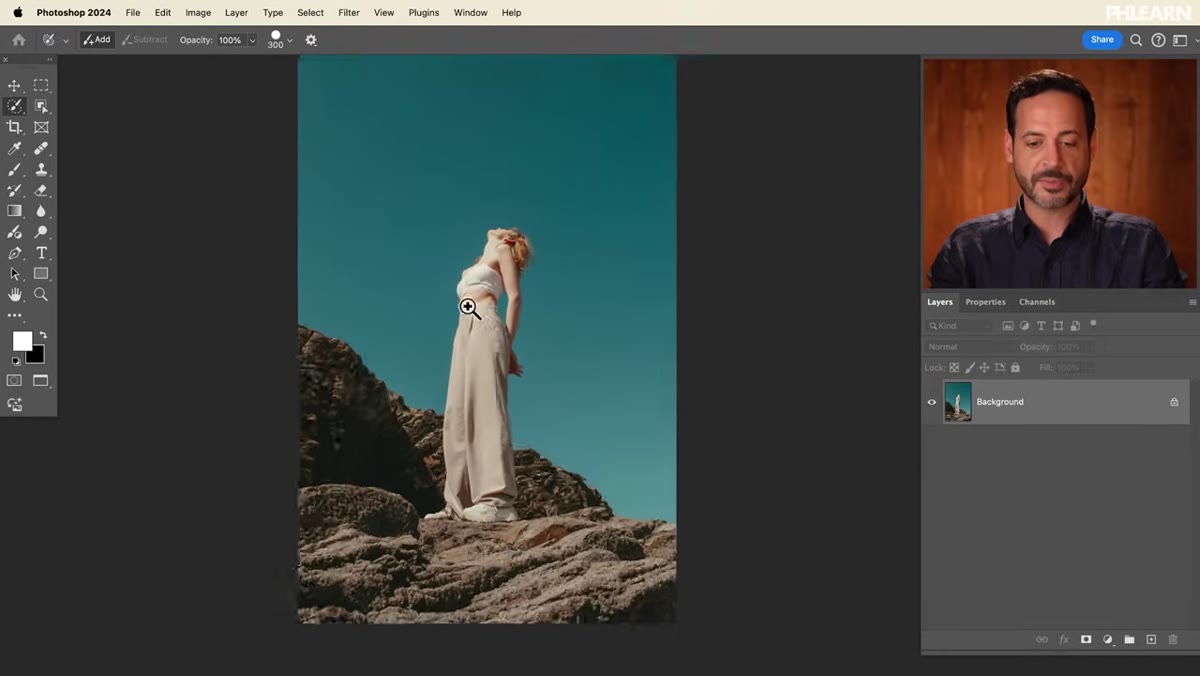
This is a tiny step but worth calling out explicitly. When you’re done with your selection, hit Ctrl+D on Windows or Command+D on Mac to deselect. Or you can click anywhere in the canvas with no active tool and choose Deselect. The selection doesn’t automatically clear just because you switched tools, so it’s easy to forget it’s still active. Trust me on this one – painting over an area with a selection you forgot about is a classic “why is this only affecting half the image” situation.
Ctrl/Cmd+D keyboard shortcut used to deselect after applying effect
This is a tiny step but worth calling out explicitly. When you’re done with your selection, hit Ctrl+D on Windows or Command+D on Mac to deselect. Or you can click anywhere in the canvas with no active tool and choose Deselect. The selection doesn’t automatically clear just because you switched tools, so it’s easy to forget it’s still active. Trust me on this one – painting over an area with a selection you forgot about is a classic “why is this only affecting half the image” situation.
Step 6: Pair It With Generative Fill for Fast Results
 Generative Fill dialog open with “rocks” typed into the prompt field
This is the step that made me actually excited. With your painted selection still active, click Generative Fill in the contextual taskbar at the bottom of the canvas. Type a prompt – Aaron uses “rocks” to extend the rocky terrain behind his subject – hit Generate, and Photoshop does its thing. What comes back is a generated layer with a mask already built from your painted selection. That means the generated content only appears where you painted, it’s non-destructive, and you can toggle it on and off. The workflow mirrors how Lightroom handles its own generative tools, and honestly it’s the cleaner approach.
Generative Fill dialog open with “rocks” typed into the prompt field
This is the step that made me actually excited. With your painted selection still active, click Generative Fill in the contextual taskbar at the bottom of the canvas. Type a prompt – Aaron uses “rocks” to extend the rocky terrain behind his subject – hit Generate, and Photoshop does its thing. What comes back is a generated layer with a mask already built from your painted selection. That means the generated content only appears where you painted, it’s non-destructive, and you can toggle it on and off. The workflow mirrors how Lightroom handles its own generative tools, and honestly it’s the cleaner approach.
The key insight here is that painting the selection first, rather than drawing it, gives you much more control over organic shapes – rocks, sky, foliage, ground texture. A lasso selection would take more effort and look worse. A painted selection takes about 10 seconds.
My Take: Where This Tool Actually Earns Its Place
I’ll be honest – my first instinct was that this was a feature for people who don’t like learning proper selection techniques. I was wrong. The Selection Brush isn’t a shortcut for beginners. It’s a faster input method for use cases where precision edge-detection doesn’t matter and broad area selection does. Generative Fill is the obvious one. But I can also see using this for painting rough masks before refining them in Select and Mask, or for quickly isolating zones when doing local color grading on a flat image.
Where I’d still reach for something else: any selection that needs to follow a defined edge – hair, product outlines, clothing against a complex background. For those, Subject Selection and the Pen Tool aren’t going anywhere. But for painting in a region of sky to replace, or roughing out a ground area for a texture swap, the Selection Brush is genuinely faster than anything I was using before.
The single biggest takeaway here is that the Selection Brush + Generative Fill combination is worth adding to your workflow right now, not someday. It’s intuitive, it’s quick, and the results Aaron shows in this tutorial are good enough to use in real work. Go see it in action: Watch the full tutorial on YouTube
Comments (2)
Simple but effective. Sometimes that's all you need.
Been doing this wrong for years apparently. Thanks for the wake-up call.
Leave a Comment