
I have a complicated relationship with text in Photoshop. Not the creative side — that part’s fine. It’s the mechanical part. You know the drill: you drop in a headline, it’s too big, you resize the box, now it’s cut off, so you nudge the font size down, and then the whole thing looks wrong and you spend twenty minutes fiddling with what should have taken two. I’ve billed clients for that time. I’m not proud of it, but I have.
So when I watched this Aaron Nace tutorial from PHLEARN covering the new Dynamic Text feature in Photoshop Beta, I felt what I can only describe as mild betrayal. Not at Aaron — at the years I spent doing this the hard way. This feature is exactly the kind of thing that makes you realize Photoshop has been quietly holding out on us. Watch the full tutorial on YouTube and then come back, or follow along here first. Either works.
The short version: Dynamic Text automatically scales and sizes your words to fill whatever text container you give it. Resize the box, the text reconfigures. No overflow, no cutting off, no manual font-size adjustments. It sounds simple because it is, and that’s the whole point.
Step 1: Open Photoshop Beta and Grab the Type Tool
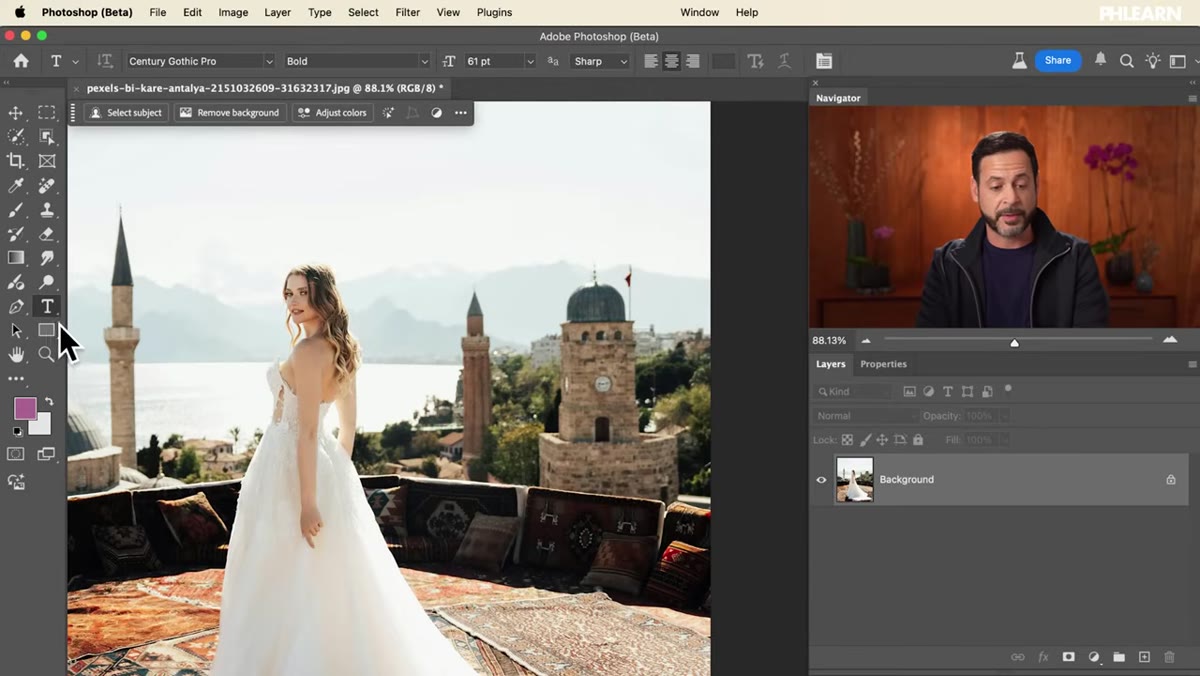 Type tool selected in Photoshop Beta toolbar
First thing, make sure you’re actually in Photoshop Beta, not the standard release. This feature isn’t in stable yet, so if you don’t see it, that’s why. Download the Beta through Creative Cloud if you haven’t already.
Once you’re in, hit T to grab the Type tool, same as you always would. Nothing exotic here. This is the normal starting point.
Step 2: Click and Drag to Create a Text Box
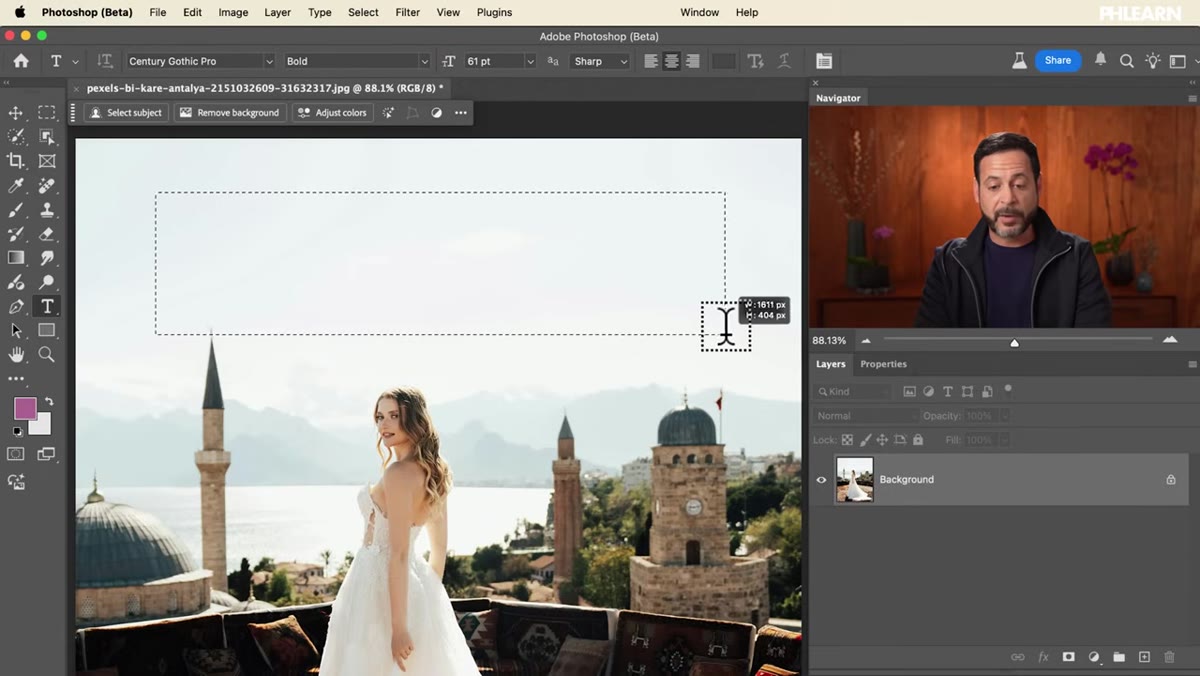 Click-and-drag creating a text box on the canvas
Instead of just clicking once to place a point-text layer, click and drag to draw a text box. This creates a bounded text container, which is the foundation Dynamic Text builds on. Photoshop will drop in placeholder text by default when you do this.
You can clear that out and paste in your own copy. Aaron mentions he used ChatGPT to generate some text for his example image, which is honestly a pretty practical move when you’re testing layouts and don’t want to type paragraphs of Lorem Ipsum by hand.
Step 3: Commit the Text and See How Traditional Text Behaves
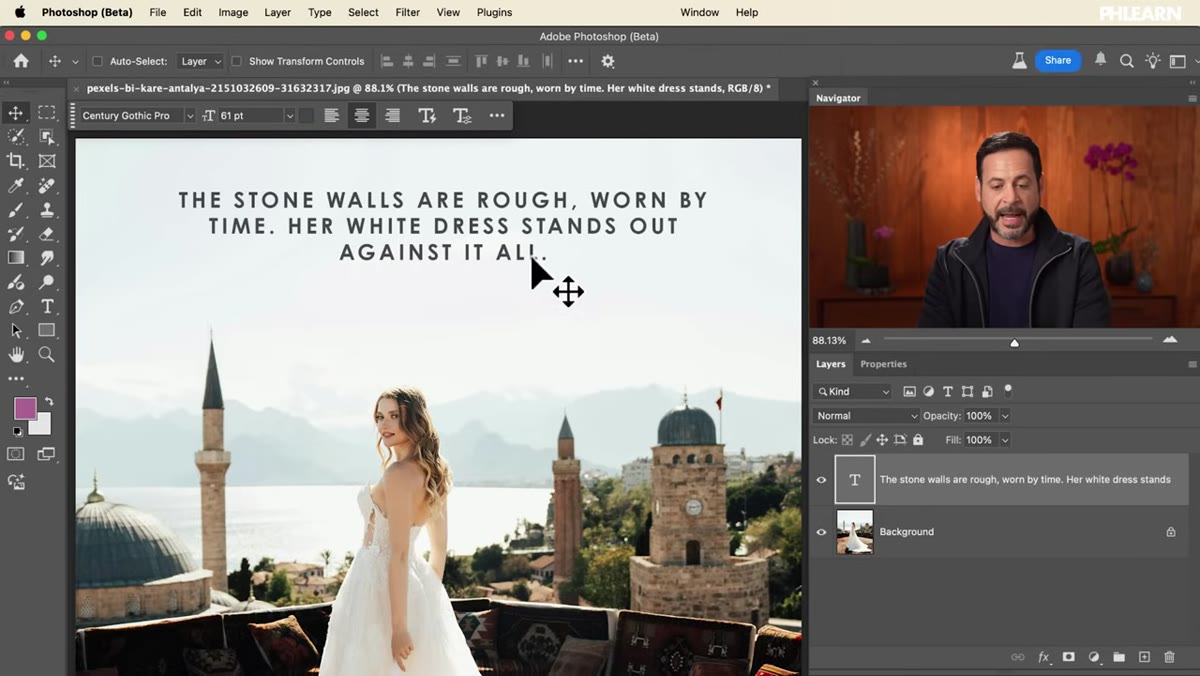 Traditional text box showing text being cut off when resized
Once you’ve got your text in the box, hit the checkmark in the options bar to commit. This is still totally standard Photoshop behavior at this stage. If you grab a corner handle and resize the box smaller, text gets cut off. Make it bigger, more text shows up. The font size stays fixed, the formatting stays fixed, and the box basically just acts like a window you’re moving over a static block of text.
This is the limitation Dynamic Text solves. It’s worth seeing it behave the old way first so the new behavior actually registers as impressive.
Step 4: Convert to Dynamic Text
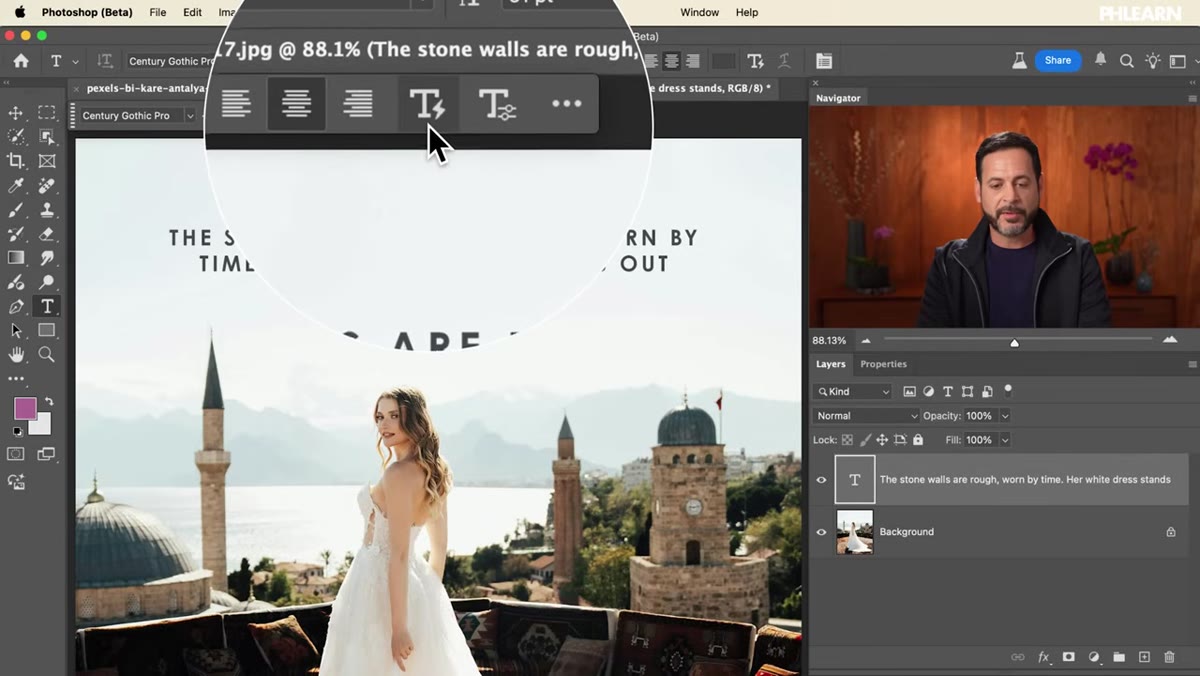 “Convert to Dynamic Text” button in the contextual taskbar
Here’s where things get interesting. With your text layer selected, look at the contextual taskbar at the bottom of the screen. You’ll see an option that says “Convert to Dynamic Text.” You can also find it by right-clicking the layer. Click it.
The moment you do, the text in your box will rearrange itself. Each word or line scales to fill the available space proportionally. It’s a little startling the first time you see it, in a good way.
Step 5: Resize the Box and Watch the Text Adapt
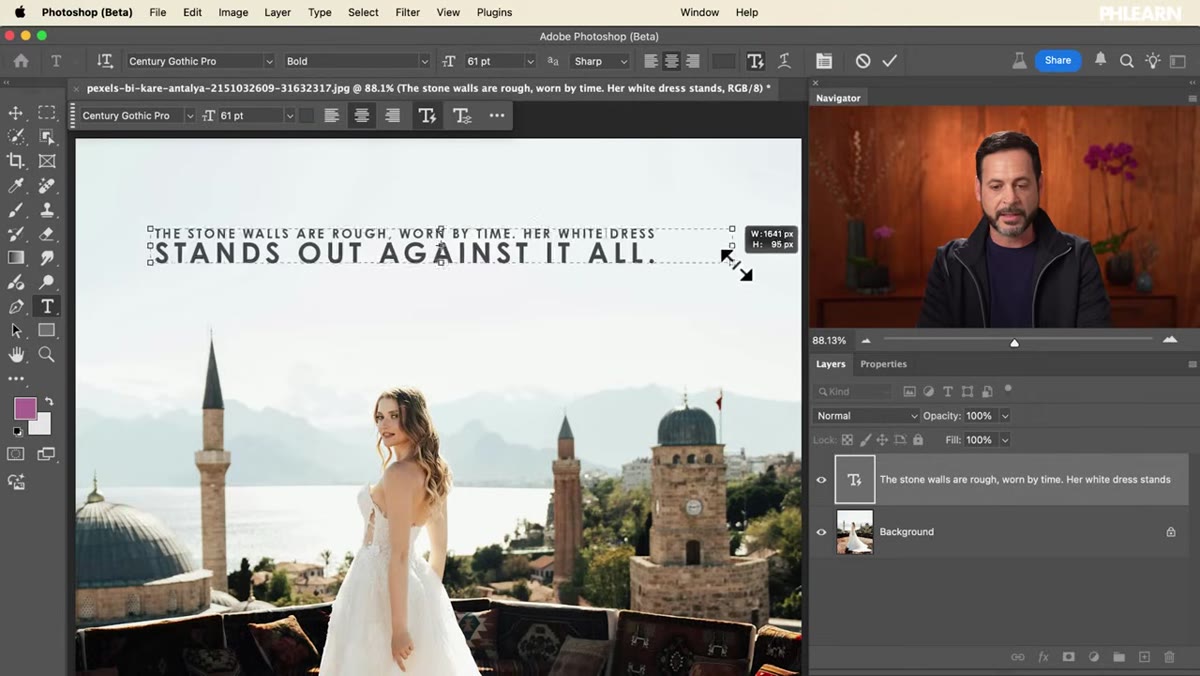 Resizing dynamic text box, words scaling to fit automatically
Now click inside the dynamic text box to activate it, and grab any of the corner or edge handles. Drag to resize. The text reflows and rescales automatically to fit the new dimensions, every time, without cutting anything off.
Aaron demonstrates making the box narrow and tall, and the text adjusts so the lines redistribute to match. Then he goes wide, and again, the text fills the space. No overflow warnings, no invisible characters hiding below the frame. The whole block of text stays visible and readable throughout. This is genuinely useful for anyone doing poster work, social media templates, or really any layout where the text-to-image ratio shifts a lot between versions.
Step 6: Commit and Reposition with the Move Tool
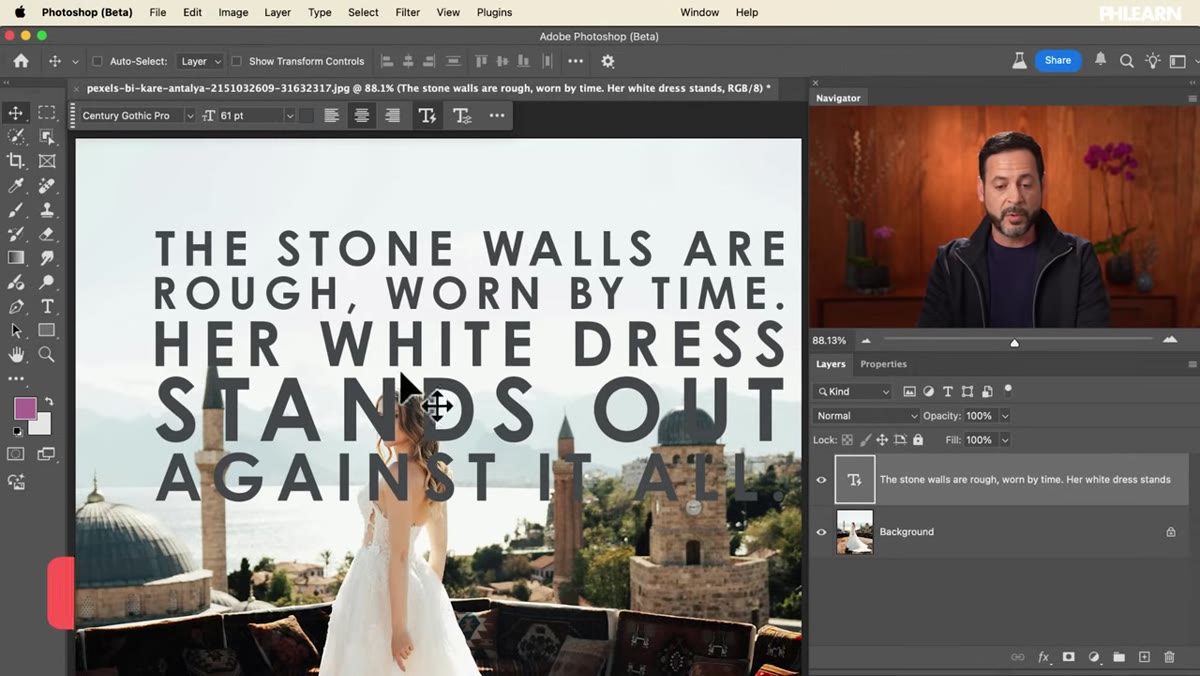 Move tool repositioning committed dynamic text on the canvas
Once you’re happy with the shape of the text box, hit the checkmark to commit, then switch to the Move tool (V) to reposition the whole text block on your canvas. The dynamic behavior is preserved after you commit. You can go back in with the Type tool, resize the box again, and it’ll keep doing its thing.
This matters because it means Dynamic Text isn’t a one-time bake. It stays live and editable, which puts it in a completely different category from just rasterizing text and scaling it.
Step 7: Layer It Into a Composite Using Select Subject
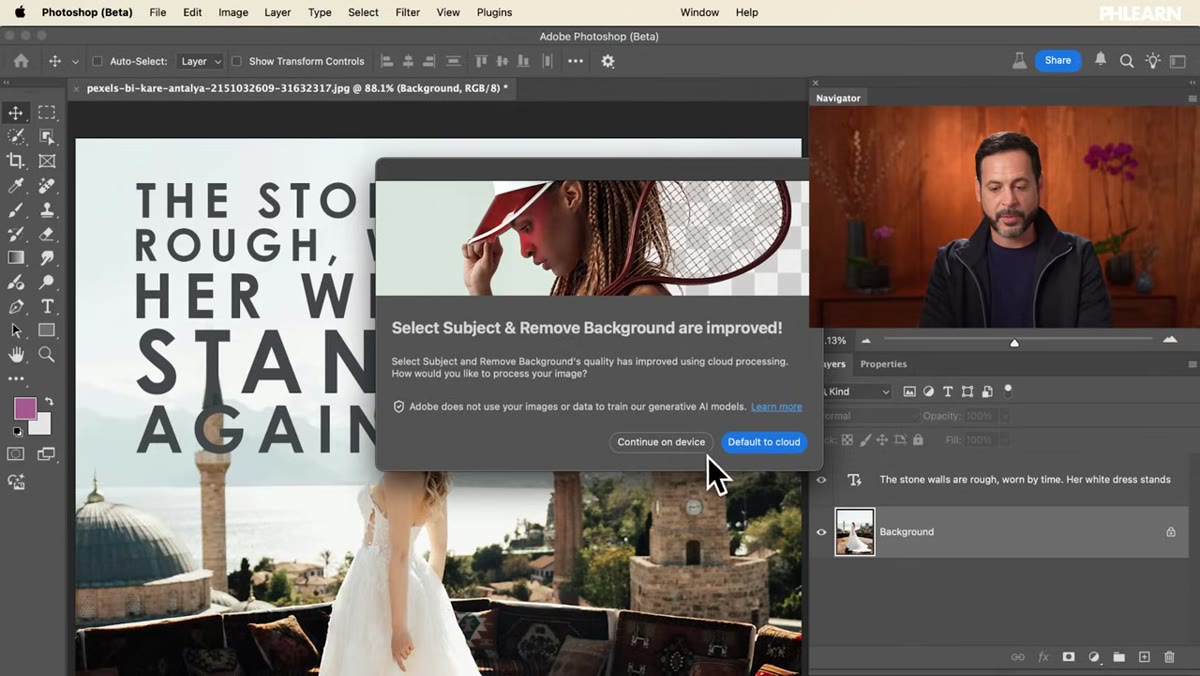 Select Subject being used on the background layer
Aaron takes the extra step of using Select Subject on the background image to pull out a subject, then applies a layer mask. The goal is to place the dynamic text behind the subject visually while keeping it readable, a classic composite text effect.
To do this yourself: select your background layer, go to Select > Subject, let it run (he uses the cloud-based option for accuracy), then click on the layer you want to mask and Alt-click (Option-click on Mac) on the Add Layer Mask button. That inverts the mask so the subject sits on top of the text layer. Position your dynamic text block underneath in the layer stack and you’ve got a clean, professional-looking integration of type and image.
What I’d Do Differently in a Real Project
The one thing Aaron doesn’t get into, understandably given the tutorial’s scope, is how Dynamic Text interacts with specific font choices. In my experience messing around with it after watching this, the feature works noticeably better with fonts that have strong weight contrast between styles. If you’re using a very uniform typeface, the scaling can feel a bit flat because every word is just getting bigger or smaller without much visual variety. Pairing Dynamic Text with a variable font or a family that has distinct weights gives you output that actually looks designed rather than just auto-fit.
Also, for client work: always keep a duplicate of the original text layer before converting. Reverting from Dynamic Text isn’t painful, but having a clean backup saves you the conversation where you explain to a client why the font sizes changed.
The bottom line here is that Dynamic Text removes a genuinely annoying category of manual work from the typography side of Photoshop. It’s not going to replace a typographer’s eye, but it replaces about forty percent of the tedious mechanical adjustments that eat up time on layout-heavy projects. For that alone, it’s worth downloading the Beta.
Watch the full tutorial on YouTube to see Aaron walk through the whole thing live, including the composite layering at the end, which is worth seeing in motion.
Comments
Leave a Comment