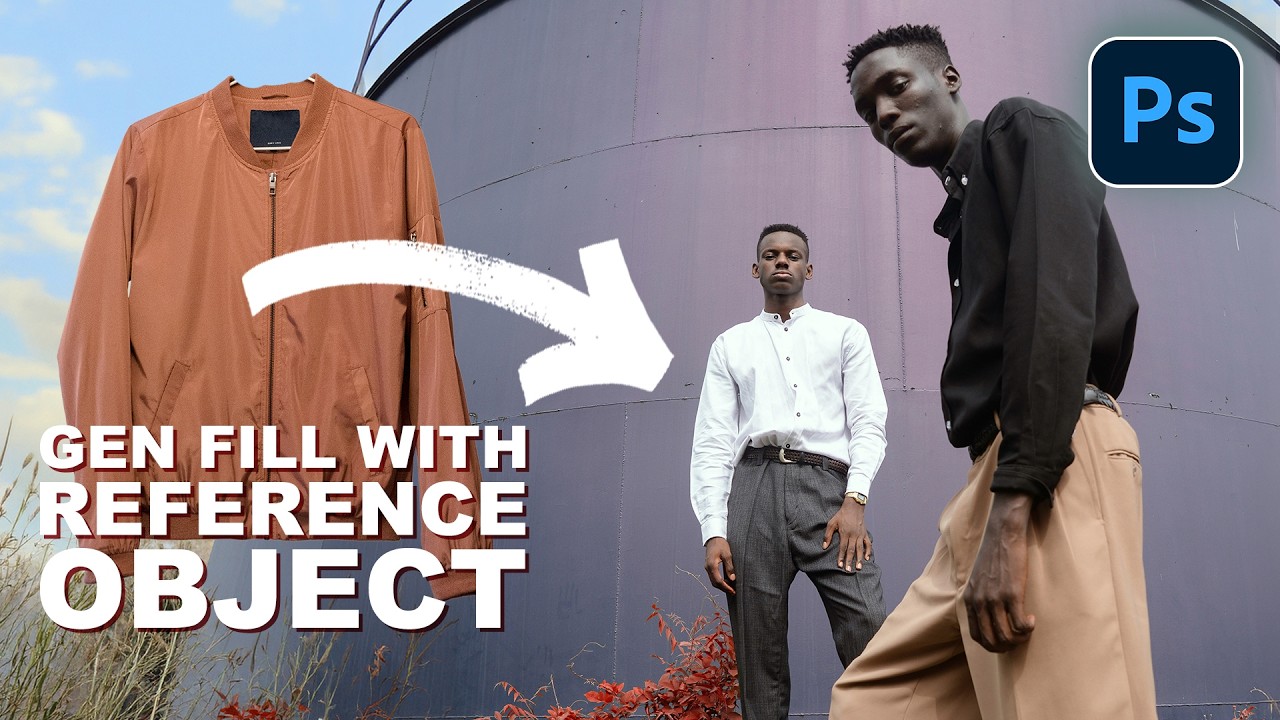
I do a decent amount of editorial and product-adjacent work, and one of the most tedious parts of that job has always been wardrobe. A client wants to see how a jacket looks on a model, or they need three versions of the same shot with different shirt colors, and suddenly what should be a quick edit turns into a multi-layer compositing nightmare. You’re cutting, masking, warping fabric, and praying the lighting doesn’t blow the whole illusion. It’s the kind of thing that makes you question your life choices around 1am in a coffee shop that’s definitely about to close.
So when I came across Watch the full tutorial on YouTube from Aaron Nace over at PHLEARN, I stopped what I was doing. The feature he’s walking through, Generative Fill with a Reference Image, just landed in the full release of Photoshop 2026 after some time in beta. The pitch is simple: you select an area of your photo, hand Photoshop a reference image of the object you want to place, and the AI figures out the rest. No warping. No frequency separation. No crying. I’ve been putting it through its paces, and here’s exactly how it works.
Step 1: Open Your Image and Zoom Into Your Subject
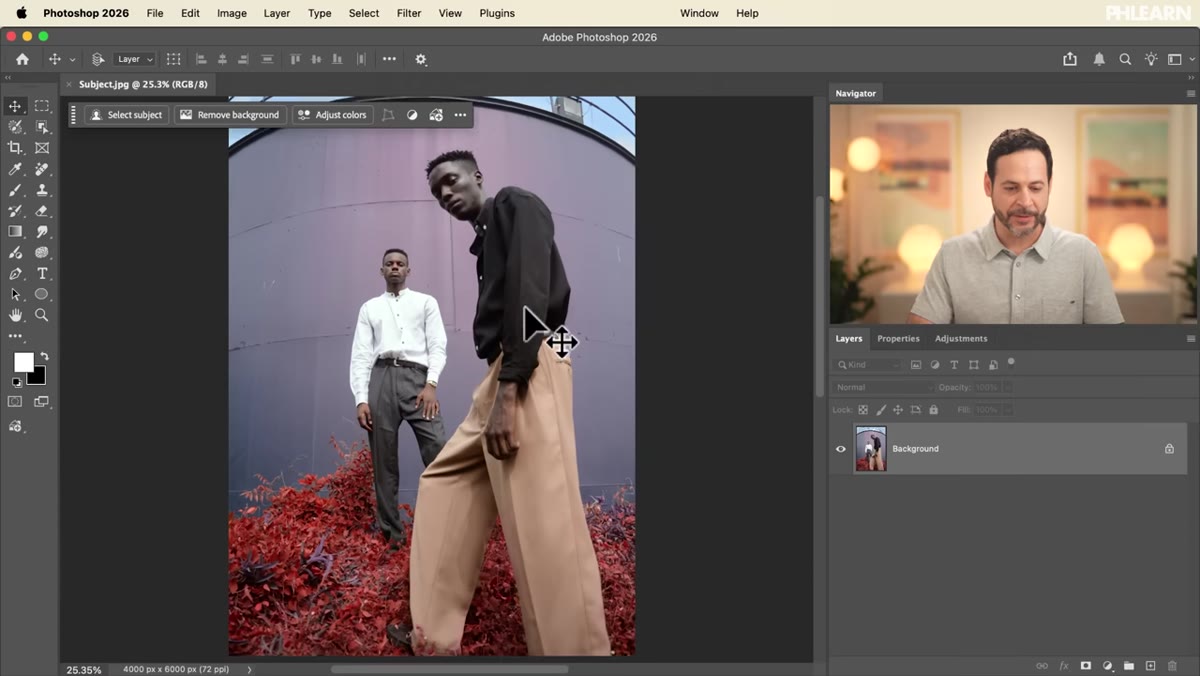 Photoshop canvas showing colorful portrait image zoomed in
Start with whatever photo you’re working on. In the tutorial, Aaron’s working with a vibrant portrait, and the subject is wearing a plain white shirt. That’s the thing he wants to replace. Zoom in close enough to see the garment clearly before you start making any selections. Working zoomed out is how you end up with sloppy edges that haunt you later.
Photoshop canvas showing colorful portrait image zoomed in
Start with whatever photo you’re working on. In the tutorial, Aaron’s working with a vibrant portrait, and the subject is wearing a plain white shirt. That’s the thing he wants to replace. Zoom in close enough to see the garment clearly before you start making any selections. Working zoomed out is how you end up with sloppy edges that haunt you later.
Step 2: Grab the Object Selection Tool and Use “Select People”
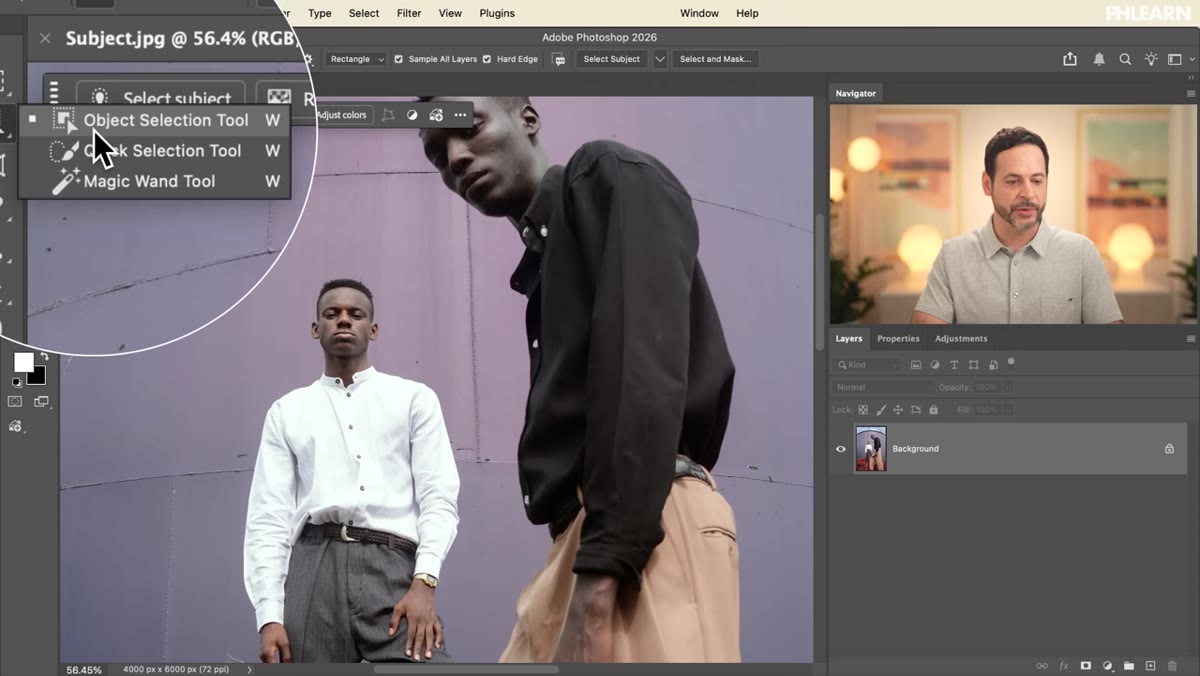 Object Selection tool active in Photoshop toolbar
Hit W to pull up the Object Selection Tool. Once it’s active, look up at the options bar and you’ll see a “Select People” button. Click it. Photoshop will scan the image and identify every person in the frame, and you can hover over each one to highlight them individually. It’s one of those features that sounds gimmicky until you actually use it and realize how absurdly good it is.
Object Selection tool active in Photoshop toolbar
Hit W to pull up the Object Selection Tool. Once it’s active, look up at the options bar and you’ll see a “Select People” button. Click it. Photoshop will scan the image and identify every person in the frame, and you can hover over each one to highlight them individually. It’s one of those features that sounds gimmicky until you actually use it and realize how absurdly good it is.
From there, you can drill down further. Instead of selecting the whole person, hover specifically over the shirt or jacket area and click. Photoshop will isolate just that garment. Aaron gets a near-perfect selection of the shirt this way without touching the lasso or pen tool at all. If your selection needs cleanup, quick mask mode is always there, but for clean studio shots this will often get you 95% of the way there on the first try.
Step 3: Open Generative Fill from the Contextual Taskbar
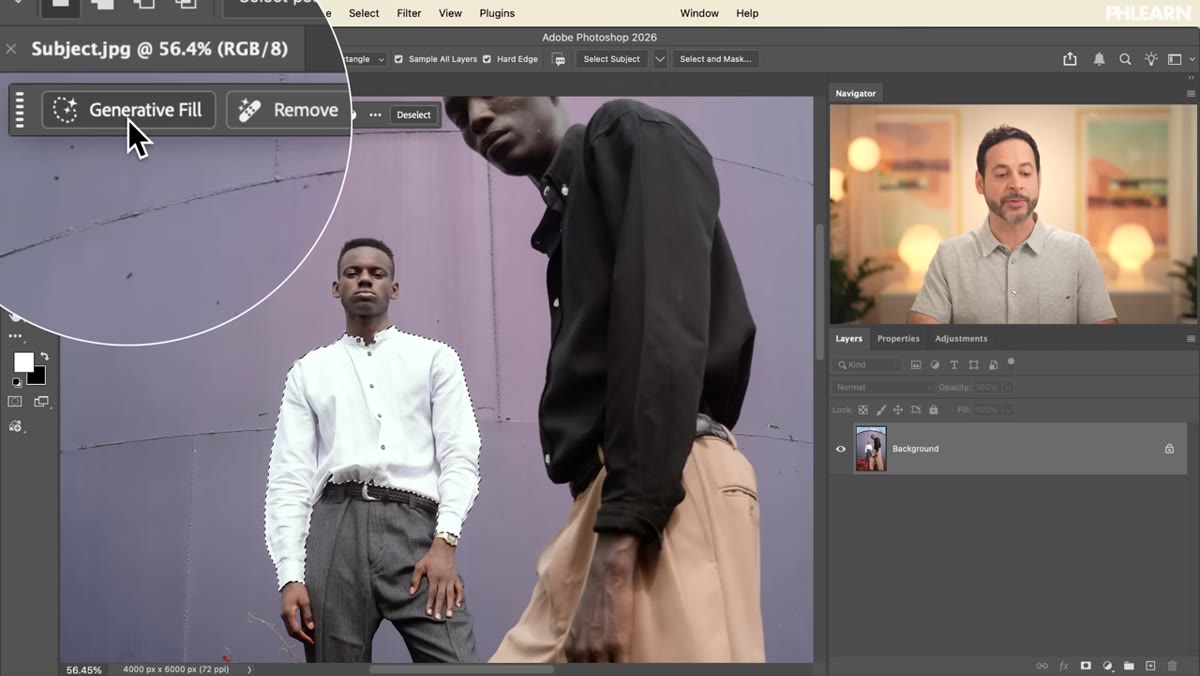 Contextual taskbar showing Generative Fill button highlighted
With your selection active, look for the contextual taskbar, that floating strip of options that appears near your selection. Click “Generative Fill.” You’ll see the familiar prompt box, but there’s something new sitting alongside it: a Reference Image button. That’s the star of this whole show. Click it.
Contextual taskbar showing Generative Fill button highlighted
With your selection active, look for the contextual taskbar, that floating strip of options that appears near your selection. Click “Generative Fill.” You’ll see the familiar prompt box, but there’s something new sitting alongside it: a Reference Image button. That’s the star of this whole show. Click it.
Step 4: Import Your Reference Image
 Reference image panel open with drag-and-drop area visible
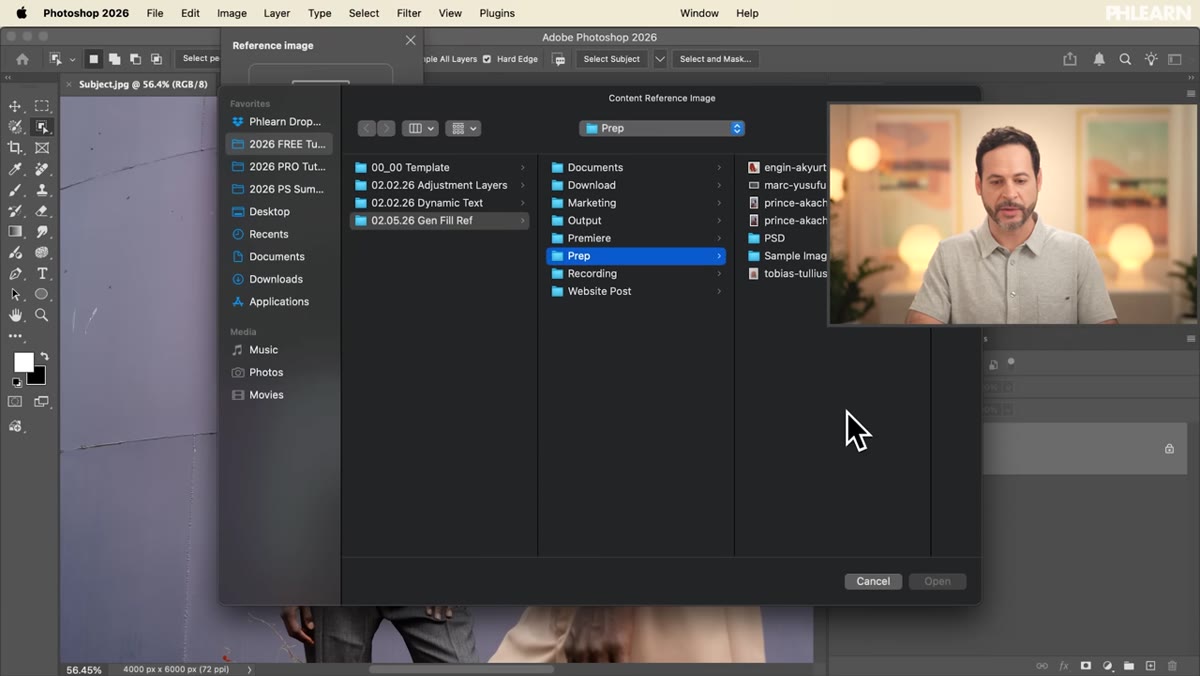
This is where things get genuinely exciting. Click to open the reference image dialog and then drag your reference photo directly into the panel. In the tutorial, Aaron drops in a stock photo of someone holding a brown jacket on a hanger. The image doesn’t need to be perfectly staged or shot on a white background. Photoshop is smart enough to identify the relevant object even when there’s visual noise around it, hands, hangers, backgrounds and all.
Reference image panel open with drag-and-drop area visible
This is where things get genuinely exciting. Click to open the reference image dialog and then drag your reference photo directly into the panel. In the tutorial, Aaron drops in a stock photo of someone holding a brown jacket on a hanger. The image doesn’t need to be perfectly staged or shot on a white background. Photoshop is smart enough to identify the relevant object even when there’s visual noise around it, hands, hangers, backgrounds and all.
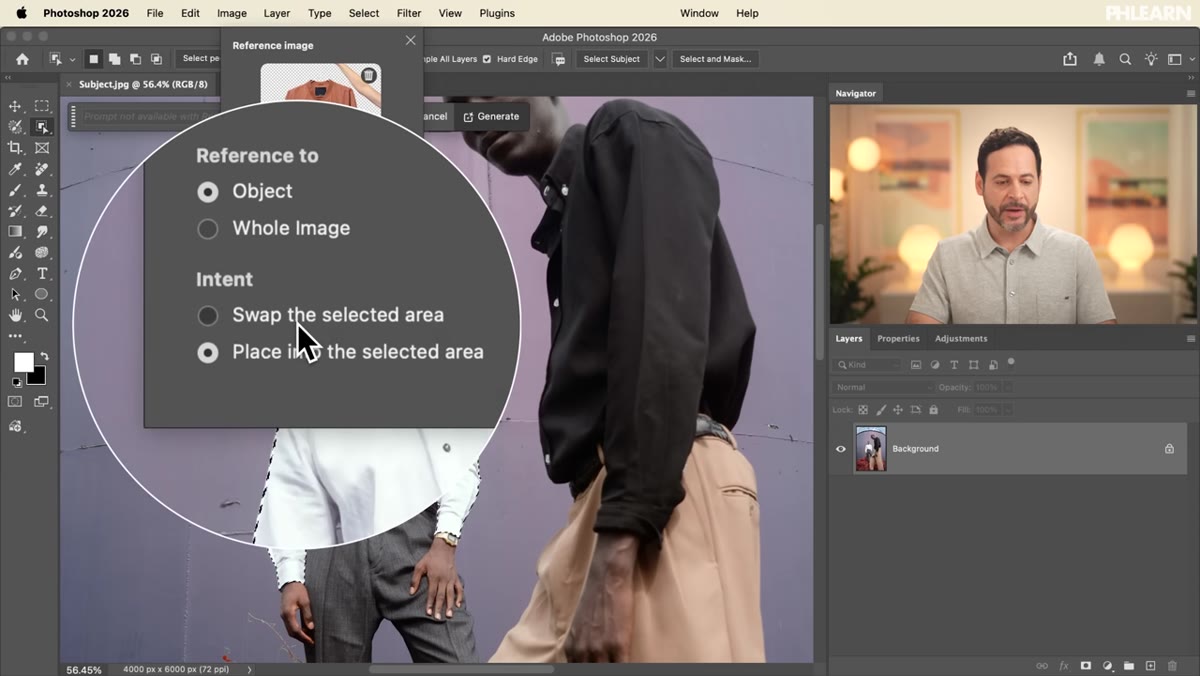
Once the image loads, you’ll see the panel gives you two options for how to reference it: “Object” or “Whole Image.” Choose Object. This tells Photoshop to isolate and analyze the specific item rather than treating the whole photo as stylistic reference. You’ll usually see a preview highlighting what the AI thinks the object is. If it’s correctly landed on the jacket or shirt, you’re good to go.
Step 5: Choose “Swap the Selected Area” as Your Intent
 Intent dropdown showing “Swap the Selected Area” option selected
Below the reference image panel, you’ll find an Intent dropdown with a couple of options. “Swap the Selected Area” and “Place into the Selected Area” both exist, and they behave differently. Swap is designed for situations where you’re replacing one thing with a similar thing, shirt for jacket, sneaker for boot. It tends to produce more realistic results because it’s thinking about replacement rather than insertion. Aaron recommends Swap for this kind of wardrobe work, and from what I’ve tested, that tracks. Use Swap here.
Intent dropdown showing “Swap the Selected Area” option selected
Below the reference image panel, you’ll find an Intent dropdown with a couple of options. “Swap the Selected Area” and “Place into the Selected Area” both exist, and they behave differently. Swap is designed for situations where you’re replacing one thing with a similar thing, shirt for jacket, sneaker for boot. It tends to produce more realistic results because it’s thinking about replacement rather than insertion. Aaron recommends Swap for this kind of wardrobe work, and from what I’ve tested, that tracks. Use Swap here.
Step 6: Generate and Review Your Results
 Generative Fill processing with no text prompt shown
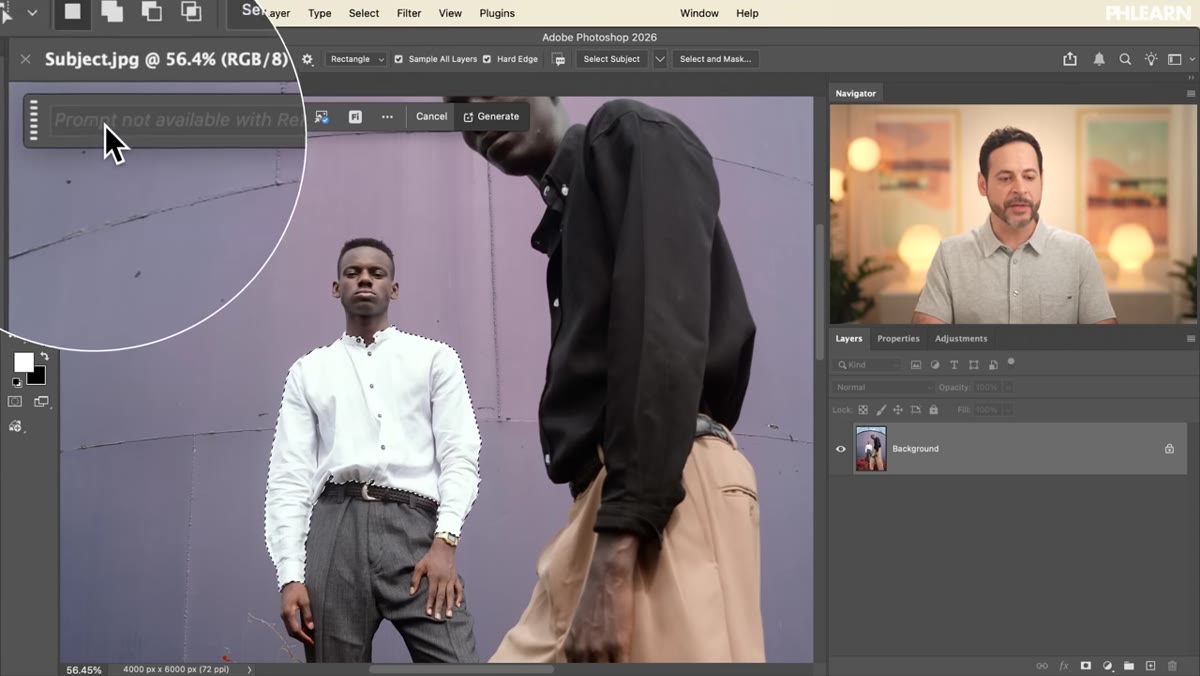
One thing worth flagging: when you’re using a reference image, the text prompt field is disabled. You don’t type anything. The reference image is the prompt. Click generate and let Photoshop do its thing. It’ll produce a few variations you can cycle through, which live in the Properties panel under the generated layer. Flip through them and pick the one that best matches your lighting and fits the scene. You’re looking for clean fabric folds, consistent shadows, and edges that don’t look like they were cut out with kindergarten scissors.
Generative Fill processing with no text prompt shown
One thing worth flagging: when you’re using a reference image, the text prompt field is disabled. You don’t type anything. The reference image is the prompt. Click generate and let Photoshop do its thing. It’ll produce a few variations you can cycle through, which live in the Properties panel under the generated layer. Flip through them and pick the one that best matches your lighting and fits the scene. You’re looking for clean fabric folds, consistent shadows, and edges that don’t look like they were cut out with kindergarten scissors.
What I’d Add from My Own Workflow
The reference image quality matters more than you might expect. I ran a quick test using a low-res, slightly blurry product photo as my reference, and the results were noticeably mushier than when I used a clean, well-lit image. If you’re doing this professionally, spend two minutes finding a decent stock photo of the item rather than pulling a thumbnail. Also, if the AI keeps grabbing the wrong object from a busy reference photo, try cropping the reference image down to just the item before importing it. Photoshop is smart, but you can still steer it.
The “Place into the Selected Area” option that Aaron briefly mentions is also worth experimenting with if you want to add something to a scene rather than replace something, dropping a bag onto a table or adding a hat to a flat lay, for example. Different tool for a different job, but it runs on the same engine.
The single most important thing to take away here is this: the quality of your selection in Step 2 determines everything downstream. A messy selection produces a messy generation, no matter how good the reference image is. Take an extra thirty seconds with the Object Selection Tool and use “Select People” before reaching for anything more manual. The AI handles the heavy lifting, but it still needs clean inputs.
For the full walkthrough, including additional examples Aaron runs through in the second half of the video, go watch it directly: Watch the full tutorial on YouTube. Well worth the time.
Comments (4)
Bookmarked. Coming back to this one for sure.
My workflow just got 10x faster. Not even kidding.
Simple but effective. Sometimes that's all you need.
Excellent tutorial. I'd add that from a gear standpoint, this technique is incredibly versatile.
Leave a Comment