I’ll be honest: selections have been the part of my workflow I’ve complained about longest and improved at slowest. Early in my freelance career I was spending 20-plus minutes hand-painting masks for sky replacements that any sane person would have finished in three. I kept thinking there had to be a better way, and for years “better” just meant slightly less tedious. Then Photoshop’s AI selection tools started actually getting good, and now with the 2025 update they’ve crossed a line I didn’t expect to cross this soon.
Watch the full tutorial on YouTube
In this Aaron Nace (PHLEARN) tutorial, Aaron walks through the updated AI-powered selection and masking tools in both Lightroom Classic and Photoshop 2025, with a specific focus on the new landscape detection feature. The core idea is simple but genuinely impressive: the AI doesn’t just find your subject anymore. It reads the entire scene and identifies distinct landscape elements, sky, mountains, architecture, vegetation, water, and ground, then lets you create separate, named masks for each one in a single click. If you shoot landscapes, cityscapes, or any environment-heavy photography, this changes how fast you can get to the actual editing.
What makes this worth your time is that Aaron doesn’t just demo the shiny new button. He shows you what to do with the masks once they exist, walking through real exposure, contrast, saturation, and color adjustments on each region. That’s the part that actually teaches you something. Here’s the full breakdown.
Step 1: Open the Masking Panel in Lightroom Classic
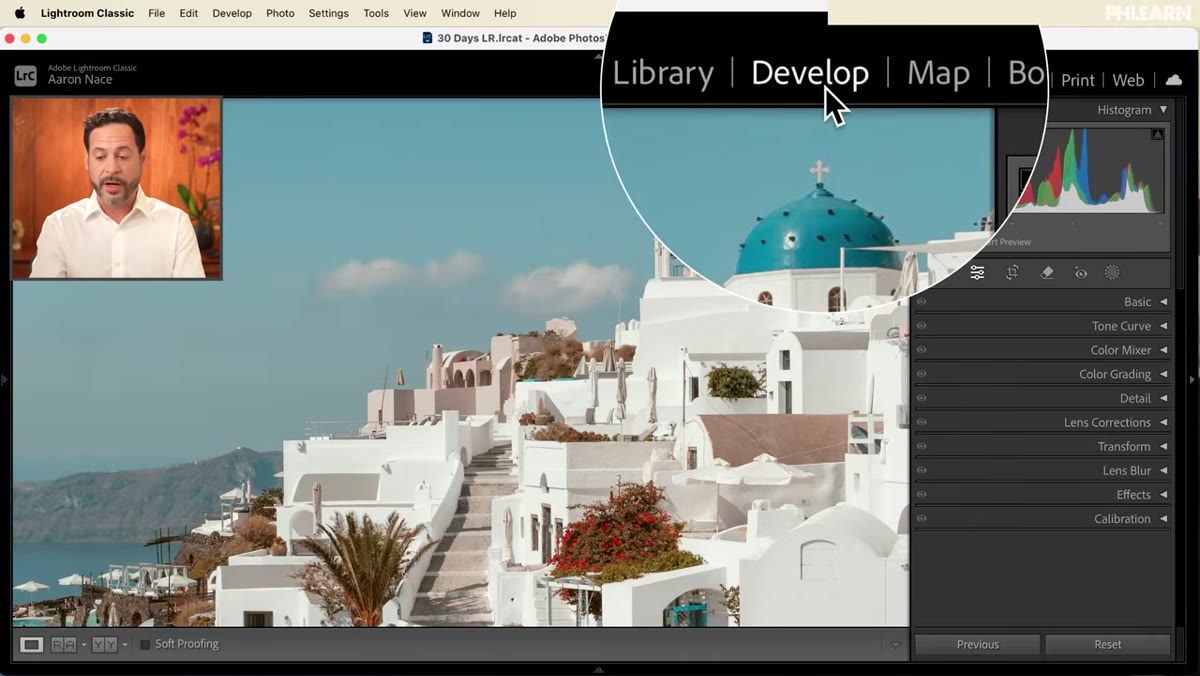 Lightroom Classic develop module with masking panel open
Start in Lightroom Classic and navigate to the Develop module. Your new tools live inside the Masking panel, which you can open from the toolbar on the right side. Once you’re in there, look for the new “Landscape” option. This is the feature that does the heavy lifting. Click it and Lightroom’s AI will scan your image and identify every distinct landscape region it can find.
The list it produces will be different for every photo, which is the right call. A coastal sunset image might return sky, water, and natural ground. A mountain village might return sky, mountains, architecture, and vegetation. The AI reads the actual content, not a fixed template. Give it five to ten seconds to analyze the image before the list populates.
Step 2: Select Your Regions and Create Separate Masks
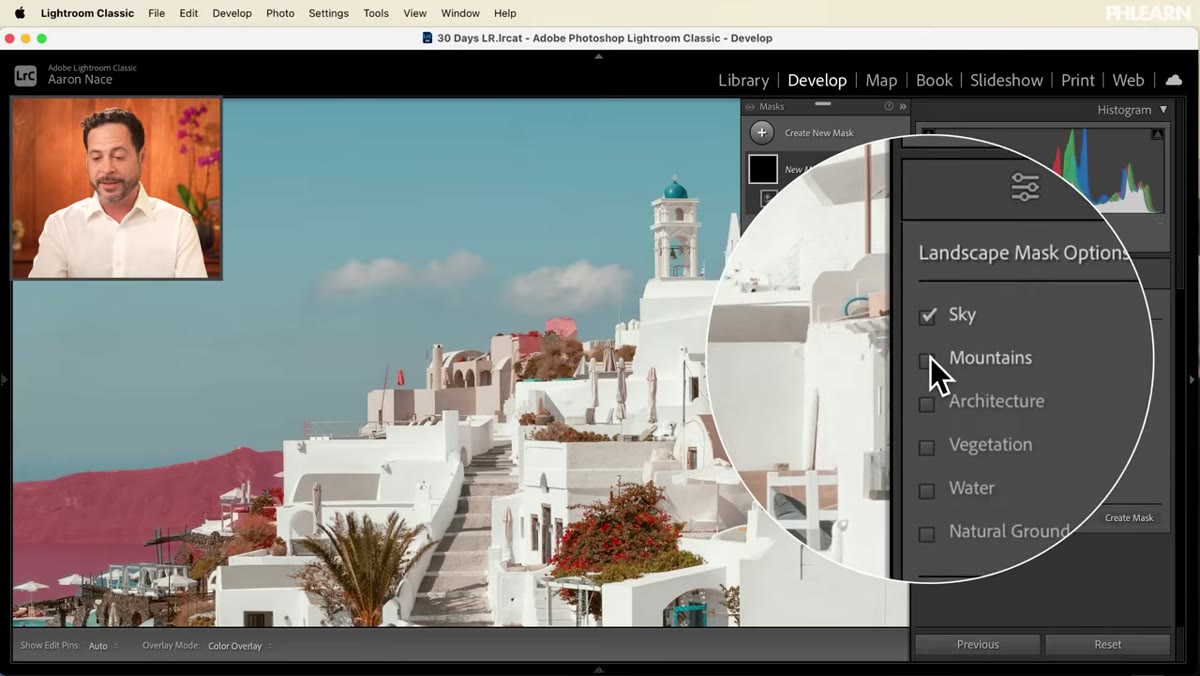 Masking panel showing multiple landscape categories checked
Once the landscape categories appear, check every region you want to work with. Aaron recommends selecting all of them if you’re doing a full edit, because creating them all at once costs you nothing and saves you from having to come back later. The key detail here: before you hit the button, make sure you check the option to create each region as its own separate mask rather than combining them into one.
Then click “Create Mask.” Lightroom builds all your individual masks simultaneously and names each one automatically. Sky. Mountains. Architecture. Vegetation. Water. Labeled and ready. This used to require multiple manual selections, luminosity masks, or third-party plugins to get even close to this result. Now it’s one dialogue box.
Step 3: Edit the Sky Mask
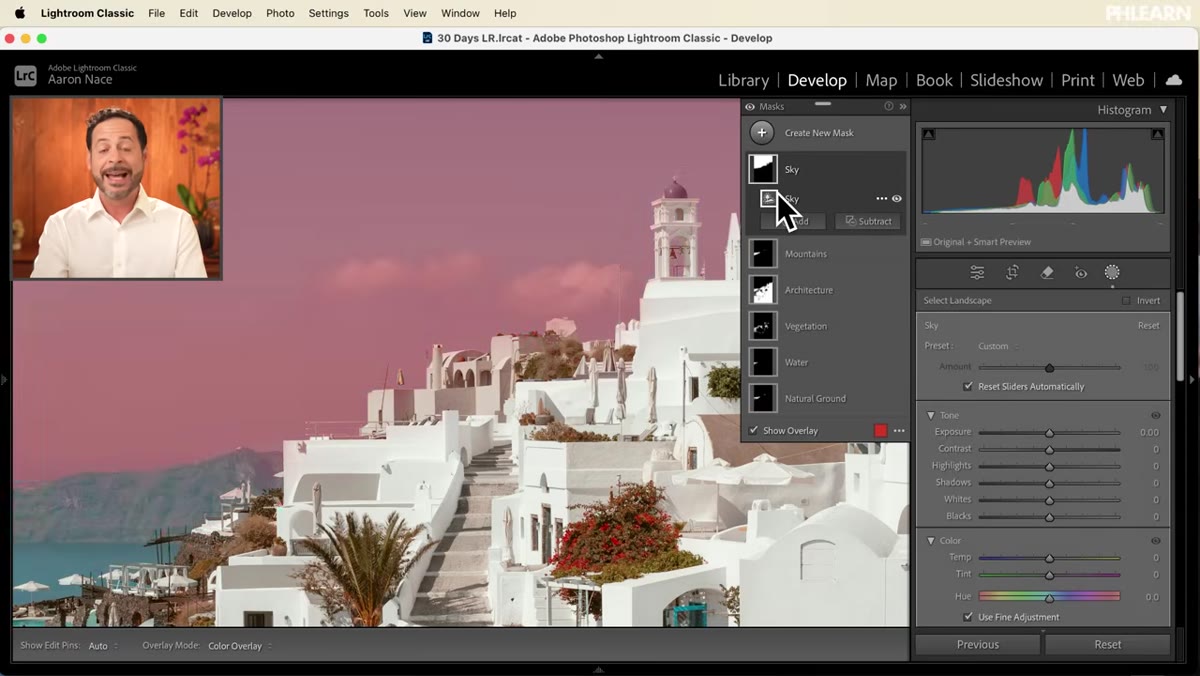 Sky mask selected with exposure and saturation sliders adjusted
Click on the Sky mask to make it active. From here, any slider adjustment you make in the Develop panel applies only to that masked region. Aaron bumps exposure up slightly to lift the sky without blowing highlights, then increases saturation to bring more color into it. He also nudges the color temperature slider cooler to push the sky toward blue.
The workflow is the same as any other Lightroom mask: activate the mask, adjust sliders, see the result live. What’s different is you didn’t spend any time creating the mask. Use the eye icon next to the mask to toggle visibility on and off, which gives you a clean before-and-after comparison for just that region. It’s a fast sanity check before you move on.
Step 4: Edit the Mountains and Architecture
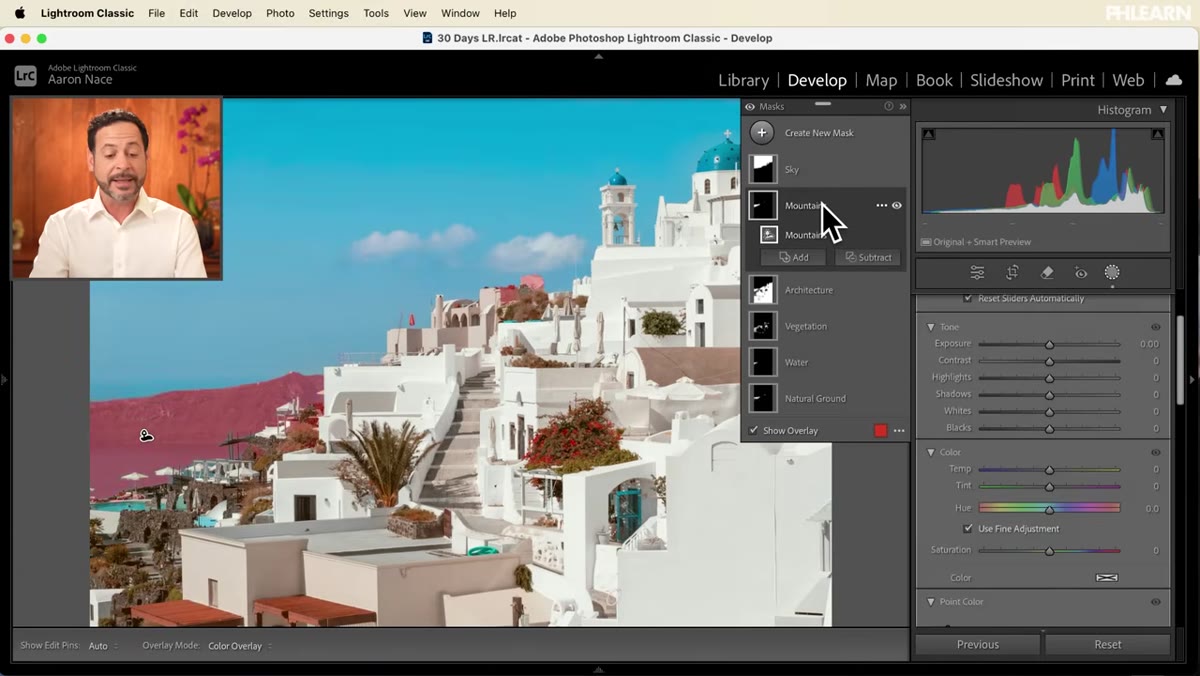 Mountains mask active with color and contrast sliders being adjusted
Click over to the Mountains mask. Aaron pulls in some green and yellow using the color temperature and tint sliders, then increases contrast to give the mountain range more definition and visual weight. The goal here is separation, making the mountains read clearly against the sky and the architecture below.
For the Architecture mask, the approach flips. Rather than warming or cooling, Aaron focuses on contrast again, pushing it higher to make the buildings pop as the focal point of the image. Small tweak, significant visual impact. If your architecture looks flat or washed out in a landscape shot, contrast is almost always the first move.
Step 5: Use Point Color to Enhance Vegetation
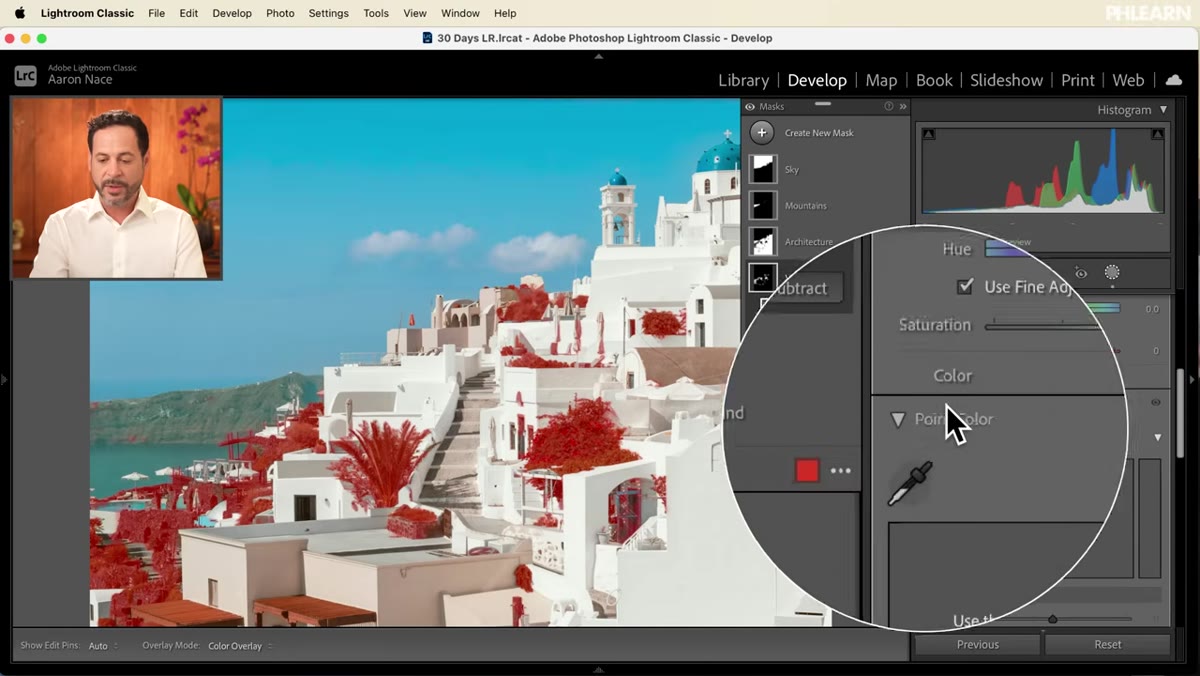 Point Color tool targeting green vegetation in the masked region
This is the step that surprised me most. With the Vegetation mask active, Aaron skips the saturation slider and goes straight to Point Color instead. Point Color lets you click directly on a specific hue within the masked area and then shift it. He targets the green of the foliage and pulls it toward a richer, more saturated green.
The reason this works better than just cranking saturation is precision. A broad saturation increase affects everything in the mask equally, including any yellows, browns, or muddy mid-tones in the vegetation. Point Color lets you zero in on the actual green you want to boost and leave everything else alone. It’s a more surgical approach and the results look more natural.
What I’d Add From My Own Experience
The masking workflow Aaron shows here translates directly into Photoshop too, which is where I spend most of my time. The Select Subject tool in Photoshop 2025 has seen similar AI improvements, and the logic is the same: let the AI do the initial heavy lifting, then refine. Where I’ve started deviating from the basics is combining these AI masks with Photoshop’s Properties panel adjustments using adjustment layers. You get non-destructive editing on each region, the same regional control Aaron demonstrates in Lightroom, but inside a file you can composite, layer, and hand off to a client as a proper PSD.
One honest caveat: the landscape AI works best on images where the regions have clear boundaries. Soft fog, overcast flat light, or very busy scenes can confuse it and require manual cleanup with the brush tool. Budget a couple extra minutes for edge refinement on those. It’s still faster than doing the whole mask from scratch, but it’s not magic every time.
The single biggest takeaway here is that the time you save on selections is time you can spend on actual creative decisions. Masks used to be a toll you paid before the real work started. That’s shifting fast.
Watch the full tutorial on YouTube and see Aaron walk through each of these steps with real images. Seeing the before-and-after on the landscape edits makes the value of the regional masks much more concrete than any description can.
Comments
Leave a Comment