
I’ll be honest with you. For most of my Photoshop life, the Frame Tool has lived in my toolbar the same way a treadmill lives in most apartments. I know it’s there. I appreciate the idea of it. I never really use it.
That changed when I watched this Aaron Nace (PHLEARN) tutorial on the updated Frame Tool in Photoshop 2025. Watch the full tutorial on YouTube. The short version is this: the Frame Tool used to cap out at rectangles and ellipses, which made it useful for roughly two scenarios in a professional workflow. The 2025 update blows that open. You can now drop images or AI-generated content into any custom vector shape, including ones you draw yourself. That’s a workflow I can actually use.
The practical problem this solves for me is layout mockups and composite backgrounds. When I’m building a design that needs image placeholders in specific shapes, or when a client wants to see a few visual directions quickly, being able to sketch a shape, define it, and fill it with a generated image in under a minute is genuinely useful. It’s not magic, but it’s the kind of tool improvement that quietly saves you twenty minutes per project.
Step 1: Open the Frame Tool and See What’s New
 Frame tool selected in Photoshop toolbar panel
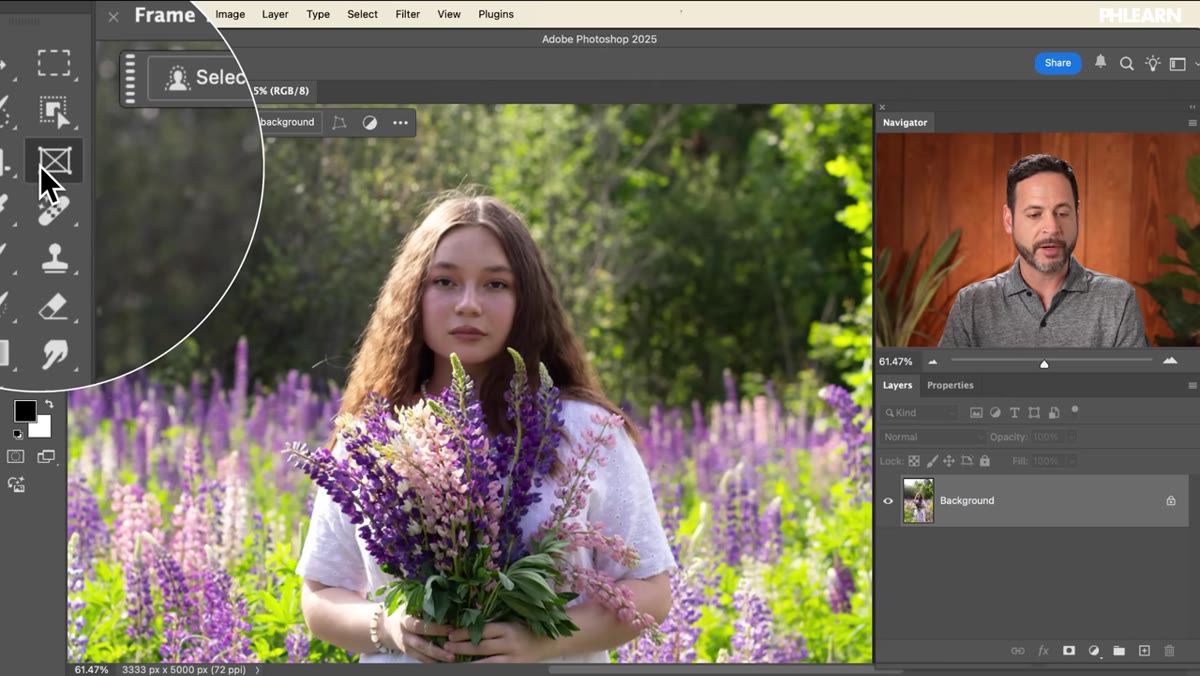
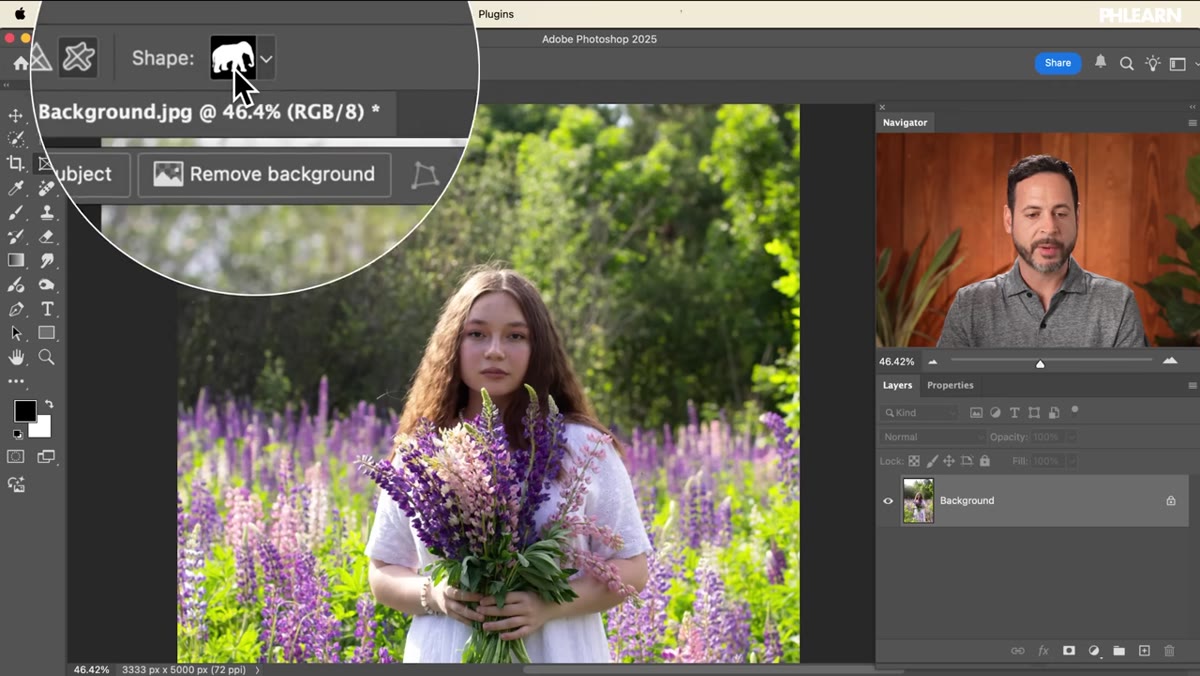
Hit K on your keyboard or grab the Frame Tool from your toolbar. If you’ve used it before, you’ll immediately notice the options bar at the top looks different. Beyond the rectangle and ellipse options, you now have a triangle option and, more importantly, a custom shapes picker. Click that and a shape library drops down showing categories like wild animals, leaves, trees, and more. Out of the box you might see a limited set, but head into the preferences flyout inside that panel and choose “Append Default Shapes.” Hit OK and your library fills out considerably.
Frame tool selected in Photoshop toolbar panel
Hit K on your keyboard or grab the Frame Tool from your toolbar. If you’ve used it before, you’ll immediately notice the options bar at the top looks different. Beyond the rectangle and ellipse options, you now have a triangle option and, more importantly, a custom shapes picker. Click that and a shape library drops down showing categories like wild animals, leaves, trees, and more. Out of the box you might see a limited set, but head into the preferences flyout inside that panel and choose “Append Default Shapes.” Hit OK and your library fills out considerably.
This is worth doing once before you dive in. Having a fuller shape library available means you can experiment, and it sets you up for the more interesting part of this workflow, which is defining your own shapes.
Step 2: Try a Preset Custom Shape (Just to See How It Works)
 Elephant custom shape drawn as a frame on canvas
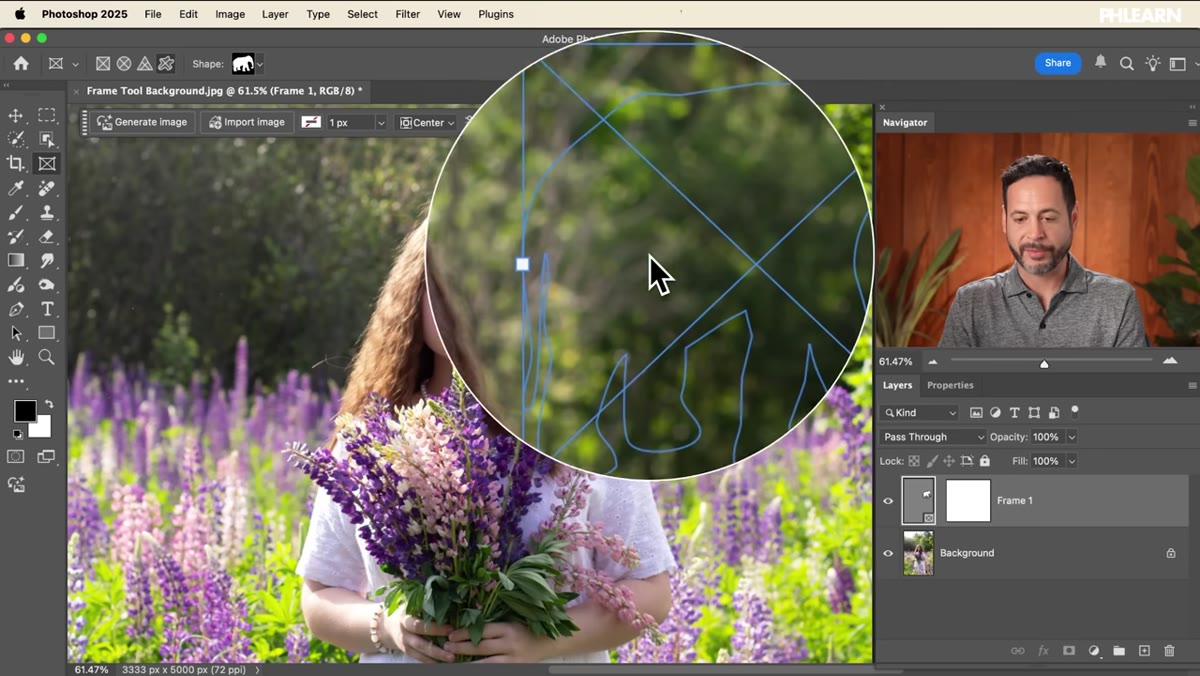
Pick any shape from the library to get a feel for the mechanic. Aaron grabs an elephant in the tutorial, which is exactly as chaotic as it sounds but makes a solid demo. Click and drag on your canvas to draw the shape as a frame. You’ll see it renders as a container, not a filled shape. It’s got that little X through it that tells you “this is a frame, drop something into me.”
Elephant custom shape drawn as a frame on canvas
Pick any shape from the library to get a feel for the mechanic. Aaron grabs an elephant in the tutorial, which is exactly as chaotic as it sounds but makes a solid demo. Click and drag on your canvas to draw the shape as a frame. You’ll see it renders as a container, not a filled shape. It’s got that little X through it that tells you “this is a frame, drop something into me.”
Once you have the frame on canvas, you can either drag an image layer directly onto it, or click into the Properties panel and use the Generate button to fill it with an AI image. Type a prompt, wait a few seconds, and Photoshop fills the frame shape with generated content. The elephant-in-an-elephant demo Aaron runs is equal parts absurd and clarifying: you can see immediately how the image clips to the shape boundary, and how the frame layer behaves independently from whatever is behind it.
Step 3: Create Your Own Custom Shape with the Rectangle Tool
 Rectangle drawn on canvas with rounded corner handles visible
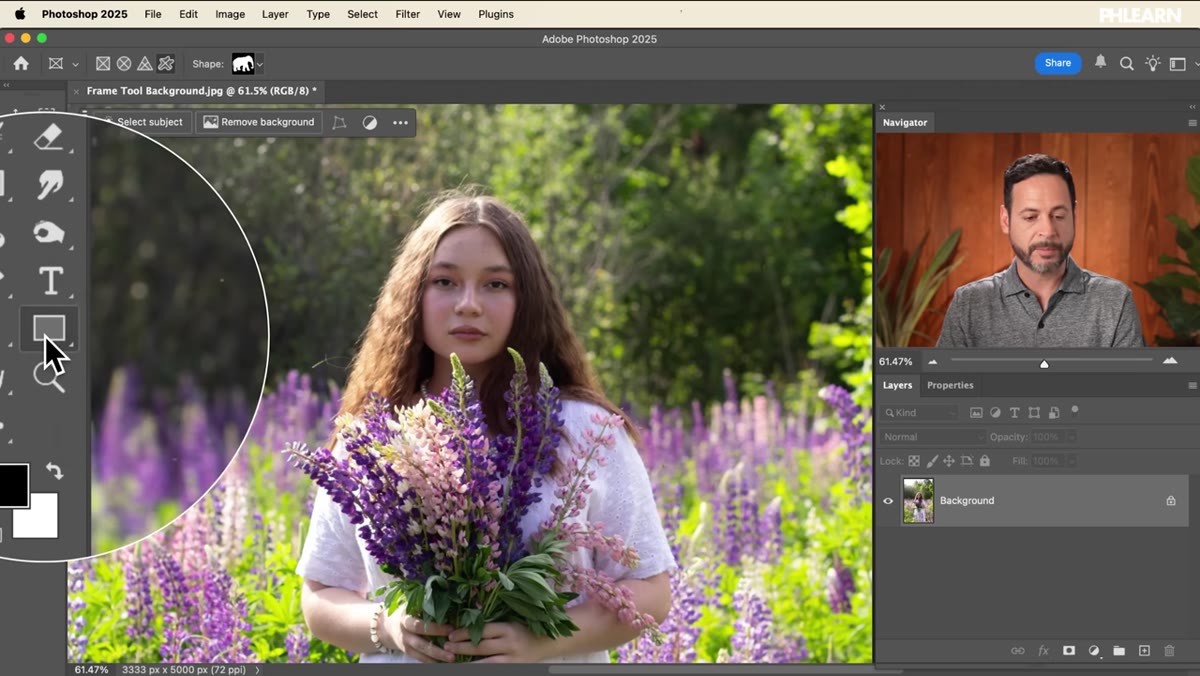
Here’s where the workflow gets actually useful for professional work. Most of the preset shapes are fun but situational. For real design work, you probably want to control the shape yourself. Grab the Rectangle Tool (U) and click and drag out whatever proportions suit your layout. Once you have the rectangle, look for the rounded corner handles at the corners of the shape (they appear as small circular targets just inside each corner point). Click and drag those inward to add a consistent border radius across all corners.
Rectangle drawn on canvas with rounded corner handles visible
Here’s where the workflow gets actually useful for professional work. Most of the preset shapes are fun but situational. For real design work, you probably want to control the shape yourself. Grab the Rectangle Tool (U) and click and drag out whatever proportions suit your layout. Once you have the rectangle, look for the rounded corner handles at the corners of the shape (they appear as small circular targets just inside each corner point). Click and drag those inward to add a consistent border radius across all corners.
You can also do this numerically in the options bar if you want precise control. This is just a vector path at this point, and the nice thing is that this workflow works with anything that produces a vector path in Photoshop: the Pen Tool, the Ellipse Tool, custom shapes you’ve drawn freehand, even paths imported from Illustrator.
Step 4: Define the Shape as a Custom Shape
 Edit menu open with Define Custom Shape option highlighted
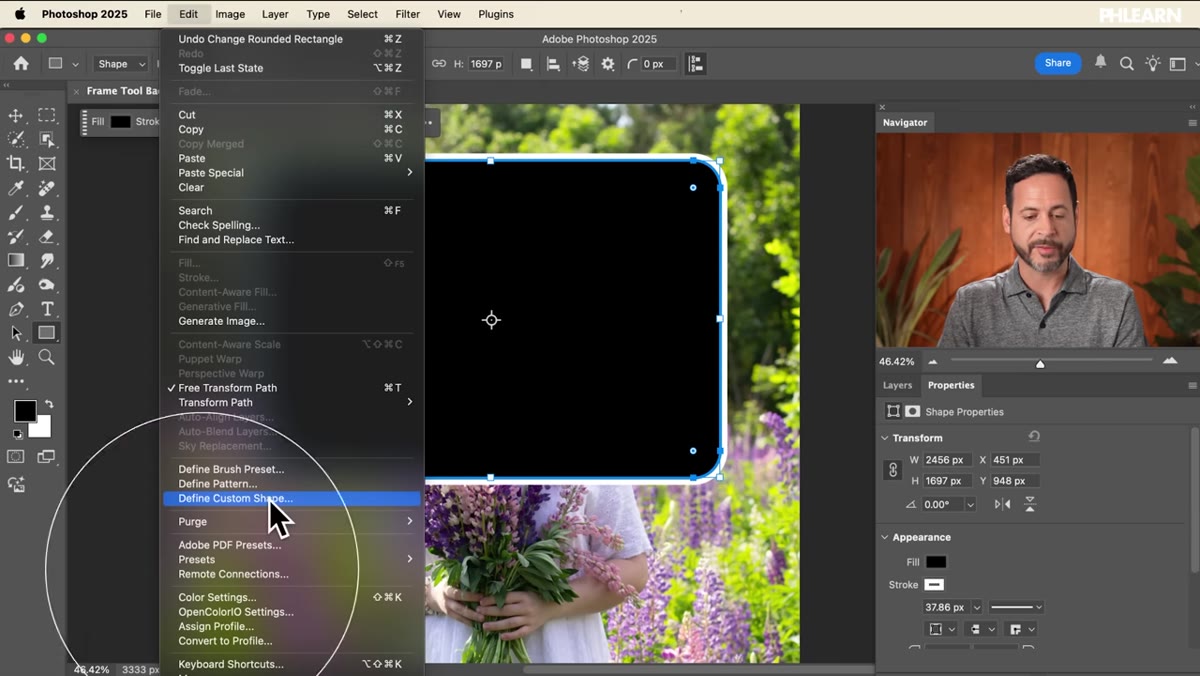
With your path or shape layer selected on the canvas, go to Edit in the menu bar and choose “Define Custom Shape.” A dialog will pop up asking you to name it. Give it something descriptive so you can find it later. Hit OK, then delete the shape from your canvas. It’s now saved into your custom shape library and ready to use from the Frame Tool.
Edit menu open with Define Custom Shape option highlighted
With your path or shape layer selected on the canvas, go to Edit in the menu bar and choose “Define Custom Shape.” A dialog will pop up asking you to name it. Give it something descriptive so you can find it later. Hit OK, then delete the shape from your canvas. It’s now saved into your custom shape library and ready to use from the Frame Tool.
This is the key step that most people skip because it’s buried in the Edit menu and not obvious at all. But this is what connects your hand-drawn or constructed shapes to the Frame Tool’s new capabilities.
Step 5: Apply Your Custom Shape as a Frame and Fill It
 Frame tool options bar showing custom shape picker with saved shape
Go back to the Frame Tool (K). Open the custom shapes picker in the options bar and scroll to the bottom of the list. Your newly defined shape will be there. Select it, then click and drag on your canvas to create a frame in that shape. From here the same two options apply: drag an existing image onto the frame to clip it inside the shape, or use the generative fill prompt in the Properties panel to have Photoshop create content for you.
Frame tool options bar showing custom shape picker with saved shape
Go back to the Frame Tool (K). Open the custom shapes picker in the options bar and scroll to the bottom of the list. Your newly defined shape will be there. Select it, then click and drag on your canvas to create a frame in that shape. From here the same two options apply: drag an existing image onto the frame to clip it inside the shape, or use the generative fill prompt in the Properties panel to have Photoshop create content for you.
The frame layer in the Layers panel will show a thumbnail of the frame shape on the left and the content thumbnail on the right, exactly like a clipping mask setup but cleaner to manage. You can double-click the content thumbnail to reposition or rescale the image inside the frame without affecting the shape itself.
What I’d Add From My Own Workflow
The tutorial shows the Frame Tool in the context of single-image compositions, which is a solid starting point. But where I’ve found this genuinely useful is building rapid layout mockups for clients who need to visualize a direction before I commit to a full composite.
My move is to create several different frame shapes across a canvas, fill them with generated images using quick prompts that match the project’s subject matter, and use that as a visual brief document. It’s not finished work, but it communicates layout, proportion, and mood fast. It used to take me a whole system of clipping masks and smart objects to pull off something similar. The Frame Tool, with custom shapes and generative fill, collapses that into a single step per frame. That’s a real time save when you’re doing six layout options for a client presentation.
One caveat: the generative fill results inside complex or very detailed custom shapes can be inconsistent. Simpler shapes, like the rounded rectangle Aaron uses, tend to give you much cleaner fills. If you’re working with an intricate silhouette shape and the fill looks weird, try simplifying the path first.
The biggest shift Photoshop 2025 makes with the Frame Tool is turning it from a layout placeholder utility into an actual compositing shortcut. Custom shapes plus generative fill is a combination that rewards experimentation, and the Define Custom Shape step is the linchpin most people won’t find on their own. Go watch the full thing, Aaron covers a few additional details worth seeing in action: Watch the full tutorial on YouTube.
Comments
Leave a Comment