
Hair. It’s the thing that has humbled every Photoshop user who ever thought they were good at this. I’ve spent embarrassing amounts of time trying to isolate a subject with flyaway strands against a busy background, painting around individual hairs with a brush like some kind of digital monk. It’s the kind of task that makes you question your career choices around hour two. So when Photoshop 2021 dropped during Adobe Max week in October 2020, I went straight for the selection improvements, because that’s where the pain lives.
In this Matt Kloskowski tutorial, Watch the full tutorial on YouTube, Matt walks through the photography-focused updates in Photoshop 2021 (version 22, confusingly enough) with the kind of practical, no-fluff approach that actually helps you understand when to use something rather than just what it does. I’ve watched a lot of feature-release videos that are basically press releases with a timeline. This one has actual technique baked in.
The short version: the selection and masking tools got meaningfully better, not just incrementally tweaked. Here’s how to use them.
Step 1: Make Sure You’re Updating the Right Version
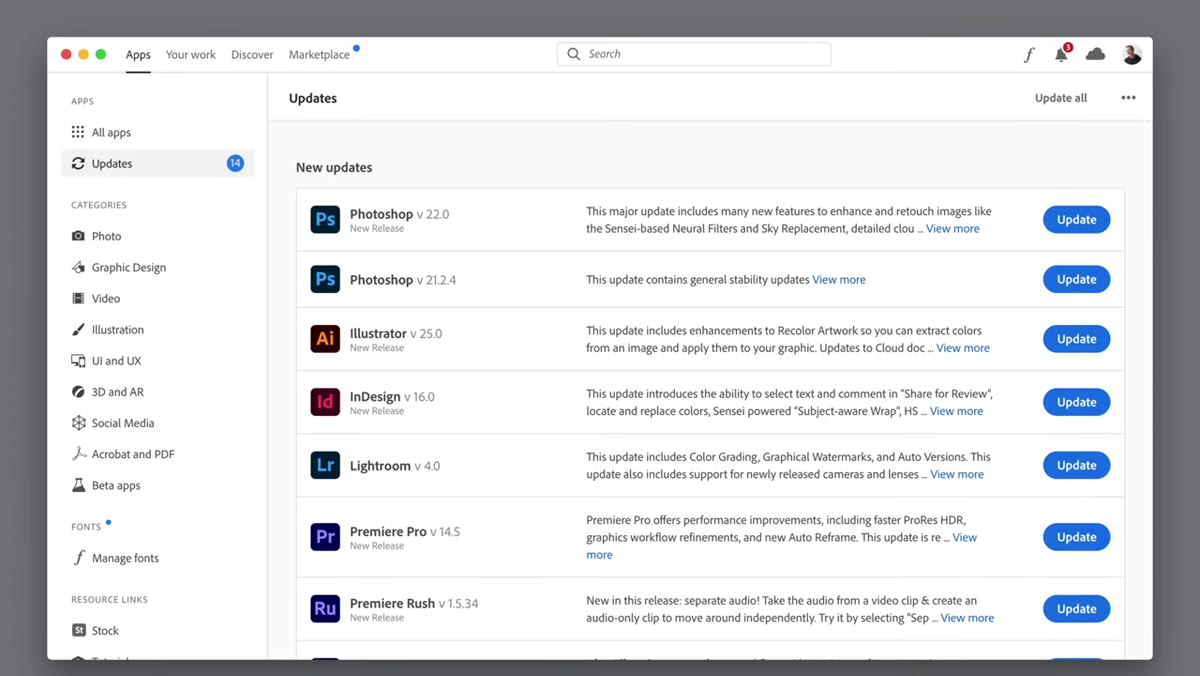 Creative Cloud updater showing version 21 vs version 22
This sounds boring, but skip it and you’ll spend twenty minutes wondering why none of the new features are showing up. Photoshop 2021 is version 22. That’s not a typo. Adobe’s versioning has always been a little chaotic, and the Creative Cloud updater will happily let you keep polishing last year’s version 21 if you’re not paying attention. Open your Creative Cloud app, confirm you’re installing or updating version 22, and go ahead and delete version 21 from your machine. You don’t need both. Treat it like that duplicate layer you keep forgetting to flatten.
Creative Cloud updater showing version 21 vs version 22
This sounds boring, but skip it and you’ll spend twenty minutes wondering why none of the new features are showing up. Photoshop 2021 is version 22. That’s not a typo. Adobe’s versioning has always been a little chaotic, and the Creative Cloud updater will happily let you keep polishing last year’s version 21 if you’re not paying attention. Open your Creative Cloud app, confirm you’re installing or updating version 22, and go ahead and delete version 21 from your machine. You don’t need both. Treat it like that duplicate layer you keep forgetting to flatten.
Step 2: Start with Select Subject
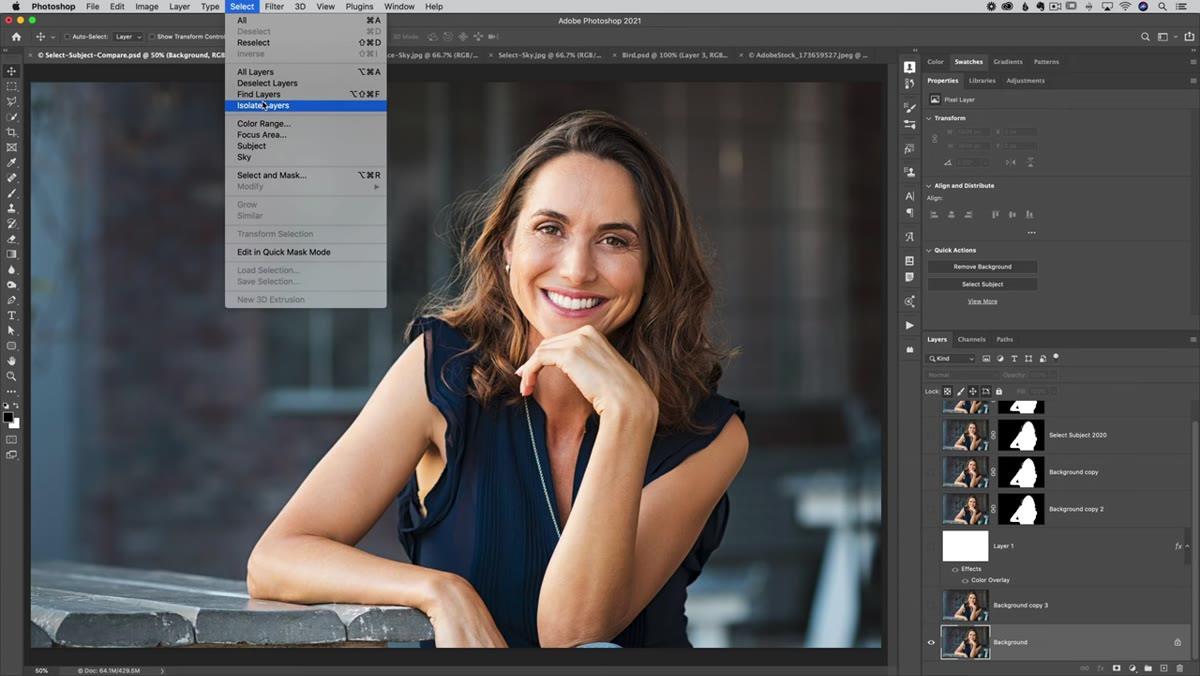 Select menu open with Select Subject highlighted
Before you do anything fancy, run Select Subject from the Select menu at the top of the screen. This feature has been quietly improving for a couple of years now, and in Photoshop 2021 it’s good enough to be a legitimate first step rather than just a rough starting point. Click it, let it do its thing, and resist the urge to immediately fix every imperfection manually. You’re about to have tools that handle most of that for you. The initial selection doesn’t need to be perfect. It needs to be good enough to take into Select and Mask.
Select menu open with Select Subject highlighted
Before you do anything fancy, run Select Subject from the Select menu at the top of the screen. This feature has been quietly improving for a couple of years now, and in Photoshop 2021 it’s good enough to be a legitimate first step rather than just a rough starting point. Click it, let it do its thing, and resist the urge to immediately fix every imperfection manually. You’re about to have tools that handle most of that for you. The initial selection doesn’t need to be perfect. It needs to be good enough to take into Select and Mask.
Step 3: Open Select and Mask
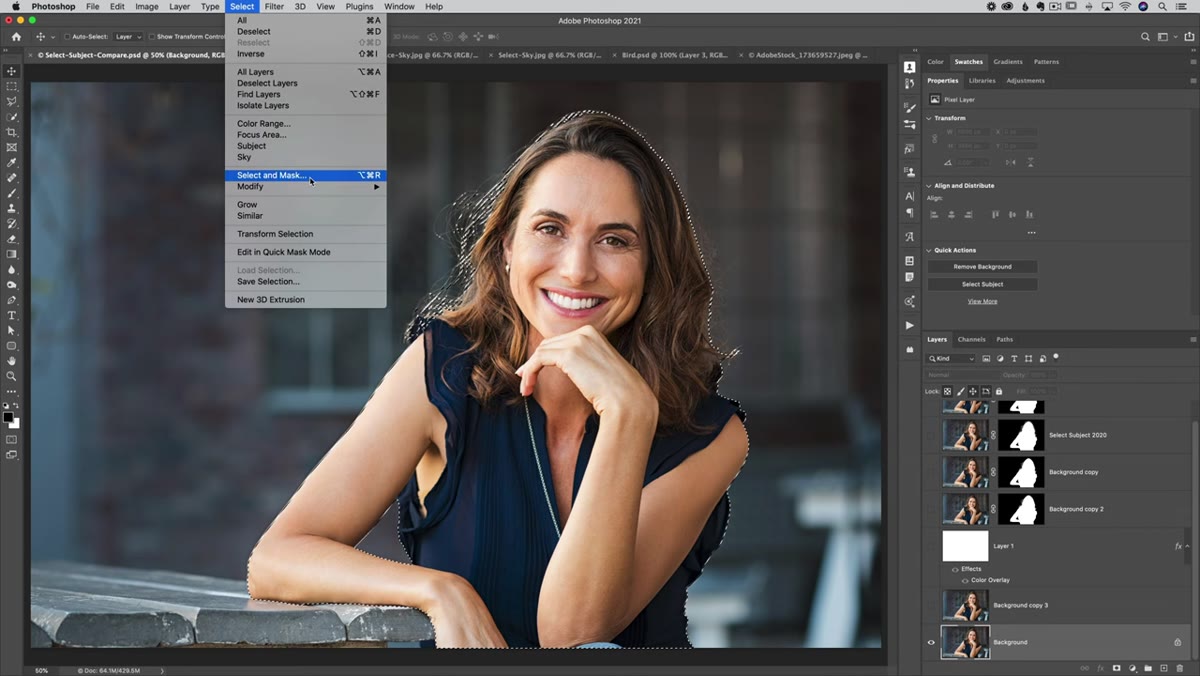 Select and Mask dialog box opening after Select Subject
With your selection active, head up to Select and then Select and Mask to open the dialog. The first thing Matt recommends doing here is changing the view mode. For subjects against complex backgrounds, switching to “On Black” gives you a much cleaner read on what your selection is actually doing. Crank the opacity up to 100 percent so you’re seeing a solid black background rather than a semi-transparent one. This isn’t just a visual preference thing. It’s diagnostic. You’ll immediately see exactly where your selection is struggling, usually around hair and fine edges, without the original background muddying the picture.
Select and Mask dialog box opening after Select Subject
With your selection active, head up to Select and then Select and Mask to open the dialog. The first thing Matt recommends doing here is changing the view mode. For subjects against complex backgrounds, switching to “On Black” gives you a much cleaner read on what your selection is actually doing. Crank the opacity up to 100 percent so you’re seeing a solid black background rather than a semi-transparent one. This isn’t just a visual preference thing. It’s diagnostic. You’ll immediately see exactly where your selection is struggling, usually around hair and fine edges, without the original background muddying the picture.
Step 4: Hit the Refine Hair Button
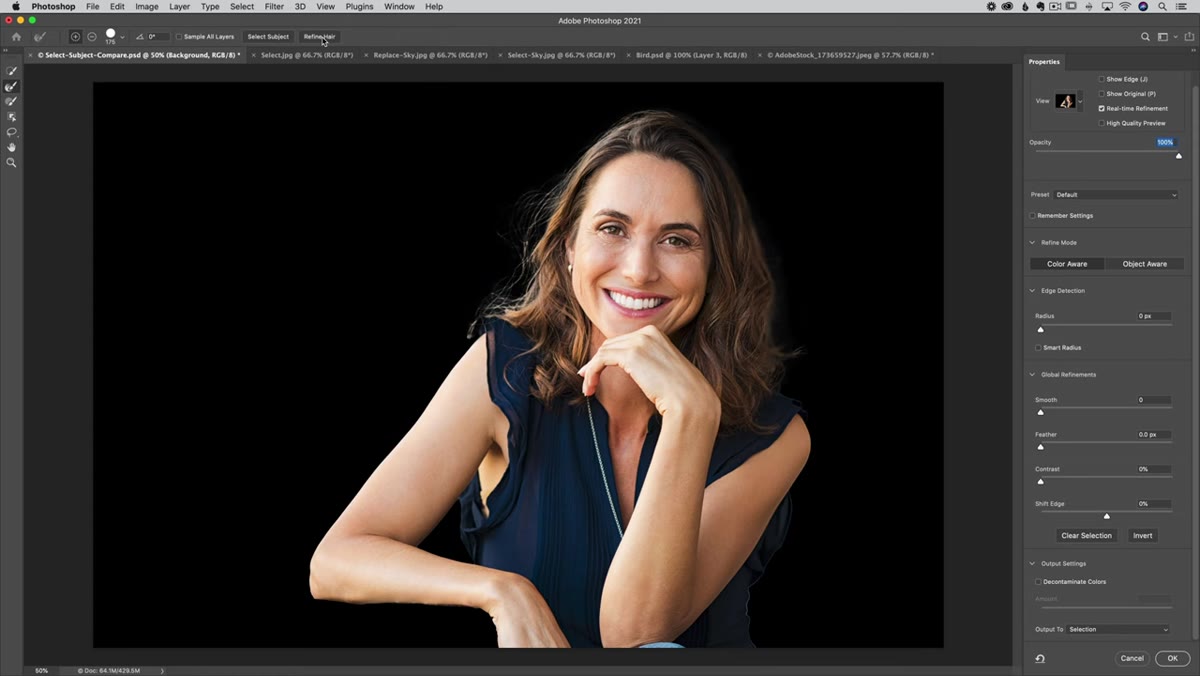 Refine Hair button at the top of Select and Mask panel
Here’s the new feature that made me audibly say “okay” at my laptop in a coffee shop, much to the annoyance of the person next to me. At the top of the Select and Mask workspace, there’s now a button called Refine Hair. Click it. Photoshop runs an analysis on the edge of your subject and automatically refines the hair selection. It’s not magic, and it won’t rescue a shot where dark hair was photographed against a dark background with no separation, but for anything with reasonable contrast, it does a genuinely impressive amount of work in about two seconds. Start here before you touch the brush manually.
Refine Hair button at the top of Select and Mask panel
Here’s the new feature that made me audibly say “okay” at my laptop in a coffee shop, much to the annoyance of the person next to me. At the top of the Select and Mask workspace, there’s now a button called Refine Hair. Click it. Photoshop runs an analysis on the edge of your subject and automatically refines the hair selection. It’s not magic, and it won’t rescue a shot where dark hair was photographed against a dark background with no separation, but for anything with reasonable contrast, it does a genuinely impressive amount of work in about two seconds. Start here before you touch the brush manually.
Step 5: Choose Between Color Aware and Object Aware
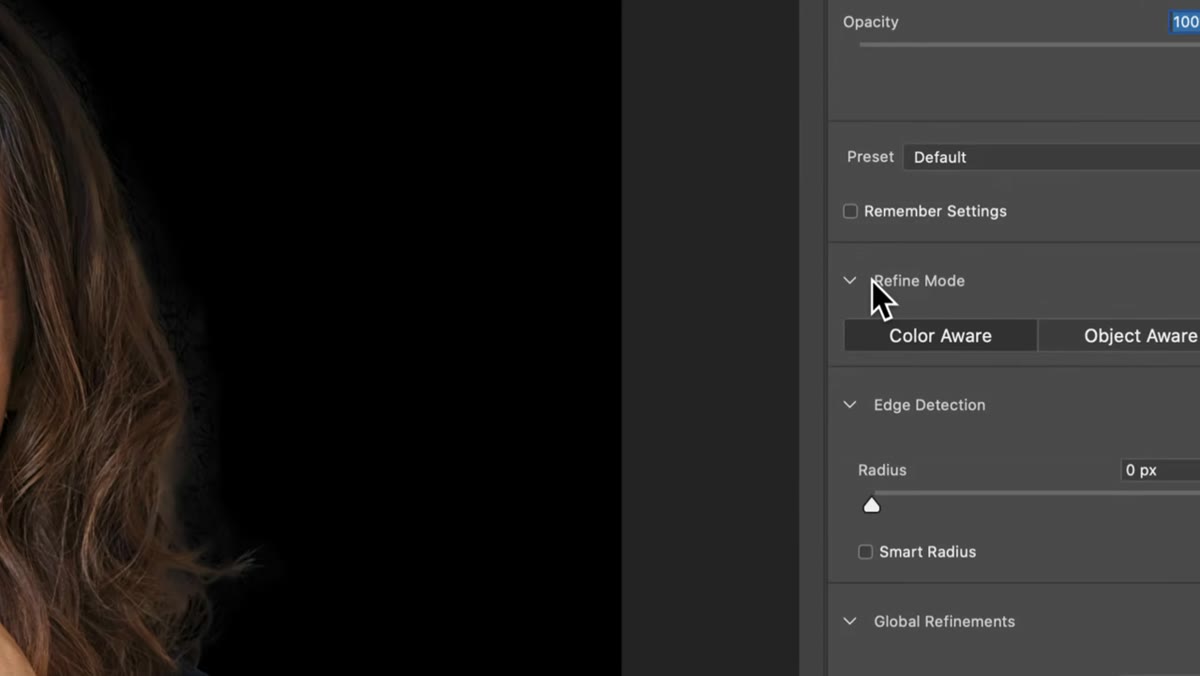 Refine Mode panel showing Color Aware and Object Aware options
On the right side of the Select and Mask panel, you’ll find a section called Refine Mode with two options: Color Aware and Object Aware. This is where Matt gives some of the most honest advice in the video, and it’s the kind of thing you won’t find in Adobe’s documentation. The short version is: try both. Color Aware works better when the edges you’re refining are primarily defined by color contrast, like a bright shirt against a different-colored background. Object Aware is better at understanding the actual shape and structure of complex edges like hair. In practice, most real-world photos have a mix of both, so the right answer is to toggle between them and judge with your eyes rather than your assumptions about which one should work.
Refine Mode panel showing Color Aware and Object Aware options
On the right side of the Select and Mask panel, you’ll find a section called Refine Mode with two options: Color Aware and Object Aware. This is where Matt gives some of the most honest advice in the video, and it’s the kind of thing you won’t find in Adobe’s documentation. The short version is: try both. Color Aware works better when the edges you’re refining are primarily defined by color contrast, like a bright shirt against a different-colored background. Object Aware is better at understanding the actual shape and structure of complex edges like hair. In practice, most real-world photos have a mix of both, so the right answer is to toggle between them and judge with your eyes rather than your assumptions about which one should work.
Step 6: Paint the Edges with the Refine Edge Brush
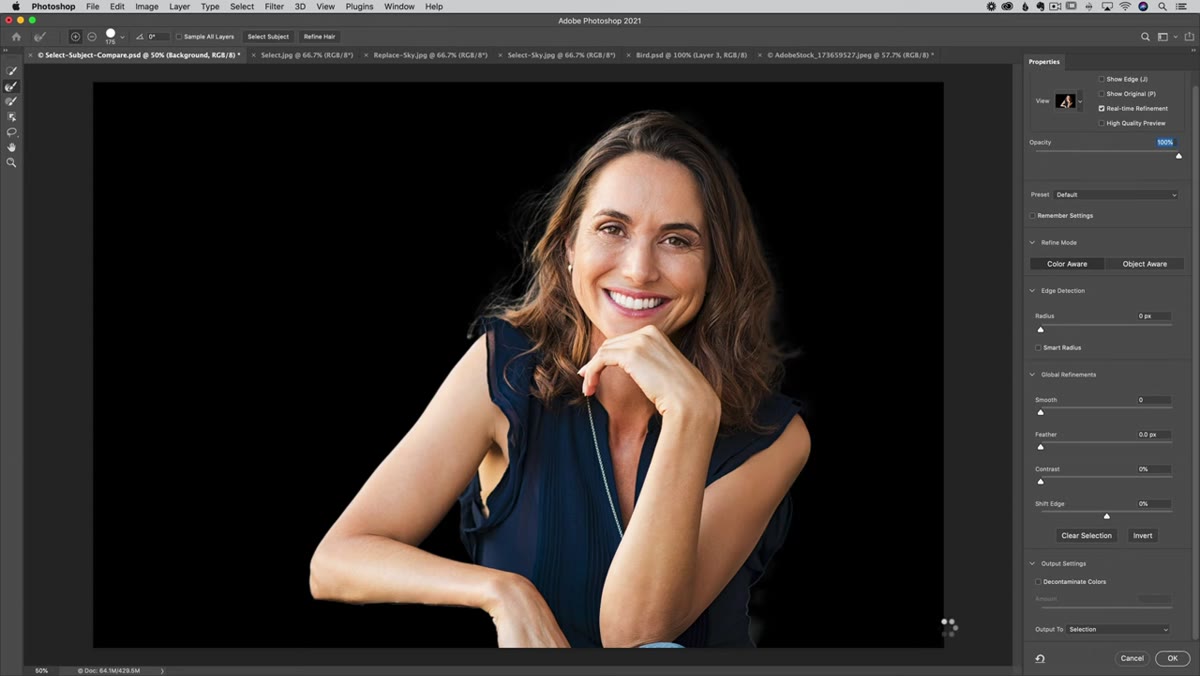 Refine Edge Brush being painted around hair edges
After you’ve run Refine Hair and picked your mode, grab the Refine Edge Brush tool (it’s in the toolbar on the left side of the Select and Mask workspace) and paint around the hair edges. You’re not painting the hair itself. You’re painting the zone where Photoshop needs to make fine decisions, the transitional area between subject and background. Use a brush size that roughly matches the width of that transition zone and work around the perimeter. The combination of the automatic Refine Hair step plus this manual brush pass, using either Color Aware or Object Aware depending on what looks better, is what gets you from a serviceable selection to a clean one.
Refine Edge Brush being painted around hair edges
After you’ve run Refine Hair and picked your mode, grab the Refine Edge Brush tool (it’s in the toolbar on the left side of the Select and Mask workspace) and paint around the hair edges. You’re not painting the hair itself. You’re painting the zone where Photoshop needs to make fine decisions, the transitional area between subject and background. Use a brush size that roughly matches the width of that transition zone and work around the perimeter. The combination of the automatic Refine Hair step plus this manual brush pass, using either Color Aware or Object Aware depending on what looks better, is what gets you from a serviceable selection to a clean one.
My Take: Don’t Skip the Diagnostic Step
I used to jump straight into the Refine Edge Brush and start painting without ever changing my view mode. My results were inconsistent, and I blamed the tool. The honest truth is I wasn’t seeing the selection clearly enough to know what I was fixing. Switching to On Black at full opacity before I touch anything is now non-negotiable in my workflow. It’s about thirty seconds of setup that saves ten minutes of second-guessing. The Refine Hair button is genuinely new and genuinely useful, but it’s only as good as your ability to evaluate what it produced. Take the thirty seconds.
One more thing worth saying: Matt points out early in the video that if you didn’t think about hair separation before you shot the image, don’t expect any tool to give you perfection after the fact. Photoshop 2021’s selection tools are better than they’ve ever been, but physics still applies. Thin, dark hair against a dark background is a hard problem. These tools will get you close, not perform miracles.
The single most useful thing to take away from this tutorial is the Refine Hair button paired with the Color Aware / Object Aware toggle. They’re not the flashiest features Adobe announced that week, but they’re the ones that will show up in your actual workflow on a regular basis. Everything else is a bonus.
Watch the full tutorial on YouTube to see Matt’s full walkthrough, including the non-photography features he covers at the end.
Comments (2)
Wow, I had no idea you could do this. Mind blown.
My workflow just got 10x faster. Not even kidding.
Leave a Comment