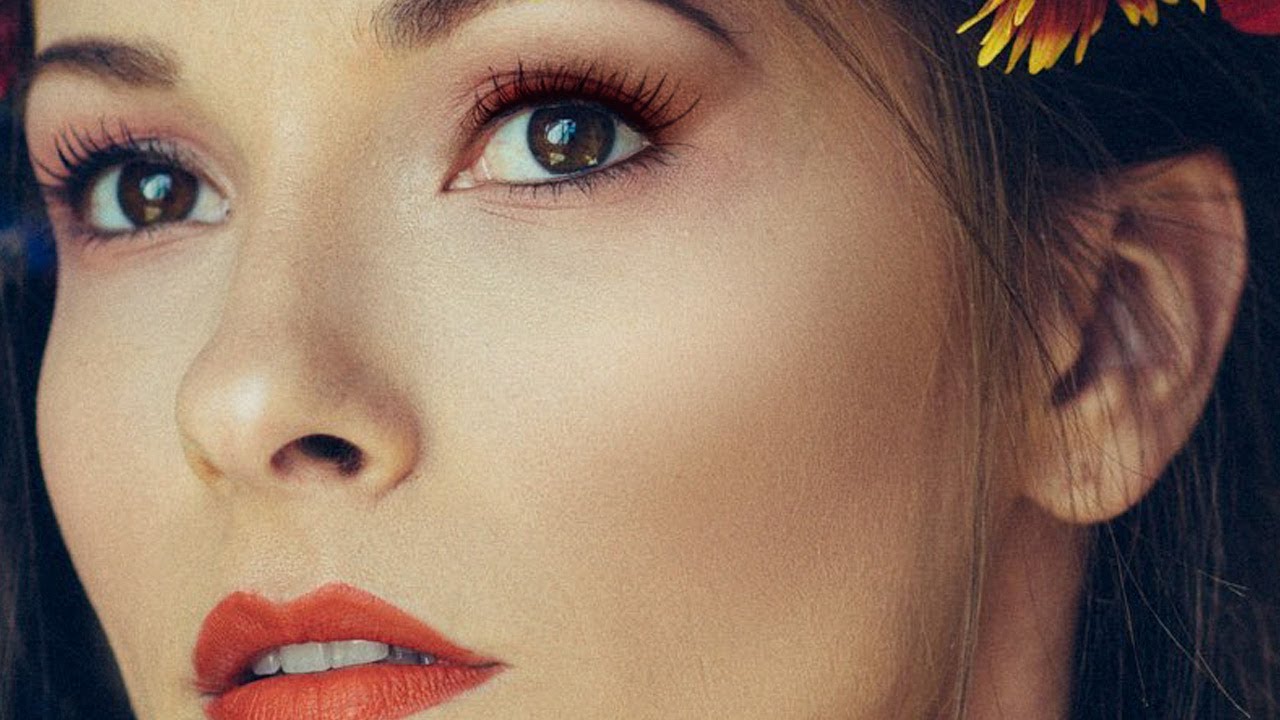
I do a lot of portrait retouching. Skin cleanup, dodging and burning, the occasional dramatic color grade. But for years, whenever a client asked me to “add some makeup” to a shot, I’d fumble around with a brush tool, slap some color on a normal layer, and wonder why it looked like I’d painted the model’s face with Microsoft Paint. Which, yes, I have experience with. It wasn’t pretty.
The real problem wasn’t the tools. It was that I had no framework for where makeup actually goes, or why. I was guessing at shapes I didn’t understand. Then I watched this Aaron Nace tutorial from PHLEARN – Watch the full tutorial on YouTube – and it reframed the whole thing. Nace doesn’t just show you which buttons to click. He walks through the logic a working makeup artist uses before they ever touch a brush, and then maps that logic directly onto Photoshop’s toolset. That alone is worth the 20-odd minutes.
What clicked for me was this: makeup is really just controlled light and shadow. Lighter tones pull areas forward. Darker tones push them back. Eyeshadow isn’t decoration. It’s contouring. Once I understood that, the Photoshop part got a lot less mysterious.
Step 1: Understand the Zones Before You Touch a Brush
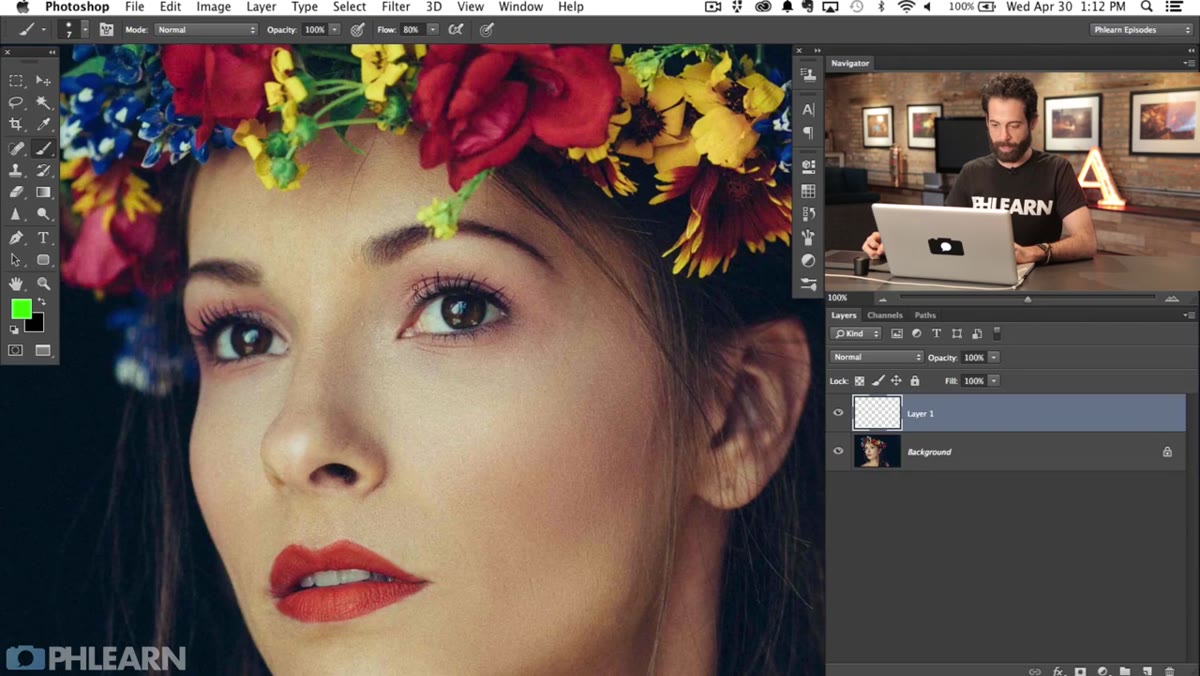 Diagram of eyeshadow, eyeliner, and highlighter zones on eye
Before creating a single layer, Nace maps out the three main zones of eye makeup: eyeliner (right along the lash line, top and sometimes bottom), eyeshadow (above the lid, blending upward), and the highlight zone just beneath the brow arch. That highlight zone is the one most people skip, and it’s doing serious structural work. Keeping it lighter than the surrounding skin creates the illusion that the brow sits higher on the face. It’s the same principle as dodging and burning for face sculpting – light areas advance, dark areas recede.
Diagram of eyeshadow, eyeliner, and highlighter zones on eye
Before creating a single layer, Nace maps out the three main zones of eye makeup: eyeliner (right along the lash line, top and sometimes bottom), eyeshadow (above the lid, blending upward), and the highlight zone just beneath the brow arch. That highlight zone is the one most people skip, and it’s doing serious structural work. Keeping it lighter than the surrounding skin creates the illusion that the brow sits higher on the face. It’s the same principle as dodging and burning for face sculpting – light areas advance, dark areas recede.
The practical takeaway: don’t crowd your eyeshadow all the way up to the brow. Leave that subarch area lighter, and you’ll get more definition with less effort.
Step 2: Set Up a New Layer with Low Flow
 Brush tool settings panel, flow set to 10 percent
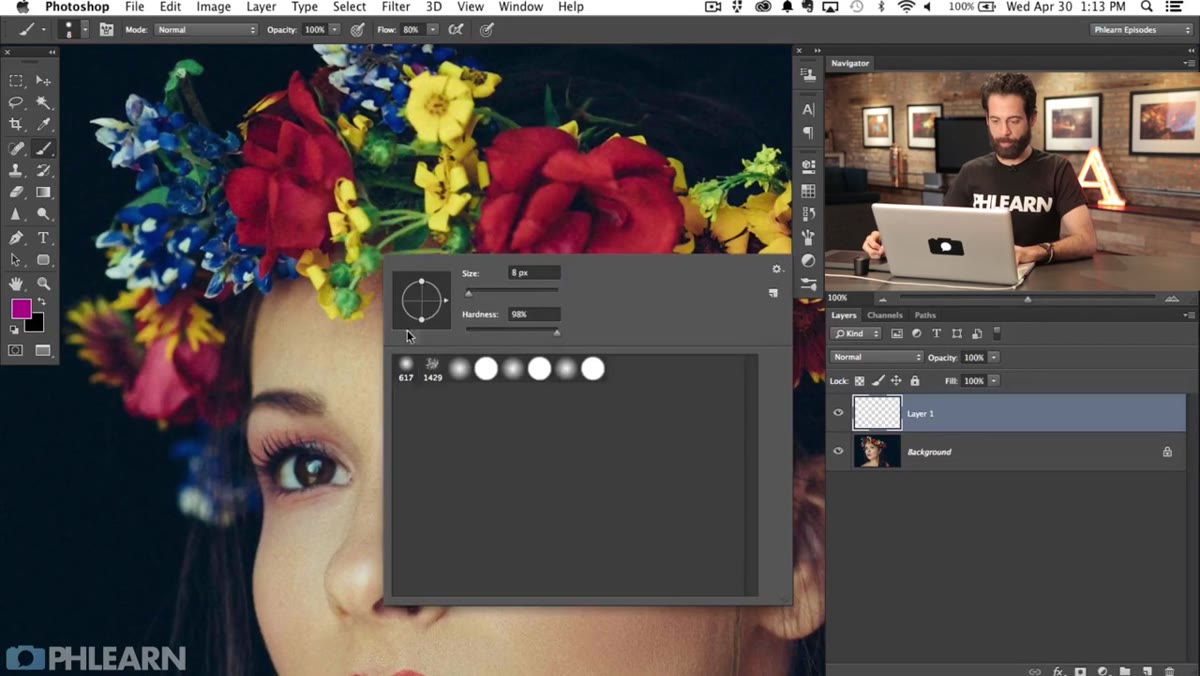
Create a new empty layer above your photo. This is where all your eyeshadow work will live, so name it something useful – “eyeshadow” works fine. Grab the Brush tool and load a standard soft round brush. Here’s the setting that matters most: drop your Flow down to around 10%. Not opacity – flow. The difference is significant. Opacity sets a hard ceiling on how opaque a single stroke can get. Flow controls how much paint deposits with each pass, so you can build coverage gradually by painting over the same area multiple times. It gives you far more control over subtle blending, which is exactly what you need for makeup that doesn’t look painted on.
Brush tool settings panel, flow set to 10 percent
Create a new empty layer above your photo. This is where all your eyeshadow work will live, so name it something useful – “eyeshadow” works fine. Grab the Brush tool and load a standard soft round brush. Here’s the setting that matters most: drop your Flow down to around 10%. Not opacity – flow. The difference is significant. Opacity sets a hard ceiling on how opaque a single stroke can get. Flow controls how much paint deposits with each pass, so you can build coverage gradually by painting over the same area multiple times. It gives you far more control over subtle blending, which is exactly what you need for makeup that doesn’t look painted on.
Step 3: Sample and Apply Your Eyeshadow Color
 Soft brush strokes being applied above the eyelid area
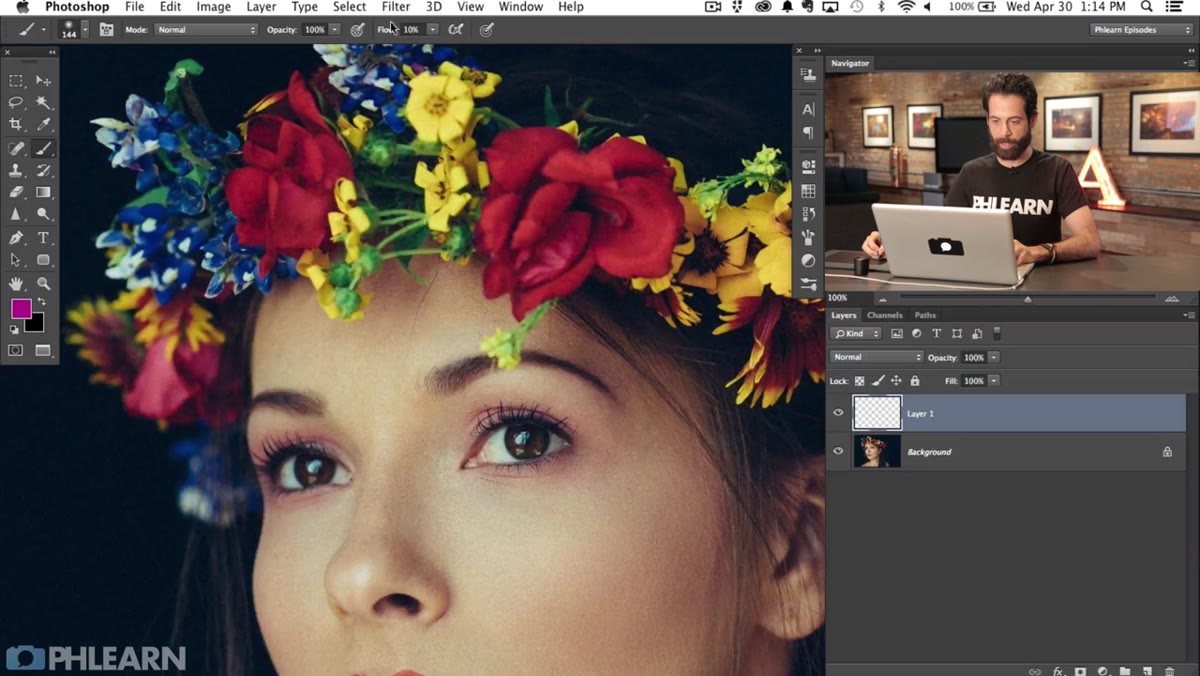
Pick a color that suits your image – for a natural look, muted purples, warm browns, and dusty mauves work well. Paint above the lid with light, overlapping strokes, building up color gradually from the lash line upward. The edges should feather out to nothing, not have a visible boundary. Because you’re on a separate layer, you can always dial back the layer opacity if things get too heavy. Start darker near the crease and lighter as you move toward the brow. You’re mimicking how a makeup artist would blend with a fluffy brush in real life – multiple light passes, not one heavy one.
Soft brush strokes being applied above the eyelid area
Pick a color that suits your image – for a natural look, muted purples, warm browns, and dusty mauves work well. Paint above the lid with light, overlapping strokes, building up color gradually from the lash line upward. The edges should feather out to nothing, not have a visible boundary. Because you’re on a separate layer, you can always dial back the layer opacity if things get too heavy. Start darker near the crease and lighter as you move toward the brow. You’re mimicking how a makeup artist would blend with a fluffy brush in real life – multiple light passes, not one heavy one.
Step 4: Change the Layer Blend Mode to Multiply (or Experiment)
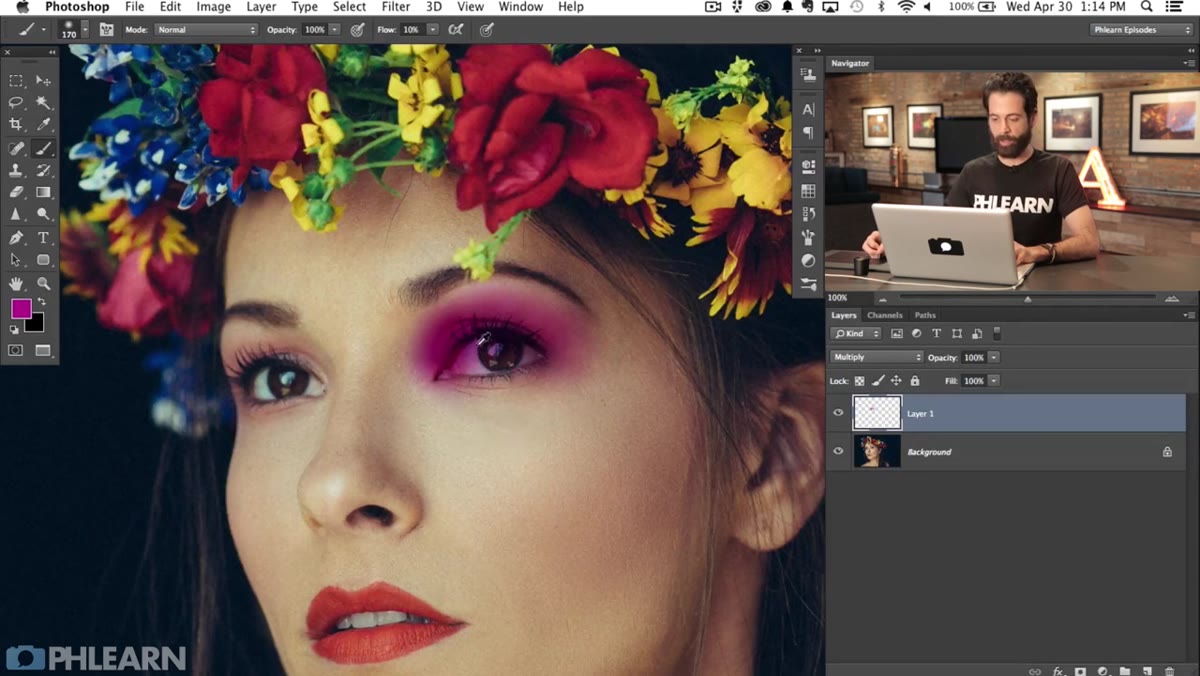 Layer blend mode dropdown, Multiply selected on eyeshadow layer
Here’s where it stops looking like a color blob and starts looking like actual makeup. Change your eyeshadow layer’s blend mode from Normal to Multiply. Multiply darkens based on what’s underneath, so the color interacts with the skin texture, wrinkles, pores – all of it. The result reads as something that’s been applied to the skin rather than painted over it. Depending on your color choice, you might also try Soft Light or Color blend modes. Soft Light is great for sheer, luminous looks. Color mode keeps the skin’s luminosity intact while just shifting the hue. Spend two minutes cycling through them – the difference between modes is dramatic and it’s the fastest way to dial in the right vibe for a specific photo.
Layer blend mode dropdown, Multiply selected on eyeshadow layer
Here’s where it stops looking like a color blob and starts looking like actual makeup. Change your eyeshadow layer’s blend mode from Normal to Multiply. Multiply darkens based on what’s underneath, so the color interacts with the skin texture, wrinkles, pores – all of it. The result reads as something that’s been applied to the skin rather than painted over it. Depending on your color choice, you might also try Soft Light or Color blend modes. Soft Light is great for sheer, luminous looks. Color mode keeps the skin’s luminosity intact while just shifting the hue. Spend two minutes cycling through them – the difference between modes is dramatic and it’s the fastest way to dial in the right vibe for a specific photo.
Step 5: Add Eyeliner with a Hard-Edged Brush
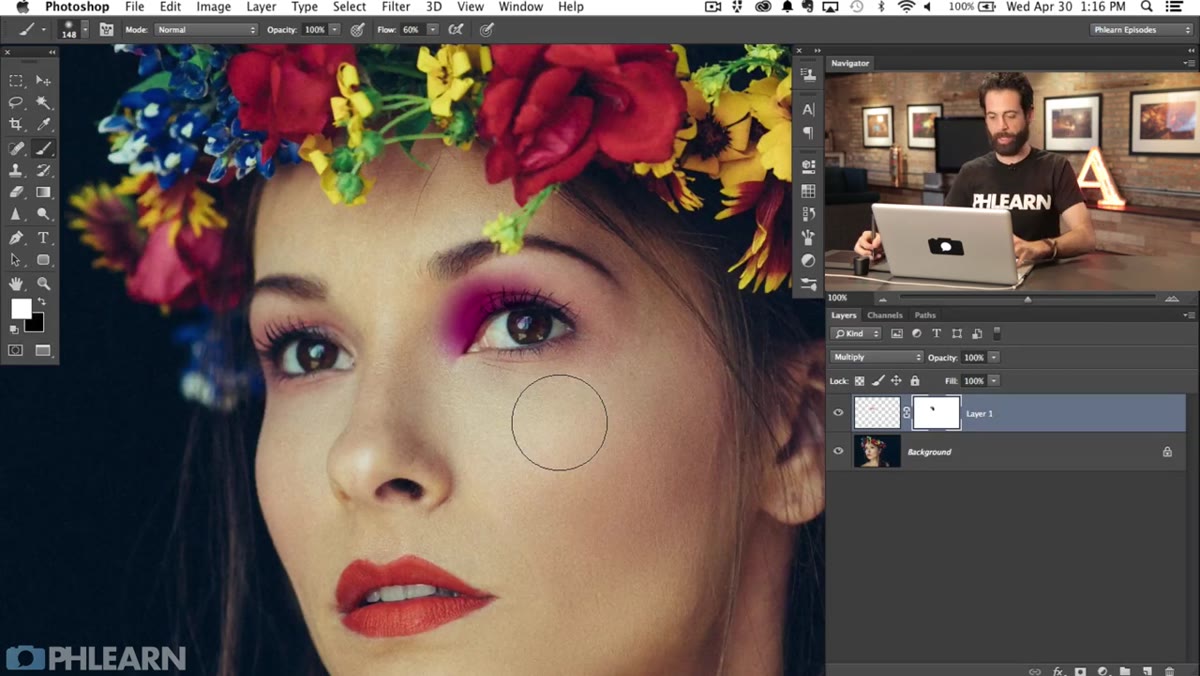 Hard round brush painting thin eyeliner along upper lash line
Create a new layer for your eyeliner. Switch to a hard round brush – or a brush with very low softness – and drop the size down small. You’re painting a thin line directly along the upper lash line, tapering it as it moves toward the inner corner and optionally flicking it into a small wing at the outer corner. Work at high zoom so you can see what you’re doing. Use a very dark brown or black. Set this layer to Multiply as well, which keeps the eyeliner from looking like a flat black stripe and lets it integrate with the skin around the eye naturally. A second, lighter application along the lower lash line (optional) can add definition without making the eye look heavy.
Hard round brush painting thin eyeliner along upper lash line
Create a new layer for your eyeliner. Switch to a hard round brush – or a brush with very low softness – and drop the size down small. You’re painting a thin line directly along the upper lash line, tapering it as it moves toward the inner corner and optionally flicking it into a small wing at the outer corner. Work at high zoom so you can see what you’re doing. Use a very dark brown or black. Set this layer to Multiply as well, which keeps the eyeliner from looking like a flat black stripe and lets it integrate with the skin around the eye naturally. A second, lighter application along the lower lash line (optional) can add definition without making the eye look heavy.
Step 6: Download and Apply Custom Eyelash Brushes
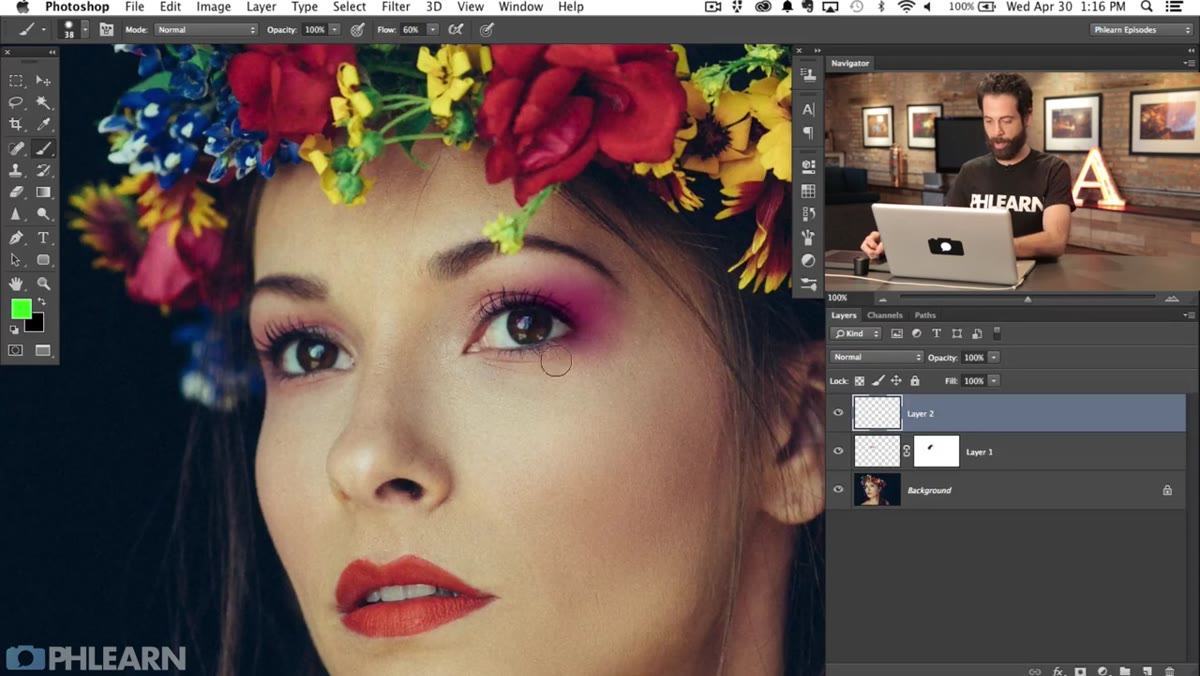 Custom eyelash brush preset being applied above existing lashes
Nace points out that painting individual lashes freehand is both tedious and unconvincing. The smarter move is to download a dedicated eyelash brush set – PHLEARN makes them available on their site, and there are solid free options on Brusheezy as well. These brushes are designed to stamp a full set of lashes in a single click, or a few clicks if you want to layer them. Create a new layer, load the brush, and stamp it roughly aligned with the natural lash line. Then use Free Transform (Cmd/Ctrl + T) to rotate and warp the result until it sits naturally on the eye. Set the layer to Multiply and adjust opacity to taste. It’s not cheating – it’s just efficient.
Custom eyelash brush preset being applied above existing lashes
Nace points out that painting individual lashes freehand is both tedious and unconvincing. The smarter move is to download a dedicated eyelash brush set – PHLEARN makes them available on their site, and there are solid free options on Brusheezy as well. These brushes are designed to stamp a full set of lashes in a single click, or a few clicks if you want to layer them. Create a new layer, load the brush, and stamp it roughly aligned with the natural lash line. Then use Free Transform (Cmd/Ctrl + T) to rotate and warp the result until it sits naturally on the eye. Set the layer to Multiply and adjust opacity to taste. It’s not cheating – it’s just efficient.
My Take: Use This as a Makeup Logic Framework, Not Just a Photoshop Recipe
The part I keep coming back to is the light-forward, dark-recede principle Nace opens with. I’ve started using it way beyond eye makeup – for contouring cheekbones, reducing the visual weight of a jawline, even making noses appear more sculpted without anything extreme. If you think of every makeup technique as a dodge-and-burn decision wearing a color costume, you’ll start making better calls about placement without needing a reference every time.
One thing I’d add from my own workflow: group all your makeup layers into a single folder and drop a black layer mask on the group. Then paint white to reveal. It gives you a master control to refine edges and reduce any makeup that’s bleeding past where it should be. Makeup in real life has crisp edges in some places and soft edges in others – being able to control that per-region is the difference between “retouched” and “looks like she walked into the shoot that way.”
The single most important idea from this tutorial is the one Nace leads with: makeup is light and shadow, applied with purpose. Get that mental model locked in before you open the Layers panel, and everything else follows naturally. Watch the full tutorial on YouTube to see Nace walk through the complete process, including more detail on brush technique and color selection that’s easier to absorb visually than in writing.
Comments
Leave a Comment