Every water composite I did in my first two years of freelancing had the same problem, and I couldn’t figure out why they looked fake. The lighting was fine. The color grading was decent. But the bubbles – oh, the bubbles. Perfect little circles, every single one of them, floating around like clip art from a 2003 PowerPoint presentation. Turns out, that’s exactly what was wrong.
Real bubbles in turbulent water are not spherical. They get squeezed, stretched, and pushed around by the water pressure around them. In this KelbyOne tutorial from Photoshop User TV, the technique covered is a genuinely simple fix for this, and it involves a filter most people associate with face retouching rather than water effects: Liquefy. Watch the full tutorial on YouTube if you want to follow along, but everything you need is right here.
Once I started applying this approach, my water composites started reading as actually believable. The logic is rooted in something called cavitation – a real physics phenomenon where bubbles form and collapse rapidly in moving water. You don’t need to understand the hydrodynamics. You just need to know that your bubbles should look a little chaotic, and Liquefy is the right tool for making that happen quickly.
Step 1: Build Your Base Scene with Bubble Brushes
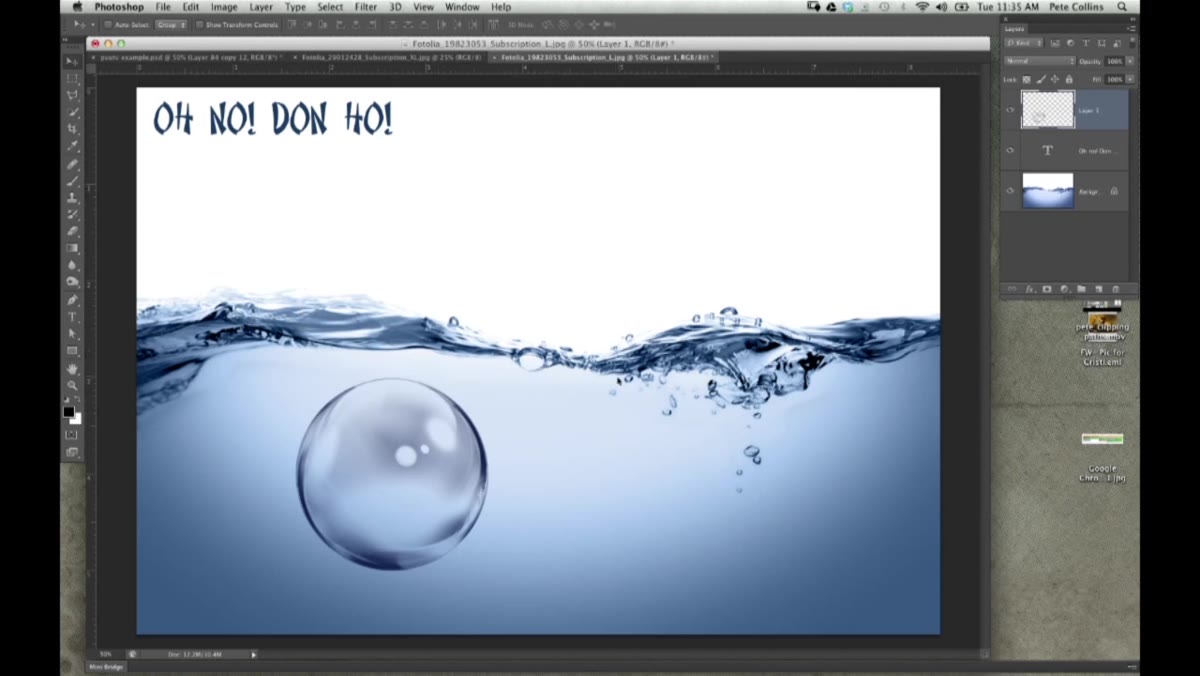 Bubble brushes applied to a water scene on canvas
Start with your composite or water scene already set up. Before you do anything in Liquefy, you need actual bubbles on the canvas to work with. There are plenty of free bubble brush packs out there – grab one, create a new layer above your water layer, set your brush to white or a light blue-white, and scatter some bubbles into the scene. Keep them on their own layer so you’re not destroying anything below. At this stage, don’t worry about how they look. Perfect circles are fine for now – you’re about to break them intentionally.
Bubble brushes applied to a water scene on canvas
Start with your composite or water scene already set up. Before you do anything in Liquefy, you need actual bubbles on the canvas to work with. There are plenty of free bubble brush packs out there – grab one, create a new layer above your water layer, set your brush to white or a light blue-white, and scatter some bubbles into the scene. Keep them on their own layer so you’re not destroying anything below. At this stage, don’t worry about how they look. Perfect circles are fine for now – you’re about to break them intentionally.
Step 2: Select Your Bubble Layer and Open Liquefy
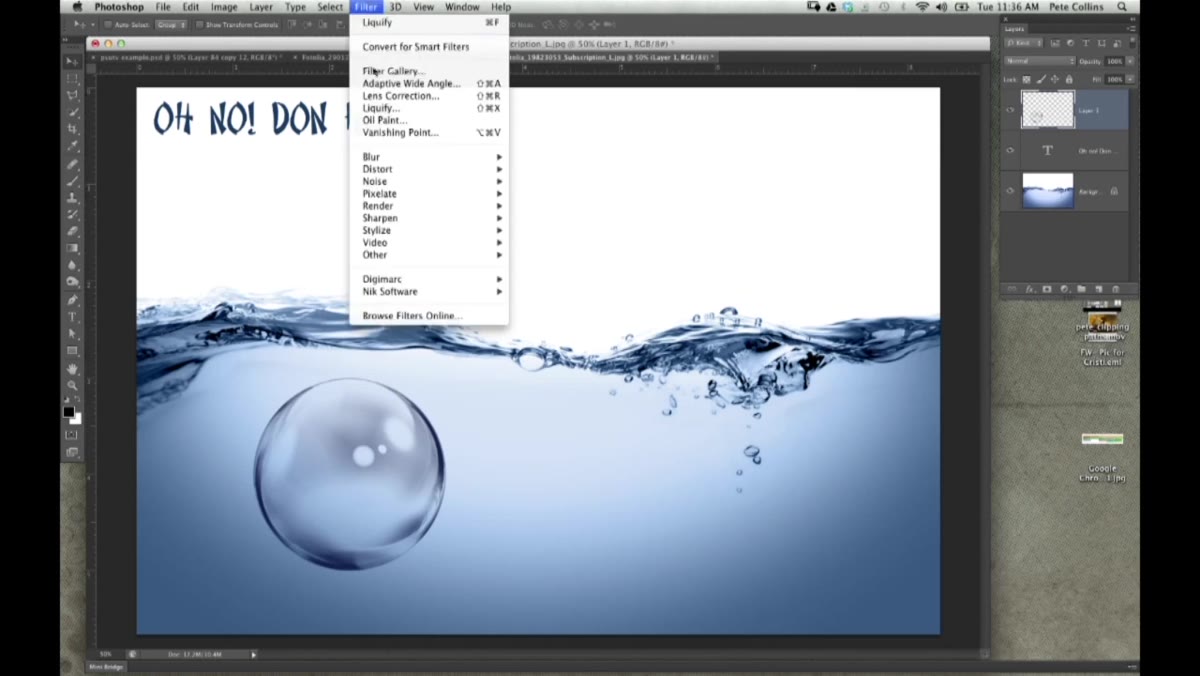 Filter menu open with Liquefy option highlighted
With your bubble layer selected in the Layers panel, go to Filter and choose Liquefy. This opens the Liquefy workspace. If you’ve only ever used this for skin retouching or the occasional comedic face warp, the interface might feel like more than you need right now. It is. You’re only going to use a small part of it – specifically the Forward Warp tool (the top tool in the left toolbar, keyboard shortcut W inside Liquefy). Set your brush size relative to the bubbles you’re working with. A brush that covers roughly one bubble at a time gives you the most control.
Filter menu open with Liquefy option highlighted
With your bubble layer selected in the Layers panel, go to Filter and choose Liquefy. This opens the Liquefy workspace. If you’ve only ever used this for skin retouching or the occasional comedic face warp, the interface might feel like more than you need right now. It is. You’re only going to use a small part of it – specifically the Forward Warp tool (the top tool in the left toolbar, keyboard shortcut W inside Liquefy). Set your brush size relative to the bubbles you’re working with. A brush that covers roughly one bubble at a time gives you the most control.
Step 3: Turn On Show Backdrop
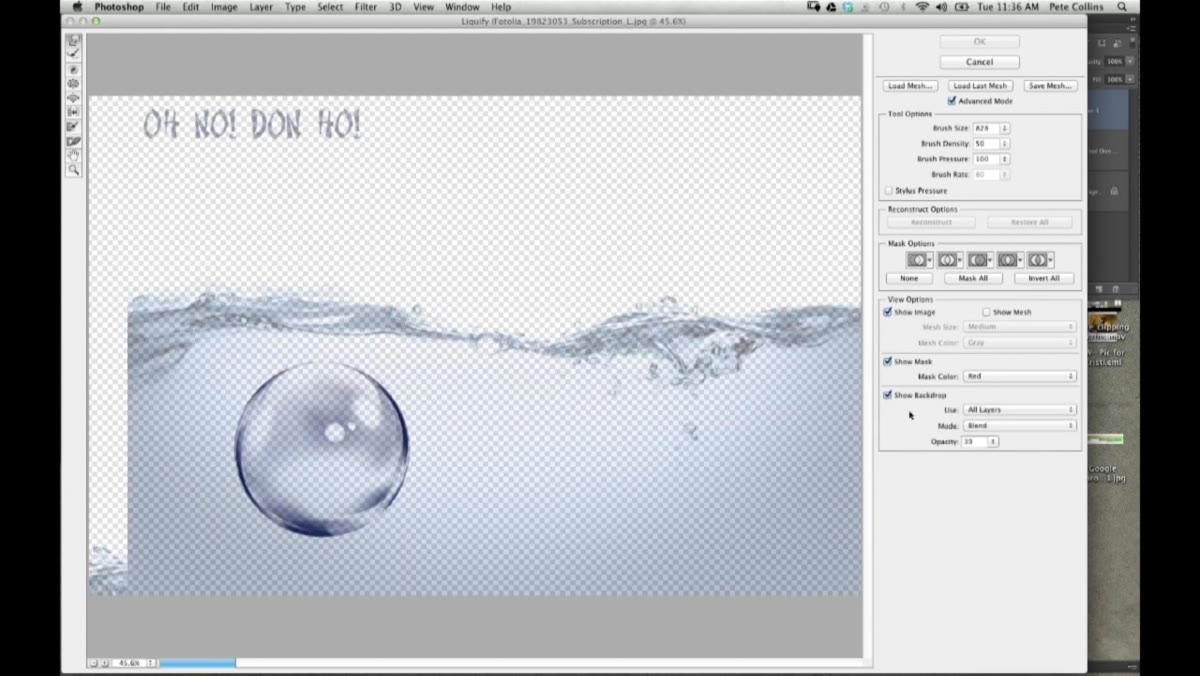 Show Backdrop checkbox enabled in Liquefy panel
Here’s the setting that most people skip, and skipping it makes Liquefy significantly harder to use well. On the right side of the Liquefy dialog, look for the “Show Backdrop” checkbox and turn it on. This lets you see your underlying image – the water, the product, the background – while you’re warping the bubbles. Without it, you’re warping in a vacuum, guessing how the bubbles are going to interact with everything else in the scene. With it, you can make informed decisions about which bubbles need more deformation and where the distortion should be most extreme (hint: it’s near the point of impact or turbulence).
Show Backdrop checkbox enabled in Liquefy panel
Here’s the setting that most people skip, and skipping it makes Liquefy significantly harder to use well. On the right side of the Liquefy dialog, look for the “Show Backdrop” checkbox and turn it on. This lets you see your underlying image – the water, the product, the background – while you’re warping the bubbles. Without it, you’re warping in a vacuum, guessing how the bubbles are going to interact with everything else in the scene. With it, you can make informed decisions about which bubbles need more deformation and where the distortion should be most extreme (hint: it’s near the point of impact or turbulence).
Step 4: Warp the Bubbles to Break Their Perfect Shape
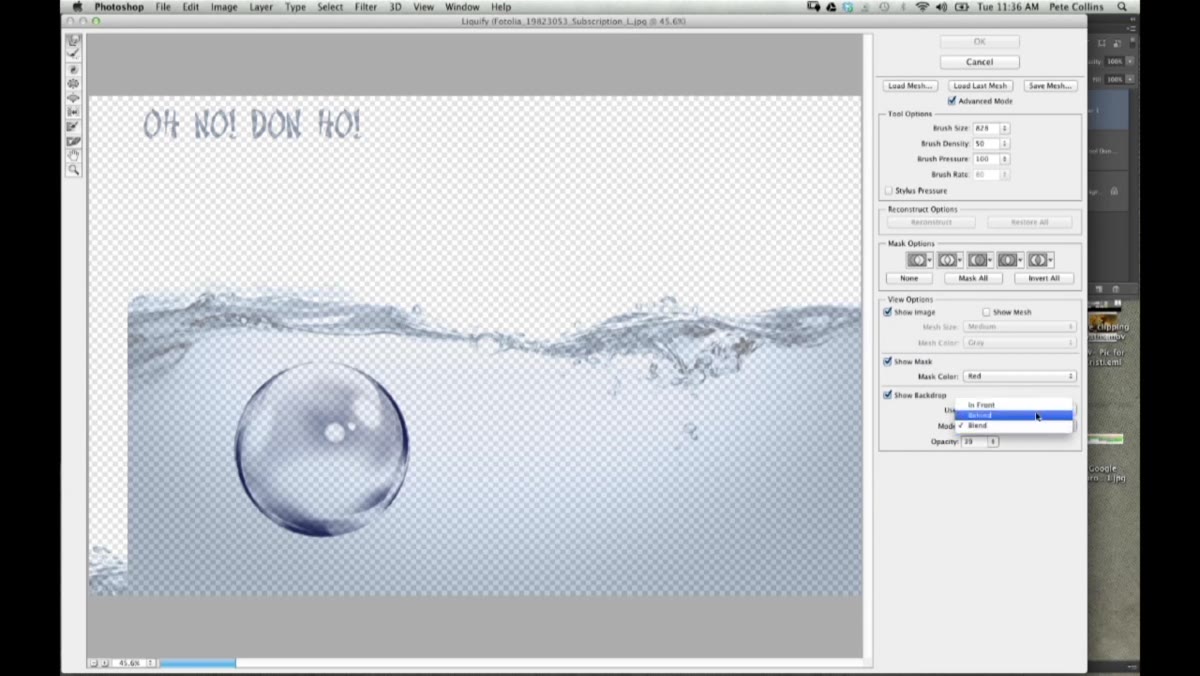 Forward Warp tool distorting bubble shapes in Liquefy
Now the actual work. Using the Forward Warp tool, push the edges of your bubbles around – slightly flatten some, elongate others, pinch a few. The goal is controlled imperfection. Bubbles near the center of the action (where something is hitting the water, for example) should be more distorted. Bubbles toward the edges of the splash can be a little more intact. Vary the brush size as you go. A smaller brush lets you create a subtle pinch or a slight elongation; a larger brush shifts the whole shape. No bubble should look exactly like its neighbor when you’re done.
Forward Warp tool distorting bubble shapes in Liquefy
Now the actual work. Using the Forward Warp tool, push the edges of your bubbles around – slightly flatten some, elongate others, pinch a few. The goal is controlled imperfection. Bubbles near the center of the action (where something is hitting the water, for example) should be more distorted. Bubbles toward the edges of the splash can be a little more intact. Vary the brush size as you go. A smaller brush lets you create a subtle pinch or a slight elongation; a larger brush shifts the whole shape. No bubble should look exactly like its neighbor when you’re done.
Step 5: Check Your Warp Against the Full Scene
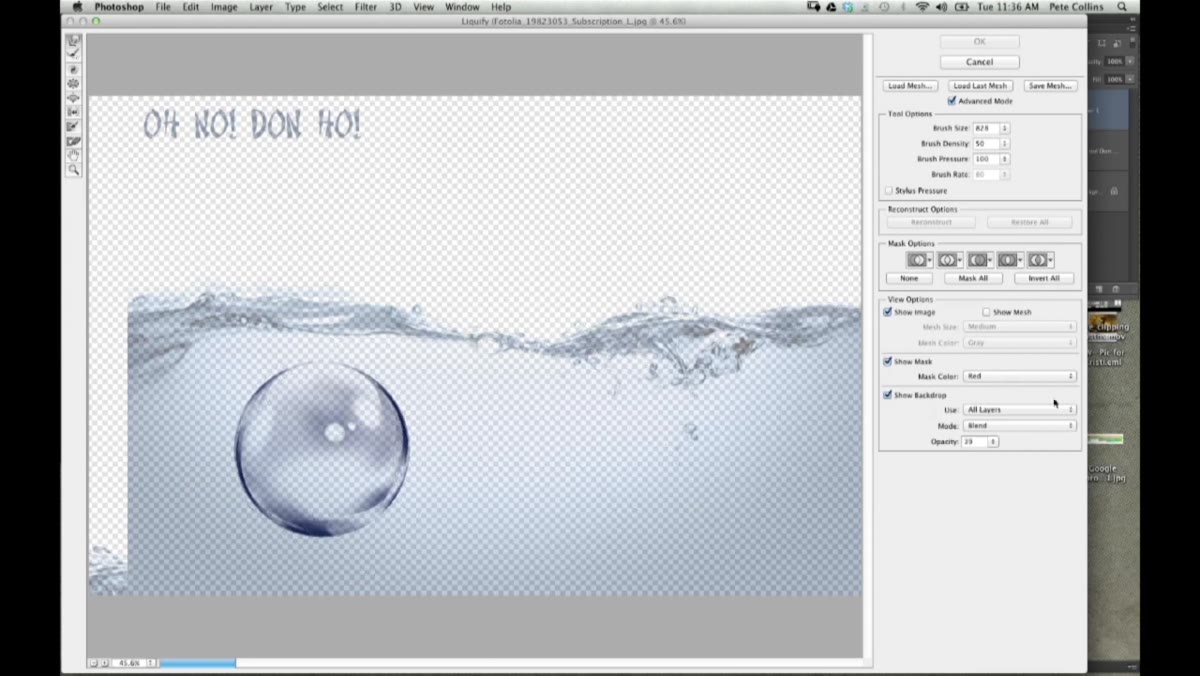 Liquefy canvas showing warped bubbles over the backdrop image
Before you click OK, zoom out inside the Liquefy dialog and look at the whole picture with Show Backdrop still active. This is where you catch the obvious problems – a bubble that got warped way too aggressively, or a cluster that all ended up the same shape even after your edits. If something looks wrong, use the Reconstruct tool (R inside Liquefy) to walk back individual areas without starting over. Small, targeted reconstruction is faster than undoing everything and trying again. Once you’re satisfied that the bubble shapes look random and physics-plausible, click OK.
Liquefy canvas showing warped bubbles over the backdrop image
Before you click OK, zoom out inside the Liquefy dialog and look at the whole picture with Show Backdrop still active. This is where you catch the obvious problems – a bubble that got warped way too aggressively, or a cluster that all ended up the same shape even after your edits. If something looks wrong, use the Reconstruct tool (R inside Liquefy) to walk back individual areas without starting over. Small, targeted reconstruction is faster than undoing everything and trying again. Once you’re satisfied that the bubble shapes look random and physics-plausible, click OK.
Step 6: Blend the Bubble Layer into the Water Scene
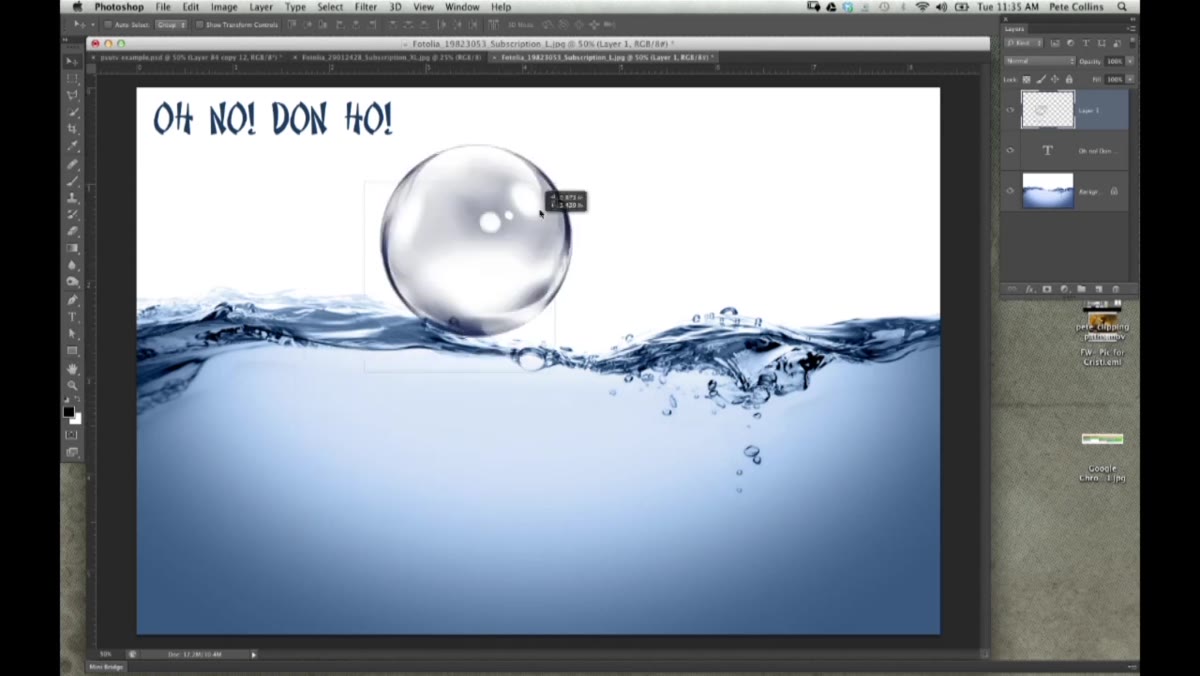 Layers panel showing bubble layer with blend mode options
Back in the main Photoshop workspace, experiment with the blend mode and opacity of your bubble layer. Screen is a reliable starting point for anything light-colored on a dark water background. Dropping the opacity to somewhere between 60% and 85% usually prevents the bubbles from looking pasted on. If your bubbles still look too uniform in tone, add a layer mask and brush away some of them around the edges with a soft black brush at low opacity. The less deliberate the bubble placement looks, the more convincing the whole thing reads.
Layers panel showing bubble layer with blend mode options
Back in the main Photoshop workspace, experiment with the blend mode and opacity of your bubble layer. Screen is a reliable starting point for anything light-colored on a dark water background. Dropping the opacity to somewhere between 60% and 85% usually prevents the bubbles from looking pasted on. If your bubbles still look too uniform in tone, add a layer mask and brush away some of them around the edges with a soft black brush at low opacity. The less deliberate the bubble placement looks, the more convincing the whole thing reads.
What I’d Add: Duplicate and Offset Before Warping
The one thing I’ve started doing that wasn’t in the tutorial is duplicating my bubble layer before I touch Liquefy, then warping each copy slightly differently. You end up with two sets of imperfect bubbles that you can blend together at different opacities. This creates natural depth variation – some bubbles read as closer to the surface, others deeper – without any extra masking work. It takes maybe two extra minutes and the payoff is significant for anything that’s going to be presented at large size or reviewed closely by a client.
The single biggest lesson here is that realism in compositing usually comes from introducing the right kind of imperfection – not from adding more detail or more complex tools. Liquefy is powerful for retouching, sure, but it’s also one of the most useful physics-faking tools in the whole application. Spend fifteen minutes with the Forward Warp tool on your next water composite and you’ll see exactly what I mean.
Watch the full tutorial on YouTube to see the technique demonstrated live alongside the full Photoshop User TV episode.
Comments (2)
The before and after really sells it. Incredible difference.
Finally someone explains this in a way that actually makes sense.
Leave a Comment