I’ll be honest with you. For an embarrassingly long time, I used Lightroom’s Radial Filter for exactly one thing: drawing a circle and darkening the outside of it. That’s it. That was my whole relationship with the tool. I was basically using a Swiss Army knife to open envelopes.
Then I stumbled onto a tutorial by landscape photographer Nigel Danson where he runs through five distinct things you can do with the Radial Filter, and I had one of those “okay I’ve been doing this wrong” moments that I usually only get from accidentally breaking something expensive. If you’re a landscape shooter or you work with any kind of environmental or atmospheric photography, this one is worth your full attention. Watch the full tutorial on YouTube if you want to follow along with his actual footage, or keep reading and I’ll walk you through the techniques step by step.
The core insight Danson keeps coming back to is that the Radial Filter gives you spatial control over adjustments that the global sliders just can’t replicate. You’re not just brightening an image. You’re brightening here, warming this spot, and softening this zone, all independently. Once that clicks, the tool stops feeling like a party trick and starts feeling essential.
Step 1: Find the Radial Filter in the Lightroom Toolbar
 Radial Filter icon highlighted in the Lightroom toolbar
The Radial Filter lives in the local adjustments toolbar, just above the Basic panel on the right side of Lightroom’s Develop module. It looks like a small oval or ellipse icon. Click it, then click and drag on your image to draw an elliptical selection. By default, whatever adjustments you make will apply to the outside of the ellipse. To flip that so adjustments hit the inside instead, hit O on your keyboard or check the “Invert Mask” checkbox at the bottom of the panel. You’ll be toggling this constantly depending on which technique you’re running.
Radial Filter icon highlighted in the Lightroom toolbar
The Radial Filter lives in the local adjustments toolbar, just above the Basic panel on the right side of Lightroom’s Develop module. It looks like a small oval or ellipse icon. Click it, then click and drag on your image to draw an elliptical selection. By default, whatever adjustments you make will apply to the outside of the ellipse. To flip that so adjustments hit the inside instead, hit O on your keyboard or check the “Invert Mask” checkbox at the bottom of the panel. You’ll be toggling this constantly depending on which technique you’re running.
Step 2: Fake a Sun or Bright Light Source
 Radial filter drawn over bright sky area in Norway landscape photo
This is the one that got me. If you’ve got a landscape where the sun is just out of frame or the light source is present but weak, you can use the Radial Filter to simulate that warm, glowing quality without it looking fake. Draw your ellipse over the area where the light would logically be coming from, then invert the mask so you’re editing inside the circle.
Radial filter drawn over bright sky area in Norway landscape photo
This is the one that got me. If you’ve got a landscape where the sun is just out of frame or the light source is present but weak, you can use the Radial Filter to simulate that warm, glowing quality without it looking fake. Draw your ellipse over the area where the light would logically be coming from, then invert the mask so you’re editing inside the circle.
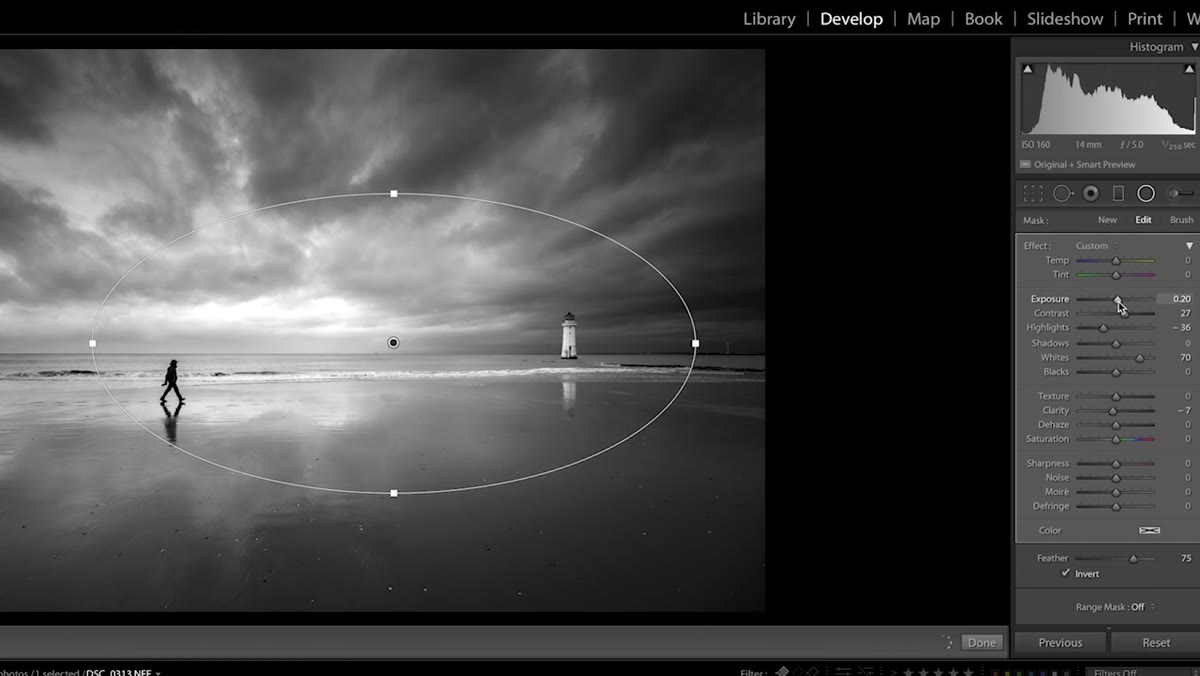
From there, bump exposure up slightly, then pull clarity way down into negative territory. Negative clarity softens contrast in the midtones and gives the area that hazy, diffused look real sunlight creates. Add a touch of warmth by nudging the temperature slider toward yellow, bring whites up a little, and dial highlights back so it doesn’t blow out. The result reads as natural light rather than a digital blob. You can then drag the ellipse around to dial in positioning, and stretch or shrink it to control how far the glow spreads. Danson also points out you can save this as a preset once you’ve got the settings dialed in, so you’re not rebuilding it every single time.
Step 3: Use It as a Flexible Vignette
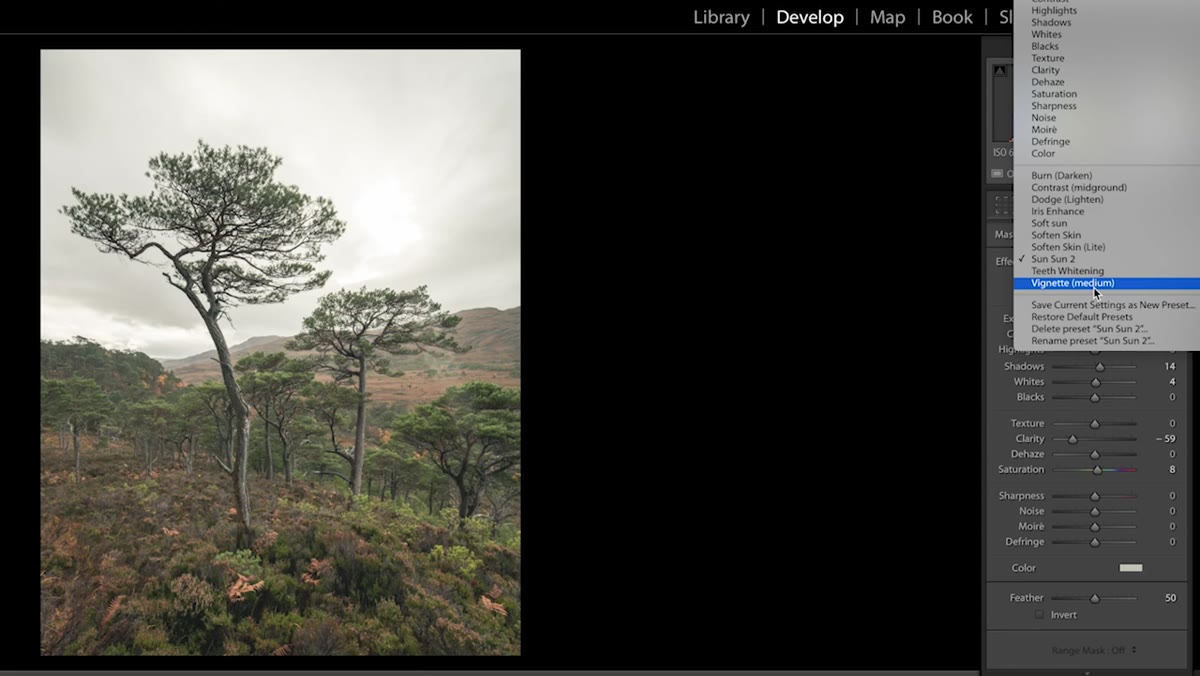 Radial filter expanded to image edges creating custom vignette effect
Lightroom has a built-in vignette tool in the Effects panel, but it’s rigid. It always darkens from the edges inward, centered on the frame. The Radial Filter version lets you push that center wherever you want. Draw a large ellipse that covers most of the frame and leave the mask uninverted so you’re darkening the outside ring.
Radial filter expanded to image edges creating custom vignette effect
Lightroom has a built-in vignette tool in the Effects panel, but it’s rigid. It always darkens from the edges inward, centered on the frame. The Radial Filter version lets you push that center wherever you want. Draw a large ellipse that covers most of the frame and leave the mask uninverted so you’re darkening the outside ring.
The real advantage here is repositioning. If your subject sits lower in the frame, you can nudge the ellipse down so the vignette draws the eye toward them rather than toward the geometric center of the image. You can also go beyond just exposure, desaturating the outer areas, shifting their color temperature, or reducing texture and clarity to make the edges feel softer and further away. The built-in vignette tool just doesn’t give you any of that.
Step 4: Inverse Vignette - Brighten the Middle
 Inverted radial filter brightening center of image selectively
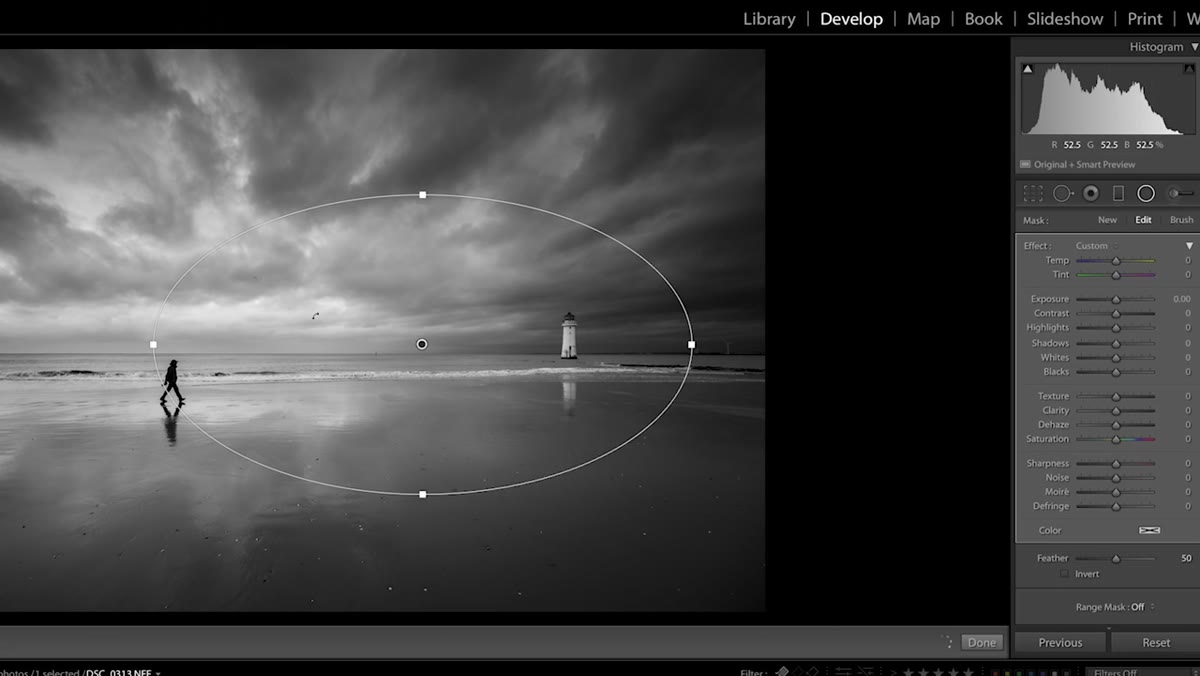
Flip the logic of the vignette entirely. Draw your ellipse in the center of the frame, invert the mask so you’re affecting the inside, and bring the exposure up. This creates a subtle spotlight effect that pulls attention toward your subject without the heavy-handed look of cranking global exposure. Danson uses it to add luminosity to a focal point while keeping the surrounding scene from feeling overexposed.
Inverted radial filter brightening center of image selectively
Flip the logic of the vignette entirely. Draw your ellipse in the center of the frame, invert the mask so you’re affecting the inside, and bring the exposure up. This creates a subtle spotlight effect that pulls attention toward your subject without the heavy-handed look of cranking global exposure. Danson uses it to add luminosity to a focal point while keeping the surrounding scene from feeling overexposed.
Keep the feathering high, which is usually the default. Hard-edged radial filters look like mistakes. A high feather value blends the adjustment gradually into the surrounding image, and most of the time nobody looking at the final result will be able to tell you did anything at all. They’ll just think the light was nice.
Step 5: Stack Multiple Radial Filters for Layered Control
 Multiple radial filter pins visible on landscape image
Nothing says you’re limited to one. Danson’s workflow often involves several Radial Filters sitting on top of each other, each doing a specific job. One might handle the fake sun glow. Another creates the vignette. A third adds a subtle brightness boost to a specific rock or tree. Each filter is independent, so you can go back and tweak any one of them without affecting the others.
Multiple radial filter pins visible on landscape image
Nothing says you’re limited to one. Danson’s workflow often involves several Radial Filters sitting on top of each other, each doing a specific job. One might handle the fake sun glow. Another creates the vignette. A third adds a subtle brightness boost to a specific rock or tree. Each filter is independent, so you can go back and tweak any one of them without affecting the others.
This is where the tool starts to resemble the kind of layer-based control you get in Photoshop, but without leaving Lightroom. If you’ve got a complex scene with multiple light sources or areas that need different treatment, stacking filters lets you address each zone on its own terms. Just name or note which pin does what, because a cluster of unmarked pins gets confusing fast.
What I’d Add From My Own Experience
The preset-saving feature Danson mentions deserves more emphasis than it gets in the tutorial. Once you’ve built a Soft Sun effect or a custom vignette that works for your style, save it immediately. Lightroom lets you name these presets whatever you want in the local adjustment panel. I now have five or six Radial Filter presets that cover most of my common use cases, and being able to drop one onto an image and just tweak the positioning saves a real chunk of time per edit. If you’re doing volume work, that adds up fast.
One thing to watch out for: the Radial Filter and Lightroom’s AI masking tools can interact in unexpected ways if you’re combining them. If you’re using Subject Select or a luminance mask alongside a Radial Filter, test the interaction before you commit to a heavy edit. Sometimes they play nicely. Sometimes you get a weird halo situation that takes longer to fix than it would have to just build the edit manually.
The single most important thing I took from this tutorial is the clarity trick for the fake sun. Dropping clarity inside a warm, slightly bright radial selection is doing a huge amount of perceptual work. It makes the area feel soft and luminous rather than just brighter, and the difference between those two things is the difference between an edit that reads as natural and one that reads as processed. That one slider move is worth the whole watch.
Watch the full tutorial on YouTube to see Danson apply all five techniques on his actual landscape images. Seeing it on real footage makes the subtleties a lot easier to calibrate when you’re trying it yourself.
Comments
Leave a Comment