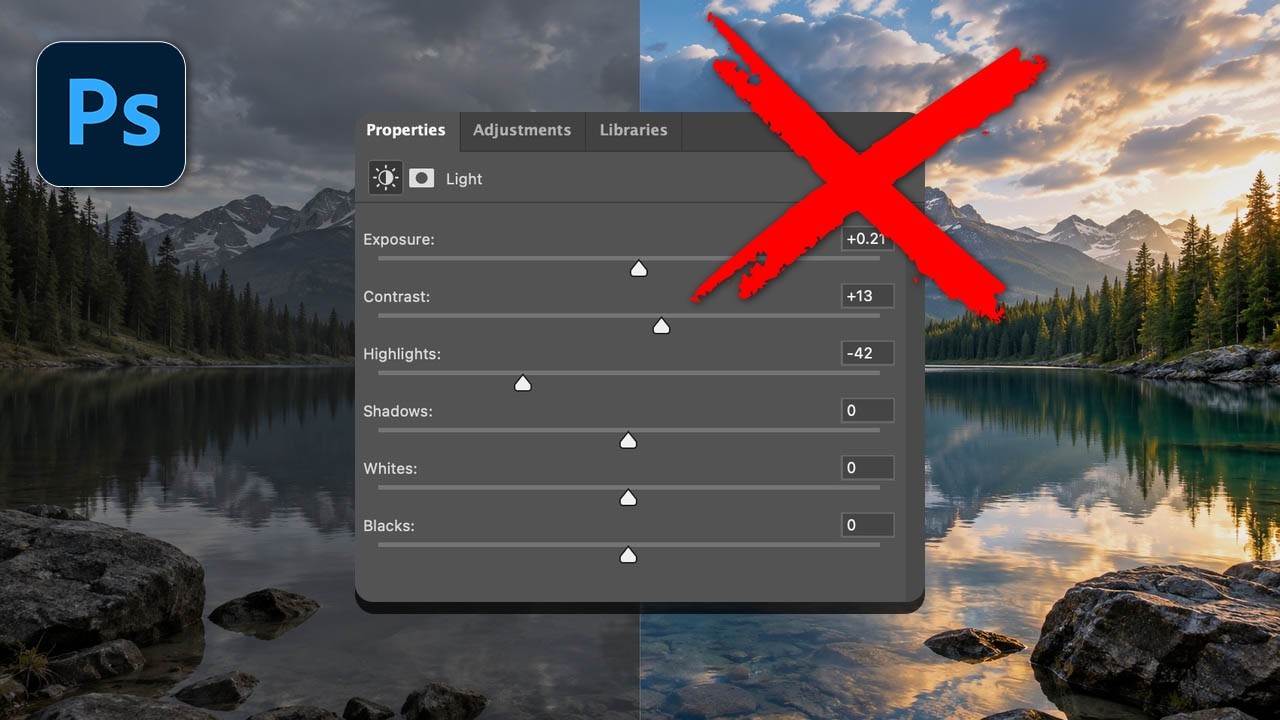
A few months back I watched a friend spend twenty minutes in Photoshop stacking curves layers, luminosity masks, and a lighting adjustment layer to fix the exposure on a landscape shot. It looked great. It also could have taken three minutes in Lightroom. I didn’t say anything because I’ve made the same mistake plenty of times, including recently, when I caught myself reaching for Photoshop out of pure habit when the RAW editor was sitting right there, already open, already better equipped for the job.
That particular habit is exactly what Matt Kloskowski addresses in this tutorial. If you’ve noticed the relatively new lighting adjustment layer in Photoshop’s main interface and wondered whether it replaces what you’d normally do in Lightroom or Camera Raw, this video is the clearest answer I’ve seen. Watch the full tutorial on YouTube before or after reading this breakdown, because Matt shows live comparisons side by side that are hard to fully replicate in text.
The short version: Lightroom and Camera Raw are still the right place for the vast majority of your tonal and color work. But the light layer in Photoshop isn’t useless either. The point is knowing which tool earns its place in which situation, instead of just defaulting to wherever your mouse happens to land.
Step 1: Understand the Setup Matt Is Working With
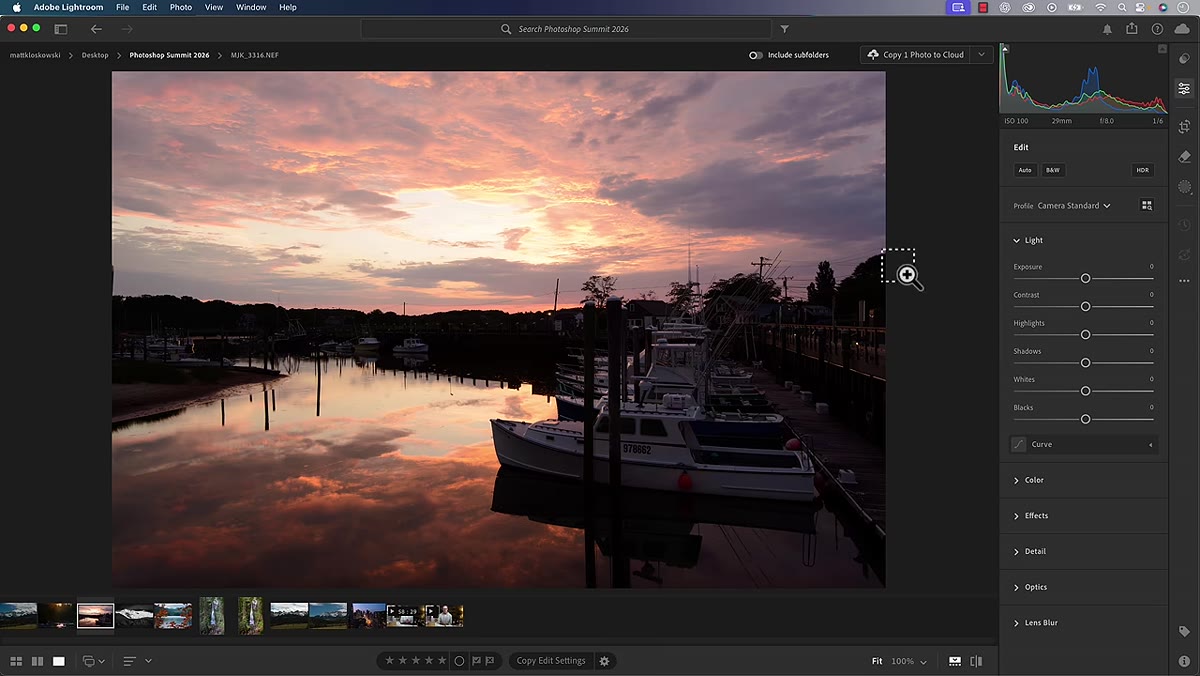
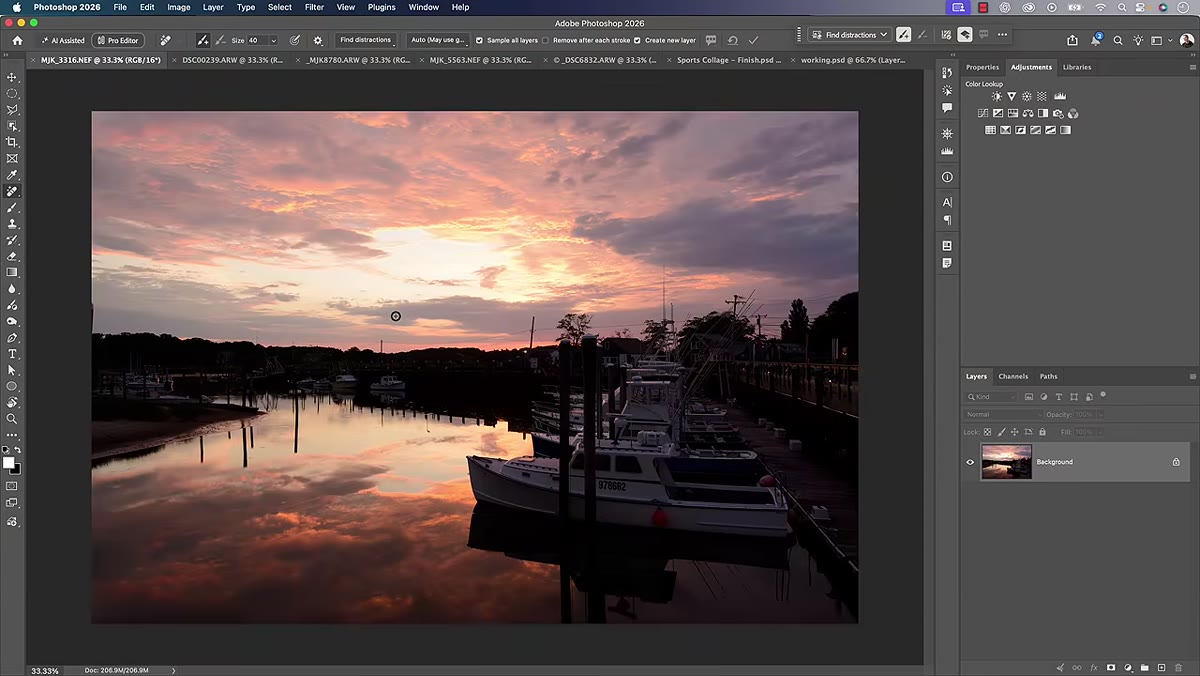 Photoshop and Lightroom open side by side on screen
Matt opens the tutorial with two environments running at once. A set of RAW photos has been opened directly in Photoshop, bypassing Camera Raw entirely by clicking through without making any adjustments. The same photos are open in Lightroom simultaneously. This side-by-side setup is the whole point of the video’s structure. You’re not watching someone build something from scratch. You’re watching a comparison unfold in real time.
Photoshop and Lightroom open side by side on screen
Matt opens the tutorial with two environments running at once. A set of RAW photos has been opened directly in Photoshop, bypassing Camera Raw entirely by clicking through without making any adjustments. The same photos are open in Lightroom simultaneously. This side-by-side setup is the whole point of the video’s structure. You’re not watching someone build something from scratch. You’re watching a comparison unfold in real time.
If you want to follow along at home, do the same. Open a RAW file in Photoshop, click Open without touching anything in Camera Raw, and also have that same file sitting in Lightroom or Lightroom Classic. The editing panel in both versions of Lightroom is functionally identical for what we’re talking about here, so don’t sweat which one you have.
Step 2: Recognize What the Lighting Adjustment Layer Actually Is
 Lighting adjustment layer being opened in Photoshop interface
The lighting adjustment layer in Photoshop looks almost identical to the tonal sliders you see in Lightroom’s Develop module or in Camera Raw. Exposure, highlights, shadows, whites, blacks, contrast. If you’ve used either RAW editor for more than a week, the layout will feel immediately familiar, which is precisely where the confusion starts.
Lighting adjustment layer being opened in Photoshop interface
The lighting adjustment layer in Photoshop looks almost identical to the tonal sliders you see in Lightroom’s Develop module or in Camera Raw. Exposure, highlights, shadows, whites, blacks, contrast. If you’ve used either RAW editor for more than a week, the layout will feel immediately familiar, which is precisely where the confusion starts.
The similarity in appearance makes it tempting to treat them as interchangeable. They’re not. The RAW editor is working on the actual RAW data. The lighting adjustment layer in Photoshop is working downstream, on a rendered image. That distinction matters more than it might seem at first glance.
Step 3: Understand Why the RAW Editor Wins for Tonal Work
 Lightroom Develop panel showing exposure and tone sliders
When you’re pulling shadows up or pushing highlights down in Lightroom or Camera Raw, you’re doing it with the full RAW file’s data available. There’s more range to work with and the math is more accurate to what the sensor originally captured. Doing the same thing in Photoshop after the fact means you’re working on a baked version of that data, and you’re more likely to introduce noise, clipping, or banding when pushing the sliders hard.
Lightroom Develop panel showing exposure and tone sliders
When you’re pulling shadows up or pushing highlights down in Lightroom or Camera Raw, you’re doing it with the full RAW file’s data available. There’s more range to work with and the math is more accurate to what the sensor originally captured. Doing the same thing in Photoshop after the fact means you’re working on a baked version of that data, and you’re more likely to introduce noise, clipping, or banding when pushing the sliders hard.
Matt makes this point directly and it lines up with what I’ve learned the messy way. The tools in the RAW editor also include masking that has genuinely caught up to, and in some cases surpassed, what Photoshop’s selection tools offer for common photographic tasks. Subject masking, sky selection, luminance range masking. That used to be a reason to jump to Photoshop. It mostly isn’t anymore.
Step 4: Recognize the Full Scope of What Belongs in the RAW Editor
 List of correction types on screen including sharpening and noise reduction
It’s not just exposure and contrast. Matt runs through a broader list of adjustments that belong in the RAW stage. Sharpening, noise reduction, lens correction, optics. These are corrections that should happen before you ever open the image in Photoshop, if you open it there at all.
List of correction types on screen including sharpening and noise reduction
It’s not just exposure and contrast. Matt runs through a broader list of adjustments that belong in the RAW stage. Sharpening, noise reduction, lens correction, optics. These are corrections that should happen before you ever open the image in Photoshop, if you open it there at all.
This is worth internalizing as a workflow principle rather than a rule-by-rule checklist. Ask yourself: is this an adjustment that works on the photo’s fundamental data? If yes, it probably belongs in Lightroom or Camera Raw. Photoshop earns its place when you’re doing things that require pixel-level control, compositing, retouching, or anything the RAW editor simply cannot do.
Step 5: Know When the Photoshop Light Layer Actually Earns Its Place
 Photoshop light layer applied to a composite or layered document
Matt is careful not to dismiss the light layer outright, and that’s what makes this tutorial more useful than a simple “Lightroom good, Photoshop bad” take. There are legitimate scenarios where the lighting adjustment layer makes sense inside Photoshop. The clearest one: you’re working on a composite or a layered document where you need to match the light on a specific layer without affecting the rest of the stack.
Photoshop light layer applied to a composite or layered document
Matt is careful not to dismiss the light layer outright, and that’s what makes this tutorial more useful than a simple “Lightroom good, Photoshop bad” take. There are legitimate scenarios where the lighting adjustment layer makes sense inside Photoshop. The clearest one: you’re working on a composite or a layered document where you need to match the light on a specific layer without affecting the rest of the stack.
If you’ve brought a sky replacement into a scene, for example, and you need to adjust the exposure of just that sky layer to match the foreground, the lighting adjustment layer clipped to that one layer is actually the right call. You’re not going back to RAW. You’re doing creative tonal matching inside a complex document. That’s a completely different situation than trying to rescue an underexposed shot after the fact.
Step 6: Respect the Workflow, Then Make Your Own Choices
 Matt speaking to camera about workflow philosophy
One thing I appreciate about how Matt frames all of this is that he’s not precious about it. He acknowledges that some people are deeply attached to their Photoshop-heavy workflows, and that’s fine. The final photo doesn’t come with a label explaining what tools were used. Nobody looks at a great shot and asks whether it was edited with curves layers or the Develop module.
Matt speaking to camera about workflow philosophy
One thing I appreciate about how Matt frames all of this is that he’s not precious about it. He acknowledges that some people are deeply attached to their Photoshop-heavy workflows, and that’s fine. The final photo doesn’t come with a label explaining what tools were used. Nobody looks at a great shot and asks whether it was edited with curves layers or the Develop module.
What matters is understanding how these tools were designed to work, so you can make informed decisions instead of just defaulting to whatever feels familiar. If you know why the RAW editor handles tonal corrections better, and you still choose to do it in Photoshop, at least you’re making that choice consciously.
One More Thing: The Habit Loop Is Real
I spent the first two or three years of my freelance career doing almost everything in Photoshop because that’s where I learned to edit. Lightroom was for organizing. Photoshop was for editing. That mental model was outdated by the time I adopted it, and it cost me hours I didn’t need to spend.
The lighting adjustment layer, to me, is a bit of a trap for people with that same background. It looks familiar, it’s right there in the interface, and it feels productive to use it. But familiarity isn’t the same as efficiency, and it’s definitely not the same as quality. Start in the RAW editor. Push it as far as it’ll go. Then open Photoshop only for the work it’s uniquely qualified to do.
The single most important takeaway here is simple: your RAW editor is not a stepping stone to Photoshop. For most photos, it’s the destination. Photoshop is the specialist you bring in for specific jobs, not the default workspace.
Watch the full tutorial on YouTube to see Matt’s live side-by-side comparisons, which make the difference between the two approaches much clearer than any screenshot can.
Comments
Leave a Comment