There’s a version of me from a few years ago who would open every photo straight in Photoshop. Raw file, JPEG, screenshot of a meme — didn’t matter. Photoshop was the big tool, so obviously that’s where the real work happened, right? Wrong. It took embarrassingly long for me to figure out that jumping past Lightroom (or Camera Raw) wasn’t a power move. It was leaving quality on the table before I’d even started.
That’s exactly the gap that Watch the full tutorial on YouTube addresses. In this Matt Kloskowski tutorial, he lays out a clear framework for knowing which application should handle which part of your edit, and more importantly, why the order matters so much more than most people realize. Matt’s the creator of the Photoshop System, a course built specifically for Lightroom and Camera Raw users, so this isn’t abstract theory. It’s a practical workflow from someone who’s thought hard about where each tool actually earns its place.
The core argument is simple but the implications run deep: raw editing tools like Lightroom or Camera Raw give you a quality ceiling that Photoshop simply cannot match for certain tasks. Once you leave that raw environment, you’re in a different world, and no Photoshop adjustment layer is going to give you back what you had. Knowing exactly where that line is will change how you approach every single edit.
Step 1: Start All Tonal Work in Lightroom (or Camera Raw)
 Basic panel sliders in Lightroom with overexposed waterfall photo
Matt opens with a real-world example: an overexposed landscape shot from the Great Smoky Mountains. He uses it to demonstrate exactly why your exposure, highlights, shadows, whites, blacks, white balance, clarity, and vibrance adjustments all belong in Lightroom’s Basic panel, not Photoshop. The key word here is “start.” Before you even think about opening Photoshop, run through these sliders.
Basic panel sliders in Lightroom with overexposed waterfall photo
Matt opens with a real-world example: an overexposed landscape shot from the Great Smoky Mountains. He uses it to demonstrate exactly why your exposure, highlights, shadows, whites, blacks, white balance, clarity, and vibrance adjustments all belong in Lightroom’s Basic panel, not Photoshop. The key word here is “start.” Before you even think about opening Photoshop, run through these sliders.
In Lightroom, pulling the Highlights slider back on a blown-out sky or waterfall actually recovers data. The same goes for lifting shadows. You’re not faking it or guessing. You’re reading real pixel information that’s encoded in the raw file. Photoshop doesn’t have access to that raw data in the same way, which means its version of the same move produces visibly different, and usually worse, results.
Step 2: Understand What “Raw Space” Actually Means for Your Edits
 Side-by-side quality comparison, Lightroom highlights vs Photoshop shadow-highlights
This is the part that clicked everything into place for me when I watched it. When you’re working in Lightroom or Camera Raw, you’re editing inside the raw processing engine. The file hasn’t been rendered into a fixed pixel grid yet. That means adjustments like shadow recovery or highlight rollback are working with a much wider range of information.
Side-by-side quality comparison, Lightroom highlights vs Photoshop shadow-highlights
This is the part that clicked everything into place for me when I watched it. When you’re working in Lightroom or Camera Raw, you’re editing inside the raw processing engine. The file hasn’t been rendered into a fixed pixel grid yet. That means adjustments like shadow recovery or highlight rollback are working with a much wider range of information.
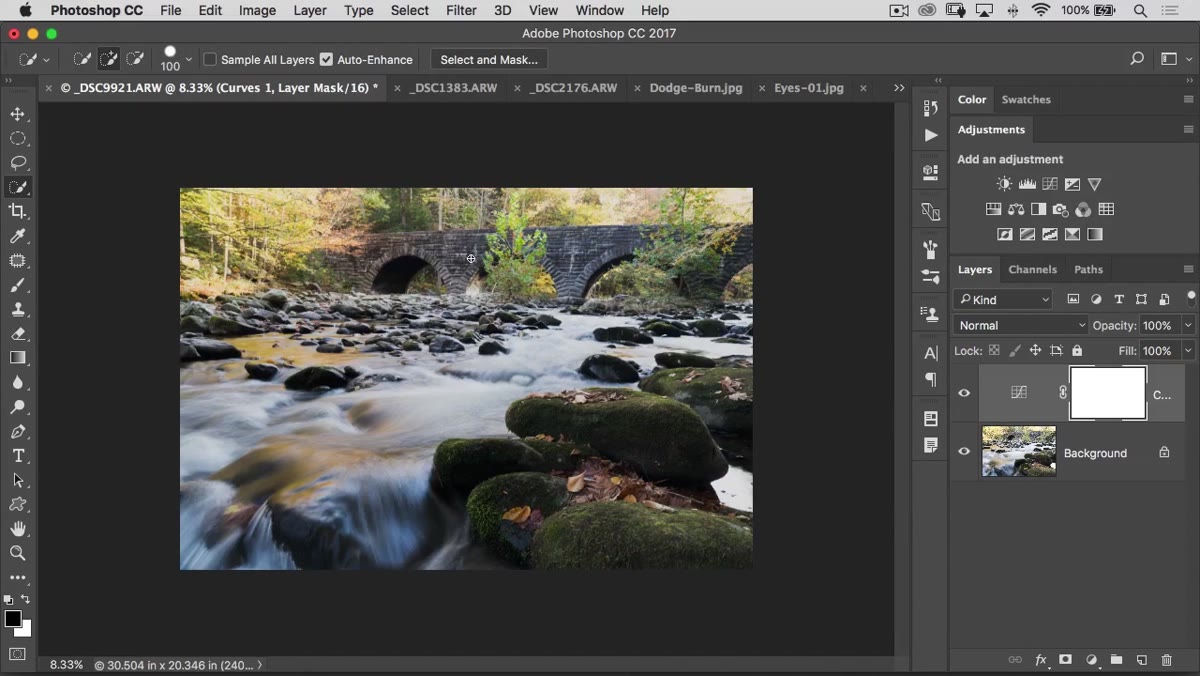
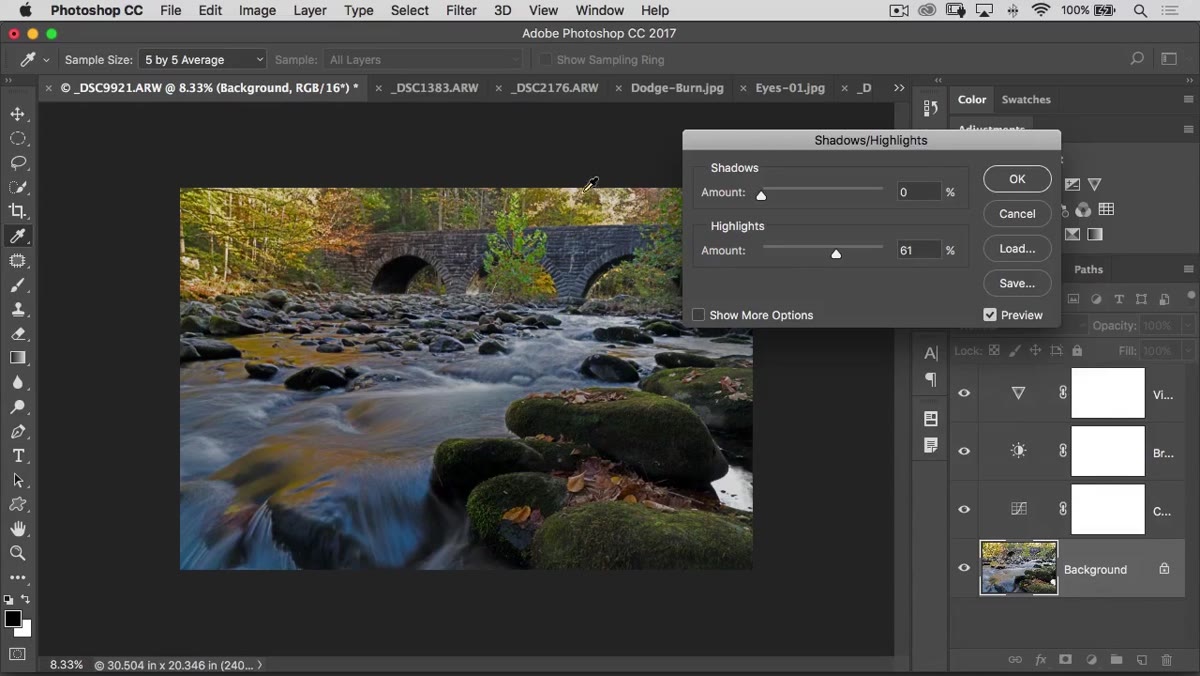
The moment you send that file to Photoshop, even without re-saving it as a low-quality JPEG, you’ve left the raw world. You’re now working in rendered pixels, and the headroom shrinks dramatically. Matt demonstrates this directly by resetting his edit and opening the same photo in Photoshop, then trying to match the Lightroom result using Curves, Brightness/Contrast, and the Shadows/Highlights adjustment. None of them get close. The highlights stay blown. The shadows go muddy. It’s not a matter of skill. It’s a fundamental difference in what the tools have to work with.
Step 3: Recognize the Two Reasons Lightroom Wins for Basic Toning
 Lightroom Basic panel showing all adjustments accessible in one place
Matt makes a point here that’s worth writing on a sticky note: there are two distinct advantages to doing your tonal work in Lightroom, not just one. First is raw quality, which we just covered. Second is efficiency. Every tonal adjustment you could possibly need lives in one panel in Lightroom. Exposure, color temperature, contrast, tone curve, all of it. In Photoshop, you’d be opening separate dialogs and adjustment layers for each one. More steps, more room for error, and you still end up with an inferior result.
Lightroom Basic panel showing all adjustments accessible in one place
Matt makes a point here that’s worth writing on a sticky note: there are two distinct advantages to doing your tonal work in Lightroom, not just one. First is raw quality, which we just covered. Second is efficiency. Every tonal adjustment you could possibly need lives in one panel in Lightroom. Exposure, color temperature, contrast, tone curve, all of it. In Photoshop, you’d be opening separate dialogs and adjustment layers for each one. More steps, more room for error, and you still end up with an inferior result.
If you’re someone who defaults to Photoshop out of habit (I see you, past me), this step is really about retraining your reflex. The question to ask yourself at the start of any edit isn’t “what do I need to fix?” It’s “can Lightroom handle this?” For basic toning, the answer is almost always yes, and it should stay there.
Step 4: Know When Photoshop Is the Right Tool
 Presenter explaining the blurred line between Lightroom and Photoshop capabilities
Matt is honest about something that a lot of tutorials gloss over: the line between what Lightroom and Photoshop can do has genuinely blurred over the years. Both applications have added features that overlap with the other. That’s not a reason to pick randomly. It’s a reason to be more deliberate about your reasoning.
Presenter explaining the blurred line between Lightroom and Photoshop capabilities
Matt is honest about something that a lot of tutorials gloss over: the line between what Lightroom and Photoshop can do has genuinely blurred over the years. Both applications have added features that overlap with the other. That’s not a reason to pick randomly. It’s a reason to be more deliberate about your reasoning.
The general principle he lands on is this: Lightroom owns the raw processing phase. Photoshop takes over when you need things that require pixel-level control, like compositing multiple images, doing detailed retouching with clone stamp or healing tools, working with text and graphics, or making selections that require layer masking. Those tasks benefit from Photoshop’s architecture. Basic toning doesn’t.
Step 5: Apply This to Your Own Workflow Before You Even Open a File
 Waterfall photo in Lightroom Basic panel before any adjustments applied
The most actionable thing I took from this tutorial is building a brief mental checklist before any edit starts. Matt doesn’t spell this out as a list, but his examples make the logic clear. Before you open anything, ask: is this primarily a toning and color correction job? Start in Lightroom. Does it involve compositing, retouching, masking, or layered work? Photoshop. Does it need both? Start in Lightroom, finish the raw work, then send to Photoshop.
Waterfall photo in Lightroom Basic panel before any adjustments applied
The most actionable thing I took from this tutorial is building a brief mental checklist before any edit starts. Matt doesn’t spell this out as a list, but his examples make the logic clear. Before you open anything, ask: is this primarily a toning and color correction job? Start in Lightroom. Does it involve compositing, retouching, masking, or layered work? Photoshop. Does it need both? Start in Lightroom, finish the raw work, then send to Photoshop.
The reason this matters at the workflow level, not just the technical level, is that it also protects you from scope creep mid-edit. When you jump to Photoshop too early because you’re impatient or just more comfortable there, you end up trying to do raw-quality work in the wrong environment, then going back, then going forward again. It gets messy fast.
What I’d Add From My Own Experience
One thing Matt doesn’t get deep into here, but that I’ve run into constantly doing client work, is that this same principle applies when you’re handed someone else’s files. A client sends you a raw from their camera? Lightroom first, always. A client sends you a flattened JPEG that they’ve already over-sharpened and saved six times? At that point the raw argument is moot. You’re in Photoshop territory whether you like it or not, and you just do what you can.
The other thing worth noting: if you’re using Adobe Camera Raw as a Smart Filter inside Photoshop, you’re getting some of that non-destructive flexibility back. It’s not identical to working in Lightroom from the start, but it’s a decent middle ground when your workflow demands you stay inside Photoshop. Still, if the raw file is available, start where the data is richest.
The single most important takeaway here is that raw quality is not recoverable once you leave it. You can be the most technically skilled Photoshop user on the planet and you still can’t pull back a blown highlight the way Lightroom can, because the data isn’t there anymore. Start every edit in the right place and you’re working with the best possible material from frame one.
Watch the full tutorial on YouTube to see Matt walk through the full comparison with his own photos. The visual difference between the Lightroom recovery and the Photoshop attempt is genuinely striking, and worth seeing with your own eyes.
Comments
Leave a Comment