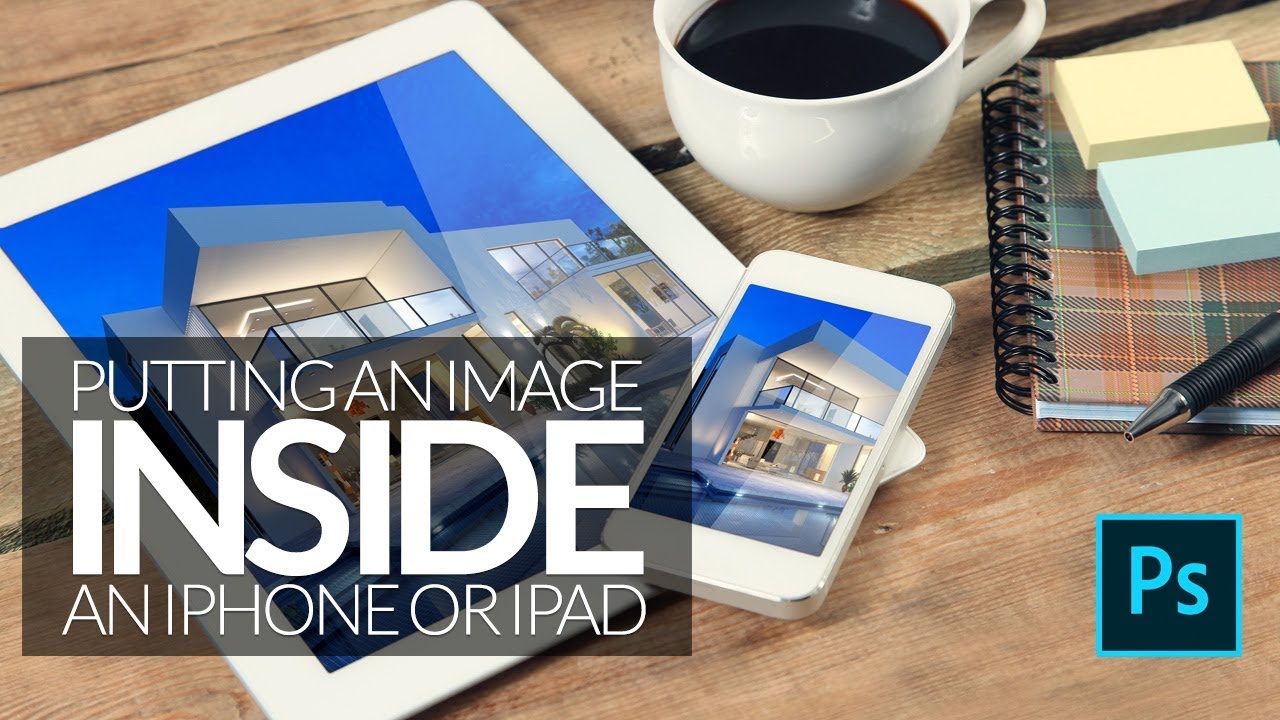
Every few months, a client asks me for a “mockup” – a product screenshot or website preview placed inside a phone or laptop screen for an ad. For a long time I was doing it the slow, painful way: dragging the image in, manually masking it, fighting with perspective until I wanted to throw my laptop across whatever coffee shop I was sitting in. Then I watched Scott Kelby walk through his version of this technique, and I felt that specific kind of embarrassment that comes from realizing a 20-minute problem was actually a 5-minute problem.
Watch the full tutorial on YouTube
In this Scott Kelby tutorial, he covers placing an image inside a device screen – phone, tablet, laptop, monitor, whatever you’ve got – and then adds a simple glassy reflection effect to make the whole thing feel believable. The technique relies on a Photoshop feature that a lot of people walk right past: Paste Special > Paste Into. Once you know it exists, you’ll use it constantly. Here’s the full walkthrough.
Step 1: Copy Your Source Image
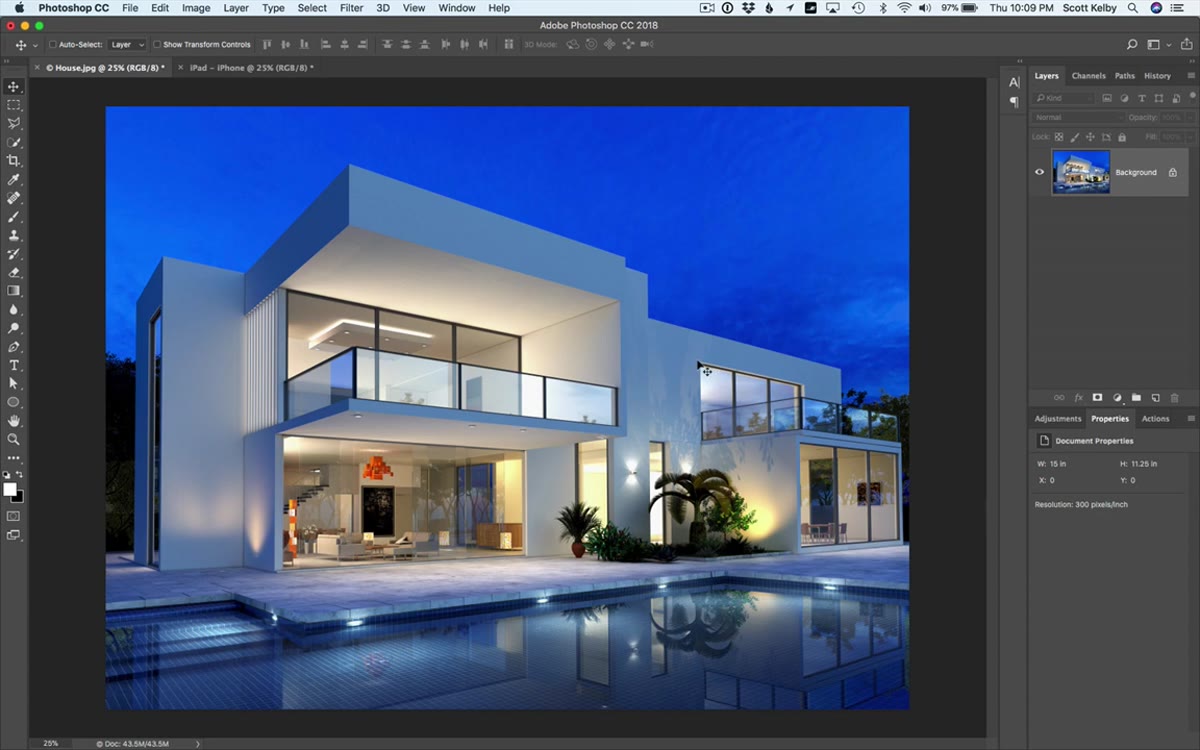 Selecting all and copying the source image
Open the image you want to place inside the device screen. This is whatever photo, screenshot, or graphic you’re dropping in. Go to Select > All (or hit Command+A on Mac, Ctrl+A on Windows), then copy it with Command+C / Ctrl+C. That’s it – the image is on your clipboard and ready to go.
Selecting all and copying the source image
Open the image you want to place inside the device screen. This is whatever photo, screenshot, or graphic you’re dropping in. Go to Select > All (or hit Command+A on Mac, Ctrl+A on Windows), then copy it with Command+C / Ctrl+C. That’s it – the image is on your clipboard and ready to go.
Keep this file open. You’ll be switching between it and your device image, and it’s easier to re-copy if something goes sideways.
Step 2: Select the Screen Area on Your Device Image
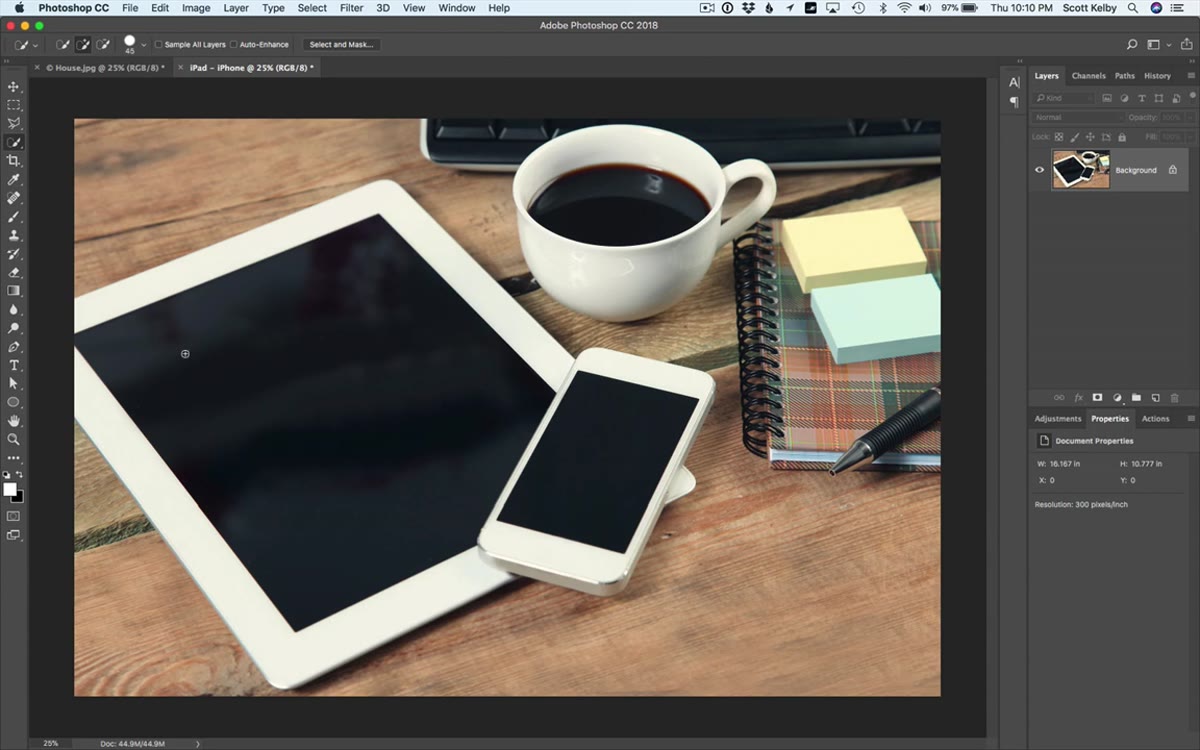 Quick Selection Tool painting over the black screen area
Switch over to your device image – the phone, tablet, or laptop photo. You need to select just the screen area, which is usually a clean, solid-colored rectangle (often black when the screen is “off”). Grab the Quick Selection Tool (W), and paint over the screen area. Because the screen tends to have a consistent tone and a clear edge against the device bezel, the Quick Selection Tool usually nails it in one or two strokes.
Quick Selection Tool painting over the black screen area
Switch over to your device image – the phone, tablet, or laptop photo. You need to select just the screen area, which is usually a clean, solid-colored rectangle (often black when the screen is “off”). Grab the Quick Selection Tool (W), and paint over the screen area. Because the screen tends to have a consistent tone and a clear edge against the device bezel, the Quick Selection Tool usually nails it in one or two strokes.
If your device image has a more complex screen area or weird reflections already baked in, you can clean up the selection with the Lasso Tool or by going into Select and Mask. But for most clean product shots, Quick Selection gets you there fast.
Step 3: Paste Into the Selection
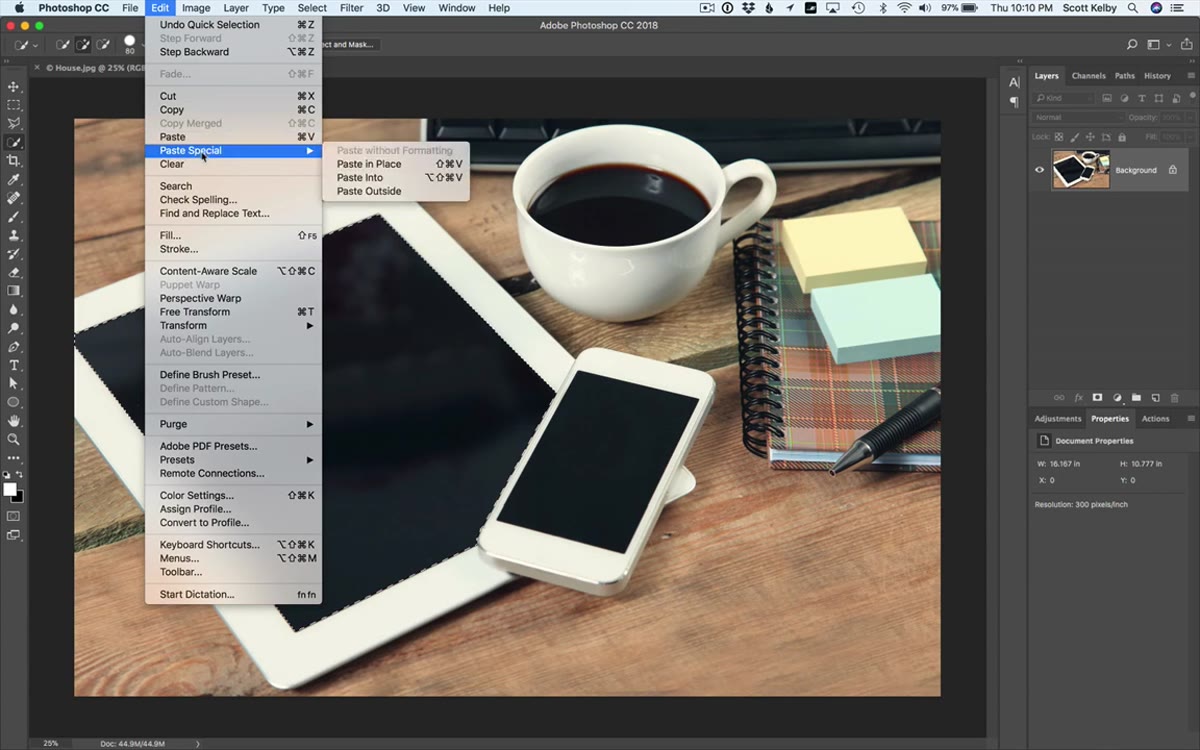 Edit menu open showing Paste Special > Paste Into option
Here’s the move that changes everything. With your selection still active, go to Edit > Paste Special > Paste Into. Do NOT just hit Command+V – a regular paste will drop the image on a new layer with no masking and no relationship to your selection at all. Paste Into is different: it uses your selection as a clipping mask, so the image only appears within the screen area you selected.
Edit menu open showing Paste Special > Paste Into option
Here’s the move that changes everything. With your selection still active, go to Edit > Paste Special > Paste Into. Do NOT just hit Command+V – a regular paste will drop the image on a new layer with no masking and no relationship to your selection at all. Paste Into is different: it uses your selection as a clipping mask, so the image only appears within the screen area you selected.
When you do this, Photoshop creates a new layer with a mask already attached. The mask is the shape of your screen selection. Your image is inside it, and anything outside the screen stays hidden. This is the core of the whole technique.
Step 4: Scale and Rotate with Free Transform
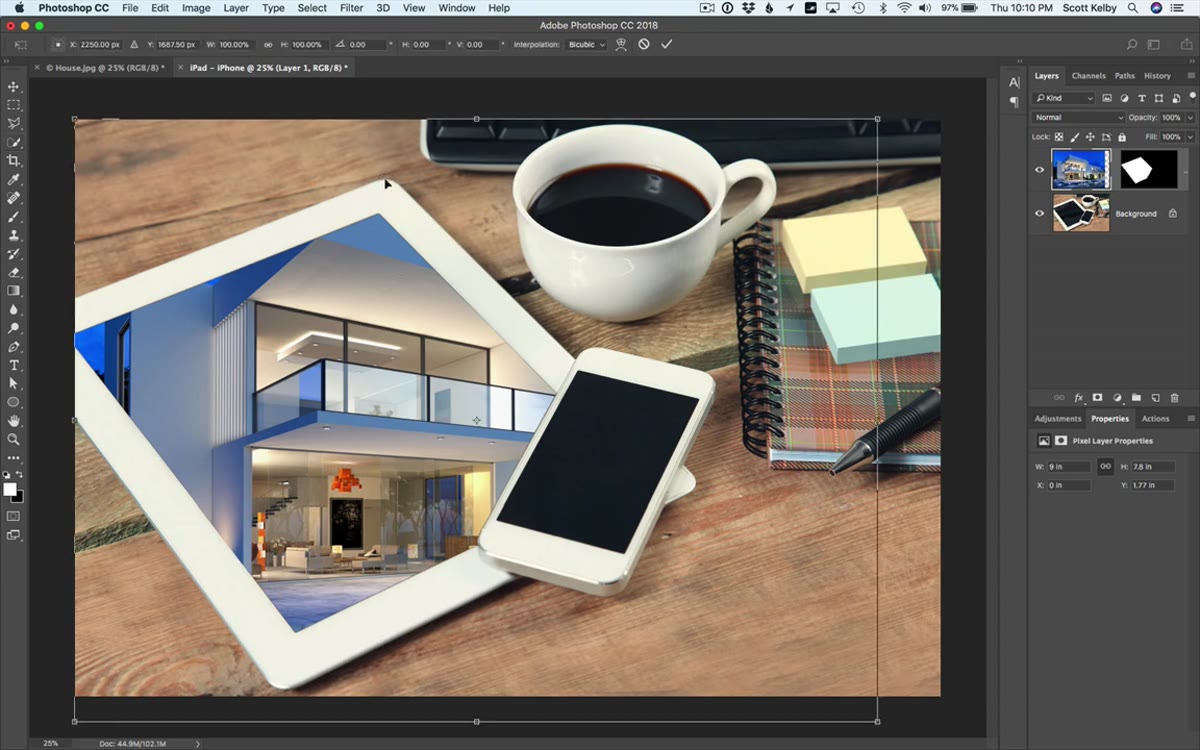 Free Transform handles visible with image scaled down inside screen
Your pasted image is almost certainly the wrong size and probably not rotated correctly. Hit Command+T (Mac) or Ctrl+T (Windows) to bring up Free Transform. Hold Shift while dragging a corner handle to scale it down proportionally – get it roughly close to the size of the screen area. If the device is shot at an angle, rotate the image to roughly match that angle too.
Free Transform handles visible with image scaled down inside screen
Your pasted image is almost certainly the wrong size and probably not rotated correctly. Hit Command+T (Mac) or Ctrl+T (Windows) to bring up Free Transform. Hold Shift while dragging a corner handle to scale it down proportionally – get it roughly close to the size of the screen area. If the device is shot at an angle, rotate the image to roughly match that angle too.
Don’t stress about getting it perfect at this stage. You’re just getting in the ballpark before the next step handles the actual perspective correction. “Close enough to fix” is the goal here.
Step 5: Use Distort to Match the Perspective
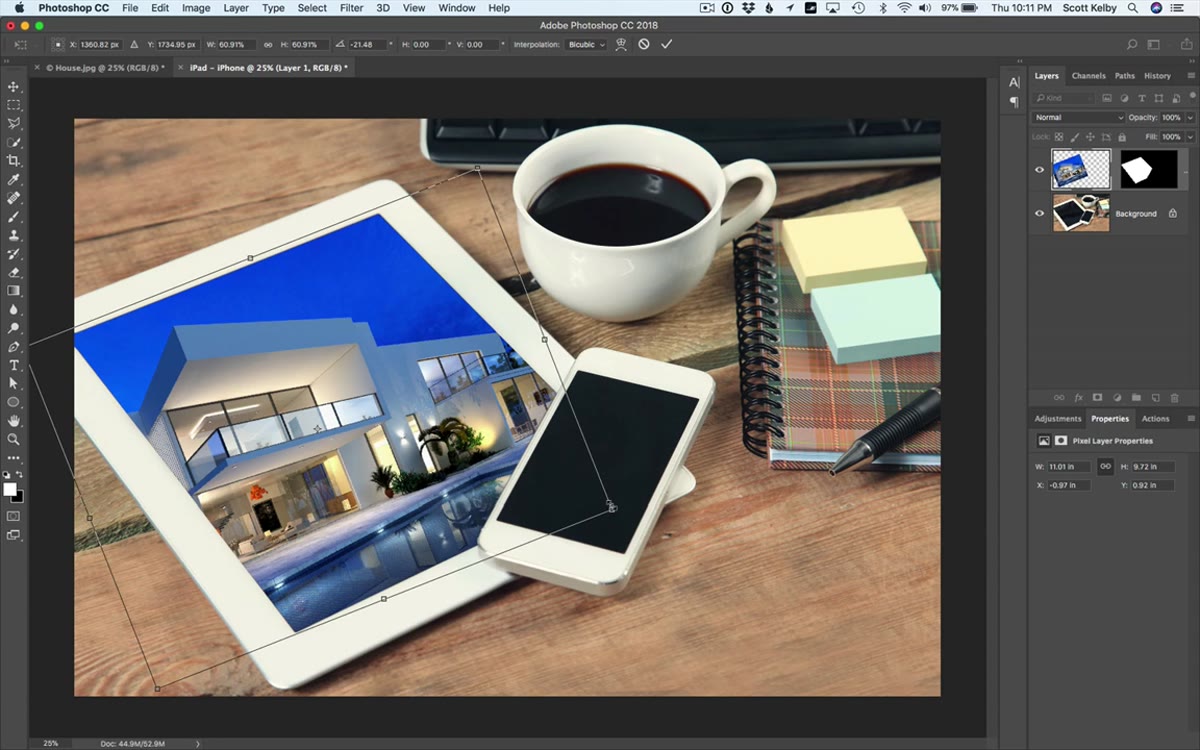 Corner point being dragged in Distort mode to match device perspective
This is where the perspective magic happens. While still in Free Transform mode, hold Command (Mac) or Ctrl (Windows) and grab one of the four corner handles. This activates Distort mode, which lets you move each corner independently – breaking free from the proportional scaling constraint.
Corner point being dragged in Distort mode to match device perspective
This is where the perspective magic happens. While still in Free Transform mode, hold Command (Mac) or Ctrl (Windows) and grab one of the four corner handles. This activates Distort mode, which lets you move each corner independently – breaking free from the proportional scaling constraint.
Work your way around all four corners, dragging each one to align with the corresponding corner of the device screen. Zoom in if you need to see the edges more clearly. If part of the screen is hidden behind a bezel or edge of the device frame, do your best to extrapolate where the corner should land based on the visible edges. When all four corners are placed, press Return (Mac) or Enter (Windows) to commit the transformation.
Step 6: Reload the Selection from the Layer Mask
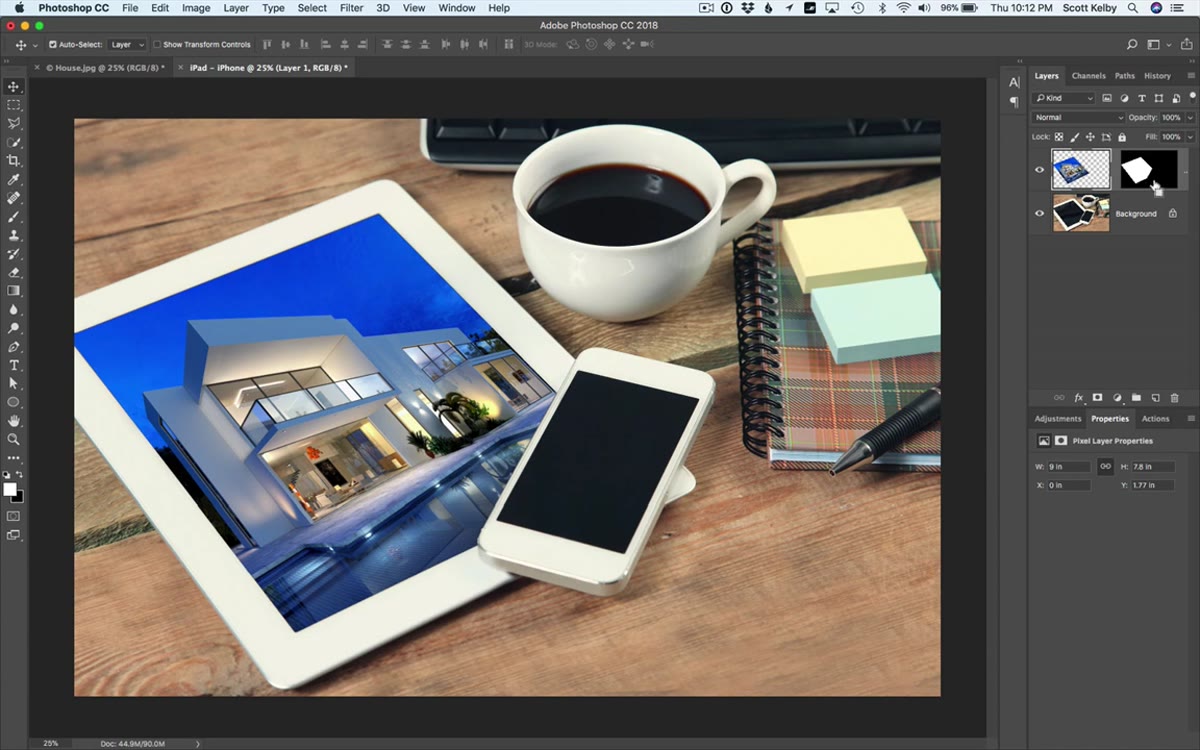 Layers panel showing mask thumbnail being Command-clicked
Now you’re going to add that reflection effect, and the first move is reloading the screen selection without having to redraw it from scratch. In the Layers panel, find the layer mask thumbnail on your pasted image layer – it’s the black-and-white shape sitting next to the image thumbnail. Hold Command (Mac) or Ctrl (Windows) and click directly on that mask thumbnail. Photoshop reloads the selection from the mask automatically.
Layers panel showing mask thumbnail being Command-clicked
Now you’re going to add that reflection effect, and the first move is reloading the screen selection without having to redraw it from scratch. In the Layers panel, find the layer mask thumbnail on your pasted image layer – it’s the black-and-white shape sitting next to the image thumbnail. Hold Command (Mac) or Ctrl (Windows) and click directly on that mask thumbnail. Photoshop reloads the selection from the mask automatically.
This is one of those shortcuts worth burning into muscle memory. Any time you need a selection back from a mask, this is how you get it.
Step 7: Add a White Fill on a New Layer for the Reflection
 New blank layer filled with white inside the active selection
With the selection active, click the New Layer icon in the Layers panel to create a blank layer above everything. Make sure your foreground color is set to white (press D to reset to defaults, then X to swap foreground to white if needed). Fill the selection with white by pressing Option+Delete (Mac) or Alt+Backspace (Windows). You now have a solid white shape covering the entire screen area on its own layer.
New blank layer filled with white inside the active selection
With the selection active, click the New Layer icon in the Layers panel to create a blank layer above everything. Make sure your foreground color is set to white (press D to reset to defaults, then X to swap foreground to white if needed). Fill the selection with white by pressing Option+Delete (Mac) or Alt+Backspace (Windows). You now have a solid white shape covering the entire screen area on its own layer.
Step 8: Erase a Portion with the Polygonal Lasso and Lower the Opacity
 Polygonal Lasso drawing selection across white fill layer
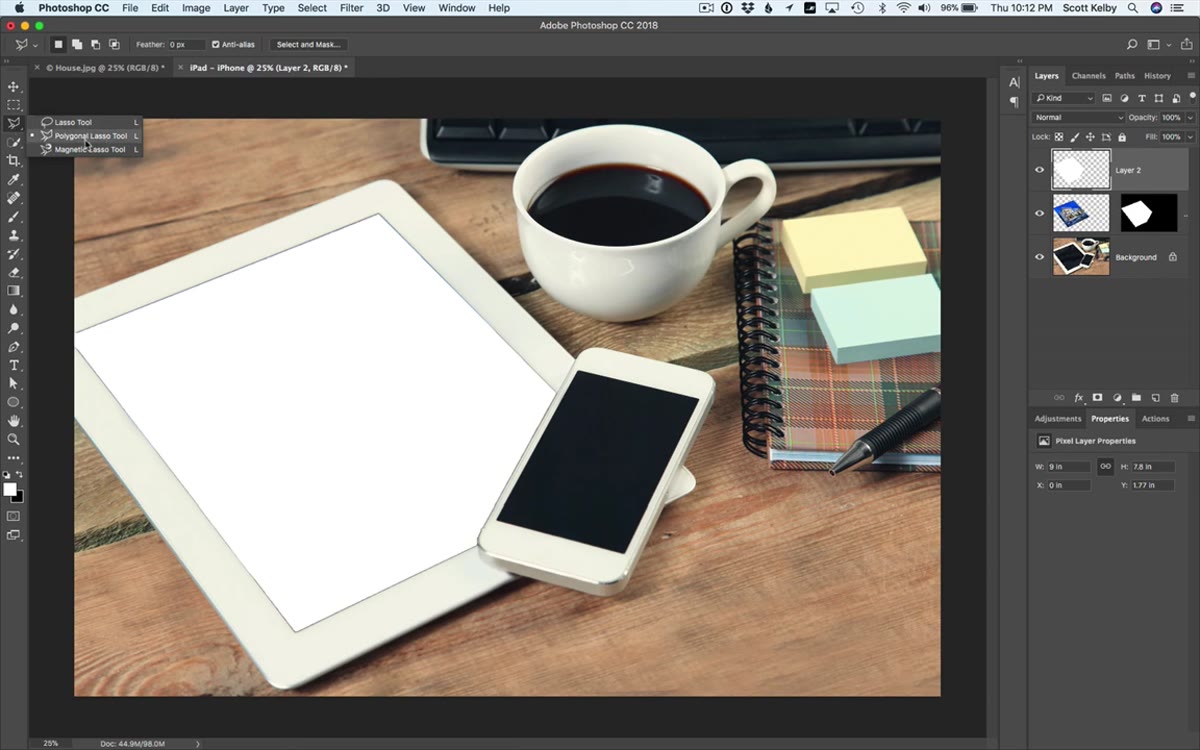
Grab the Polygonal Lasso Tool (hide under the regular Lasso – hit Shift+L to cycle to it). Click to draw a rough triangular or wedge-shaped selection that covers roughly half of the white screen shape diagonally, representing the area you want to keep as a “highlight.” Once you’ve closed the selection, hit Delete (Mac) or Backspace (Windows) to remove that portion of the white layer. Deselect with Command+D / Ctrl+D.
Polygonal Lasso drawing selection across white fill layer
Grab the Polygonal Lasso Tool (hide under the regular Lasso – hit Shift+L to cycle to it). Click to draw a rough triangular or wedge-shaped selection that covers roughly half of the white screen shape diagonally, representing the area you want to keep as a “highlight.” Once you’ve closed the selection, hit Delete (Mac) or Backspace (Windows) to remove that portion of the white layer. Deselect with Command+D / Ctrl+D.
Now drop the opacity of this white layer way down – somewhere between 10% and 20% is usually enough. You want a subtle suggestion of glare, not a blinding white blob. The result is a soft diagonal highlight that reads as a glass screen reflection.
A Note on Device Mockup Angles
One thing I’ve run into doing this for client work: the technique lives or dies by the quality of your device photo. If you’re sourcing a random stock image of a phone shot at a dramatic angle, the Distort tool can only stretch the perspective so far before things start looking warped. For tight deadlines, I keep a small library of clean device mockup photos – flat lays and slight 3/4 angles – that I know play nicely with this workflow. Sites like Unsplash and Mockup World have solid free options. The cleaner the source image, the less distortion gymnastics you have to do in Step 5.
The single biggest takeaway here is to stop using regular Paste and start using Paste Into whenever you need an image to live inside a defined area. The mask is created for you, the image stays editable, and the whole thing stays non-destructive. It’s one of those features that feels almost too simple once you know it.
Watch the full tutorial on YouTube to see Scott walk through the complete technique with his own device images – seeing the Distort handles move in real time is worth the watch.
Comments (2)
Just subscribed. If the rest of your content is this good, I'm in.
Would love to see a follow-up going deeper into this topic.
Leave a Comment