There’s a particular kind of client brief that shows up every few months in my inbox: “We want it to feel retro. Like neon. You know, glowy.” And for a long time, my answer involved stacking a bunch of Gaussian blurs and Outer Glow layer styles and hoping the client didn’t zoom in too close. It worked. Barely. But it never looked like actual light bouncing off a surface, because it wasn’t. It was just a blur pretending to be a glow.
That changed when I started digging into Photoshop’s 3D illumination material system. In this KelbyOne tutorial from Photoshop User TV, Cory Barker walks through a Creative Cloud update to Photoshop’s 3D tools that lets you assign self-illuminating materials to 3D text, so the object actually appears to emit light into its environment. It’s the difference between painting a lightbulb and screwing one into a socket. The technique requires Photoshop’s 3D workspace, which means this is aimed at CC users, but if you have access, this is worth your time.
What follows is a full walkthrough you can work through without watching the video, though I’d recommend doing both. Seeing Cory demonstrate the render step is particularly useful because the change is subtle until suddenly it isn’t.
Step 1: Set Up Your 3D Text on a Background
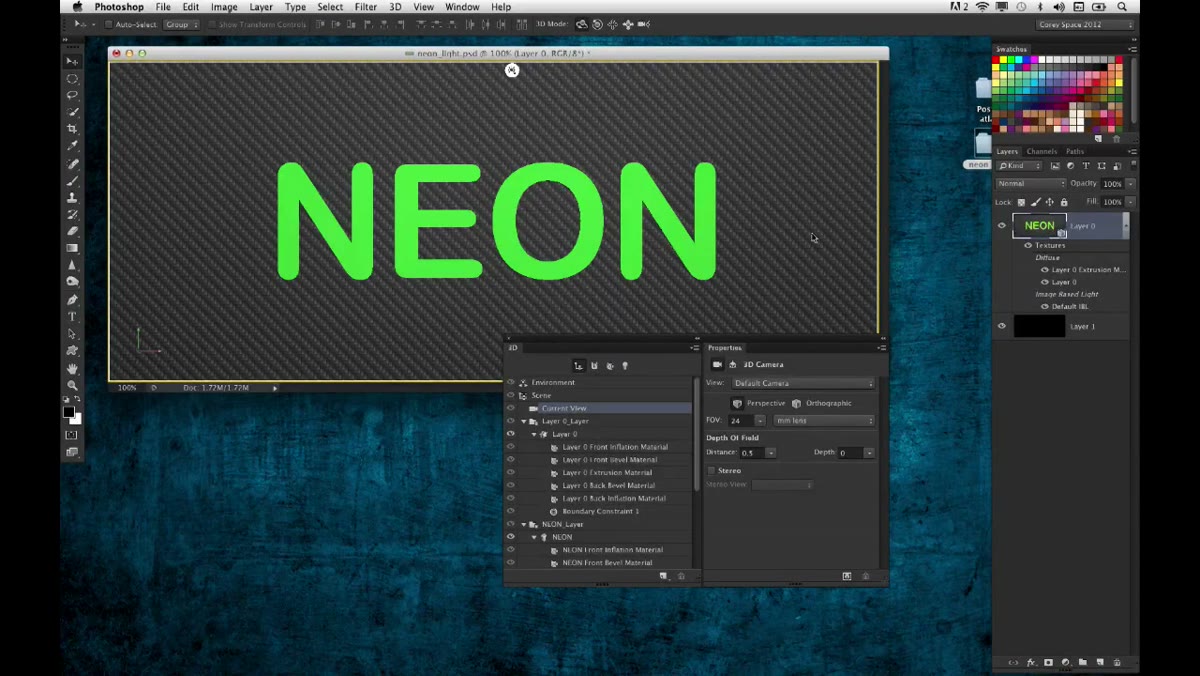 3D text object positioned in front of a dark background panel
Start with a text layer that you’ve already converted to a 3D object. Cory is working with a single word set against a dark background. The dark background matters here. Illumination effects are close to invisible on light backgrounds, so set yourself up for success and use something dark, even just a solid near-black fill layer underneath.
3D text object positioned in front of a dark background panel
Start with a text layer that you’ve already converted to a 3D object. Cory is working with a single word set against a dark background. The dark background matters here. Illumination effects are close to invisible on light backgrounds, so set yourself up for success and use something dark, even just a solid near-black fill layer underneath.
Once your 3D text is in place, use the 3D rotate tool to get a slight angle on the text. You want to be able to see the depth of the letters, not just the flat front face.
Step 2: Add Inflation (Bevel) to the Text Using the Cap Settings
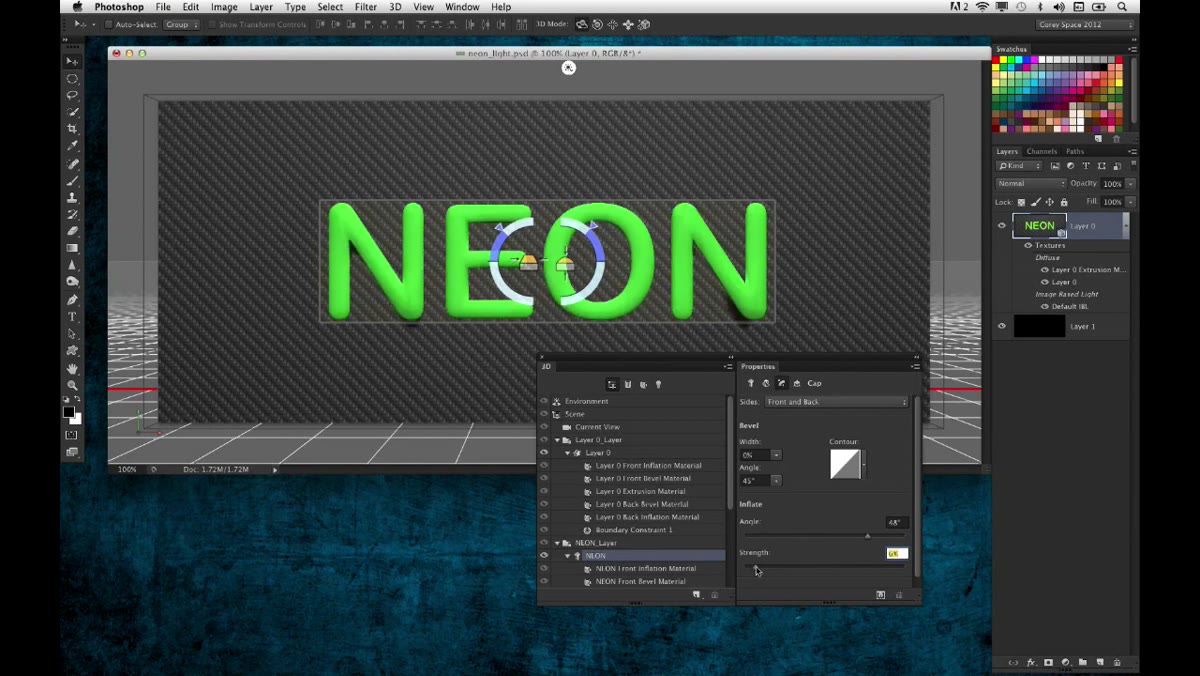 Properties panel showing the Cap settings with Strength slider raised
With the 3D text object selected in the 3D panel, head over to the Properties panel and click the Cap icon. You’ll see a Strength slider. Pull this up gradually and watch what happens to the edges of your letters: they start to round and inflate outward, like the letters are being pressed from inside. It’s a subtle but satisfying effect.
Properties panel showing the Cap settings with Strength slider raised
With the 3D text object selected in the 3D panel, head over to the Properties panel and click the Cap icon. You’ll see a Strength slider. Pull this up gradually and watch what happens to the edges of your letters: they start to round and inflate outward, like the letters are being pressed from inside. It’s a subtle but satisfying effect.
Set both the front and back inflation to the same value so the effect is consistent across the full depth of the text. Rotate the object to check that both faces are inflating symmetrically. This rounded cap is what’s going to catch light realistically in the render step later.
Step 3: Assign an Illumination Color to the Back Inflation Material
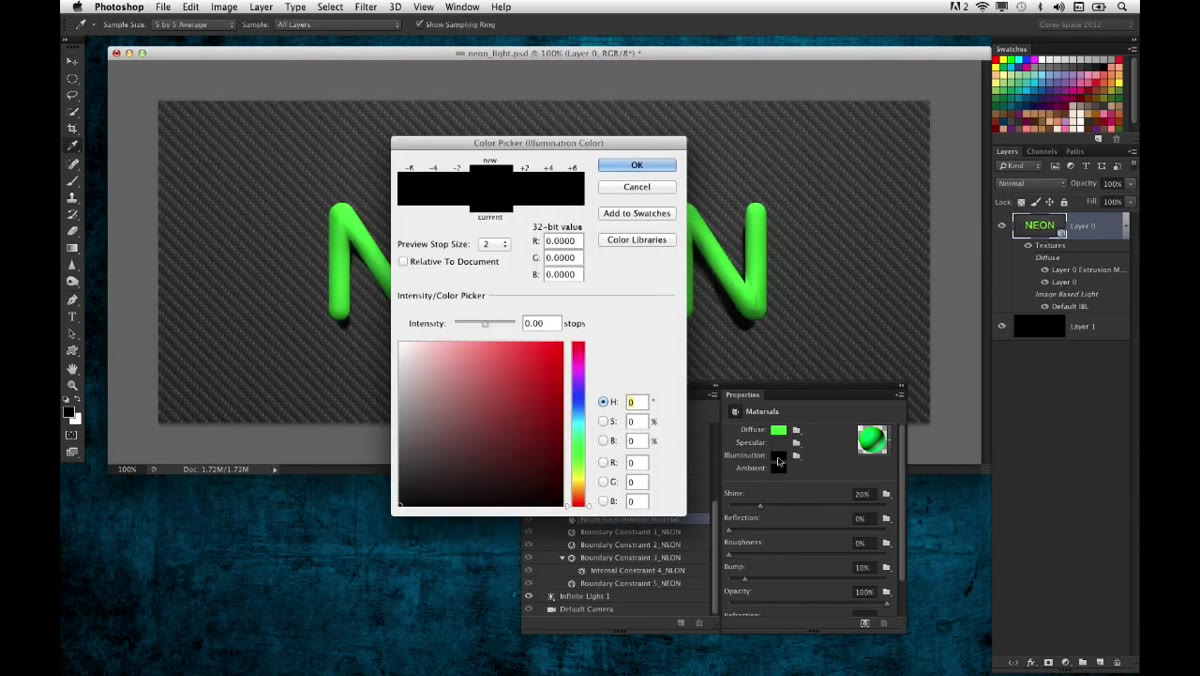 Illumination color swatch selected in Properties for the back inflation material
This is the step that actually creates the neon effect. In the 3D panel, select the back inflation material for your text. In the Properties panel, find the Illumination option and click its color swatch.
Illumination color swatch selected in Properties for the back inflation material
This is the step that actually creates the neon effect. In the 3D panel, select the back inflation material for your text. In the Properties panel, find the Illumination option and click its color swatch.
When the Color Picker opens, move your cursor directly onto the text in your canvas and sample the text’s color. In the tutorial, Cory samples a green. Whatever color your text is, use that. Then drag the brightness slider in the Color Picker upward to increase intensity. This is telling Photoshop that this face of the text is actively emitting light at that color, not just reflecting it. Click OK.
Step 4: Repeat the Illumination Step for the Front Face
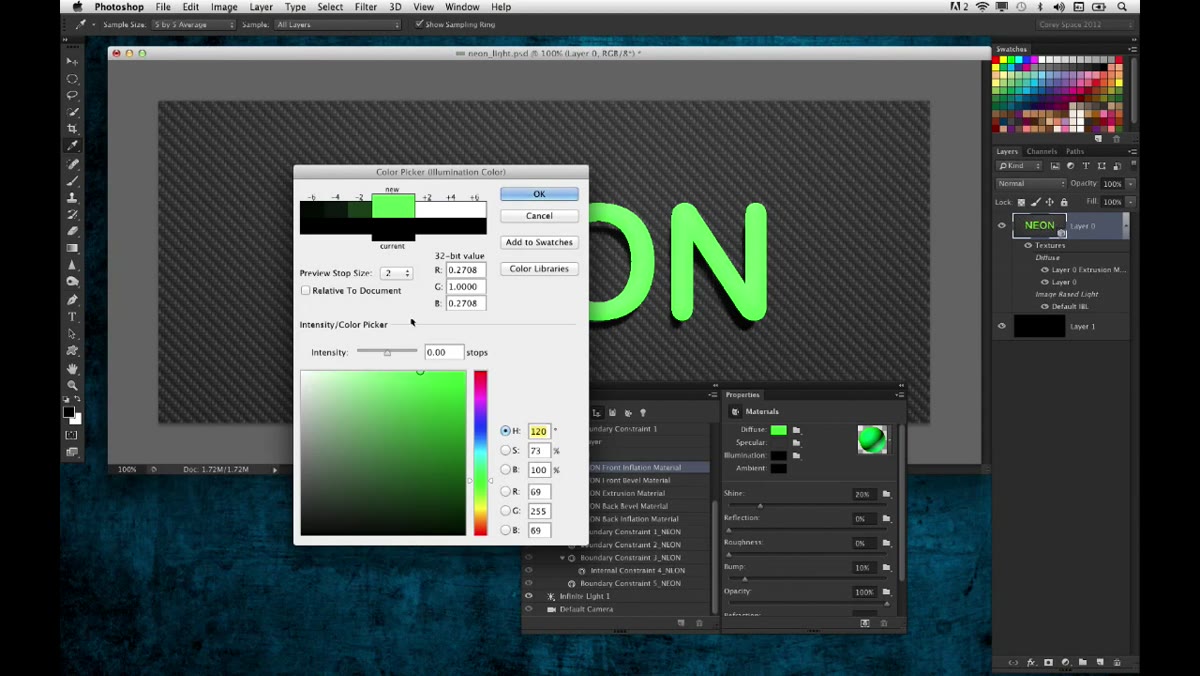 Front inflation material selected, illumination color being sampled from text
Go back into the 3D panel and select the front inflation material now. Repeat the exact same process: click the Illumination swatch, sample the text color, bump the intensity, click OK. You’re making both the front and back faces self-luminous.
Front inflation material selected, illumination color being sampled from text
Go back into the 3D panel and select the front inflation material now. Repeat the exact same process: click the Illumination swatch, sample the text color, bump the intensity, click OK. You’re making both the front and back faces self-luminous.
It might not look like anything dramatic has changed yet on the canvas. That’s normal. The real payoff comes at render time. Think of this step as loading the gun, not firing it.
Step 5: Increase Shine and Reflection on the Front Inflation
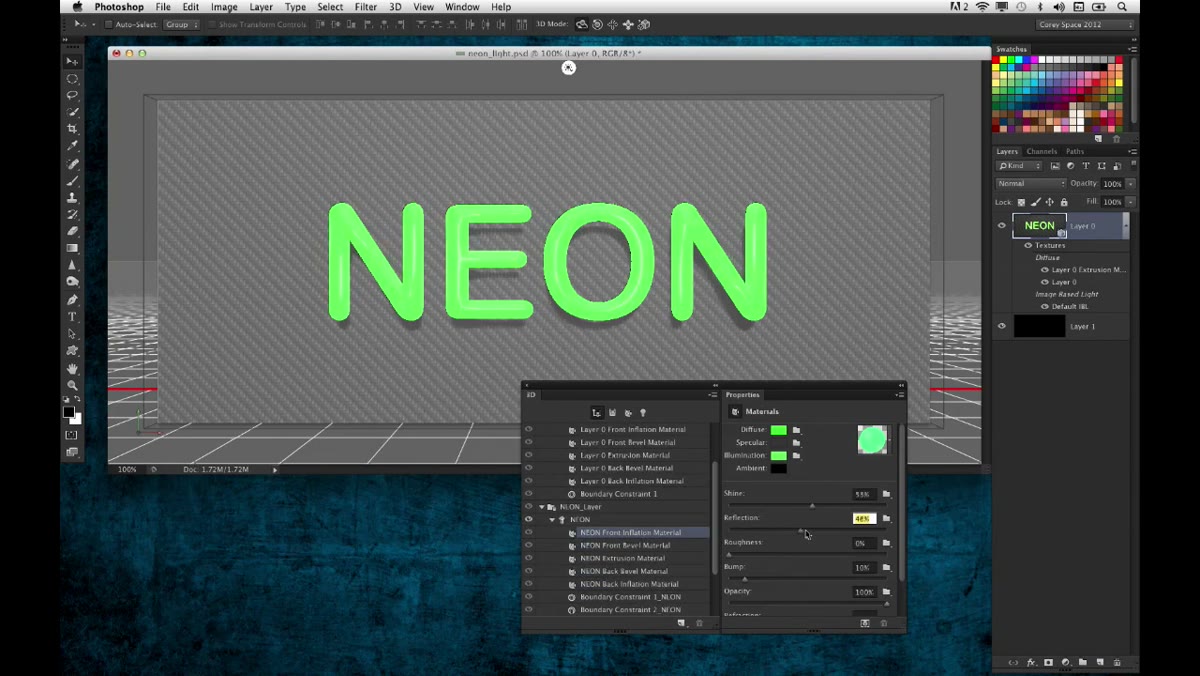 Shine and Reflection sliders raised in Properties for front inflation material
While you still have the front inflation material selected in the Properties panel, push the Shine and Reflection sliders up. This adds a specular highlight to the curved surface of the letters, giving them that glass-tube quality you see in real neon signs.
Shine and Reflection sliders raised in Properties for front inflation material
While you still have the front inflation material selected in the Properties panel, push the Shine and Reflection sliders up. This adds a specular highlight to the curved surface of the letters, giving them that glass-tube quality you see in real neon signs.
You should see a glare appear on the front face of the letters. This is catching the scene’s default infinite light. If you don’t see it, make sure your infinite light is still active in the 3D panel. Don’t go too heavy on the reflection, or the text starts to look more like chrome than neon.
Step 6: Disable Shadow Casting on the Infinite Light
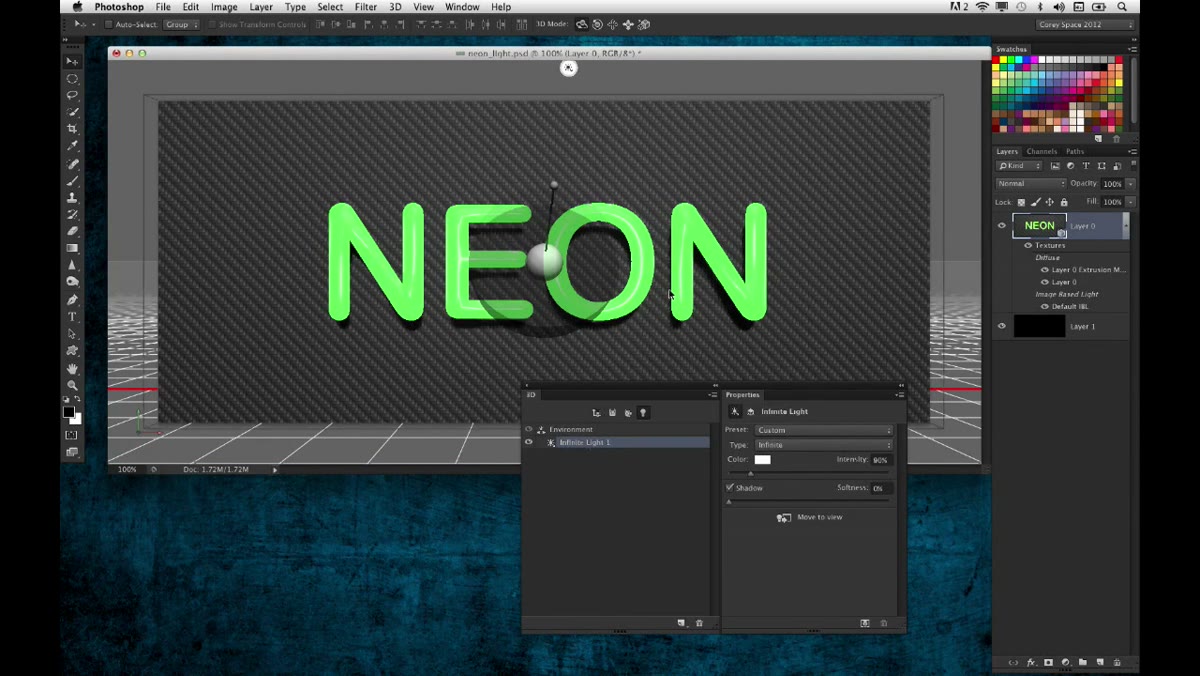 Shadow checkbox unchecked in Properties panel for the infinite light
Click on the infinite light in your 3D panel, then look at the Properties panel. Uncheck the Shadow option. The light is there to create the specular glare on the text surface, but you don’t want it throwing hard shadows across your background. That would fight with the soft ambient glow you’re building. Removing the shadow keeps the scene clean and puts all the visual focus on the illumination coming from the text itself.
Shadow checkbox unchecked in Properties panel for the infinite light
Click on the infinite light in your 3D panel, then look at the Properties panel. Uncheck the Shadow option. The light is there to create the specular glare on the text surface, but you don’t want it throwing hard shadows across your background. That would fight with the soft ambient glow you’re building. Removing the shadow keeps the scene clean and puts all the visual focus on the illumination coming from the text itself.
Step 7: Render the Scene to See the Glow
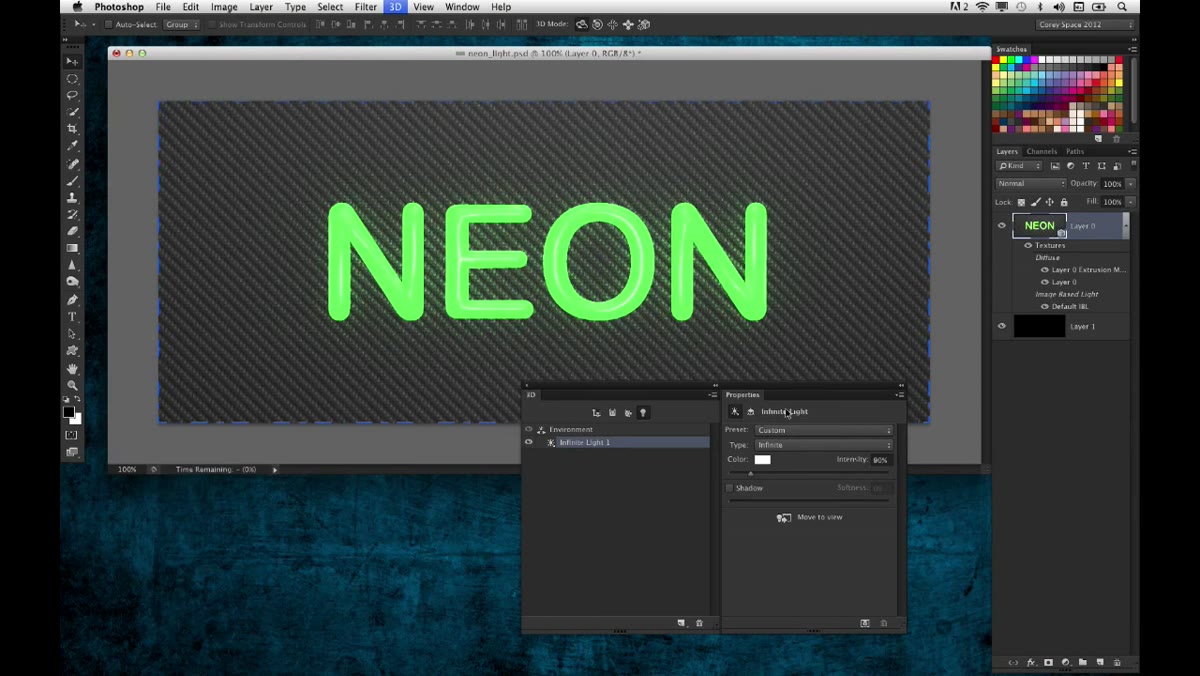 Render in progress showing green glow building around the 3D text
Here’s where it pays off. Press Shift + Option + Command + R (Mac) or check your 3D menu for Render 3D Layer. Photoshop will start its progressive render, and you’ll begin to see a colored glow blooming out from the text into the surrounding area. Let it run for at least a few passes before you judge it. The glow intensifies as the render matures.
Render in progress showing green glow building around the 3D text
Here’s where it pays off. Press Shift + Option + Command + R (Mac) or check your 3D menu for Render 3D Layer. Photoshop will start its progressive render, and you’ll begin to see a colored glow blooming out from the text into the surrounding area. Let it run for at least a few passes before you judge it. The glow intensifies as the render matures.
This is the bit that would have taken me 20 minutes of manual blur work before I knew this technique existed. The render is doing the physics for you.
My Extension: Try This With Multiple Colors
When I tested this technique in my own workflow, one of the first things I tried was assigning different illumination colors to different letters. You can do this by splitting your 3D text into separate objects, or by working with multiple text layers each converted independently. A mix of pink and blue illumination on adjacent letters gives you that classic retro neon sign palette without any extra compositing work. The render handles the color bleed between letters naturally, which is something you’d spend a long time faking with layer modes.
One thing I’ll flag: render times climb fast once you start adding multiple illuminated surfaces to a scene. Save before you render, and save often. That’s not specific to this technique, that’s just 3D in Photoshop in general.
The single most useful thing this tutorial taught me is that “glow” in Photoshop isn’t always a layer style problem. Sometimes it’s a materials problem, and the 3D illumination system is genuinely the right tool for the job when you need light that interacts with geometry. If you’ve been faking neon with Outer Glow for years like I was, this will change how you think about it.
Watch the full tutorial on YouTube and see Cory walk through the render live. Watching the glow build in real time makes the whole system click in a way that screenshots can’t quite capture.
Comments (4)
This is the kind of content that keeps me coming back.
Really solid breakdown. This pairs perfectly with the photography work I've been writing about.
Finally someone explains this in a way that actually makes sense.
I tried this on a client project yesterday and the results were way better than expected.
Leave a Comment