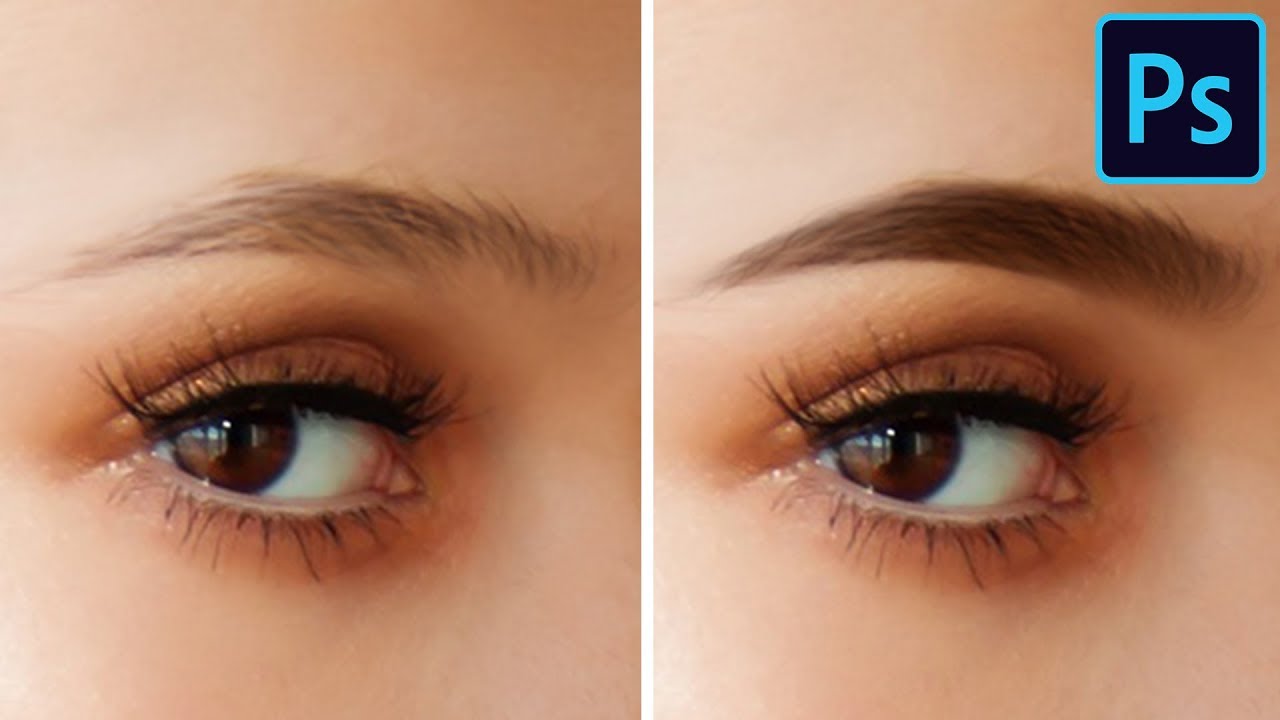
Portrait retouching has a way of humbling you fast. You can nail the skin, the dodge and burn, the color grade, and then the eyebrows sit there looking like someone drew them on with a Sharpie and called it a day. I’ve handed back work that I was genuinely proud of, only to get feedback that the brows looked “off,” which is the polite version of “you made my client look like a cartoon villain.” The problem is usually that people try to paint eyebrows in one pass, when the real trick is building them in two distinct stages: a base fill first, then individual hairs on top.
In this Aaron Nace (PHLEARN) tutorial, he walks through both stages cleanly, and the result is eyebrows that actually read as real hair under scrutiny. Watch the full tutorial on YouTube if you want to follow along with his original footage. Below is my breakdown of exactly what he does and how to replicate it on your own portraits.
The technique works whether you’re filling in sparse brows, doing beauty retouching, or, like Aaron, rebuilding brows that were thinned out on purpose for demonstration. Two parts, a few layers, and a brush setting that does most of the heavy lifting.
Step 1: Zoom In and Grab the Pen Tool
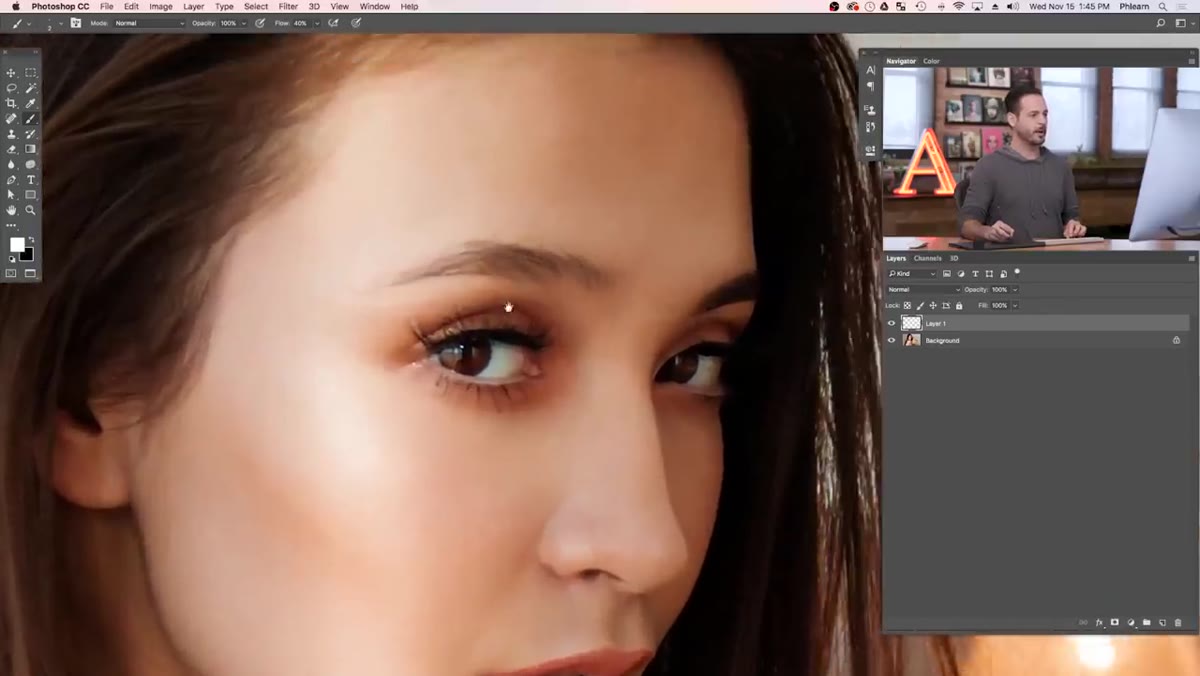 Pen tool selected, zoomed into eyebrow area
Hit P to pull up the Pen tool and zoom in tight on the eyebrow you’re working on. The goal here is to draw a rough outline of the full eyebrow shape you want, not the shape that currently exists. Think of it the way you’d think about applying makeup: you’re drawing the silhouette first before filling anything in.
Pen tool selected, zoomed into eyebrow area
Hit P to pull up the Pen tool and zoom in tight on the eyebrow you’re working on. The goal here is to draw a rough outline of the full eyebrow shape you want, not the shape that currently exists. Think of it the way you’d think about applying makeup: you’re drawing the silhouette first before filling anything in.
Click to place anchor points along the brow line, dragging slightly on your first point to pull out a curve handle that follows the natural arch. You don’t need to be obsessively precise here. Aaron’s advice is to go slightly larger than you think you need, because you can always mask back the edges later. The Pen tool earns its reputation here because you can hold Ctrl (or Command on Mac) and drag any anchor point to adjust the shape after the fact. Nothing is committed until you say so.
Step 2: Convert the Path to a Selection With Feathering
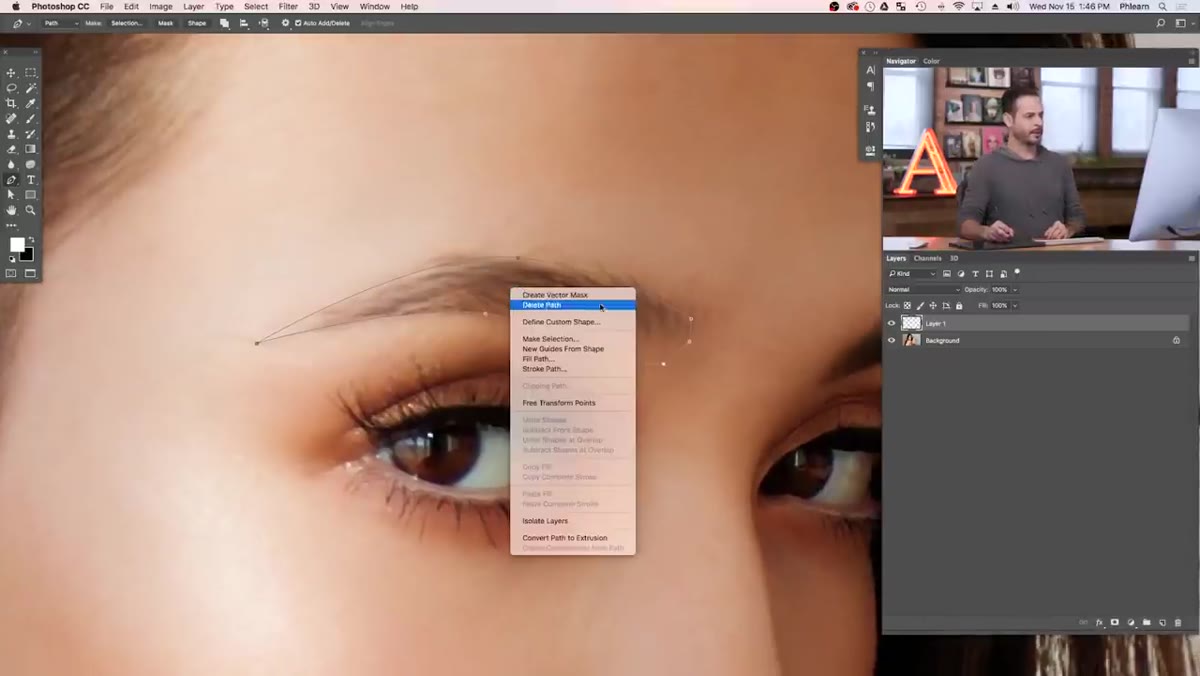 Make Selection dialog box, feather radius field visible
Once your path looks like a reasonable eyebrow shape, right-click inside the path and choose Make Selection. In the dialog that pops up, set the Feather Radius to 1 pixel. That single pixel of feathering is doing quiet but important work: it softens the edge of your selection just enough that whatever you paint inside it won’t have a hard, artificial border.
Make Selection dialog box, feather radius field visible
Once your path looks like a reasonable eyebrow shape, right-click inside the path and choose Make Selection. In the dialog that pops up, set the Feather Radius to 1 pixel. That single pixel of feathering is doing quiet but important work: it softens the edge of your selection just enough that whatever you paint inside it won’t have a hard, artificial border.
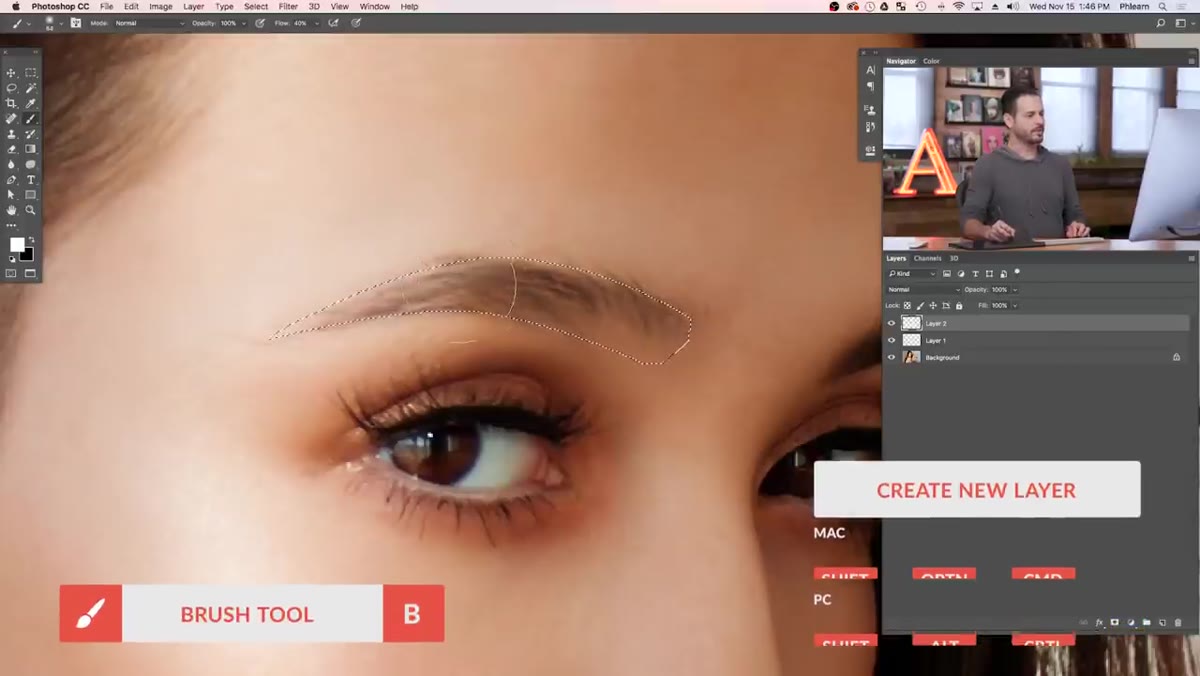
Hit OK and you’ll see the marching ants appear around your eyebrow shape. You’re not going to paint directly on the background layer. Create a new layer above it now, before you touch a brush.
Step 3: Sample the Existing Brow Color
 Eyedropper sampling color from existing eyebrow hair
Switch to the Brush tool and hold Alt (Option on Mac) to temporarily grab the eyedropper. Click on whatever hair color already exists in the brow area to sample it. If the brows are extremely sparse or barely there, sampling from the hair on the subject’s head is completely valid. You just need a color that’s in the right family: the same underlying warmth or coolness, the same approximate darkness.
Eyedropper sampling color from existing eyebrow hair
Switch to the Brush tool and hold Alt (Option on Mac) to temporarily grab the eyedropper. Click on whatever hair color already exists in the brow area to sample it. If the brows are extremely sparse or barely there, sampling from the hair on the subject’s head is completely valid. You just need a color that’s in the right family: the same underlying warmth or coolness, the same approximate darkness.
This step matters more than people give it credit for. A color that’s even slightly too cool or too saturated relative to the existing hair will look like a bad dye job once you start painting. Sample from the source material first, every time.
Step 4: Set the Layer Blend Mode to Multiply
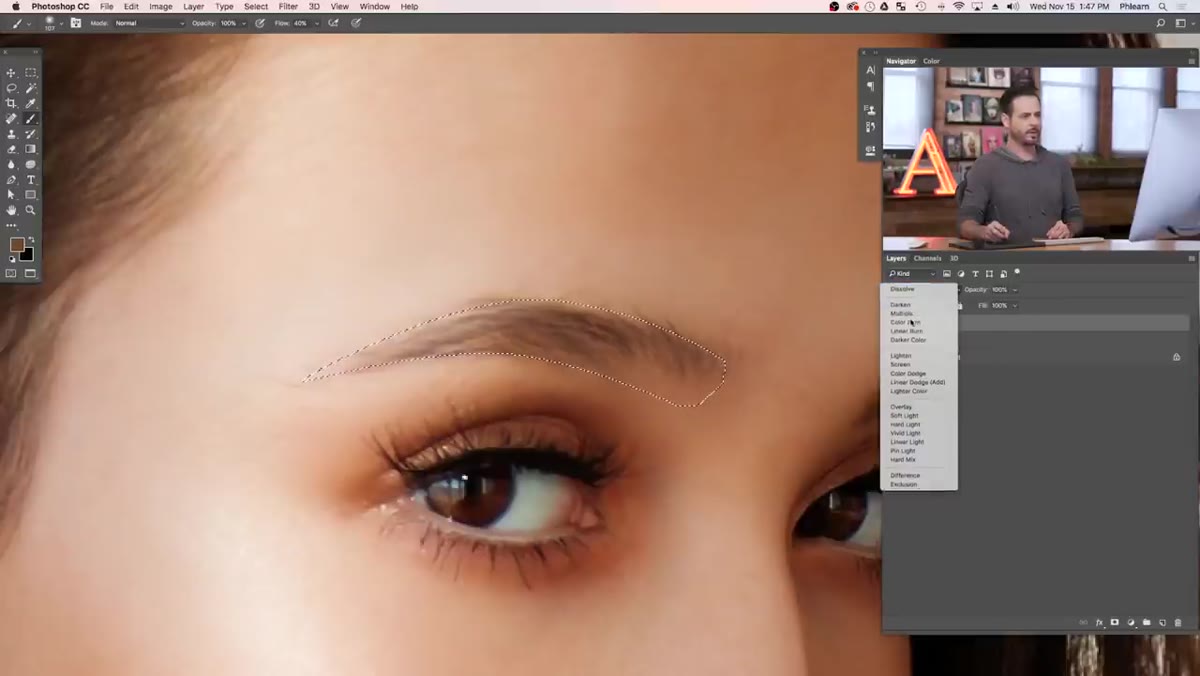 Layer blend mode dropdown set to Multiply
Before you paint a single stroke, change the blend mode of your new layer from Normal to Multiply. Multiply darkens by combining the layer with whatever is below it, which means your painted color will interact naturally with the skin tones underneath rather than sitting on top like an opaque block of color. It’s the same principle behind why makeup artists build up color in thin layers rather than one thick application.
Layer blend mode dropdown set to Multiply
Before you paint a single stroke, change the blend mode of your new layer from Normal to Multiply. Multiply darkens by combining the layer with whatever is below it, which means your painted color will interact naturally with the skin tones underneath rather than sitting on top like an opaque block of color. It’s the same principle behind why makeup artists build up color in thin layers rather than one thick application.
This is the kind of thing that separates a retouch that looks like a retouch from one that just looks like a good photograph. Normal mode would give you a flat, painted-on result. Multiply gives you depth.
Step 5: Fill the Shape With a Large, Soft Brush
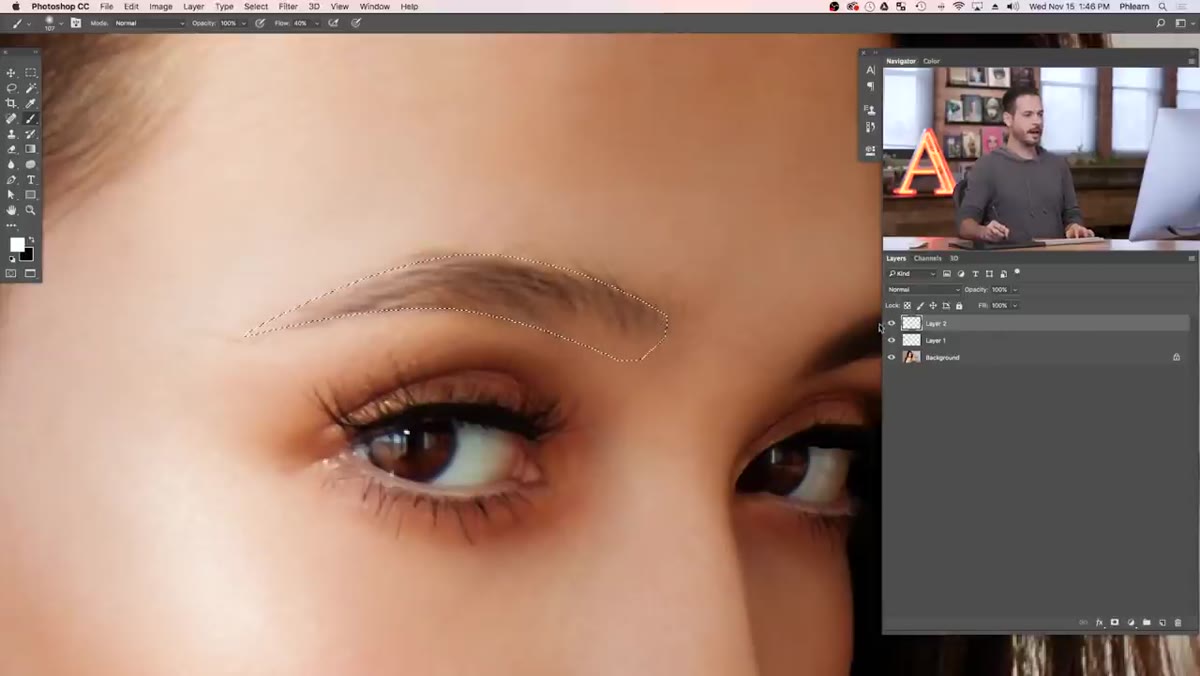 Large soft brush painting inside eyebrow selection on new layer
Use a large, soft-edged brush with hardness set to 0%. Aaron’s working with a brush around 100px wide here, which sounds enormous for something as small as an eyebrow, but that’s the point: you want to lay down a diffuse base of color, not a precise stroke. Paint over the entire selection area in one or two passes. The feathered selection edge combined with the soft brush will give you a gradient that fades naturally at the borders of the shape.
Large soft brush painting inside eyebrow selection on new layer
Use a large, soft-edged brush with hardness set to 0%. Aaron’s working with a brush around 100px wide here, which sounds enormous for something as small as an eyebrow, but that’s the point: you want to lay down a diffuse base of color, not a precise stroke. Paint over the entire selection area in one or two passes. The feathered selection edge combined with the soft brush will give you a gradient that fades naturally at the borders of the shape.
The result at this stage should look like a slightly darkened base where the eyebrow is. It shouldn’t look like a drawn brow yet. That’s fine. That’s exactly where you want to be before moving to the next stage.
Step 6: Paint in Individual Hairs With a Fine Brush
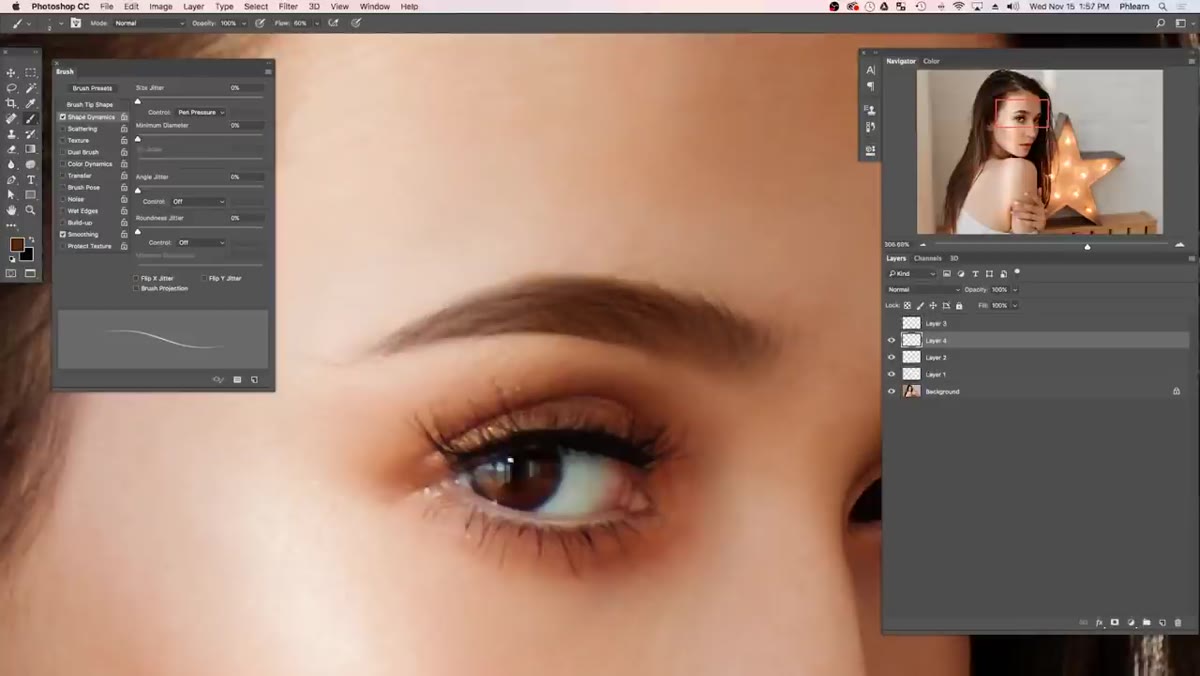 Fine brush strokes being painted to simulate individual eyebrow hairs
This is where the work gets fun. Switch to a much smaller, harder brush and start painting individual hair strokes over the base you just created. The motion matters here: short, quick strokes that follow the natural direction of hair growth. Real eyebrow hairs don’t all point the same way, so vary your angle slightly as you work across the brow. Hairs at the inner corner tend to grow more upward; hairs toward the tail sweep outward.
Fine brush strokes being painted to simulate individual eyebrow hairs
This is where the work gets fun. Switch to a much smaller, harder brush and start painting individual hair strokes over the base you just created. The motion matters here: short, quick strokes that follow the natural direction of hair growth. Real eyebrow hairs don’t all point the same way, so vary your angle slightly as you work across the brow. Hairs at the inner corner tend to grow more upward; hairs toward the tail sweep outward.
If you’re on a pressure-sensitive tablet, turn on pressure sensitivity for opacity so lighter strokes produce thinner, more transparent lines. If you’re on a mouse or trackpad, reduce your brush opacity to around 50-70% and build up strokes in multiple passes rather than trying to nail it in one. Aaron makes the point that either setup can produce convincing hair texture. It just takes a few extra passes with a mouse.
My Caveat: Mask the Edges Before You Call It Done
The one thing I always add to this workflow is a layer mask on the fill layer once the base color is down. Even with a feathered selection, the edge where the brow meets the skin can occasionally look a little too uniform. A few seconds with a soft black brush on the mask, knocking back opacity at the borders, makes the transition from brow to skin read as completely natural. It’s especially useful if the subject has lighter skin where any slightly heavy-handed fill will catch the light and announce itself.
I picked up this habit after a client pointed out a very obvious brow edge in a headshot I thought was finished. Five minutes with a mask would have caught it. Now it’s part of the checklist.
The single most important thing this tutorial reinforces is that realistic hair isn’t painted in one pass. The base fill gives you the shape and tone; the individual strokes give you texture. Neither one works without the other. Get the foundation right and the detail work almost paints itself.
Watch the full tutorial on YouTube to see Aaron demonstrate the brush strokes in real time, which is genuinely helpful for getting a feel for the rhythm and pressure of the hair-painting stage.
Comments (4)
Love how you break down complex stuff into manageable steps.
Just used this on a wedding shoot edit. Client was thrilled.
Clear and practical. No fluff. Appreciate that.
I keep coming back to this article. It's that useful.
Leave a Comment