
You know that photo. The one where someone cropped out their ex but left a disembodied hand draped over their shoulder like a horror movie prop. I’ve seen it on every social platform imaginable, and every time I think: twenty minutes in Photoshop would fix that. The problem is most people don’t know how to do it properly, so they settle for an awkward crop and hope nobody notices the ghost limb.
This is exactly what Aaron Nace tackles in this PHLEARN tutorial. Watch the full tutorial on YouTube before diving in, or follow along here and use the video as a reference when things get visual. The scenario is a couple’s photo where one person needs to disappear entirely, including the hands overlapping the subject’s shoulder. That overlap is the real challenge. It’s not a background removal job. It’s a reconstruction job, and the approach Aaron uses is genuinely smart.
What makes this tutorial useful beyond the gimmicky premise is that the technique stacks three tools most Photoshop users already know, just in a sequence they’ve probably never tried together. Pen tool for precise path-based selections. Clone Stamp for background repair. Brush for painting back missing subject detail. Let’s walk through it.
Step 1: Assess the Problem Before Touching a Single Tool
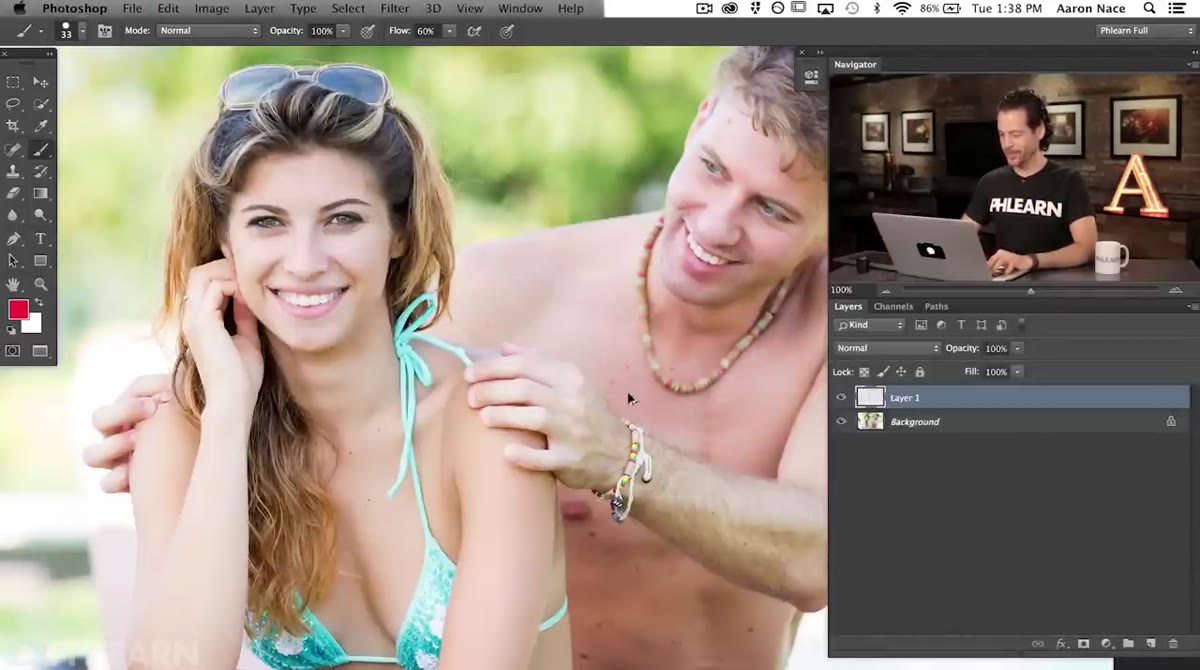 Close-up of hands overlapping Kimberly’s shoulder area
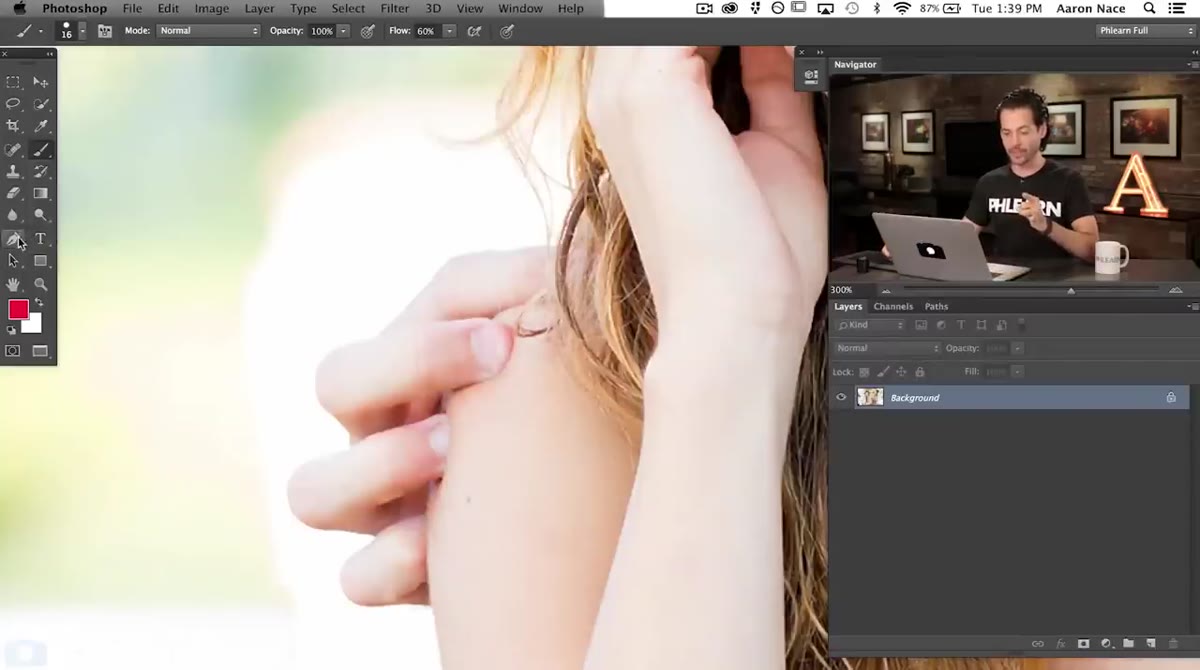
Before you make a single click, zoom in and figure out what you’re actually dealing with. In this example, the removed person’s hands are covering part of the subject’s shoulder. That means you’re not just erasing a background element. You have to reconstruct a body part that’s currently hidden underneath someone else’s hand.
Map out two problems: what needs to be removed, and what needs to be rebuilt. These are separate tasks that happen in a specific order, and mixing them up will cost you a lot of time. Identify the edges you’ll need to define manually, because the software has no idea what her shoulder looks like under there.
Step 2: Use the Pen Tool to Define the New Shoulder Edge
 Pen tool path being drawn along the shoulder curve
Grab the Pen tool (P on your keyboard, and yes, I have opinions about keyboard shortcuts, and yes, P is one of the good ones). Start your path at the bottom edge of the frame and work upward along where the subject’s shoulder should naturally curve. You’re not tracing anything that exists yet. You’re making an educated guess based on the visible parts of the shoulder and basic human anatomy.
The key move here: once you’ve defined the shoulder curve, hold Alt (Option on Mac) and click your last anchor point to break the handle direction. This lets you redirect the path without creating an unwanted curve. From there, extend the path outward to wrap around the unwanted hand, closing the selection in a way that captures everything you want gone while also defining the new shoulder boundary.
Step 3: Convert the Path to a Selection
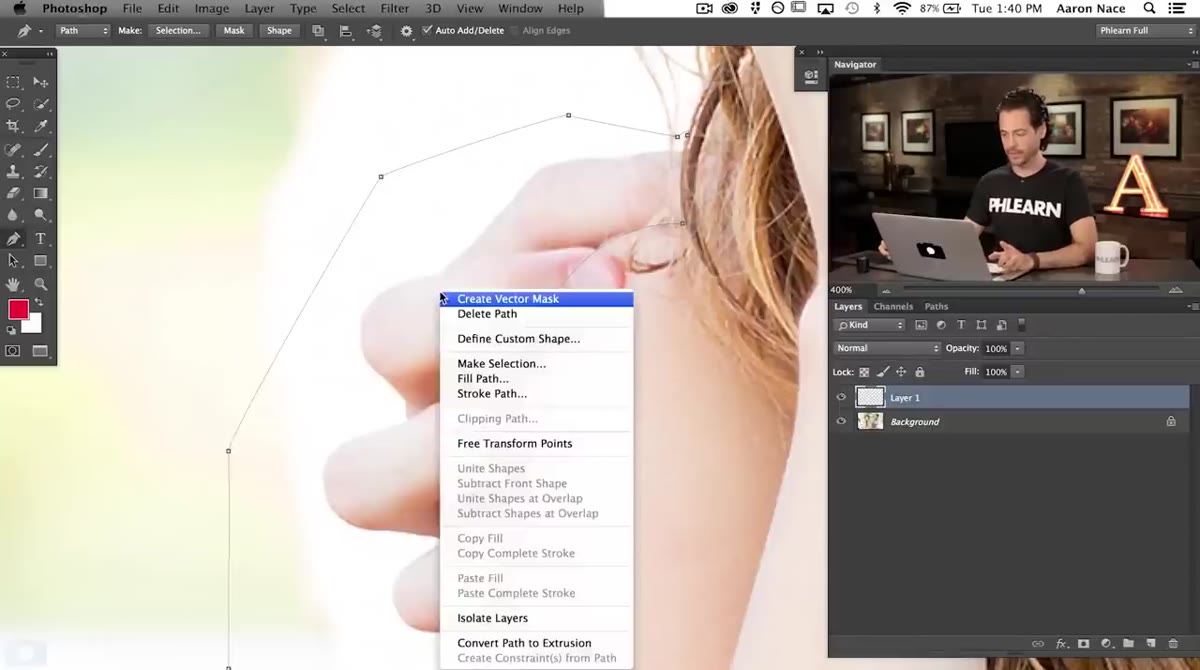 Make Selection dialog box with feather radius field visible
With your path complete, right-click anywhere on the canvas while the Pen tool is active and choose “Make Selection.” In the dialog box, set the feather radius to 0.5 pixels. Not 0, not 2. Half a pixel. This gives you a selection edge that’s crisp enough to look intentional but soft enough to blend without a hard cutout look.
This one path is going to do double duty. First it defines what to remove. Then it defines where to paint back the shoulder. Getting this shape right is worth spending an extra few minutes on, because every step after this depends on it.
Step 4: Clone Out the Background Behind the Removed Person
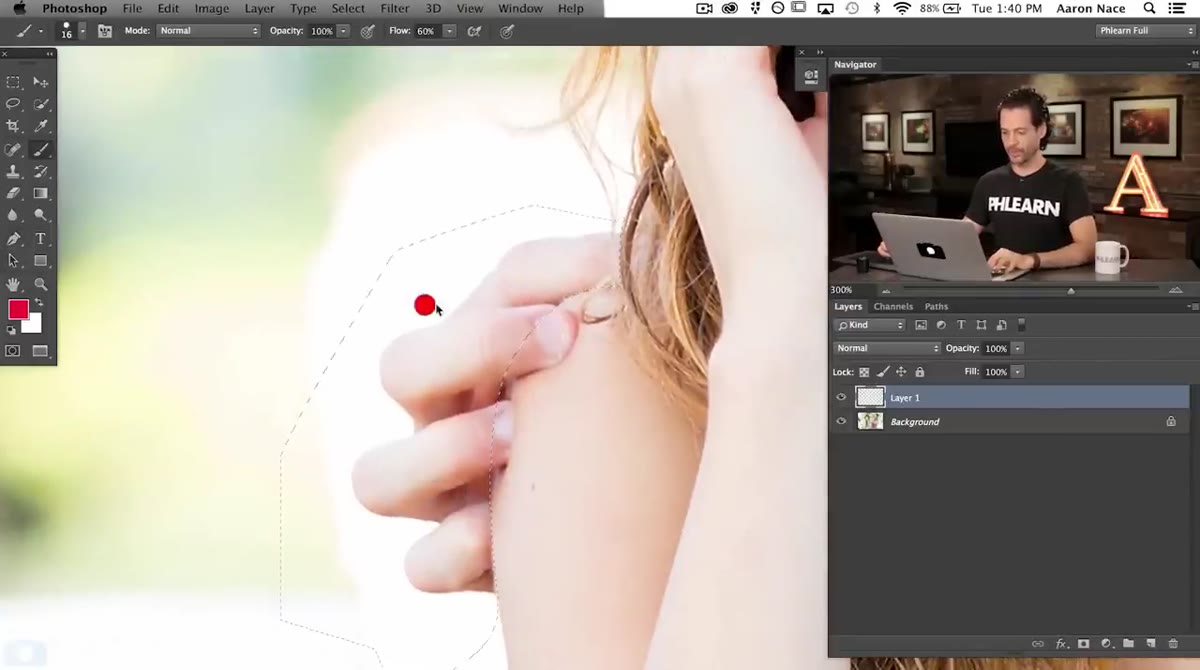 White background area with Clone Stamp work in progress
Create a new blank layer above your base image. With your selection still active, switch to the Clone Stamp tool (S). Sample from the clean background area nearby, then paint over the sections where the removed person’s body was. Because this particular image has a simple white background, this step moves quickly. Your background won’t always be this cooperative.
Work on a separate layer rather than stamping directly onto the original. This is non-destructive, and if you make a mess (which you will, at least once), you can just delete the layer and try again without losing anything. Sample often and vary your source point so you don’t create repeating texture patterns that look fake on close inspection.
Step 5: Paint Back the Reconstructed Shoulder
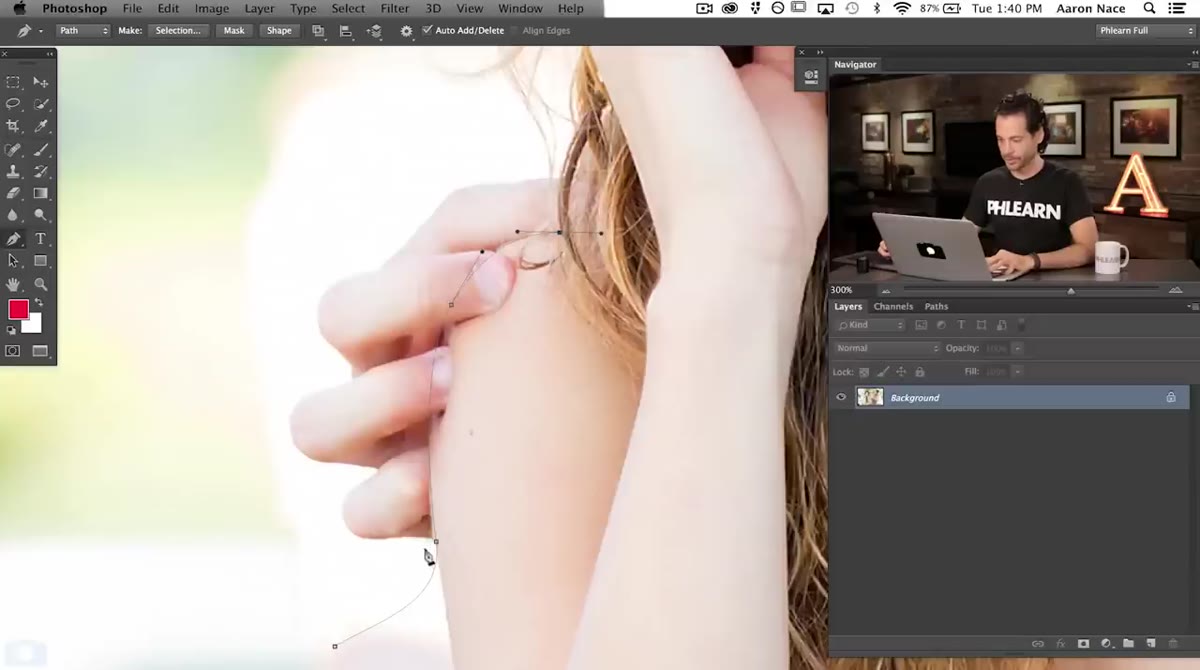 Pen path defining the curved shape of the subject’s shoulder
Re-activate your original pen path as a selection. This time, instead of using it to define what to delete, you’re using it to constrain where you paint. Create another new layer and use a soft-edged Brush set to match the subject’s skin tone. Sample the color directly from a clean area of the subject’s existing shoulder using the eyedropper.
Paint within the selection to fill in the reconstructed shoulder. Keep your brush opacity low, around 20 to 30 percent, and build up gradually. You want the shape to feel like skin, not a painted blob. Zoom out regularly and check how it reads at full image size. Close-up, everything looks rough. Step back to see if it’s working as a whole.
A Note From Someone Who’s Cloned Out More Than Just Ex-Boyfriends
I’ve used variations of this exact workflow to remove power lines, scaffolding, tourists in travel shots, and, one time, a client’s own signage that had gone out of date before the shoot was even over. The thing Aaron’s tutorial makes clear, even if it doesn’t say it directly, is that the Pen tool is the real foundation of clean compositing work.
Most people avoid the Pen tool because the learning curve feels steep. I avoided it for longer than I should have. I was an everything-with-Lasso-and-Quick-Select person for years, which worked fine until it didn’t. The first time I had to reconstruct an edge rather than just select one that already existed, I understood why the Pen tool is worth the investment. It’s the only tool that lets you define a shape that isn’t actually in the photo yet.
If you’ve been putting off learning it, this tutorial is a low-stakes place to start. The stakes are emotional, maybe, but technically this is a beginner-friendly use case with a clean background that gives you room to breathe.
The biggest thing this tutorial reinforces: removal jobs are rarely just removal jobs. Something always needs to be rebuilt on the other side. Plan for both tasks before you start, use your pen paths for double duty, and work on separate layers so you have an escape hatch when something goes sideways.
Watch the full tutorial on YouTube to see Aaron work through the finer details in real time, especially the brush work on the shoulder reconstruction.
Comments (1)
Tried this technique this morning. Game changer for real.
Leave a Comment