
There’s a specific kind of photo that shows up in everyone’s catalog and causes a small amount of existential dread: the backlit candid. You know the one. The light is beautiful, the moment is real, and the subject looks like they’re being interviewed in a witness protection program. I have folders full of these from outdoor events, and for a long time my solution was to either slap a Lightroom preset on them and hope for the best, or just quietly move them to trash.
Then I watched this tutorial from Matt Kloskowski, episode three in his start-to-finish raw editing series, where he takes a genuinely dark, backlit photo of his cousin at the beach and turns it into something that looks intentional and polished. No studio lights, no elaborate compositing. Just a smart, repeatable workflow split between Lightroom and Photoshop. Watch the full tutorial on YouTube if you want to follow along with the actual raw file (he provides a download link on his site). Below is my breakdown of the technique, rewritten so you can actually follow it without pausing every fifteen seconds.
The thing I appreciate most about Matt’s approach is that he’s not pretending you’re a studio photographer. He shoots outdoors because that’s where real moments happen, and he edits to match that energy. The results end up looking natural rather than processed, which is the whole game with candid work.
Step 1: Start With Exposure, Not Shadows
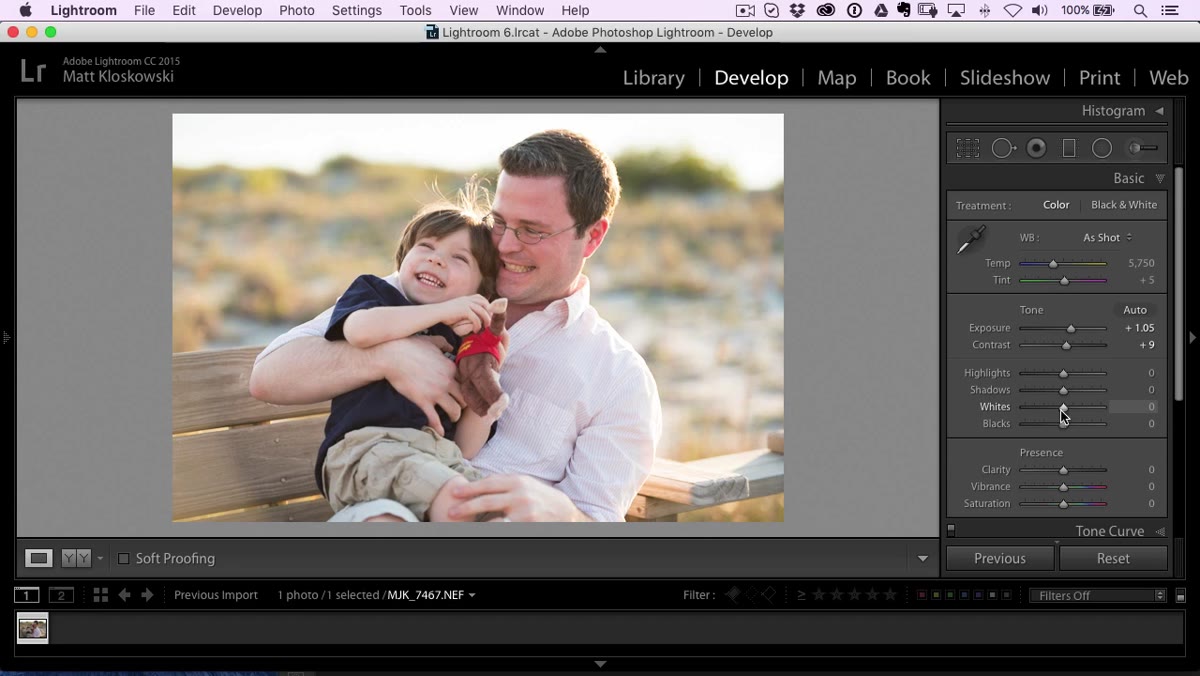
 Lightroom exposure slider being pushed right on backlit portrait
Your first instinct with a dark photo might be to reach for the Shadows slider, and honestly, it’s not a terrible instinct. But Matt’s point here is a good one: pulling Shadows alone tends to flatten the image. It lifts the darks without giving you the overall sense of light that the scene actually had. Instead, go straight to the Exposure slider and push it toward overexposure deliberately. For this shot, the goal is to honor the fact that the sun was going down behind the subject. That bright, airy feeling should come through in the edit. Don’t be timid about it.
Lightroom exposure slider being pushed right on backlit portrait
Your first instinct with a dark photo might be to reach for the Shadows slider, and honestly, it’s not a terrible instinct. But Matt’s point here is a good one: pulling Shadows alone tends to flatten the image. It lifts the darks without giving you the overall sense of light that the scene actually had. Instead, go straight to the Exposure slider and push it toward overexposure deliberately. For this shot, the goal is to honor the fact that the sun was going down behind the subject. That bright, airy feeling should come through in the edit. Don’t be timid about it.
A useful trick while you’re doing this: hold down Option (Mac) or Alt (Windows) as you drag the slider. This toggles a clipping overlay that shows you exactly where you’re starting to blow out detail. Use it as a reference, then back off slightly from that point. You want bright, not destroyed.
Step 2: Set Your White Point and Black Point the Right Way
 Whites and Blacks sliders in Lightroom with Alt key clipping view
Once exposure is in a good place, you need to anchor your tonal range properly. For Whites, hold down Option/Alt and drag the Whites slider to the right. The canvas will go black, and small colored or white patches will start appearing as you push it. Those patches indicate clipping. Back off just to the point where they disappear. That’s your white point.
Whites and Blacks sliders in Lightroom with Alt key clipping view
Once exposure is in a good place, you need to anchor your tonal range properly. For Whites, hold down Option/Alt and drag the Whites slider to the right. The canvas will go black, and small colored or white patches will start appearing as you push it. Those patches indicate clipping. Back off just to the point where they disappear. That’s your white point.
Do the same for Blacks, but in reverse. Hold Option/Alt and drag left until you just start seeing detail in the shadows. Matt’s point about the blown-out background highlights is worth noting here: he doesn’t try to recover them, because there’s nothing useful back there. Not every highlight needs saving. If the blown-out area is sky or ambient light and it doesn’t distract from the subject, let it go. Chasing unrecoverable highlight detail is one of those editing habits that wastes time and muddies the final result.
Step 3: Add Contrast Selectively, Skip the Contrast Slider
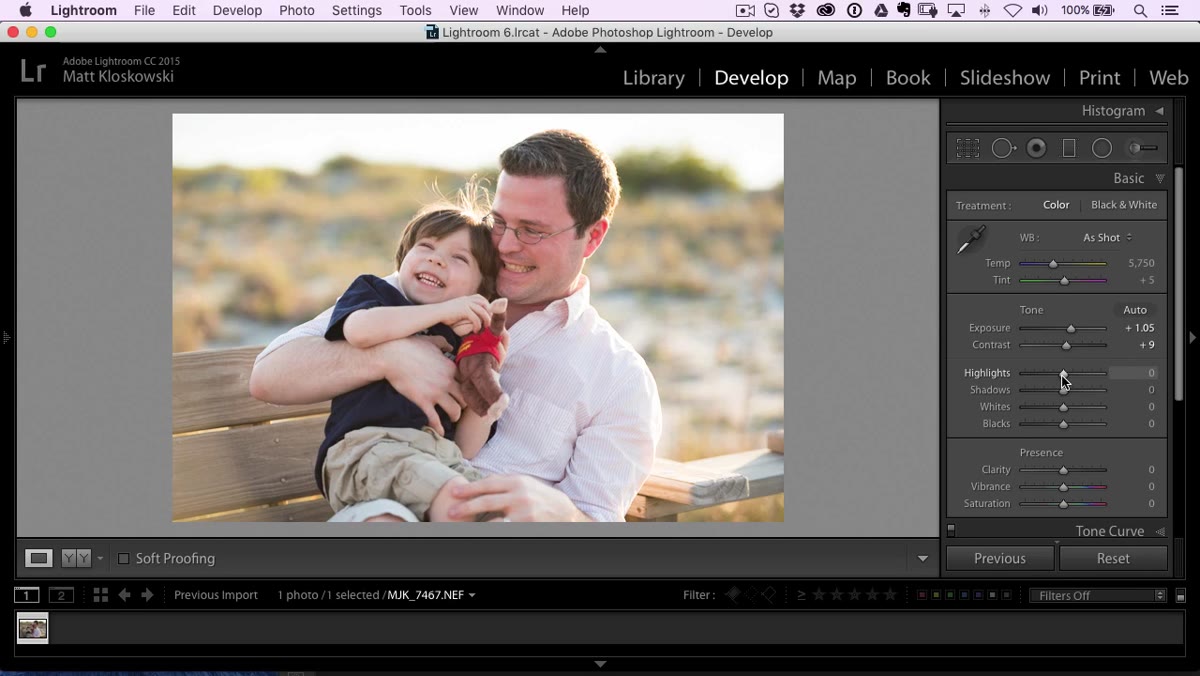 Contrast slider adjustment in Lightroom basic panel
Matt adds a small amount of contrast in Lightroom’s Basic panel, but the key word is small. The contrast slider in Lightroom is a blunt instrument. It hits everything at once and can easily undo the careful exposure work you just did. A nudge is fine. What you don’t want to do is crank it trying to add punch, because you’ll compress your shadows and muddy your highlights in the same move.
Contrast slider adjustment in Lightroom basic panel
Matt adds a small amount of contrast in Lightroom’s Basic panel, but the key word is small. The contrast slider in Lightroom is a blunt instrument. It hits everything at once and can easily undo the careful exposure work you just did. A nudge is fine. What you don’t want to do is crank it trying to add punch, because you’ll compress your shadows and muddy your highlights in the same move.
If you want more targeted contrast later, that work happens in Photoshop, not here. Keep the Lightroom adjustments global and conservative. You’re setting a foundation, not finishing the image.
Step 4: Move to Photoshop for the Heavy Lifting
 Photo being opened from Lightroom into Photoshop
Once the Lightroom basics are dialed in, send the file to Photoshop. In Lightroom, right-click the image and choose Edit In > Edit in Adobe Photoshop. This is where you can start working more precisely on the subject versus the background, something Lightroom’s masking has gotten better at but Photoshop still handles more powerfully in complex situations.
Photo being opened from Lightroom into Photoshop
Once the Lightroom basics are dialed in, send the file to Photoshop. In Lightroom, right-click the image and choose Edit In > Edit in Adobe Photoshop. This is where you can start working more precisely on the subject versus the background, something Lightroom’s masking has gotten better at but Photoshop still handles more powerfully in complex situations.
The reason this workflow matters: Lightroom is fast and non-destructive, but its tools are global by default. Photoshop lets you isolate your subject and treat them differently from everything else in the frame. For a backlit portrait where the background is intentionally bright and the subject needs help, that separation is everything.
Step 5: Sharpen and Stylize the Eyes With onOne Effects (or a Photoshop Alternative)
 Eye enhancement being applied in onOne Effects plugin
This is the step that surprised me most about Matt’s workflow. He uses a plugin called onOne Effects to sharpen and stylize the eyes, and he’s upfront that this is his preferred tool for this specific task. There’s a free version available at onone.com, and a 30-day full trial if you want to test the whole thing. For a portrait, especially a candid where you didn’t control the focus precisely, getting the eyes sharp and present is what separates a photo people hang on a wall from one they casually thumb past.
Eye enhancement being applied in onOne Effects plugin
This is the step that surprised me most about Matt’s workflow. He uses a plugin called onOne Effects to sharpen and stylize the eyes, and he’s upfront that this is his preferred tool for this specific task. There’s a free version available at onone.com, and a 30-day full trial if you want to test the whole thing. For a portrait, especially a candid where you didn’t control the focus precisely, getting the eyes sharp and present is what separates a photo people hang on a wall from one they casually thumb past.
If you’d rather stay inside Photoshop without a plugin, the manual alternative is to duplicate your layer, apply a High Pass filter (Filter > Other > High Pass) set to a small radius, change the blend mode to Overlay or Soft Light, and mask it so it only affects the eyes. It’s more steps but it achieves a similar result. The eyes need to read as sharp and alive even if the rest of the image is slightly soft.
One Thing I’d Add From My Own Experience
Matt’s workflow is tight and I don’t have much to argue with, but one habit I’ve built on top of this kind of edit: create a merged stamp layer in Photoshop (Shift + Ctrl/Cmd + Alt + E) before any final sharpening or plugin work. This gives you a flattened version of everything you’ve done so far, on a single layer, without destroying the layers below it. If you apply onOne Effects or any other stylization and it goes sideways, you just delete that stamp layer and start the last step over. No undo chain required. I learned to do this after a client delivery situation that I’d rather not relive in detail.
The biggest takeaway from Matt’s approach is the order of operations. Exposure first, then tonal anchoring with whites and blacks, light contrast, then move to Photoshop for targeted work. It sounds obvious written out, but most people (myself included for a long time) try to do everything at once in one panel and wonder why the image looks weird. Building the edit in logical stages means each decision is cleaner and easier to undo if something goes wrong.
Watch the full tutorial on YouTube to see Matt walk through the complete edit from raw file to finished image, and grab his raw file from his site if you want to work along with the exact same photo.
Comments
Leave a Comment