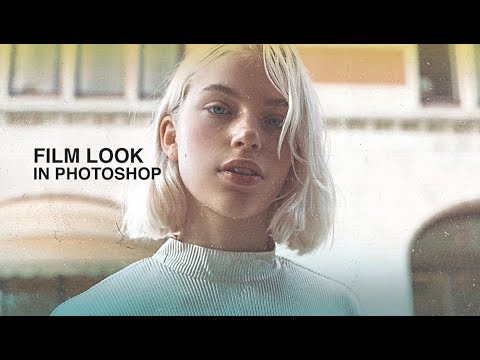
I shoot a lot of product and lifestyle work, and somewhere between “clean and sharp” and “actually interesting,” there’s a sweet spot that analog film textures can unlock. Not because it looks like real film – it doesn’t, and anyone who tells you otherwise is lying – but because a little grain, a little dust, a little edge color does something to a photo that no amount of contrast sliders can replicate. It adds noise in the good sense. Visual personality.
I came across this Jessica Kobeissi tutorial on YouTube while looking for a faster way to add this kind of texture without committing to a full Lightroom preset workflow. What I like about Jessica’s approach is that she’s upfront about what this technique actually is: a fun, customizable way to add dust and scratch overlays to your images using blend modes. No pretense, no magic. Just Photoshop doing what Photoshop does.
The whole thing takes maybe ten minutes once you have your texture files ready, and the results look genuinely good. Here’s how to do it.
Step 1: Download a Film Dust Texture Pack
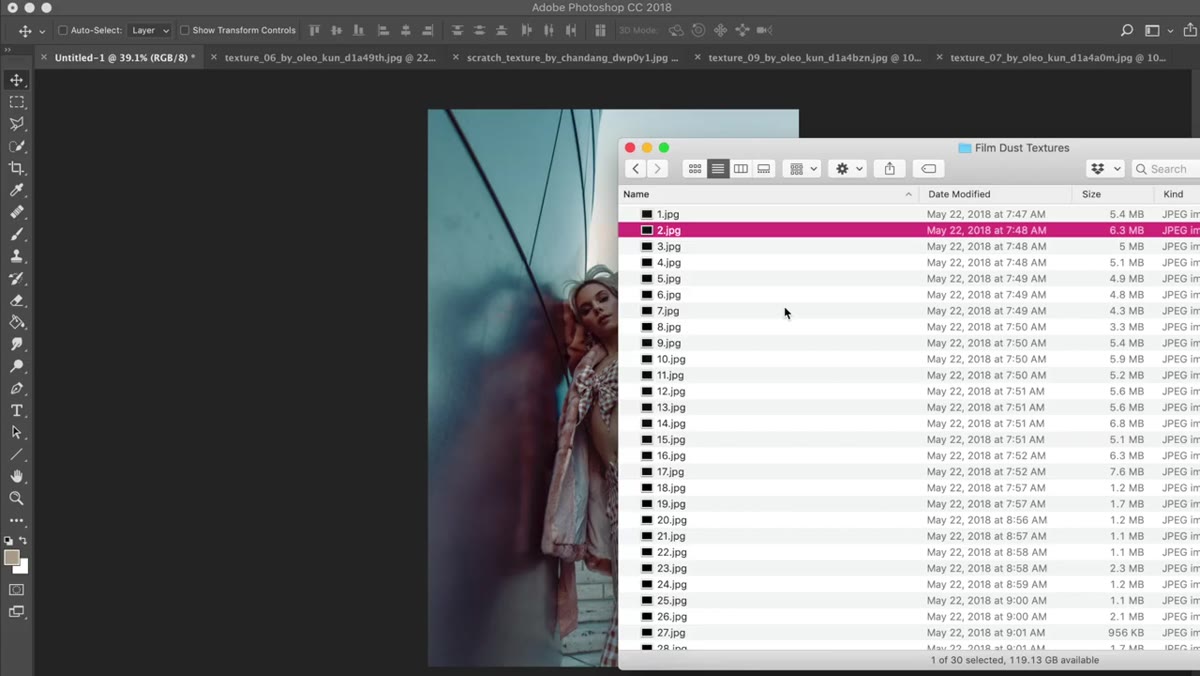 Folder of film dust texture files ready to use
Before you open Photoshop, you need the raw material: film dust and scratch textures. Jessica links to the pack she uses in her video description, and it’s a solid one with a good variety of styles, some heavy grain, some light specks, some with scratches. These are typically PNG or JPEG files with the texture isolated on a black or white background, which is exactly what makes the blend mode trick work later.
Folder of film dust texture files ready to use
Before you open Photoshop, you need the raw material: film dust and scratch textures. Jessica links to the pack she uses in her video description, and it’s a solid one with a good variety of styles, some heavy grain, some light specks, some with scratches. These are typically PNG or JPEG files with the texture isolated on a black or white background, which is exactly what makes the blend mode trick work later.
If you want to hunt for your own, search for “free film grain texture overlay” and look for packs with multiple variations. Having options matters because you’ll be layering two or three textures together, and you don’t want them all looking identical.
Step 2: Drag the Texture onto Your Image in Photoshop
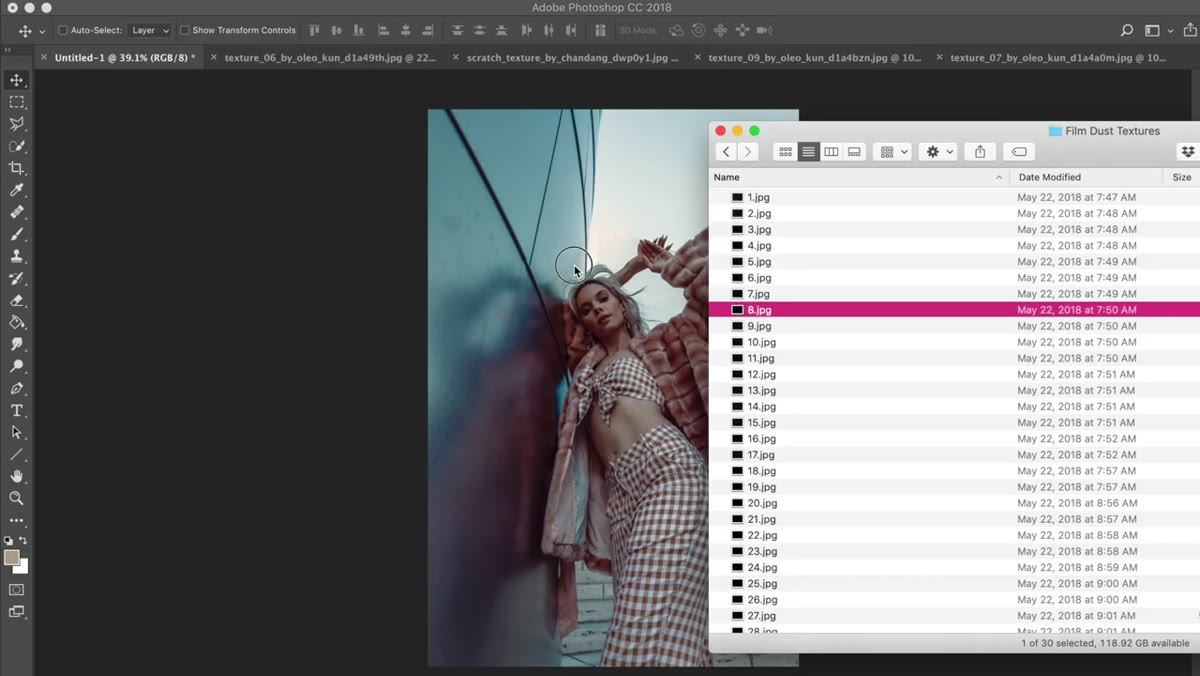 Dragging texture file from folder onto open Photoshop document
Open your photo in Photoshop, then just drag the texture file directly from your folder onto the canvas. Photoshop will place it as a Smart Object, which is genuinely useful here because it means you can scale it without permanently degrading the texture quality. Use Free Transform (Cmd/Ctrl + T) to resize the texture so it covers your full image. Hold Shift if you need to constrain proportions, though most texture packs are already sized to cover standard photo dimensions.
Dragging texture file from folder onto open Photoshop document
Open your photo in Photoshop, then just drag the texture file directly from your folder onto the canvas. Photoshop will place it as a Smart Object, which is genuinely useful here because it means you can scale it without permanently degrading the texture quality. Use Free Transform (Cmd/Ctrl + T) to resize the texture so it covers your full image. Hold Shift if you need to constrain proportions, though most texture packs are already sized to cover standard photo dimensions.
Press Enter to commit the transform. The texture is now sitting on its own layer above your photo, looking like a grey or black mess. That’s normal. The next step is where it starts to look intentional.
Step 3: Set the Blend Mode to Screen or Multiply
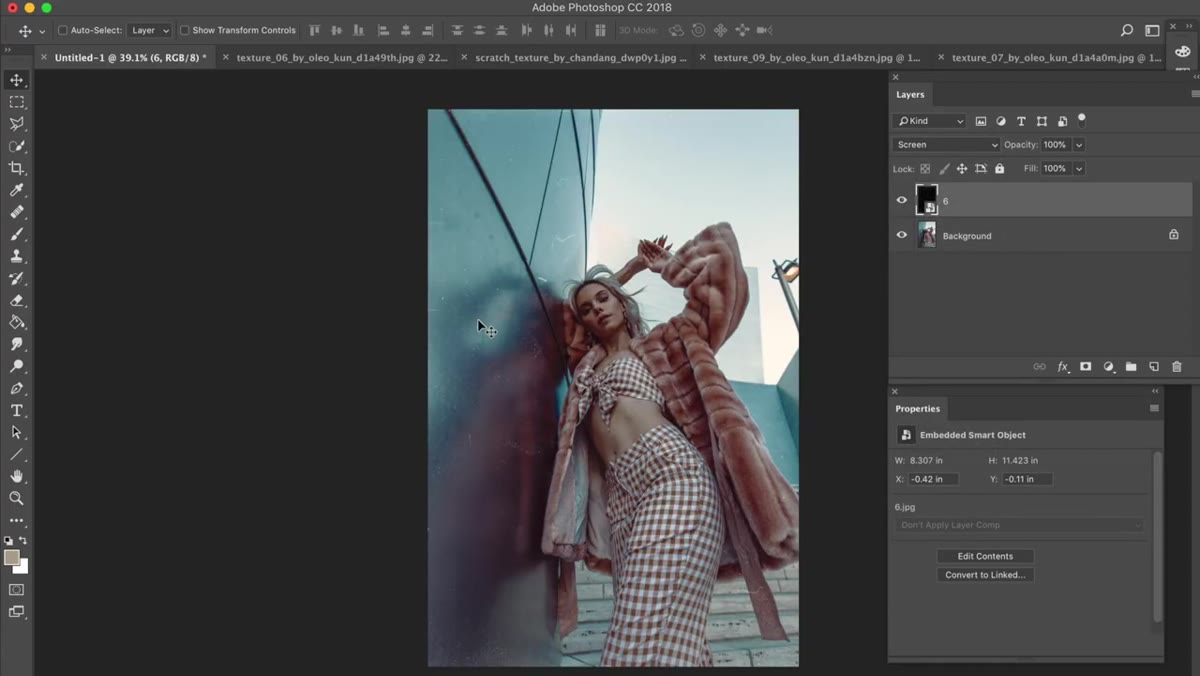 Blend mode dropdown showing Screen selected on texture layer
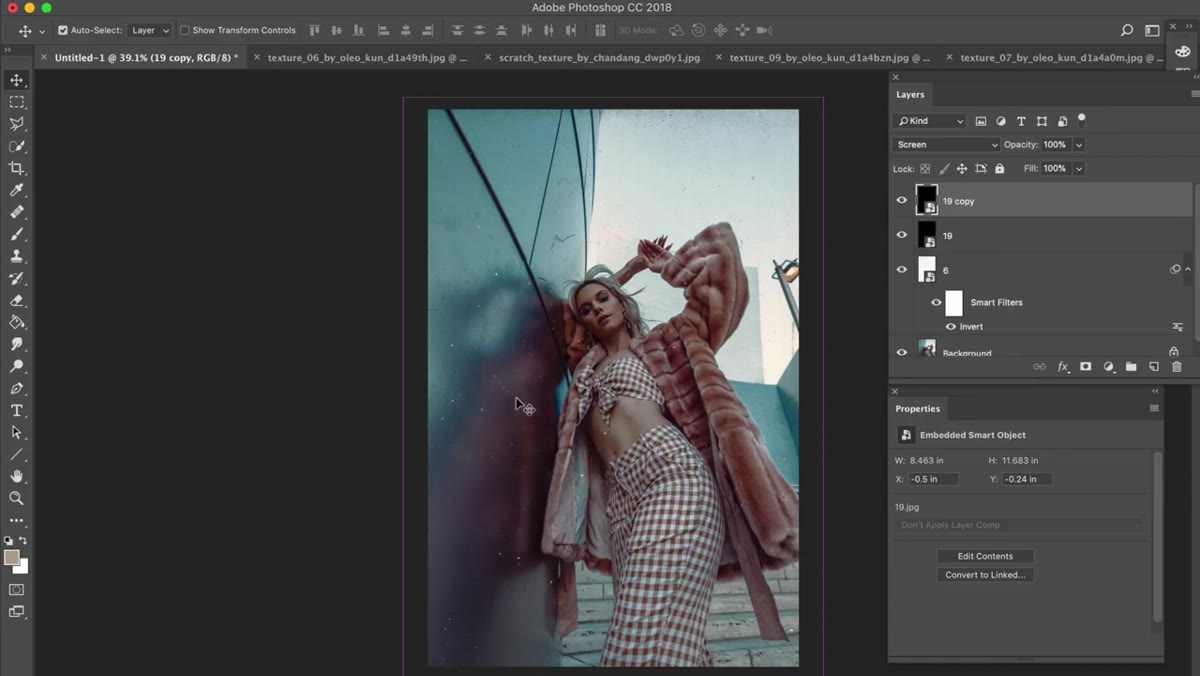
This is the core of the technique and it’s simpler than people expect. With your texture layer selected, open the blend mode dropdown at the top of the Layers panel (it defaults to “Normal”) and switch it to Screen. Screen mode makes the dark pixels in the texture invisible and lets the light pixels, your dust and scratches, show through as bright specks on the image. It looks like light leaks through a lens. Good, subtle, believable.
Blend mode dropdown showing Screen selected on texture layer
This is the core of the technique and it’s simpler than people expect. With your texture layer selected, open the blend mode dropdown at the top of the Layers panel (it defaults to “Normal”) and switch it to Screen. Screen mode makes the dark pixels in the texture invisible and lets the light pixels, your dust and scratches, show through as bright specks on the image. It looks like light leaks through a lens. Good, subtle, believable.
If you want dark dust instead of white specks, press Cmd + I (Ctrl + I on Windows) to invert the texture layer, then switch the blend mode to Multiply instead of Screen. Multiply hides the white pixels and shows the dark ones, giving you those classic black scratches and grain marks. Jessica’s approach is to mix both: drop in one texture on Screen, another inverted on Multiply. The combination reads as genuinely complex texture rather than a single repeated overlay.
Step 4: Duplicate or Adjust the Texture Intensity with a Clipped Levels Layer
 Levels adjustment layer clipped to texture layer in Layers panel
If the effect is too subtle, the quick fix is just duplicating the texture layer (Cmd/Ctrl + J). More often than not that’s all you need. But if you want proper control over the intensity without just stacking copies, Jessica shows a cleaner method: add a Levels adjustment layer and clip it specifically to the texture layer below it.
Levels adjustment layer clipped to texture layer in Layers panel
If the effect is too subtle, the quick fix is just duplicating the texture layer (Cmd/Ctrl + J). More often than not that’s all you need. But if you want proper control over the intensity without just stacking copies, Jessica shows a cleaner method: add a Levels adjustment layer and clip it specifically to the texture layer below it.
To do this, go to Layer, then New Adjustment Layer, then Levels. Before hitting OK, hold Alt/Option and click on the boundary line between the Levels layer and the texture layer below it in the Layers panel. The cursor changes to show a clipping icon, and when you click, the Levels layer gets clipped, meaning it only affects the texture layer and not your base photo. From there, drag the black and white input sliders inward to crank up the contrast on the texture itself, pushing more of the dust into visibility. It gives you surgical control without touching the underlying image.
Step 5: Add an Edge Color Bleed with a Gradient Layer
 Red gradient applied to side of photo with Darken blend mode
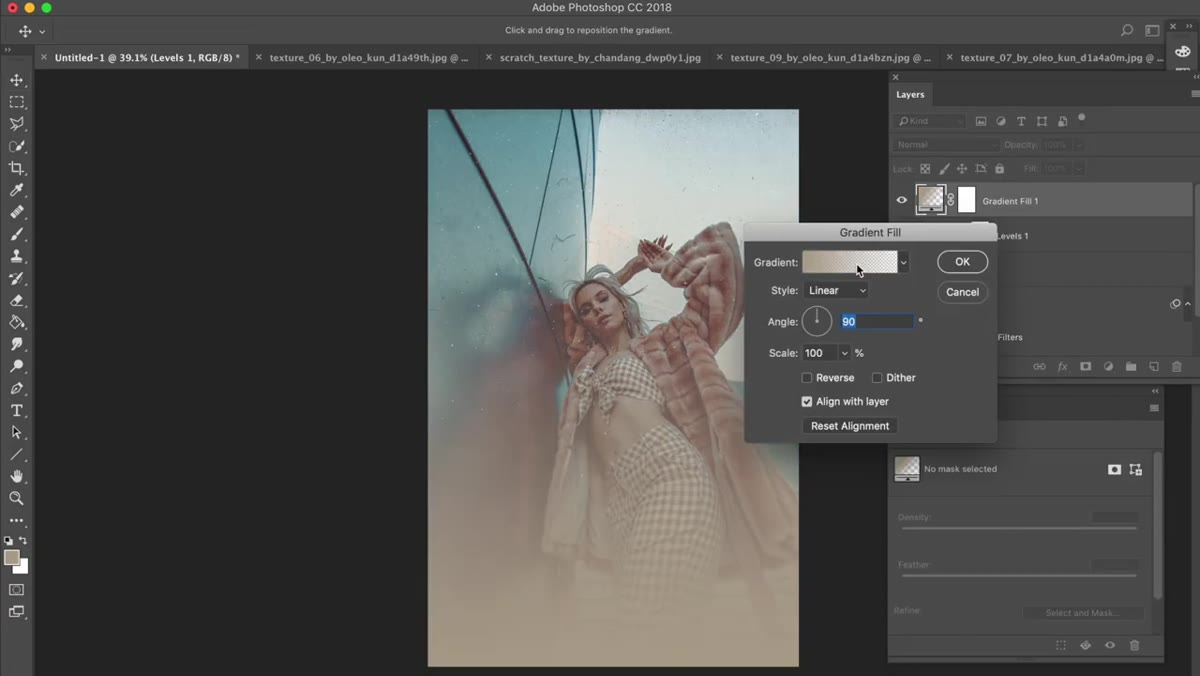
This one is optional but it’s the detail that takes the whole thing from “texture overlay” to “film aesthetic.” Real film photographs often have color bleeding at the edges, especially a red or orange hue from light exposure. You can fake this with a gradient fill layer.
Red gradient applied to side of photo with Darken blend mode
This one is optional but it’s the detail that takes the whole thing from “texture overlay” to “film aesthetic.” Real film photographs often have color bleeding at the edges, especially a red or orange hue from light exposure. You can fake this with a gradient fill layer.
Go to Layer, New Fill Layer, Gradient. In the dialog that opens, click the gradient preview to edit it, and set one end to a saturated red or orange and the other end to fully transparent. Back in the gradient fill settings, make sure the style is set to Linear, then drag the gradient so it originates from one edge of the frame. The transition should be tight, falling off quickly rather than bleeding all the way across the image. Hit OK, then change that layer’s blend mode to Darken. Darken mode only affects pixels that are lighter than the gradient color, so it settles into the edges naturally without blowing out your subject. Subtle and genuinely good-looking.
One Thing I’d Add: Stack These Textures on a Smart Object Group
Jessica’s tutorial is tight and practical, but there’s one workflow tweak I’d recommend if you’re planning to use this on client work or revisit the image later. Before you start adding textures, group your base photo into a Smart Object (right-click the layer, Convert to Smart Object). Then do all your texture and gradient layers above it.
This keeps your original image completely intact and makes it trivially easy to swap out the base photo while keeping all the texture layers exactly where they are. I learned to love Smart Objects after a painful incident involving a flattened file and a very unimpressed client. Working non-destructively costs you thirty seconds upfront and can save you an ugly conversation later.
The single most important thing to take away here is that the blend mode is doing all the work. Screen and Multiply aren’t magic, they’re just math that either hides blacks or hides whites from a layer. Once you understand that, the technique becomes endlessly remixable: different textures, different colors, different levels of intensity. You’re not applying a filter, you’re building something.
Watch the full tutorial on YouTube to see Jessica walk through the whole thing in real time. Her texture pack link in the description is worth grabbing before you start.
Comments
Leave a Comment