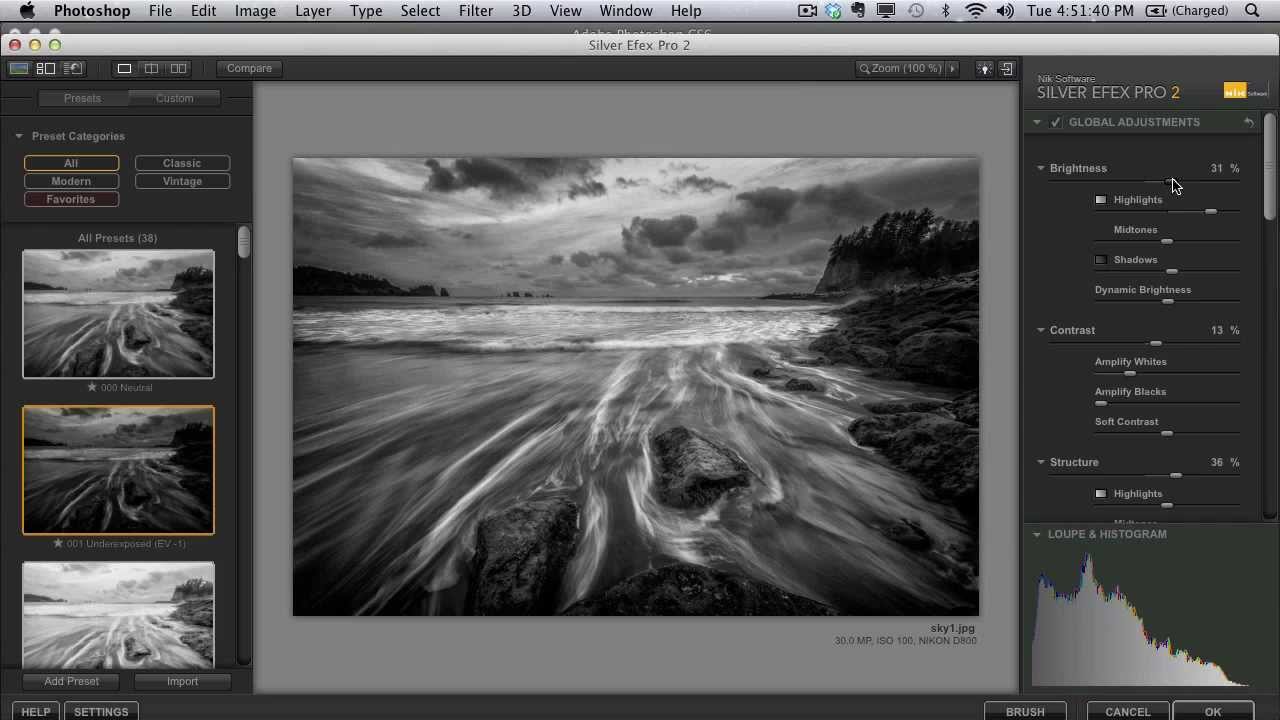
I’ll be honest – black and white photography used to feel like something I’d slap on a photo when the colors were too ugly to save. Hit the desaturate button, call it art, move on. It wasn’t until I started paying closer attention to how working photographers actually approach monochrome that I realized how much I’d been leaving on the table. In this KelbyOne tutorial, the whole round-trip is laid out from a completely untouched RAW file all the way through Lightroom adjustments and into Silver Efex Pro for the final black and white conversion. Watch the full tutorial on YouTube – then come back here for the breakdown.
The image is a long-exposure landscape with streaky water and a bright sky, which is exactly the kind of photo that punishes lazy editing. Too much exposure and the water goes soft and featureless. Too little and the shadows swallow everything. The tutorial walks through how to handle that tension in Lightroom before any creative work even starts, which is the part most people skip straight past. The black and white conversion itself is the reward, but the Lightroom groundwork is what makes it sing.
What I like about this workflow is that it treats the two tools as a relay race, not a competition. Lightroom does the technical heavy lifting. Silver Efex Pro handles the creative interpretation. If you try to skip the first leg, the second one falls apart.
Step 1: Reset and Warm the White Balance
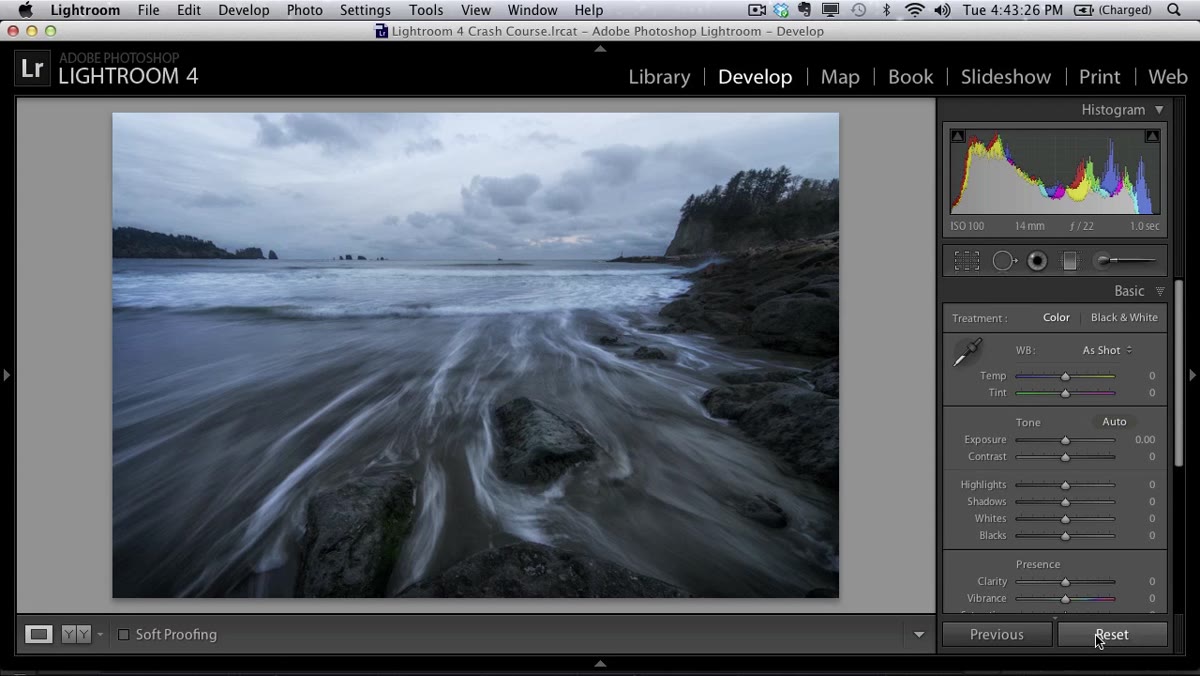 Basic panel open, reset button highlighted, temperature slider being nudged
Before touching anything else, hit the Reset button in the Develop module to clear any auto-corrections Lightroom may have applied on import. Start with a clean slate. From there, add just a touch of warmth to the white balance. For a landscape with water and sky, warming the temperature a few hundred Kelvin tends to pull out more texture and give the image a little life before the conversion strips out the color entirely. Don’t overdo it – you’re not going for golden hour, you’re just counteracting the cold flatness of the sensor.
Basic panel open, reset button highlighted, temperature slider being nudged
Before touching anything else, hit the Reset button in the Develop module to clear any auto-corrections Lightroom may have applied on import. Start with a clean slate. From there, add just a touch of warmth to the white balance. For a landscape with water and sky, warming the temperature a few hundred Kelvin tends to pull out more texture and give the image a little life before the conversion strips out the color entirely. Don’t overdo it – you’re not going for golden hour, you’re just counteracting the cold flatness of the sensor.
Step 2: Set Exposure, Then Pull the Highlights
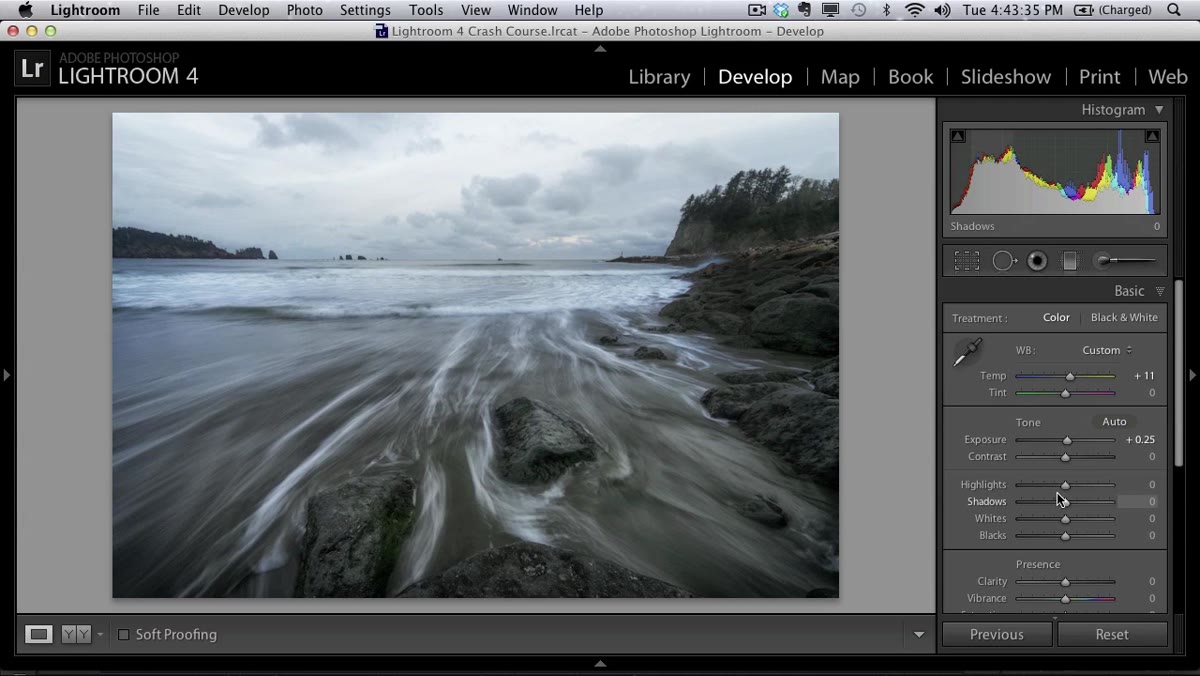 Exposure slider being nudged up, Highlights slider being dragged left
Nudge the exposure up slightly to bring the image to a workable brightness level. Then – and this is the move that earns its keep on landscape shots – drag the Highlights slider to the left. For a photo with a bright sky over water, the highlights slider is doing something smarter than just lowering brightness across the board. It’s selectively pulling back the blown-out areas without touching the midtones or shadows. You get a brighter overall image that still has a sky with actual detail in it. It’s one of those sliders that feels subtle until you turn it off and wonder how the sky got so washed out again.
Exposure slider being nudged up, Highlights slider being dragged left
Nudge the exposure up slightly to bring the image to a workable brightness level. Then – and this is the move that earns its keep on landscape shots – drag the Highlights slider to the left. For a photo with a bright sky over water, the highlights slider is doing something smarter than just lowering brightness across the board. It’s selectively pulling back the blown-out areas without touching the midtones or shadows. You get a brighter overall image that still has a sky with actual detail in it. It’s one of those sliders that feels subtle until you turn it off and wonder how the sky got so washed out again.
Step 3: Open Up Shadows, Then Set White and Black Points
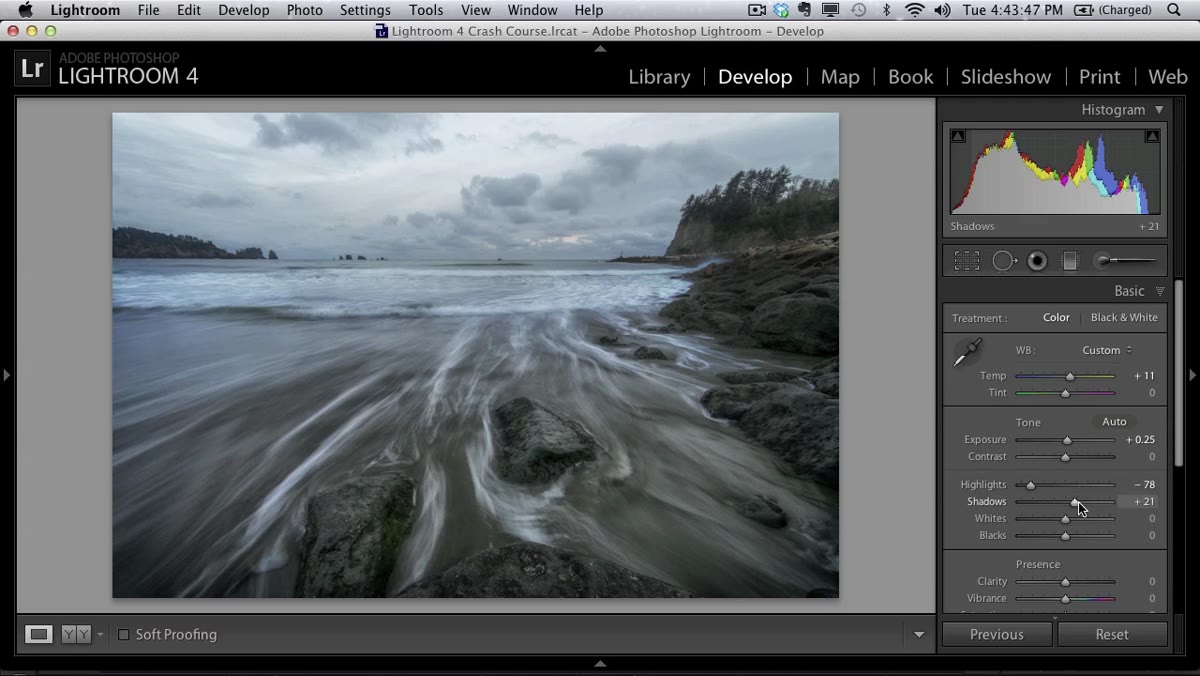 Shadows slider being dragged right, then Alt/Option key held for white point clipping view
Bring the Shadows slider up to recover detail in the darker areas – water textures, rocks, foreground – without flattening the contrast. Then set your white and black points properly. Hold down Option (Mac) or Alt (Windows) and drag the Whites slider right. The canvas goes black, and as you drag you’ll start to see small bright specks appear. The moment you see the first specks, stop – that’s your white point. Do the same for Blacks, but drag left. The canvas goes white, and you’re looking for the first dark specks to appear. Stop there. This clipping view method takes about ten seconds and does more for overall tonal balance than eyeballing sliders ever will.
Shadows slider being dragged right, then Alt/Option key held for white point clipping view
Bring the Shadows slider up to recover detail in the darker areas – water textures, rocks, foreground – without flattening the contrast. Then set your white and black points properly. Hold down Option (Mac) or Alt (Windows) and drag the Whites slider right. The canvas goes black, and as you drag you’ll start to see small bright specks appear. The moment you see the first specks, stop – that’s your white point. Do the same for Blacks, but drag left. The canvas goes white, and you’re looking for the first dark specks to appear. Stop there. This clipping view method takes about ten seconds and does more for overall tonal balance than eyeballing sliders ever will.
Step 4: Add Clarity and Fine-Tune Exposure
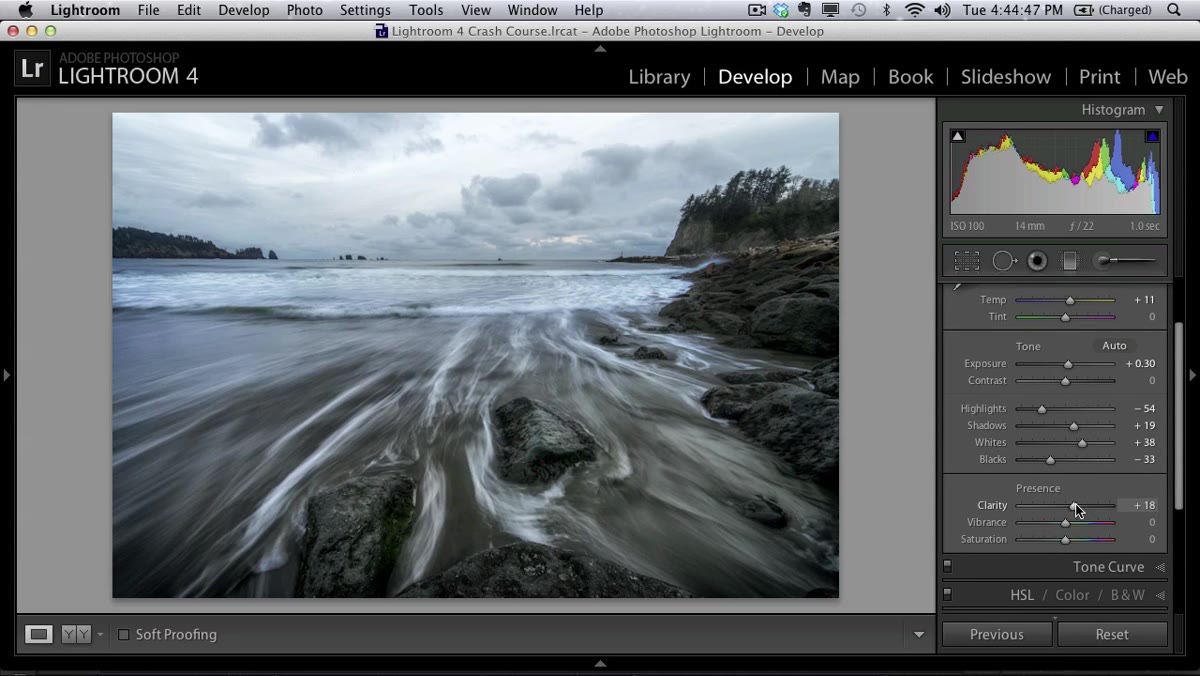 Clarity slider being adjusted in Basic panel, backslash key toggling before/after
Once your tonal range is locked in, add a moderate bump of Clarity. For landscape and water shots, Clarity adds micro-contrast – it sharpens up the texture in the rocks and water without making the image look over-sharpened at the macro level. After that, take another look at your overall exposure. It’s common to need one last small adjustment once everything else is in place. Toggle the before and after using the backslash key to check your work. If the scene looks intentional rather than just brighter, you’re in good shape.
Clarity slider being adjusted in Basic panel, backslash key toggling before/after
Once your tonal range is locked in, add a moderate bump of Clarity. For landscape and water shots, Clarity adds micro-contrast – it sharpens up the texture in the rocks and water without making the image look over-sharpened at the macro level. After that, take another look at your overall exposure. It’s common to need one last small adjustment once everything else is in place. Toggle the before and after using the backslash key to check your work. If the scene looks intentional rather than just brighter, you’re in good shape.
Step 5: Use a Graduated Filter to Control the Sky
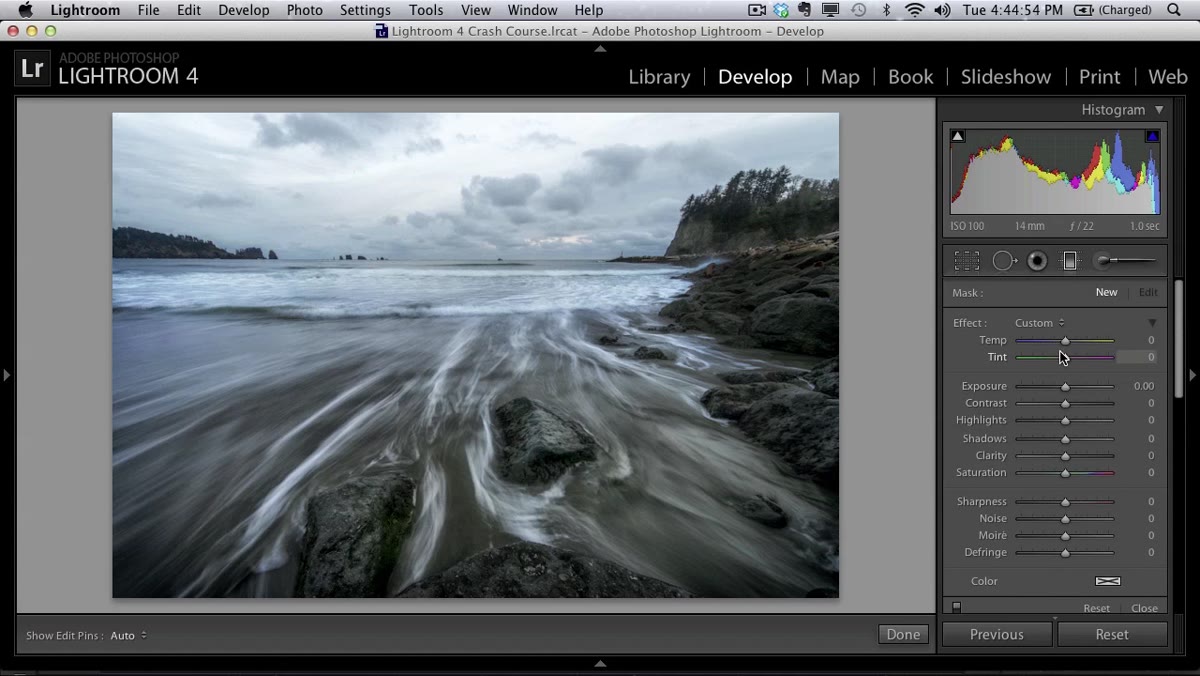 Graduated filter being dragged down from top of image over the sky
Open the Graduated Filter tool and drag from the top of the image down across the sky. Drop the Exposure value within the filter to darken the sky the way a physical neutral density graduated filter would – except this one doesn’t darken a lighthouse or tree branch that sticks above the horizon line in a way you can’t fix. Within the graduated filter, try using the Highlights slider instead of (or in addition to) the Exposure slider. Pulling Highlights within the filter targets only the bright areas of the sky rather than uniformly darkening the whole gradient. The result is a sky that looks naturally moody rather than artificially dimmed.
Graduated filter being dragged down from top of image over the sky
Open the Graduated Filter tool and drag from the top of the image down across the sky. Drop the Exposure value within the filter to darken the sky the way a physical neutral density graduated filter would – except this one doesn’t darken a lighthouse or tree branch that sticks above the horizon line in a way you can’t fix. Within the graduated filter, try using the Highlights slider instead of (or in addition to) the Exposure slider. Pulling Highlights within the filter targets only the bright areas of the sky rather than uniformly darkening the whole gradient. The result is a sky that looks naturally moody rather than artificially dimmed.
Step 6: Send to Silver Efex Pro for Black and White Conversion
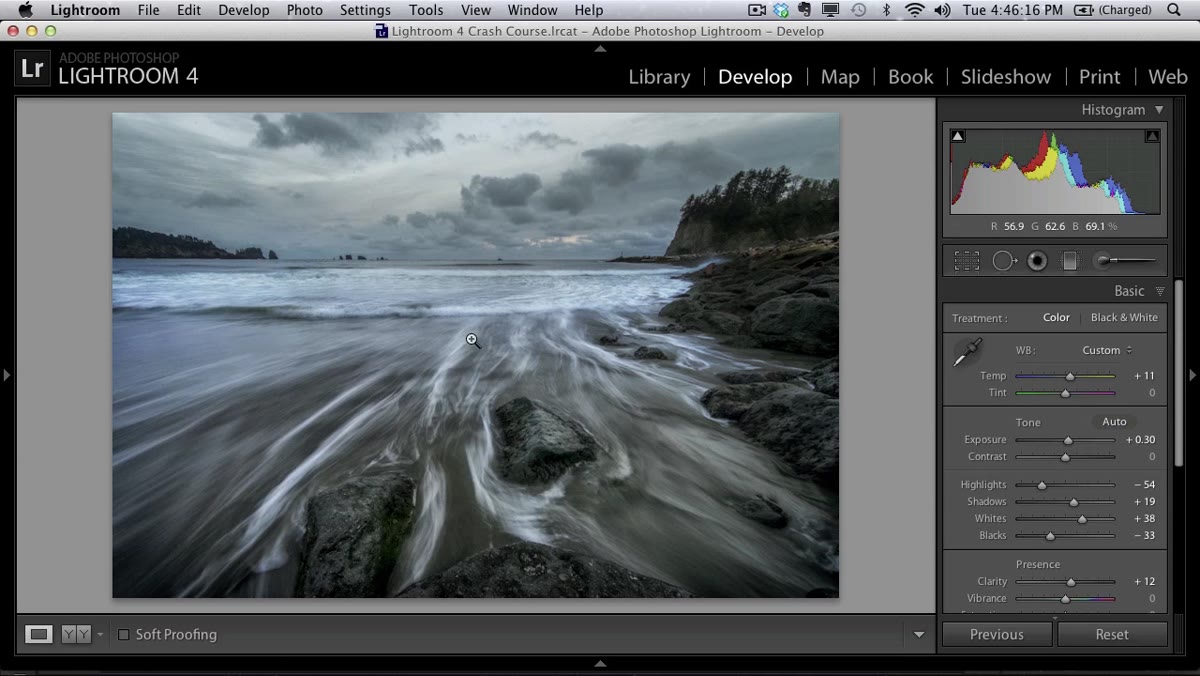 Image being opened in Silver Efex Pro from Lightroom’s Edit In menu
Once the Lightroom work is done, send the image to Silver Efex Pro via Photo - Edit In. If you don’t have Silver Efex Pro, Lightroom’s own black and white mix panel will get you somewhere – but Silver Efex gives you film emulation presets, localized control points, and tonal relationships that the native tools don’t come close to matching. It’s genuinely the industry standard for monochrome conversion, which is an annoying thing to admit if you’re trying to keep your plugin list short. Inside Silver Efex, the base Lightroom edits you’ve already done give the conversion something real to work with. The tonal range you set earlier translates directly into separation between the sky, water, and rocks in the final black and white image.
Image being opened in Silver Efex Pro from Lightroom’s Edit In menu
Once the Lightroom work is done, send the image to Silver Efex Pro via Photo - Edit In. If you don’t have Silver Efex Pro, Lightroom’s own black and white mix panel will get you somewhere – but Silver Efex gives you film emulation presets, localized control points, and tonal relationships that the native tools don’t come close to matching. It’s genuinely the industry standard for monochrome conversion, which is an annoying thing to admit if you’re trying to keep your plugin list short. Inside Silver Efex, the base Lightroom edits you’ve already done give the conversion something real to work with. The tonal range you set earlier translates directly into separation between the sky, water, and rocks in the final black and white image.
What I’d Add From My Own Experience
Silver Efex is great, but the graduated filter step in Lightroom is where I see people bail too early. A single flat gradient from top to bottom isn’t always right – sometimes the horizon is uneven, or there’s a subject breaking into the sky. In those cases, stack two or three smaller graduated filters at slightly different angles and exposure values rather than fighting with one aggressive one. You lose a little speed but gain a lot of control, especially for anything with a complicated skyline. The Highlights slider inside each filter is doing work that most people don’t realize is even available.
The real lesson from this tutorial is that a technically solid Lightroom edit isn’t just prep work – it’s the foundation that determines whether your final conversion looks intentional or accidental. The black and white treatment is the headline, but the white point, highlight recovery, and sky gradient are what hold the whole thing together underneath it.
Watch the full tutorial on YouTube to see the Silver Efex Pro section in full – that part moves fast and is worth watching more than once.
Comments (2)
I tried this on a client project yesterday and the results were way better than expected.
Wow, I had no idea you could do this. Mind blown.
Leave a Comment