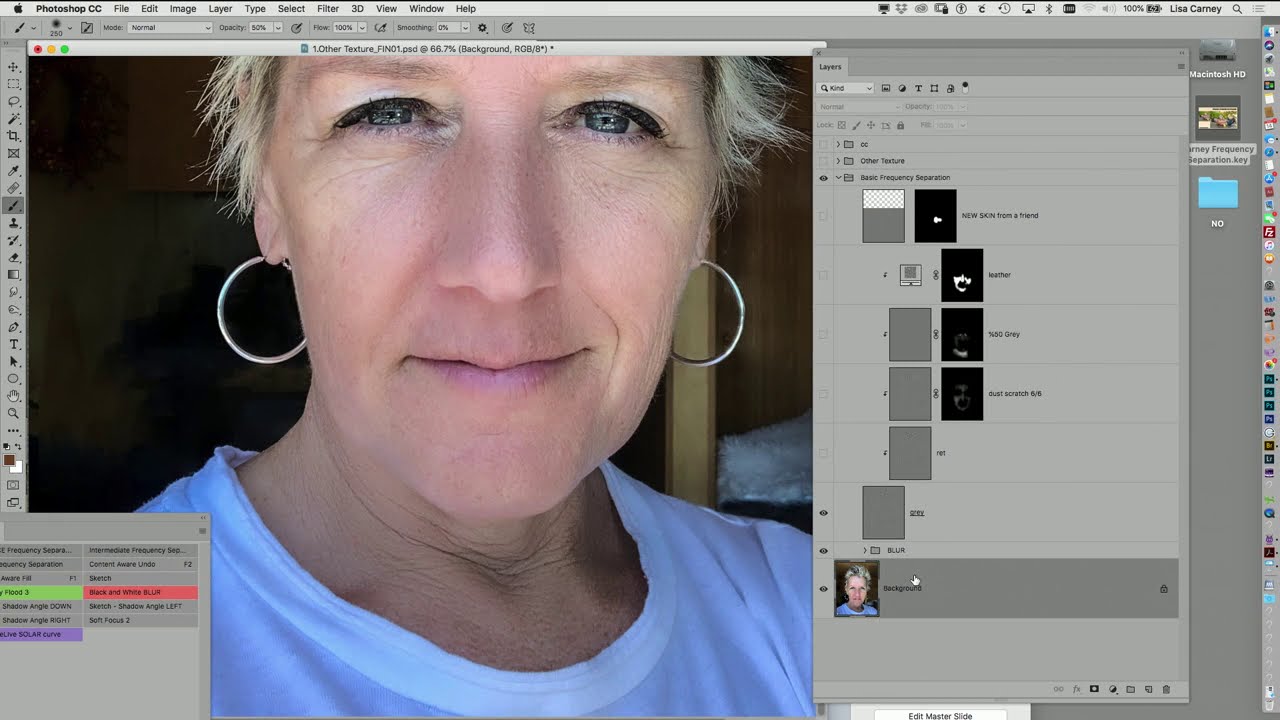
Frequency separation is one of those techniques that every retoucher learns, uses constantly, and then slowly starts doing wrong out of habit. The classic setup is fine. You’ve got your high-frequency texture layer, your low-frequency color layer, and you’re ready to go. But then you grab the Gaussian blur and just… nuke the whole low-frequency layer. Every dark blends into every light. You get that weird mushy modeling effect that looks fine at 50% zoom and terrible everywhere else. I’ve shipped work like that. I’m not proud of it.
This is exactly the problem that gets tackled in a recent CreativeLive tutorial on using filters inside the frequency separation workflow. Watch the full tutorial on YouTube before or after reading this, because the visual payoff when the technique clicks is genuinely worth seeing. The instructor walks through a smarter, more surgical approach to blurring the low-frequency layer, and then layers on a Dust and Scratches filter trick that I immediately added to my retouching toolkit. Here’s how it works.
Step 1: Run Your Basic Frequency Separation Setup
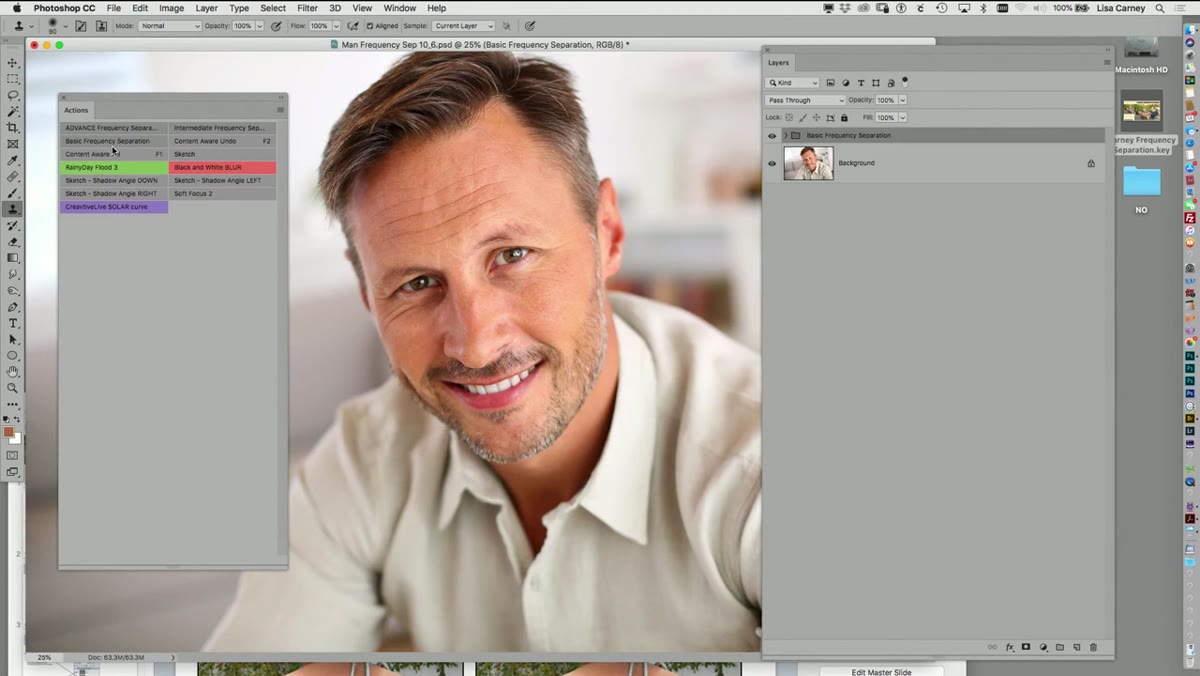 Frequency separation action being applied in the Layers panel
Start with your standard frequency separation setup. If you’ve got an action saved for this, run it now. The tutorial uses a pre-built action called “basic frequency separation” to get the layers in place quickly, which is honestly the right call. You want to spend your time on the actual retouching, not rebuilding the same layer structure from scratch every time. Make sure you’ve got your high-frequency detail layer and your low-frequency color layer stacked and ready.
Frequency separation action being applied in the Layers panel
Start with your standard frequency separation setup. If you’ve got an action saved for this, run it now. The tutorial uses a pre-built action called “basic frequency separation” to get the layers in place quickly, which is honestly the right call. You want to spend your time on the actual retouching, not rebuilding the same layer structure from scratch every time. Make sure you’ve got your high-frequency detail layer and your low-frequency color layer stacked and ready.
Step 2: Select Specific Areas on the Low-Frequency Layer Instead of Blurring the Whole Thing
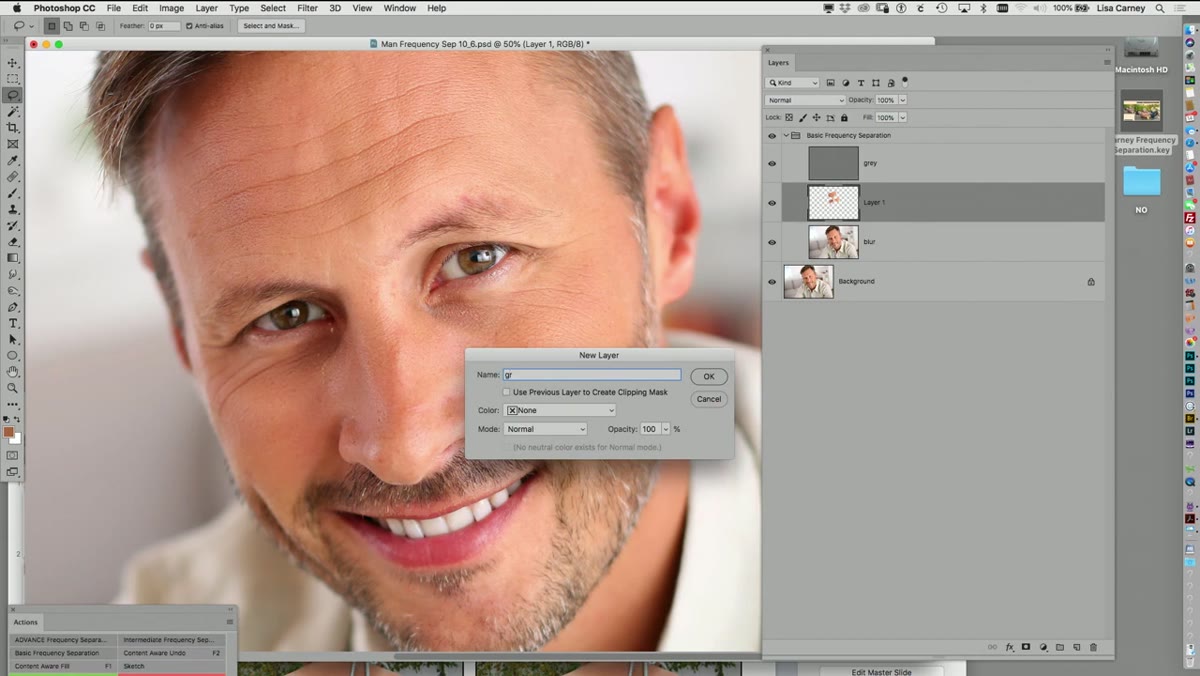
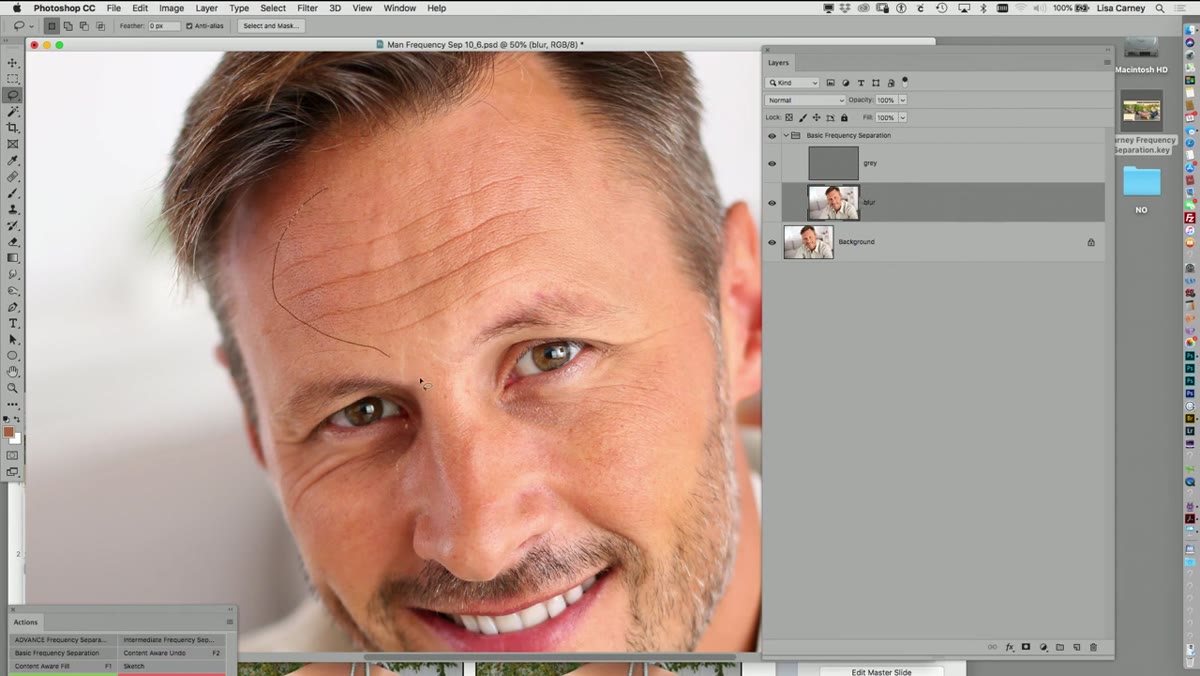 Lasso tool active, selecting a region on the low-frequency layer
Here’s where the tutorial breaks from the standard approach. Instead of applying a Gaussian blur to the entire low-frequency layer, grab the Lasso tool and draw a loose selection around just one area of skin, maybe a cheek or a forehead section. Hit Command+J to duplicate just that selected region onto its own layer. Now apply your Gaussian blur (around 10 pixels is the starting point shown in the tutorial) only to that isolated chunk.
Lasso tool active, selecting a region on the low-frequency layer
Here’s where the tutorial breaks from the standard approach. Instead of applying a Gaussian blur to the entire low-frequency layer, grab the Lasso tool and draw a loose selection around just one area of skin, maybe a cheek or a forehead section. Hit Command+J to duplicate just that selected region onto its own layer. Now apply your Gaussian blur (around 10 pixels is the starting point shown in the tutorial) only to that isolated chunk.
Why does this matter? Because when you blur the whole layer, you’re forcing the dark shadow areas of the face to bleed into the lighter highlight zones. Blur a selected cheek area only and you’re only softening that zone. No bleed, no modeling artifacts. The darks stay with the darks and the lights stay with the lights.
Step 3: Repeat the Selection-and-Blur Process for Other Regions
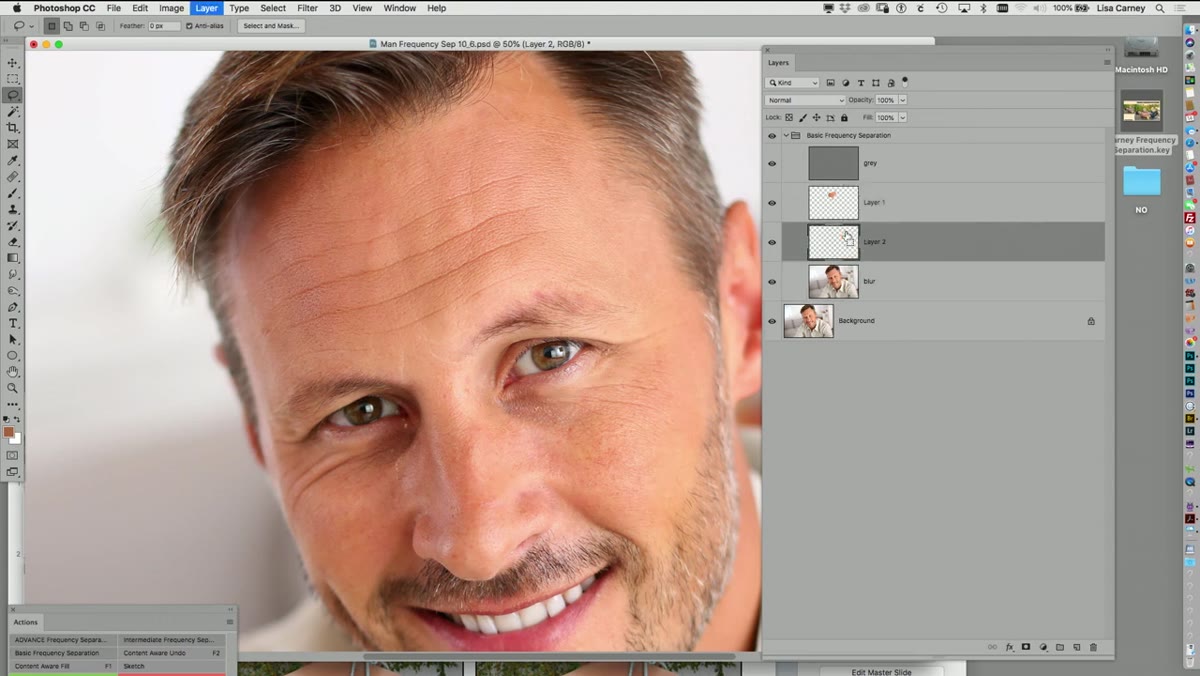 Second selection being made with the lasso tool on a different area
Go back to your original low-frequency layer and repeat: draw a new selection, hit Command+J, run the same Gaussian blur. Most retouchers will end up with three to ten of these small duplicated pieces by the time they cover the full face. It feels like extra steps compared to one global blur, but the quality difference is real and the control you get is worth the added layers.
Second selection being made with the lasso tool on a different area
Go back to your original low-frequency layer and repeat: draw a new selection, hit Command+J, run the same Gaussian blur. Most retouchers will end up with three to ten of these small duplicated pieces by the time they cover the full face. It feels like extra steps compared to one global blur, but the quality difference is real and the control you get is worth the added layers.
Keep the blur value consistent across all your selections unless you have a specific reason to vary it. The tutorial recommends using the Repeat Filter shortcut (Command+F on Mac) to re-apply the same blur settings without having to re-enter the values each time. Once all your regional blur layers are done, Shift-click to select them all and merge them into a single layer. Label it something like “paint” or “blur base” so you know what it is when you come back to the file.
Step 4: Use the Gradient Tool to Correct Color Tones on the Low-Frequency Layer
 Gradient tool being dragged across a selected under-eye area
For areas with uneven color, like under-eye discoloration or redness, the tutorial shows a tidy gradient-based fix. Select the area you want to correct, sample a color that matches the surrounding healthy skin tone, then use the Gradient tool to click and drag across the zone. A few short drags can blend the target area smoothly into the surrounding skin without a harsh edge.
Gradient tool being dragged across a selected under-eye area
For areas with uneven color, like under-eye discoloration or redness, the tutorial shows a tidy gradient-based fix. Select the area you want to correct, sample a color that matches the surrounding healthy skin tone, then use the Gradient tool to click and drag across the zone. A few short drags can blend the target area smoothly into the surrounding skin without a harsh edge.
If the gradient bleeds somewhere it shouldn’t, like into the eyes, don’t panic. Add a layer mask to that gradient layer, set your foreground color to black, and paint the gradient out of the areas where it doesn’t belong. This is basic masking but it’s worth saying out loud: layer masks fix almost everything.
Step 5: Duplicate the Gray Layer and Apply a Dust and Scratches Filter
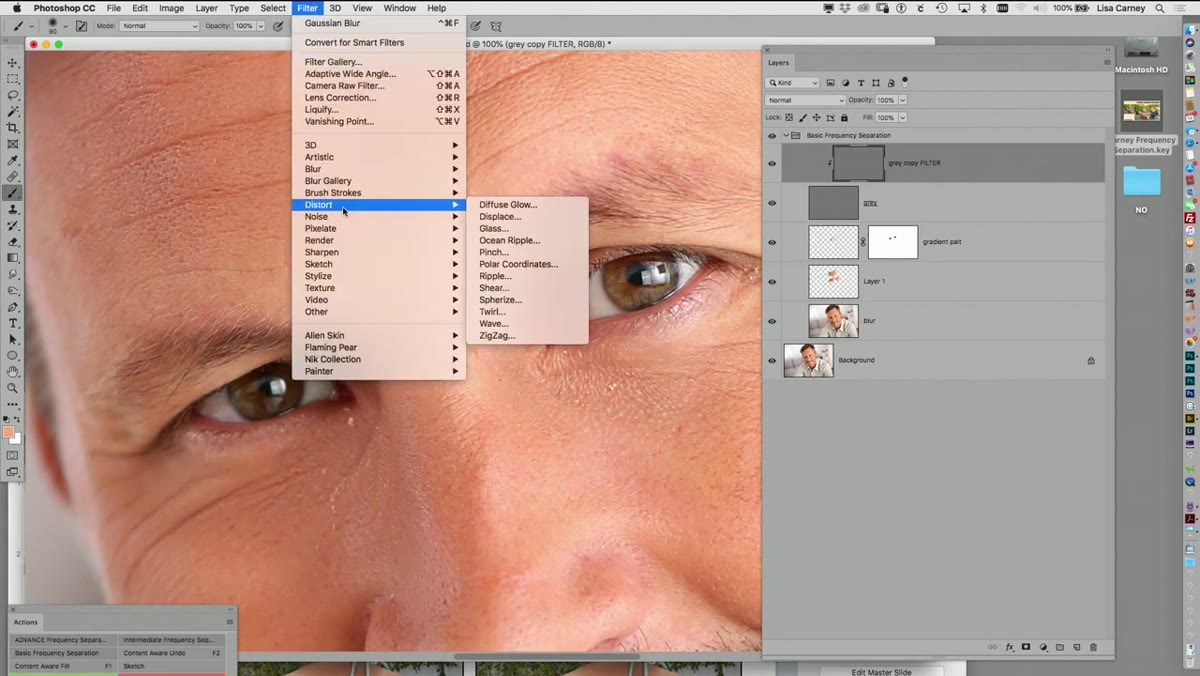 Dust and Scratches filter dialog open with Radius 10, Threshold 6
This is the part I hadn’t seen done quite this way before. Duplicate the high-frequency gray layer, then change its blend mode to Normal (temporarily pulling it out of the linear light setup). Run Filter, Noise, Dust and Scratches. The settings shown in the tutorial are a Radius of 10 and a Threshold of 6, but you’ll want to adjust based on your image. The result on the skin is dramatic. Large pores, uneven texture, and surface noise get smoothed out heavily. It looks over-processed at first, but that’s fine because you’re about to mask it.
Dust and Scratches filter dialog open with Radius 10, Threshold 6
This is the part I hadn’t seen done quite this way before. Duplicate the high-frequency gray layer, then change its blend mode to Normal (temporarily pulling it out of the linear light setup). Run Filter, Noise, Dust and Scratches. The settings shown in the tutorial are a Radius of 10 and a Threshold of 6, but you’ll want to adjust based on your image. The result on the skin is dramatic. Large pores, uneven texture, and surface noise get smoothed out heavily. It looks over-processed at first, but that’s fine because you’re about to mask it.
Label this layer immediately. Seriously. The tutorial hammers on this and it’s correct. If a client sends you ten similar portraits and you need consistency across all of them, you have to know what settings you used. “Dust and Scratch 10/6” takes five seconds to type and saves you from re-guessing later.
Step 6: Apply a Black Mask and Paint the Effect Back In Selectively
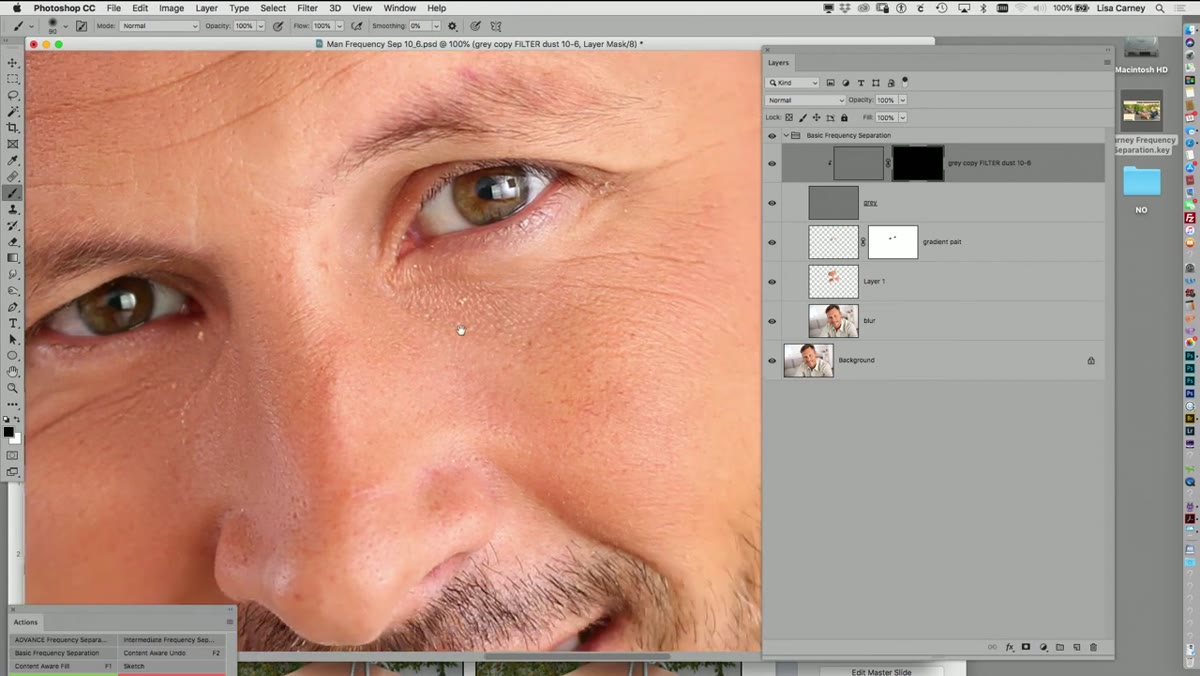 Black layer mask applied, brush painting skin back into view
Hold Option and click the Add Layer Mask button to create a black mask, which hides the entire Dust and Scratches layer by default. Now grab a soft white brush and paint the effect back in only over the skin areas where you actually want it. You can paint at reduced opacity, around 50%, over areas like the forehead where you want to preserve some natural wrinkle texture while still reducing the rougher surface noise.
Black layer mask applied, brush painting skin back into view
Hold Option and click the Add Layer Mask button to create a black mask, which hides the entire Dust and Scratches layer by default. Now grab a soft white brush and paint the effect back in only over the skin areas where you actually want it. You can paint at reduced opacity, around 50%, over areas like the forehead where you want to preserve some natural wrinkle texture while still reducing the rougher surface noise.
This is the key move. You’re not retouching the whole face the same way. You’re deciding, zone by zone, how much smoothing each area needs. That’s the difference between retouching that looks worked-on and retouching that just looks like better skin.
What I’d Add From My Own Work
The lasso-and-duplicate approach in Step 2 takes some getting used to if you’re used to working fast and loose, but it’s genuinely better for images where the subject has strong directional lighting. I’ve used it on product shots where one side of a surface is lit and the other isn’t, and global blurs always killed the depth. This method keeps the tonal separation intact. One extra tip: use a feathered lasso selection (10-20 pixels of feather) so your per-region blur patches blend into each other without visible seams when you merge them.
The biggest takeaway here is that “frequency separation” is not a single action you run and then paint on. It’s a framework, and the blurring step inside that framework is where most retouchers are leaving quality on the table. Targeted blurs, selective filter application, and disciplined masking turn it from a decent technique into a precise one.
Watch the full tutorial on YouTube to see the before-and-after on the skin, because screenshots don’t do that Dust and Scratches result justice.
Comments (6)
This should be required reading for anyone starting out.
Bookmarked. Coming back to this one for sure.
Love this. I referenced a similar technique in one of my recent posts. Always good to see other perspectives.
I've been looking for exactly this kind of tutorial. Perfect timing.
Applied this to my portfolio shots and the improvement is noticeable.
This is fantastic. I've been recommending this approach to my readers too.
Leave a Comment