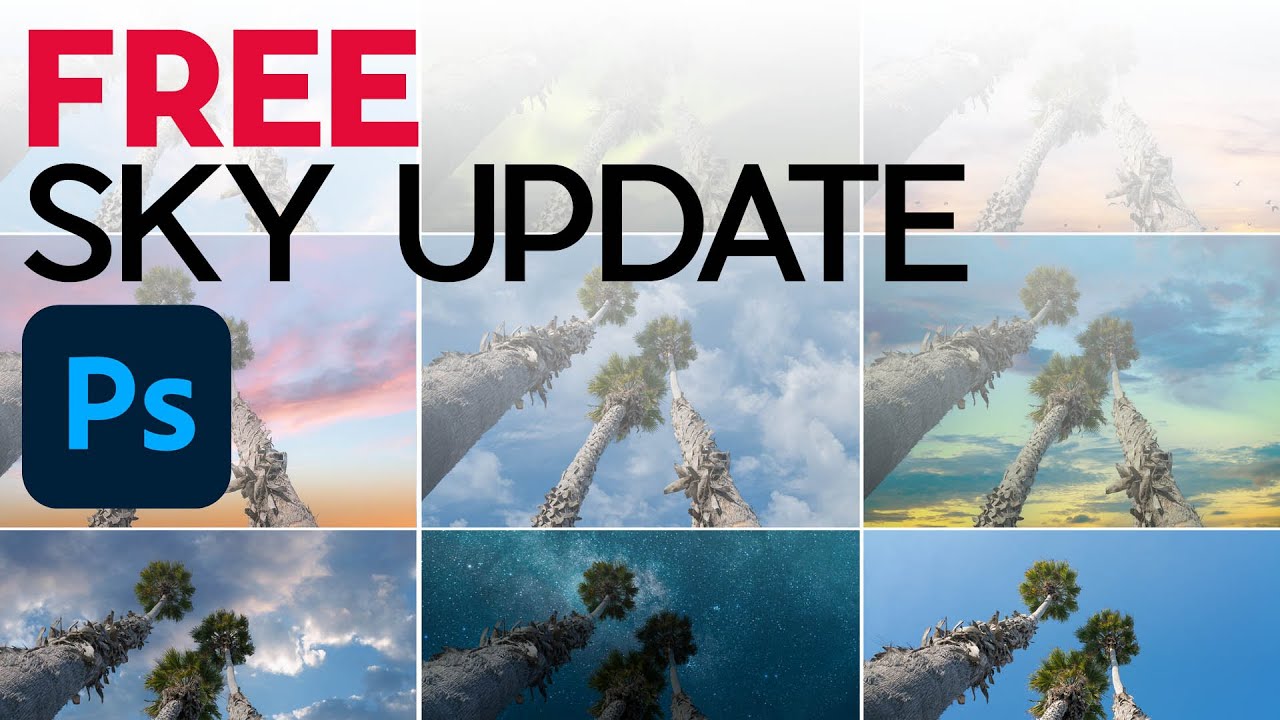
I’ll be honest with you. When I first started doing composite work for clients, I had exactly three skies I rotated through like a tired DJ with a three-song setlist. One dramatic sunset, one moody overcast, one blue-sky-good-vibes option. It worked until it didn’t, and “didn’t” usually meant a client squinting at a finished piece saying “wait, didn’t you use that same sky on my competitor’s brochure?” Not my finest hour. The point is, having a deep library of quality skies matters, and building one from scratch by scouring stock sites takes time nobody actually has.
So when Adobe quietly dropped an update to Photoshop that adds a direct pipeline to free sky packs right inside the Sky Replacement window, I paid attention. In this Matt Kloskowski tutorial, he breaks down exactly what changed in version 22.5.0 and how to take full advantage of it. It’s a short video but dense with useful detail, and I’m going to walk you through it step by step so you can hit the ground running. Watch the full tutorial on YouTube if you want to follow along with the visuals.
Step 1: Confirm You’re Running Photoshop 22.5.0
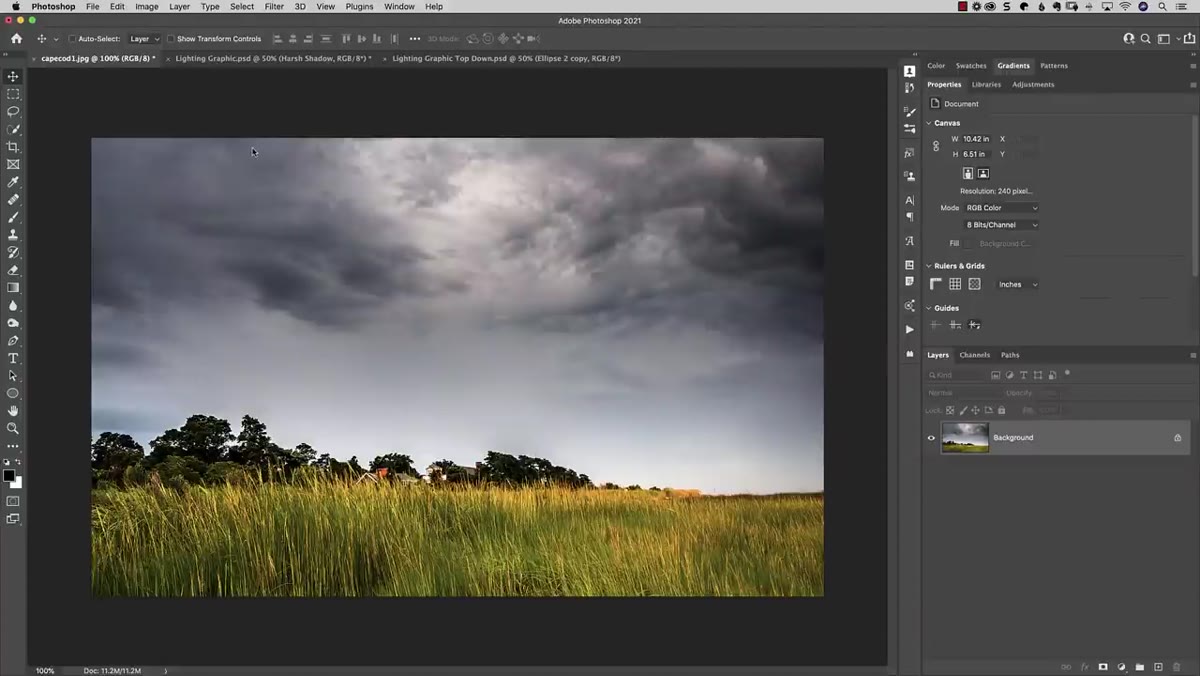 Photoshop version number shown under About Photoshop
Before anything else, check your version. Go to Photoshop > About Photoshop on Mac or Help > About Photoshop on Windows. You’re looking for version 22.5.0 or later. If you’re not there yet, open your Creative Cloud desktop app and run any available updates. Matt notes that sometimes a full computer restart is needed for updates to register properly, so if the update shows as installed but things look wrong, reboot first before going down any troubleshooting rabbit holes.
Photoshop version number shown under About Photoshop
Before anything else, check your version. Go to Photoshop > About Photoshop on Mac or Help > About Photoshop on Windows. You’re looking for version 22.5.0 or later. If you’re not there yet, open your Creative Cloud desktop app and run any available updates. Matt notes that sometimes a full computer restart is needed for updates to register properly, so if the update shows as installed but things look wrong, reboot first before going down any troubleshooting rabbit holes.
This matters because the new features inside Sky Replacement won’t appear at all in older versions. It’s not a setting you toggle on. It’s either there or it isn’t, based entirely on your version number.
Step 2: Open Sky Replacement from the Edit Menu
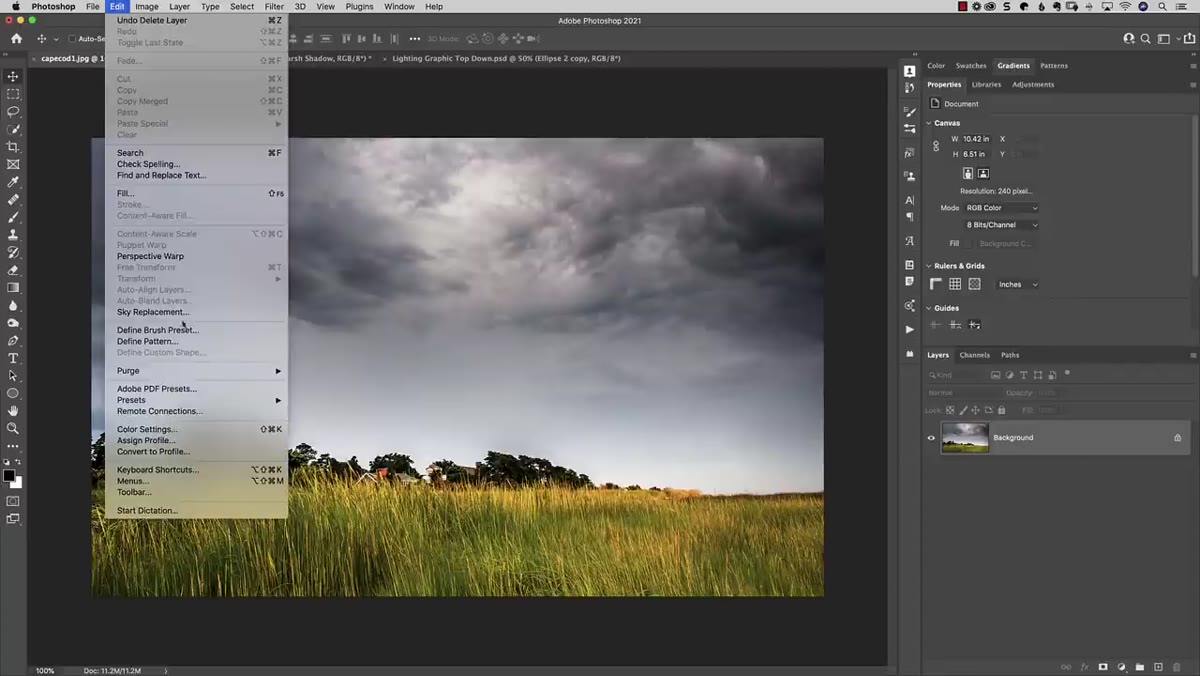 Edit menu open with Sky Replacement option highlighted
With your image open, head to Edit > Sky Replacement. Nothing about the core window has changed since the feature launched, so if you’ve used it before, it’ll feel familiar. If you haven’t, Matt mentions he has a separate deep-dive tutorial that covers every control in that panel, which is worth your time as a follow-up. For now, the goal is getting to the right spot inside the interface to find the new stuff.
Edit menu open with Sky Replacement option highlighted
With your image open, head to Edit > Sky Replacement. Nothing about the core window has changed since the feature launched, so if you’ve used it before, it’ll feel familiar. If you haven’t, Matt mentions he has a separate deep-dive tutorial that covers every control in that panel, which is worth your time as a follow-up. For now, the goal is getting to the right spot inside the interface to find the new stuff.
The Sky Replacement dialog will open with a preview of your image and the current sky applied. Don’t get distracted tweaking sliders yet. The new features are one click deeper.
Step 3: Click the Sky Thumbnail to Open the Sky Browser
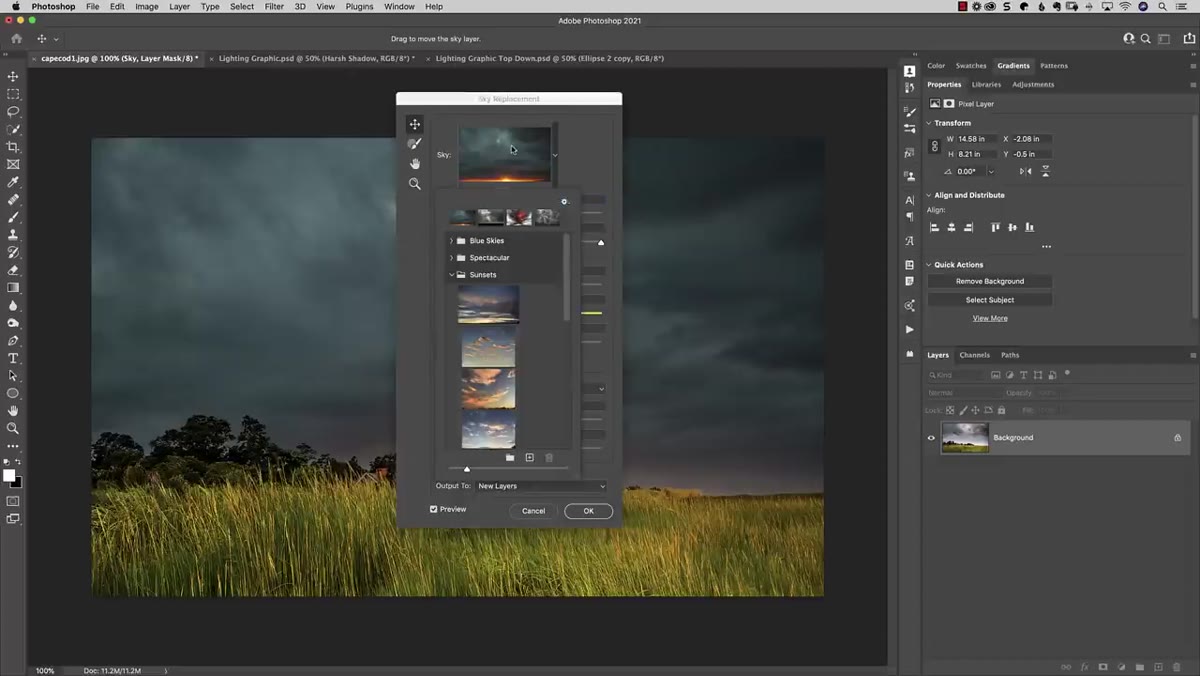 Sky thumbnail clicked, dropdown panel showing sky categories
Inside the Sky Replacement window, look for the small thumbnail image showing your current sky near the top of the panel. Click directly on that thumbnail. This opens a dropdown panel displaying all of your sky categories and the individual sky images sorted within them. You’ll see the default sets that shipped with Photoshop when the feature originally launched, things like Sunsets, Blue Skies, and a few others.
Sky thumbnail clicked, dropdown panel showing sky categories
Inside the Sky Replacement window, look for the small thumbnail image showing your current sky near the top of the panel. Click directly on that thumbnail. This opens a dropdown panel displaying all of your sky categories and the individual sky images sorted within them. You’ll see the default sets that shipped with Photoshop when the feature originally launched, things like Sunsets, Blue Skies, and a few others.
This panel is your library view, and it’s where you’ll be importing any new packs you download. Keep this in mind for Step 5.
Step 4: Click the Gear Icon and Select “Get More Skies”
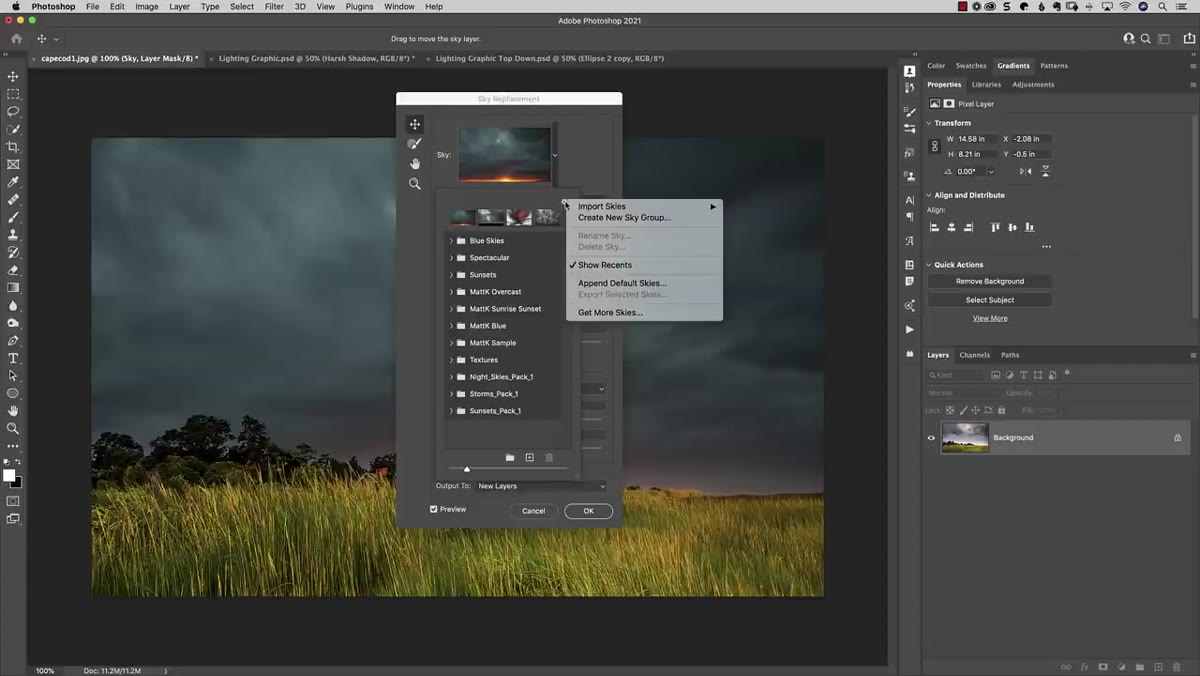 Gear icon menu open showing Get More Skies option
Here’s the new addition. Inside that sky browser panel, there’s a small gear icon. Click it, and you’ll now see an option called Get More Skies. This is the feature that was added in 22.5.0 and it’s the whole point of this update. Selecting it will open Adobe’s website in your browser, pointed directly at the sky packs available for download.
Gear icon menu open showing Get More Skies option
Here’s the new addition. Inside that sky browser panel, there’s a small gear icon. Click it, and you’ll now see an option called Get More Skies. This is the feature that was added in 22.5.0 and it’s the whole point of this update. Selecting it will open Adobe’s website in your browser, pointed directly at the sky packs available for download.
You need to be logged into your Adobe Creative Cloud account for this to work smoothly. If you’re not logged in, the site will prompt you. The login is the same credentials you use everywhere else in the Adobe ecosystem, so no new account setup required.
Step 5: Download Sky Packs from Adobe’s Website
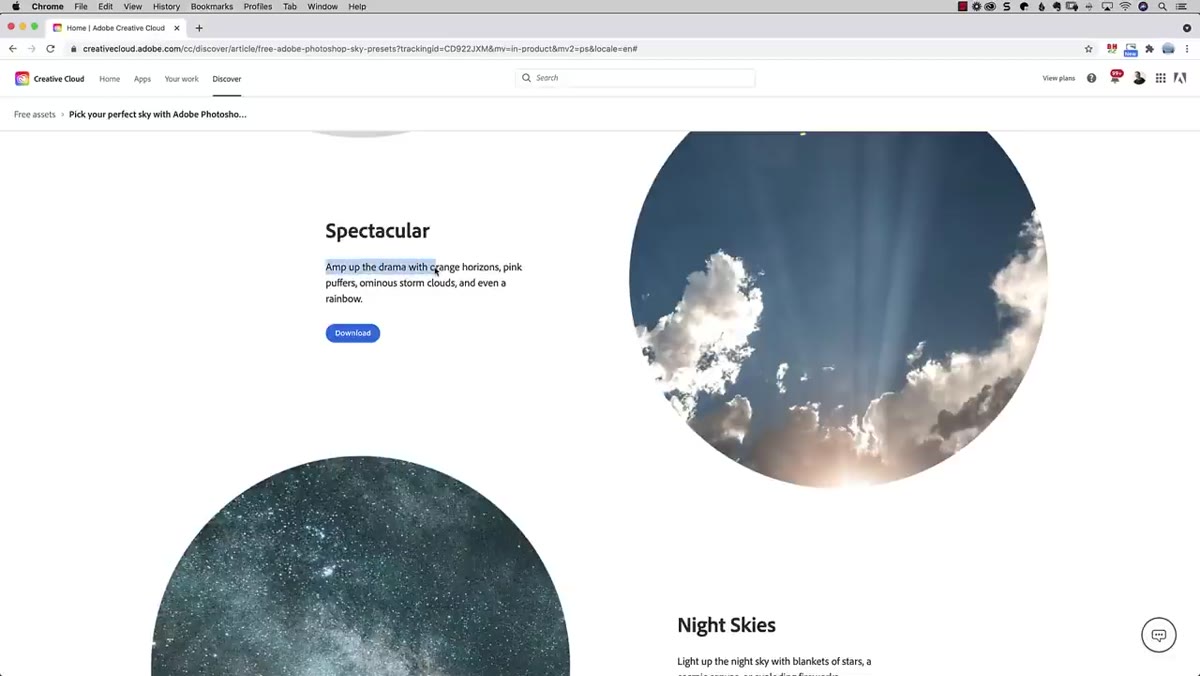 Adobe website showing sky pack categories available for download
The Adobe page shows several categories of sky packs available as free downloads. At the time Matt recorded this, the available packs included Sunsets, Spectacular, Night Skies, Blue Skies, and Storms. Night Skies and Storms are newer additions. Each pack downloads as a .sky file, which is Photoshop’s native format for bundled sky assets.
Adobe website showing sky pack categories available for download
The Adobe page shows several categories of sky packs available as free downloads. At the time Matt recorded this, the available packs included Sunsets, Spectacular, Night Skies, Blue Skies, and Storms. Night Skies and Storms are newer additions. Each pack downloads as a .sky file, which is Photoshop’s native format for bundled sky assets.
One thing worth knowing before you download everything at once: the existing Sunsets category inside Photoshop and the new Sunsets pack are not identical. Adobe added different images to the downloadable pack, so installing it gives you genuinely new skies rather than duplicates of what you already have. Hovering over individual sky thumbnails on the website shows you a tooltip with the photographer credit and the image dimensions, which is a nice touch if resolution matters for your use case.
Step 6: Import the .sky Files into Photoshop
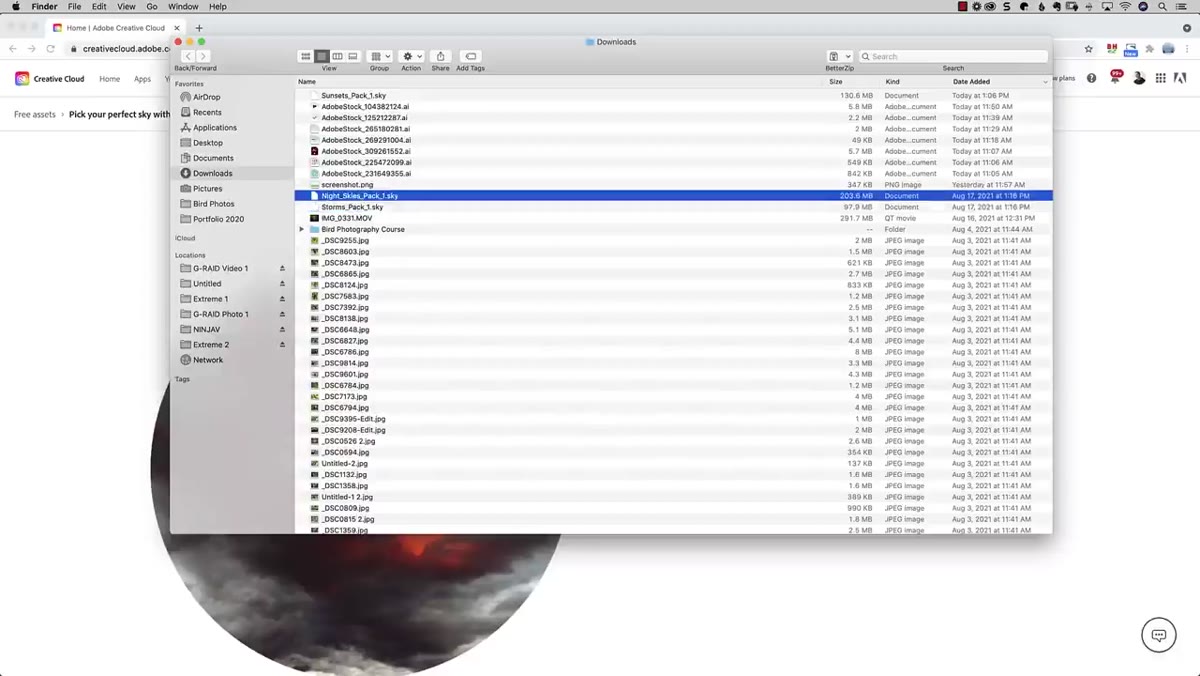 Gear icon menu showing Import Skies option in Photoshop
Once your .sky files have downloaded, go back into Photoshop and return to that same gear icon inside the sky browser panel. This time, look for the Import Skies option. Navigate to wherever your downloads landed, select the .sky file you want to add, and Photoshop will install it into a new category inside your sky library. Repeat for each pack you downloaded.
Gear icon menu showing Import Skies option in Photoshop
Once your .sky files have downloaded, go back into Photoshop and return to that same gear icon inside the sky browser panel. This time, look for the Import Skies option. Navigate to wherever your downloads landed, select the .sky file you want to add, and Photoshop will install it into a new category inside your sky library. Repeat for each pack you downloaded.
The new categories will appear alongside your original defaults in the sky browser, and you can switch between them during any Sky Replacement session just by clicking the category name.
Step 7: Export Multiple Skies as a Single .sky File
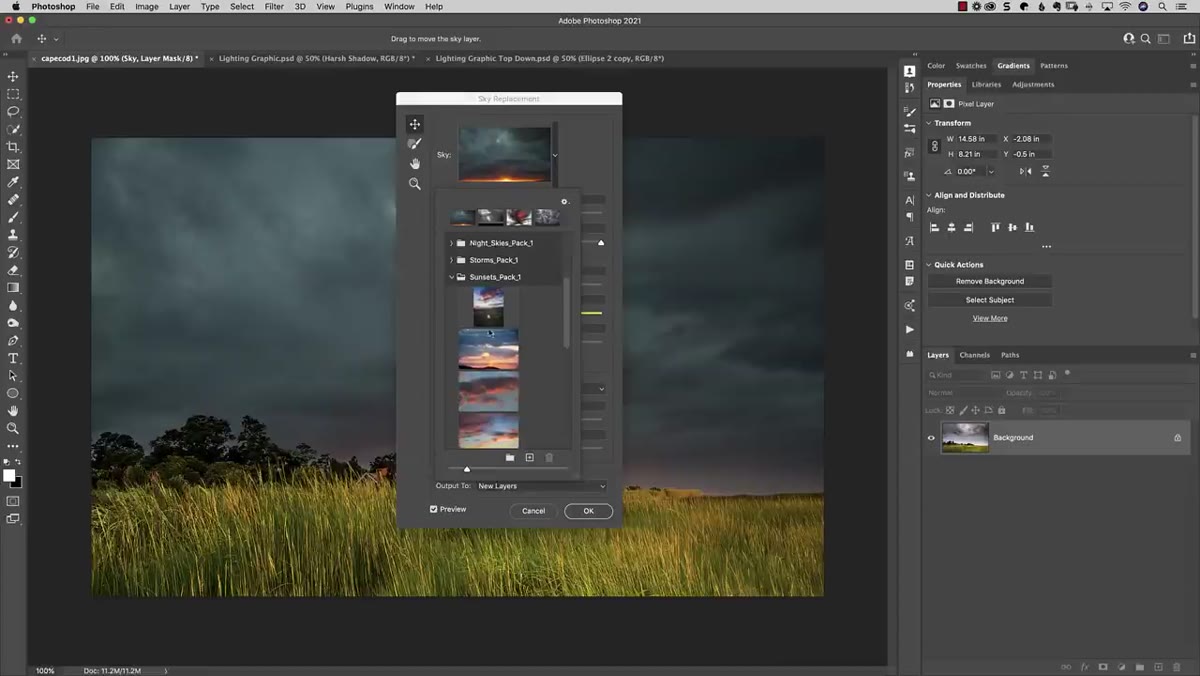 Export Selected Skies option in gear menu with skies selected
This one’s a workflow improvement that Matt flags, and it’s genuinely useful if you share Photoshop setups across machines or hand off projects to collaborators. Inside the sky browser, you can click one sky thumbnail, then Shift-click additional thumbnails to select a group. Then go to the gear icon and choose Export Selected Skies. Photoshop packages everything you selected into a single .sky file that you can move anywhere.
Export Selected Skies option in gear menu with skies selected
This one’s a workflow improvement that Matt flags, and it’s genuinely useful if you share Photoshop setups across machines or hand off projects to collaborators. Inside the sky browser, you can click one sky thumbnail, then Shift-click additional thumbnails to select a group. Then go to the gear icon and choose Export Selected Skies. Photoshop packages everything you selected into a single .sky file that you can move anywhere.
Before this update, exporting skies had to be done one at a time, which was the kind of small friction that makes you put off doing something sensible indefinitely. The batch export kills that excuse.
My Take: Build Your Sky Library Before You Need It
The worst time to go looking for the right sky is when a client is waiting. I’ve made that mistake enough times that it’s basically a core personality trait at this point. My suggestion is to download all the available packs right now, even for categories you don’t think you’ll use. Storms feel niche until you’re working on a dramatic real estate shot or a band promo and suddenly that dark roiling sky is exactly what the comp needs.
Also worth noting: the .sky format means you can build a single master file with your absolute favorite skies pulled from multiple packs and keep it backed up with the rest of your assets. Combined with the new batch export feature, this update makes sky library management feel like an actual system rather than a folder full of random JPEGs you found three years ago.
The big win here isn’t any single sky. It’s that Adobe embedded a direct resource channel into the tool itself, which means future sky packs will be one gear-icon click away. That’s the right direction.
Watch the full tutorial on YouTube for Matt’s full walkthrough, including a look at the actual packs installed and previewed inside Photoshop.
Comments
Leave a Comment