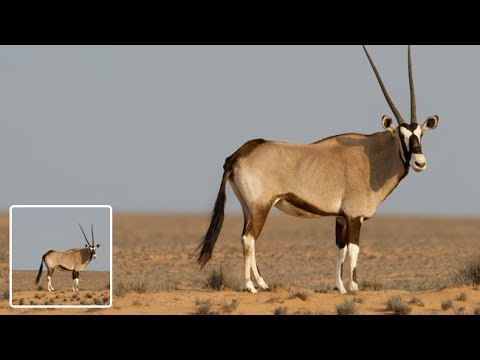
There’s a specific kind of jealousy you feel when you see a photo where the subject just pops off the background. You know the shot. The subject is razor-sharp, the background melts into a creamy blur, and the whole thing looks like it was taken with a lens that costs more than your rent. I’ve been on both ends of that feeling. Some shots I’ve edited genuinely had that optical depth of field baked in. A lot of them didn’t. The ones that didn’t? I faked it. And honestly, you can’t always tell the difference.
That’s exactly what this technique is about. In this Aaron Nace (PHLEARN) tutorial, he walks through how to use Photoshop’s Tilt-Shift blur filter to push a background out of focus and draw the viewer’s eye straight to the subject. It’s not a hack. It’s a legitimate post-processing workflow that portrait photographers, product shooters, and yes, people who edit photos of deer for fun all use regularly. Watch the full tutorial on YouTube if you want to follow along with the original, or keep reading and I’ll break it down step by step.
The core idea is simple: blur everything except your subject. The clever part is how you do it without the blur bleeding onto the parts you want sharp. That’s where the selection work comes in, and that’s what most quick tutorials skip over. This one doesn’t.
Step 1: Duplicate Your Background Layer
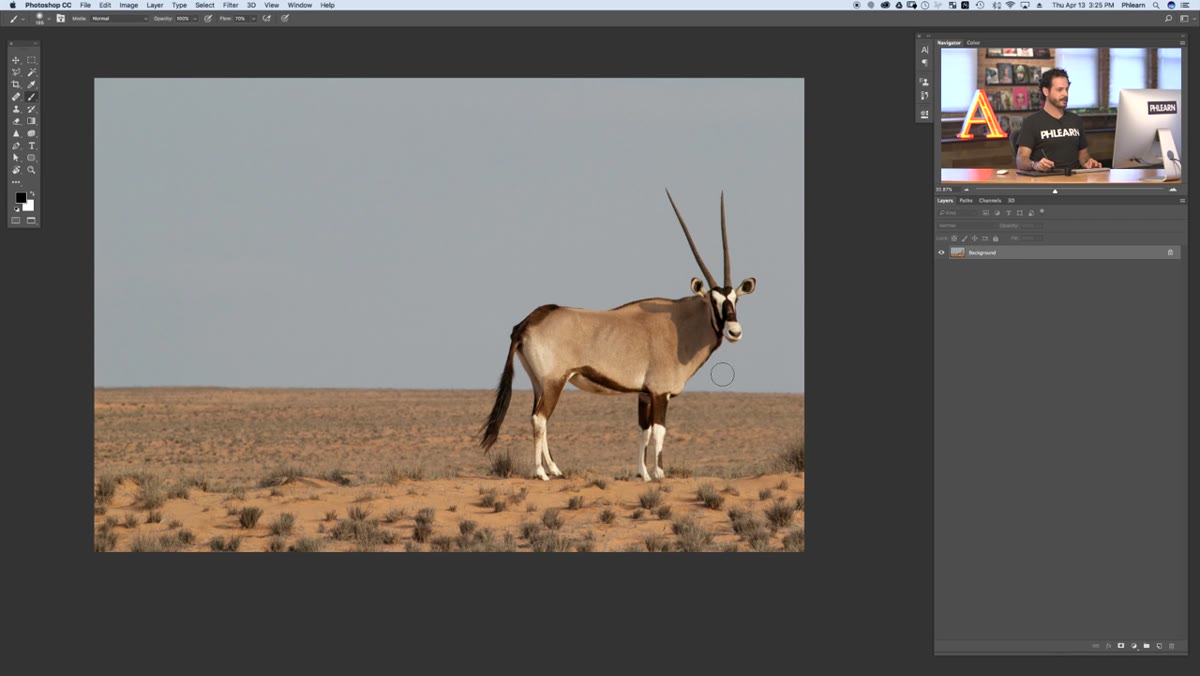 Duplicating the background layer using Ctrl/Cmd+J
Before you touch any filters, protect yourself. Hit Ctrl+J (Cmd+J on Mac) to duplicate your background layer. This gives you a working copy to apply the blur to, and your original stays untouched underneath. It takes two seconds and has saved me from a genuinely embarrassing number of situations. Work on Layer 1, leave the background alone.
Duplicating the background layer using Ctrl/Cmd+J
Before you touch any filters, protect yourself. Hit Ctrl+J (Cmd+J on Mac) to duplicate your background layer. This gives you a working copy to apply the blur to, and your original stays untouched underneath. It takes two seconds and has saved me from a genuinely embarrassing number of situations. Work on Layer 1, leave the background alone.
Step 2: Select Your Subject Using Focus Area
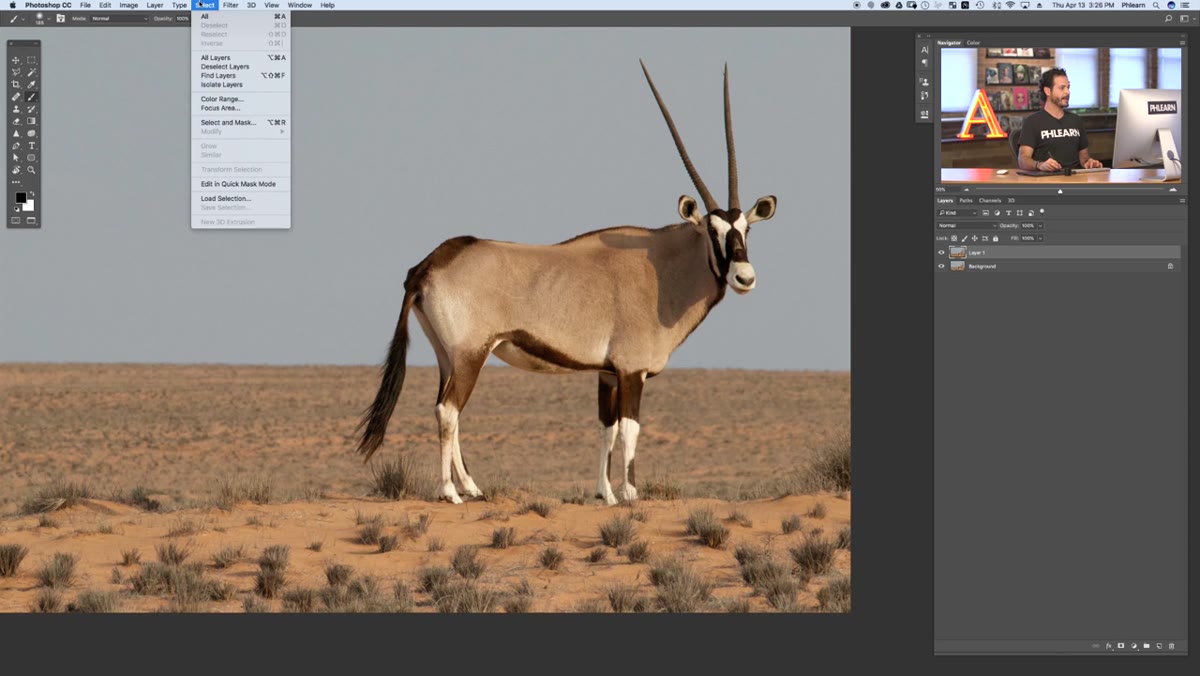 Navigating to Select menu, then Focus Area option
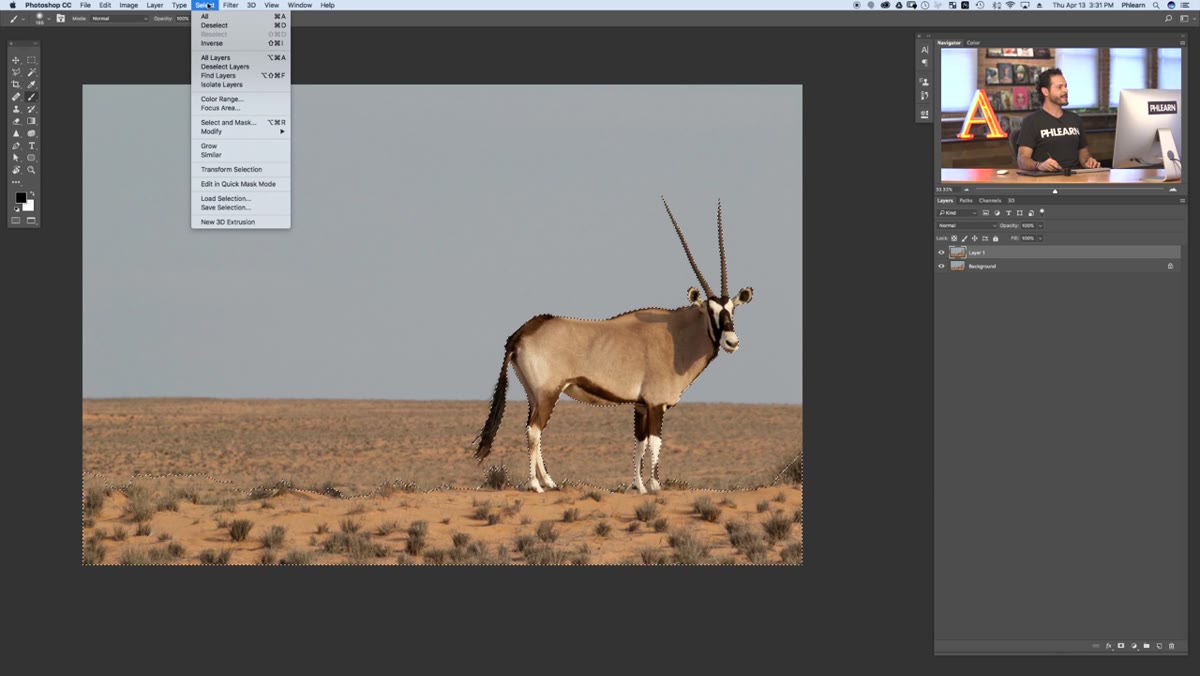
Here’s where it gets interesting. Go to Select, then scroll down to Focus Area. This is a Photoshop tool that reads the actual focus data in your image and builds a selection around whatever is sharp. If your subject was in focus when the photo was taken (even just reasonably so), this tool does a surprisingly smart job of finding it.
Navigating to Select menu, then Focus Area option
Here’s where it gets interesting. Go to Select, then scroll down to Focus Area. This is a Photoshop tool that reads the actual focus data in your image and builds a selection around whatever is sharp. If your subject was in focus when the photo was taken (even just reasonably so), this tool does a surprisingly smart job of finding it.
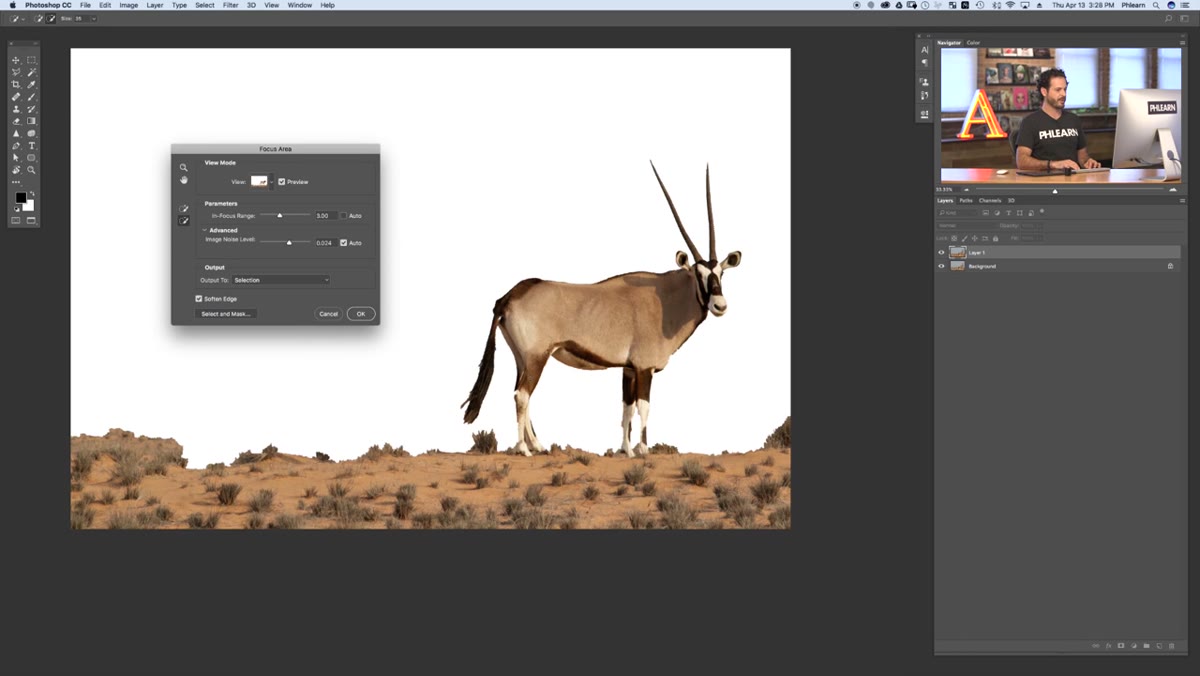
Once the dialog opens, you’ll see an In-Focus Range slider. Think of it as a sensitivity dial. Drag it lower and the selection gets stricter, picking up only the sharpest areas. Drag it higher and it starts pulling in more of the frame. Aaron lands around 3.0 for the sample image, but your sweet spot will depend on how much natural depth of field your photo already has. Start at the default and nudge up or down until the background starts dropping out of the selection preview.
Step 3: Refine the Selection Manually
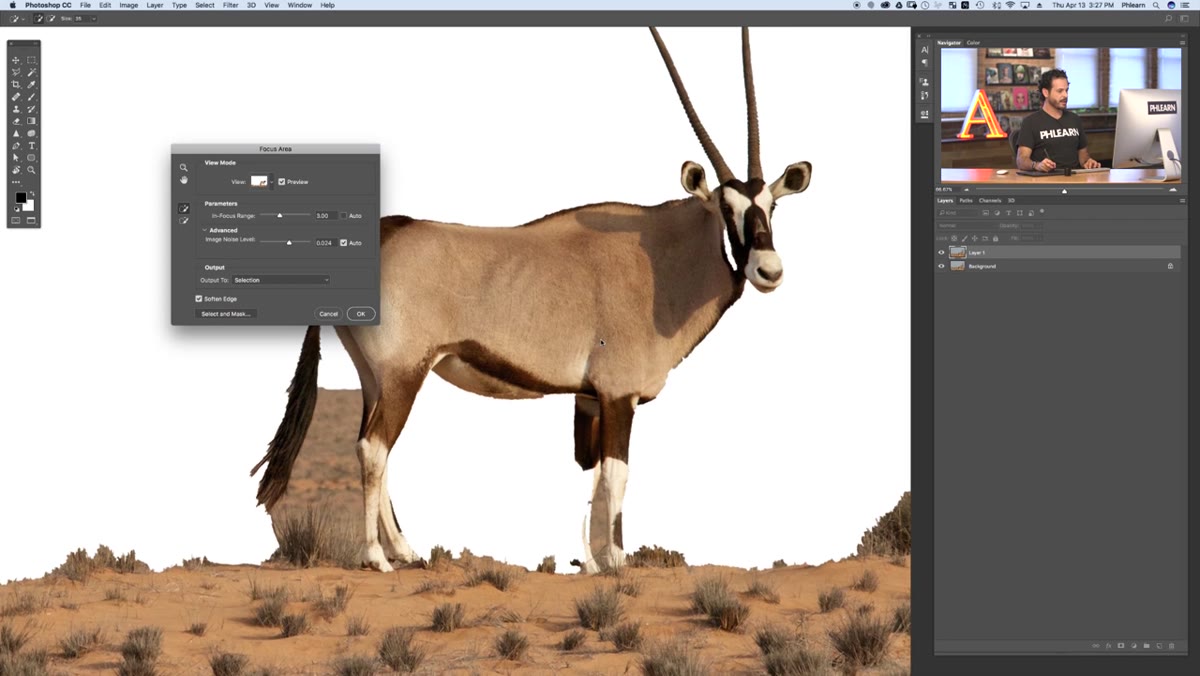 Using add and subtract brush tools within Focus Area dialog
Focus Area is smart, but it’s not magic. Legs get clipped. Edges get missed. Bits of background sneak in. That’s normal. Inside the Focus Area dialog, you’ve got two brush tools: one to add areas to the selection and one to subtract them. Use them freely. You don’t need to be precise here. Paint roughly over a missing limb and Photoshop figures out where the actual edge is. Slap the subtract brush over a patch of background that crept in and it cleans it up.
Using add and subtract brush tools within Focus Area dialog
Focus Area is smart, but it’s not magic. Legs get clipped. Edges get missed. Bits of background sneak in. That’s normal. Inside the Focus Area dialog, you’ve got two brush tools: one to add areas to the selection and one to subtract them. Use them freely. You don’t need to be precise here. Paint roughly over a missing limb and Photoshop figures out where the actual edge is. Slap the subtract brush over a patch of background that crept in and it cleans it up.
Aaron makes the point that it’s okay to be a bit sloppy, and he’s right. The selection doesn’t need to be pixel-perfect at this stage because you’ve got one more refinement pass coming. Get it mostly right, then hit OK. Your selection will be output as a standard marching-ants selection on your canvas.
Step 4: Refine the Edge for Clean Hair and Fur
 Refine Edge dialog open with edge detection active
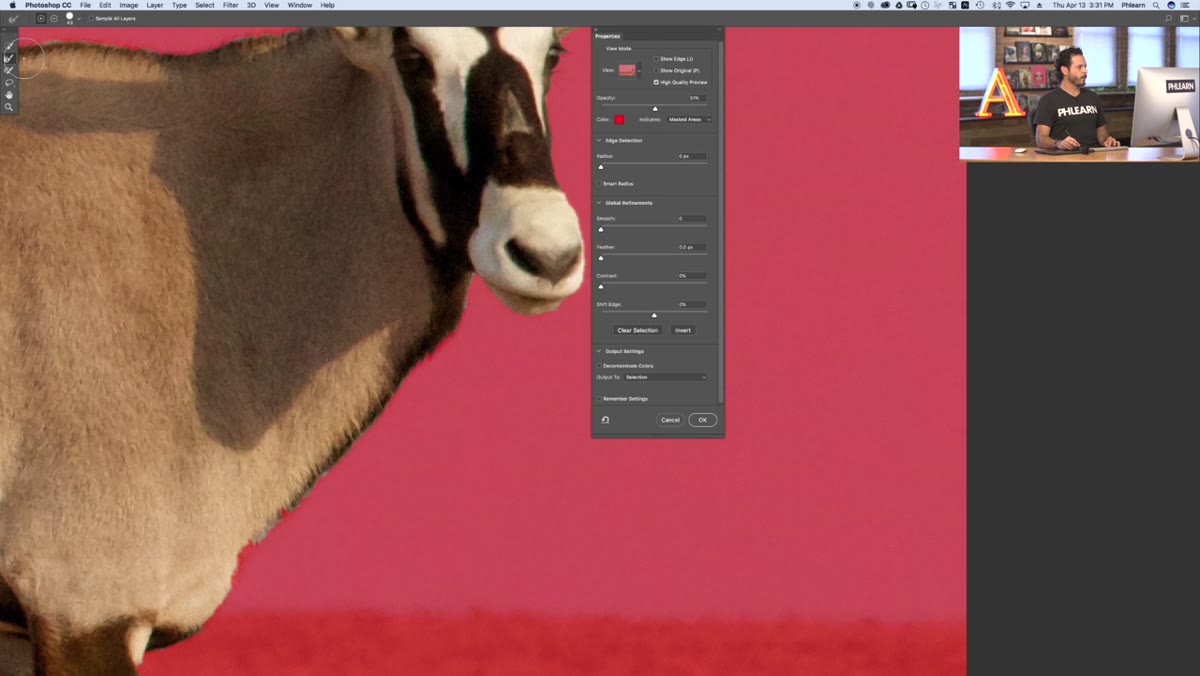
Once you’re back on the canvas with your selection active, go back to Select and choose Select and Mask (older versions call this Refine Edge). This is where you clean up the selection before applying any blur. Use the edge detection radius to let Photoshop trace the fine detail along the subject’s edges. For fur, hair, or anything with texture, bump the radius up and check Smart Radius. It will follow the contour of the subject rather than just applying a uniform feathered line.
Refine Edge dialog open with edge detection active
Once you’re back on the canvas with your selection active, go back to Select and choose Select and Mask (older versions call this Refine Edge). This is where you clean up the selection before applying any blur. Use the edge detection radius to let Photoshop trace the fine detail along the subject’s edges. For fur, hair, or anything with texture, bump the radius up and check Smart Radius. It will follow the contour of the subject rather than just applying a uniform feathered line.
Smooth, Feather, and Contrast sliders give you fine-tuned control. A tiny bit of feather (0.5 to 1px) makes the final blur look more natural. Output the selection as a layer mask on your duplicate layer. Now your subject is isolated.
Step 5: Apply the Tilt-Shift Blur to the Background
 Tilt-Shift blur filter applied with blur band visible on image
Here’s the payoff. With your duplicate layer and its mask set up, you want to apply the blur to the background, not the subject. Click on your original background layer (the unmasked one). Go to Filter, then Blur Gallery, then Tilt-Shift.
Tilt-Shift blur filter applied with blur band visible on image
Here’s the payoff. With your duplicate layer and its mask set up, you want to apply the blur to the background, not the subject. Click on your original background layer (the unmasked one). Go to Filter, then Blur Gallery, then Tilt-Shift.
The Tilt-Shift filter gives you a set of lines you can drag across the image. The center band is the in-focus zone. Anything outside those outer lines gets blurred completely. The space in between transitions gradually from sharp to blurred. Drag the center point to align with your subject’s position in the frame. Spread the band to match the depth of your subject. Increase the blur amount (measured in pixels) until the background looks the way you want it. Somewhere between 15 and 25px gives a realistic look for most images. Go too high and it starts reading as a special effect rather than optical depth of field.
Step 6: Flatten and Review
 Final composite showing sharp subject against blurred background
Once you’re happy with the blur, hit OK. Now zoom out and look at your full composite. The subject layer (with the mask) sits on top. The blurred background layer sits underneath. Together, they should read as a single image where the subject is optically separated from the scene behind it. Toggle the top layer on and off to compare. If the edge looks too harsh, revisit the mask and add a touch more feather.
Final composite showing sharp subject against blurred background
Once you’re happy with the blur, hit OK. Now zoom out and look at your full composite. The subject layer (with the mask) sits on top. The blurred background layer sits underneath. Together, they should read as a single image where the subject is optically separated from the scene behind it. Toggle the top layer on and off to compare. If the edge looks too harsh, revisit the mask and add a touch more feather.
One Thing I’d Add: Try It on Flat Lighting First
The tilt-shift blur technique earns its keep fastest on images with flat or even lighting across the subject and background. When the light is the same everywhere, blur is your primary tool for creating separation. I’ve had shots from overcast outdoor sessions that looked completely flat until I pushed the background out of focus this way. Suddenly the subject had weight. Conversely, if your image already has strong directional light creating contrast between subject and background, the effect can sometimes feel over-cooked. Dial back the blur amount and let the lighting do some of the work.
Also worth knowing: the Focus Area tool performs better on images with higher pixel counts. If you’re working from a heavily compressed JPEG, the selection edges may be rough. Shoot raw when you can, or at least work from the largest file version you have.
The single biggest takeaway from this workflow is that the quality of the blur is only as good as the quality of the selection beneath it. Spend the time in Focus Area and Refine Edge, and the blur will look like it was captured in-camera. Rush the selection and you’ll see halos, muddy edges, and a result that screams “edited in Photoshop” for all the wrong reasons. Do it right and nobody will know.
Watch the full tutorial on YouTube to see Aaron walk through the whole thing in real time, including his live selection tweaks on the sample image.
Comments
Leave a Comment