
There’s a specific kind of shame that comes from overcomplicating something that turns out to be embarrassingly simple. I spent an entire afternoon once trying to mask out a silhouette for a composite, painstakingly painting around hair strands, when the whole thing could have been handled in about three minutes with the right technique. Double exposure effects had the same reputation in my head: cinematic, editorial, definitely complicated. Turns out I was wrong by a significant margin.
In this PHLEARN tutorial, Aaron walks through the entire double exposure process in under seven minutes, and the core mechanic is literally one dropdown menu change. Watch the full tutorial on YouTube if you want to follow along with the source images. What I’m laying out below is the technique in full, with enough detail that you can follow it without the video open.
The effect works because of contrast. That’s the whole secret. A light background plus a dark subject gives you a natural separation zone where two images can coexist without either one eating the other alive. Keep that principle in mind and the rest falls into place.
Step 1: Choose Your Base Image Wisely
 Silhouette subject on light background open in Photoshop
Your base image should have a strong contrast between light and dark areas. A silhouette works perfectly for this because the dark subject sits against a lighter background, creating natural zones where your second image will appear visible. If you try to do this with two similarly exposed, midtone-heavy photos, the blend will look muddy. Pick images with clear separation.
Silhouette subject on light background open in Photoshop
Your base image should have a strong contrast between light and dark areas. A silhouette works perfectly for this because the dark subject sits against a lighter background, creating natural zones where your second image will appear visible. If you try to do this with two similarly exposed, midtone-heavy photos, the blend will look muddy. Pick images with clear separation.
Open your background/base image in Photoshop. This is the image whose subject you want to preserve as the dominant figure in the final composition.
Step 2: Bring Your Second Image in as a Smart Object
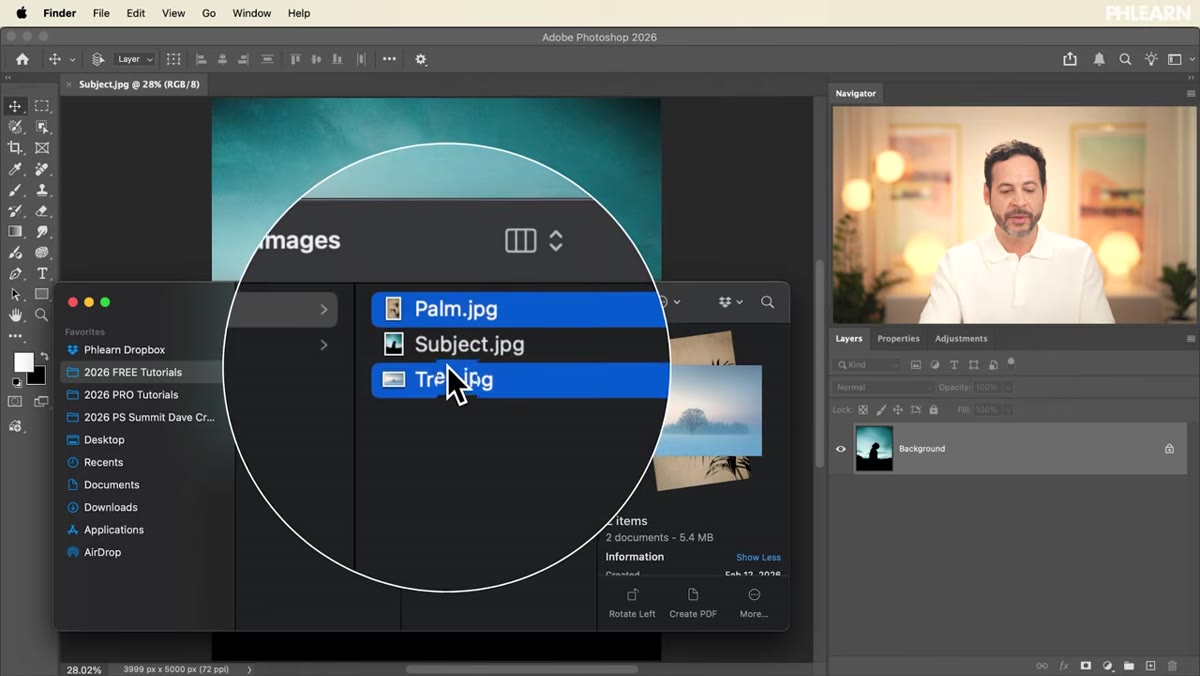 Dragging second image file into the Photoshop canvas
Go grab the image you want to blend on top, whether that’s a forest, a cityscape, palm trees, whatever fits the mood you’re going for. Hold Ctrl (or Cmd on Mac), select your file(s) in Explorer or Finder, and drag them directly onto your Photoshop canvas. When you drop a file in this way, Photoshop automatically places it as a Smart Object. Hit the checkmark in the toolbar to confirm placement.
Dragging second image file into the Photoshop canvas
Go grab the image you want to blend on top, whether that’s a forest, a cityscape, palm trees, whatever fits the mood you’re going for. Hold Ctrl (or Cmd on Mac), select your file(s) in Explorer or Finder, and drag them directly onto your Photoshop canvas. When you drop a file in this way, Photoshop automatically places it as a Smart Object. Hit the checkmark in the toolbar to confirm placement.
The Smart Object part matters more than it might seem right now. It’s not just about preserving quality when you scale, it’s going to let you use Generative Expand inside the file later without affecting your main canvas. More on that in a minute.
Step 3: Change the Blending Mode to Screen
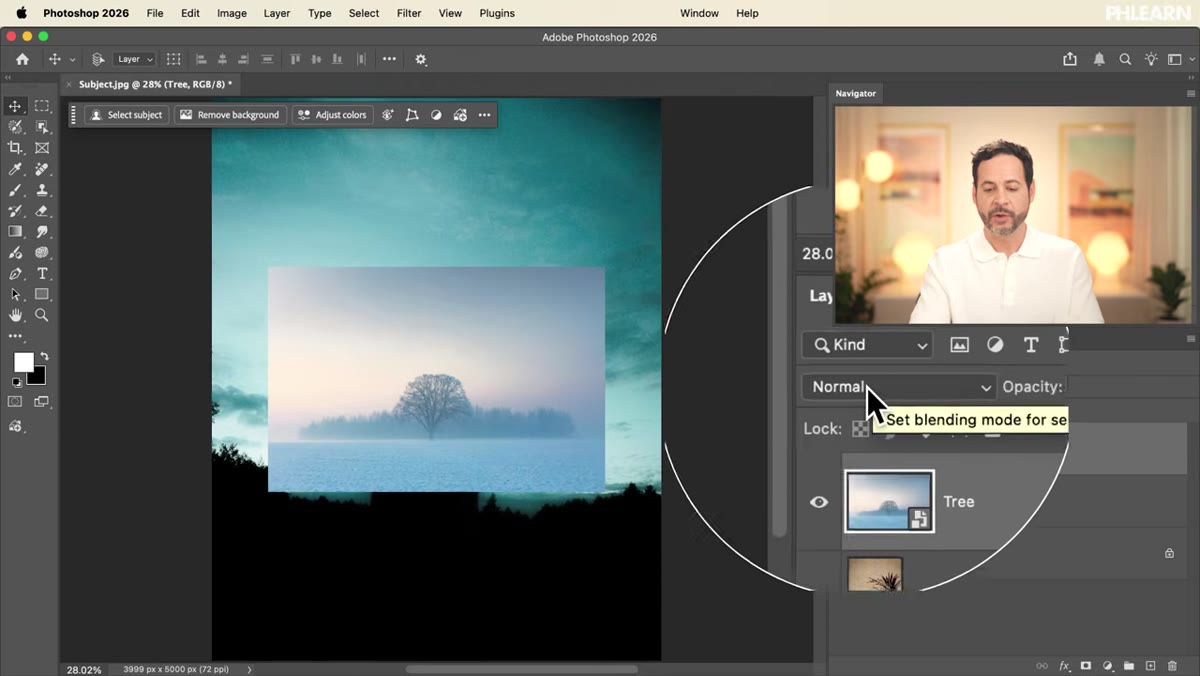 Blending mode dropdown changing from Normal to Screen
With your second image layer selected in the Layers panel, click the blending mode dropdown (the one that says “Normal” by default) and switch it to Screen. That’s it. That’s the move. The double exposure effect is essentially built at this point.
Blending mode dropdown changing from Normal to Screen
With your second image layer selected in the Layers panel, click the blending mode dropdown (the one that says “Normal” by default) and switch it to Screen. That’s it. That’s the move. The double exposure effect is essentially built at this point.
Screen mode works by making darker pixels transparent and preserving lighter ones. So the dark areas of your overlay image disappear, letting your background subject show through, while the lighter areas of the overlay sit on top and blend. This is why high-contrast source images matter so much. If your overlay image is mostly dark, you’ll lose it. If it’s mostly light, you’ll lose your subject underneath.
Step 4: Position and Scale Your Overlay Layer
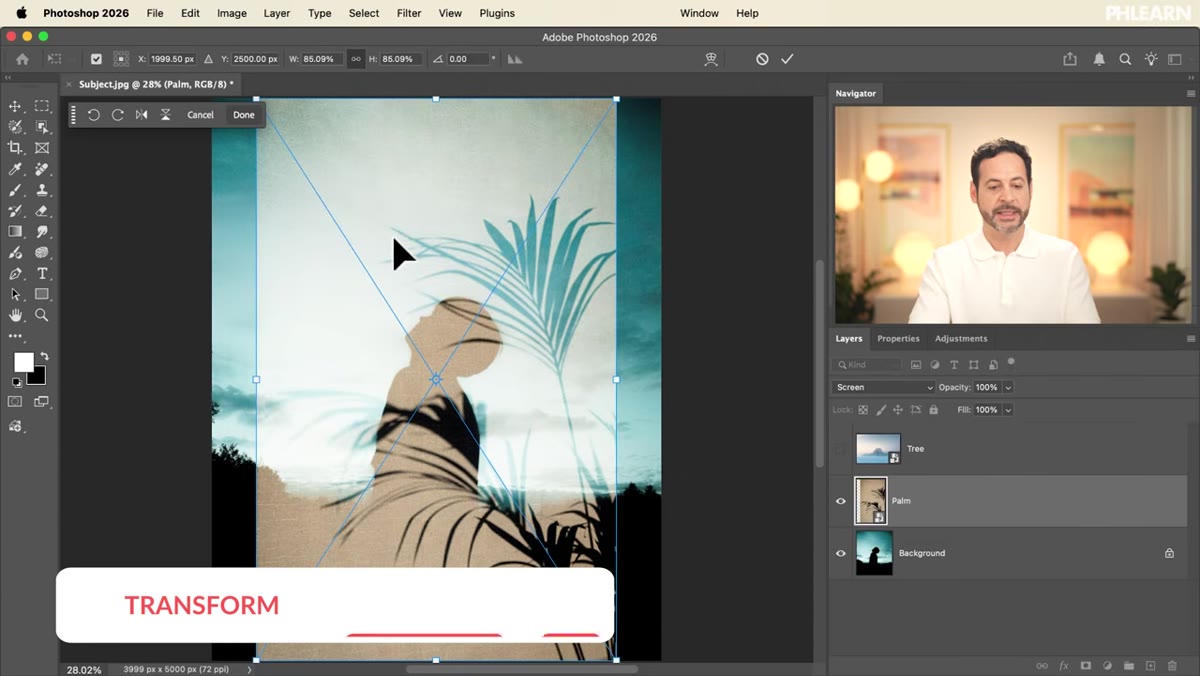 Transform handles around overlay image being repositioned
Hit Ctrl+T (or Cmd+T) to enter Free Transform. From here, you can drag the corners to resize or click inside the bounding box to reposition. You want the interesting parts of your overlay image to land on or around your subject rather than bleeding out into empty background space.
Transform handles around overlay image being repositioned
Hit Ctrl+T (or Cmd+T) to enter Free Transform. From here, you can drag the corners to resize or click inside the bounding box to reposition. You want the interesting parts of your overlay image to land on or around your subject rather than bleeding out into empty background space.
In the tutorial, the tree is positioned so it appears to grow up through the figure, which gives the composition a narrative logic. Think about what story your overlap is telling. Centering a forest canopy over a face reads differently than anchoring it at the feet. Move it around and watch how the effect shifts. There’s no single correct position, but there are definitely wrong ones.
Step 5: Use Generative Expand Inside the Smart Object
 Double-clicking smart object thumbnail to open in separate window
Here’s where it gets clever. If your overlay image doesn’t quite fill the canvas after you’ve positioned it where you want it, the instinct is to just scale it up until it covers everything. But that might move your image out of the sweet spot compositionally. Instead, double-click the Smart Object thumbnail in the Layers panel. This opens the source file in its own separate window.
Double-clicking smart object thumbnail to open in separate window
Here’s where it gets clever. If your overlay image doesn’t quite fill the canvas after you’ve positioned it where you want it, the instinct is to just scale it up until it covers everything. But that might move your image out of the sweet spot compositionally. Instead, double-click the Smart Object thumbnail in the Layers panel. This opens the source file in its own separate window.
Inside that window, you can use Generative Expand to extend the canvas. Grab the Crop tool, drag it out beyond the current image boundaries, and use the Generative Expand option in the contextual taskbar to fill the new space with AI-generated content that matches your image. Once you’re happy, flatten or merge the layers inside the Smart Object window and hit Ctrl+S to save it. Switch back to your main canvas and the Smart Object updates automatically, now with a larger image that fills your composition without forcing you to move it.
Step 6: Repeat with Your Second Overlay (Optional)
 Second overlay layer set to Screen blending mode
If you have a second overlay image (the tutorial uses both a tree and a palm), follow the same process: place it as a Smart Object, switch to Screen mode, position it, scale if needed. Multiple Screen-mode layers stack without multiplying the weirdness, because Screen mode is non-destructive in the way it interacts with layers beneath it. You can toggle visibility on each layer to compare compositions quickly and decide which overlay, or combination, works best.
Second overlay layer set to Screen blending mode
If you have a second overlay image (the tutorial uses both a tree and a palm), follow the same process: place it as a Smart Object, switch to Screen mode, position it, scale if needed. Multiple Screen-mode layers stack without multiplying the weirdness, because Screen mode is non-destructive in the way it interacts with layers beneath it. You can toggle visibility on each layer to compare compositions quickly and decide which overlay, or combination, works best.
One Thing I’d Add From Experience
The PHLEARN tutorial keeps the process clean and accessible, which is exactly right for getting started. Where I’d extend it: try running a Curves adjustment layer clipped to your overlay layer (hold Alt and click between the two layers in the Layers panel to clip it). Pulling the shadows up slightly on your overlay can soften the transition and keep the double exposure from looking like a technical exercise and more like an intentional editorial choice. This is especially useful when your overlay image has very heavy blacks that create hard cut-ins rather than blending gradually into your subject.
Also worth testing: Multiply mode instead of Screen on a light-subject-on-dark-background base image. The same logic applies, just inverted. Multiply drops the lights and preserves darks, so if your subject is backlit against a dark sky, Multiply on the overlay might be the call.
The single most important thing this tutorial drives home is that blending modes are doing serious compositional heavy lifting in Photoshop, and Screen mode specifically is one of the most practical tools you’re not using enough if you’re still doing every composite by hand. The double exposure effect is a clean, high-impact look that takes less than ten minutes once you understand the underlying logic of contrast and transparency.
Watch the full tutorial on YouTube to see the Generative Expand steps demonstrated in real time. The visual of that Smart Object workflow clicking into place is worth seeing once before you try it yourself.
Comments (2)
Wow, I had no idea you could do this. Mind blown.
Love this. I referenced a similar technique in one of my recent posts. Always good to see other perspectives.
Leave a Comment