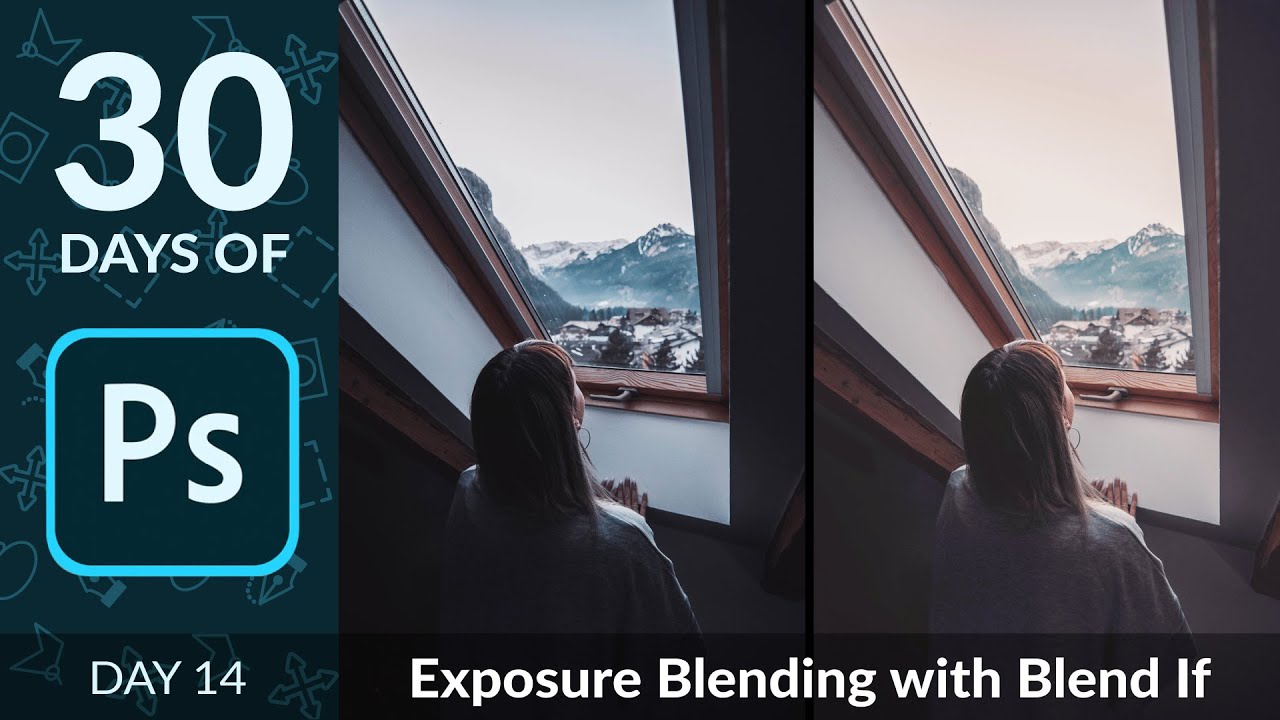
There’s a specific kind of frustration I know really well. You shoot a photo, or a client sends you one, and the sky is gorgeous but the foreground looks like it was taken inside a coal mine. Or the opposite: the subject is perfectly lit and the background is a blown-out white void. I spent an embarrassing amount of time masking around these problems by hand, painting on layer masks pixel by pixel like some kind of digital monk. Turns out there’s a smarter way, and I only found it because I was procrastinating at a coffee shop watching Photoshop tutorials instead of actually finishing a project.
In this Aaron Nace (PHLEARN) tutorial on exposure blending, the spotlight is on a feature called Blend If. If you’ve never touched it, you’re in good company. It lives tucked away in the Layer Style panel, and most people scroll right past it. The short version: Blend If lets you control a layer’s visibility based on the tonal values of either that layer itself or the layers underneath it. Highlights, midtones, shadows. You get to decide which parts of a layer show up and where. Watch the full tutorial on YouTube if you want to follow along with Aaron’s example photo.
Step 1: Understand What Blend If Actually Does
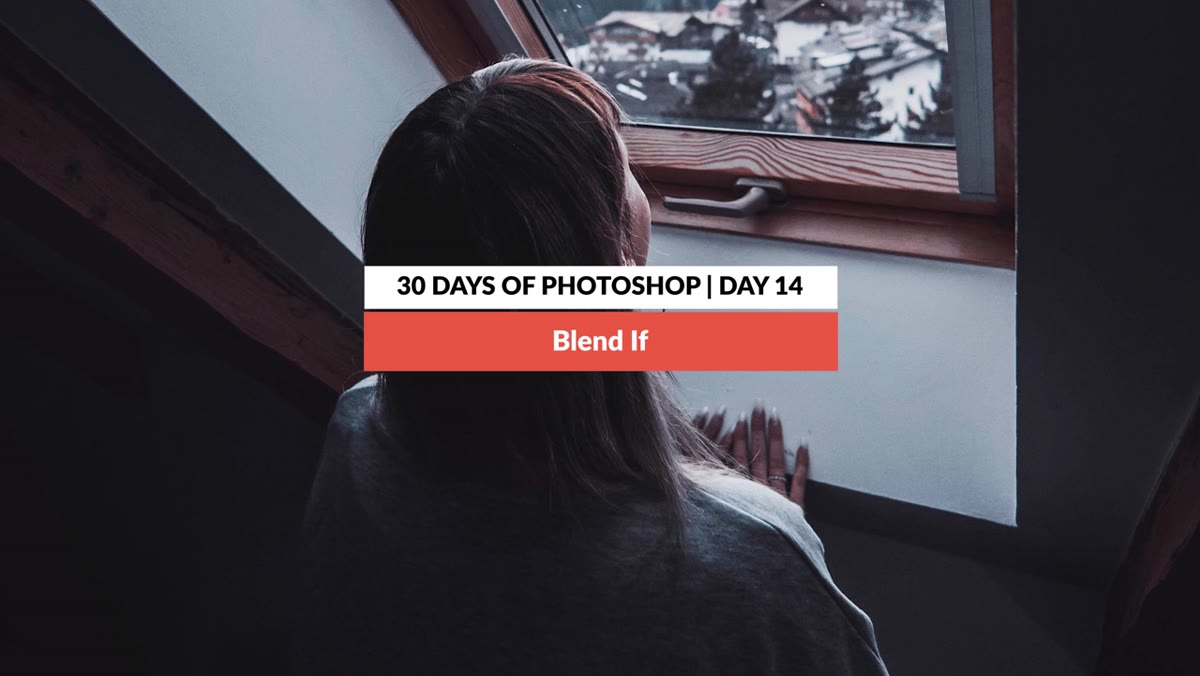 Blend If intro with layer visible in highlights and shadows
Before touching any sliders, it helps to have a mental model. Blend If doesn’t mask things with brushes or selections. It hides or reveals parts of a layer based on luminosity values, meaning how bright or dark the pixels are. You’ve got two rows of sliders: one that controls visibility based on the current layer’s own pixel values, and one that controls visibility based on what’s underneath. Think of it like telling Photoshop, “only show this layer where the underlying image is bright” or “hide this layer wherever it gets too dark.”
Blend If intro with layer visible in highlights and shadows
Before touching any sliders, it helps to have a mental model. Blend If doesn’t mask things with brushes or selections. It hides or reveals parts of a layer based on luminosity values, meaning how bright or dark the pixels are. You’ve got two rows of sliders: one that controls visibility based on the current layer’s own pixel values, and one that controls visibility based on what’s underneath. Think of it like telling Photoshop, “only show this layer where the underlying image is bright” or “hide this layer wherever it gets too dark.”
Step 2: Open Layer Style and Find the Blend If Sliders
 Layer Style dialog with Blend If sliders visible at bottom
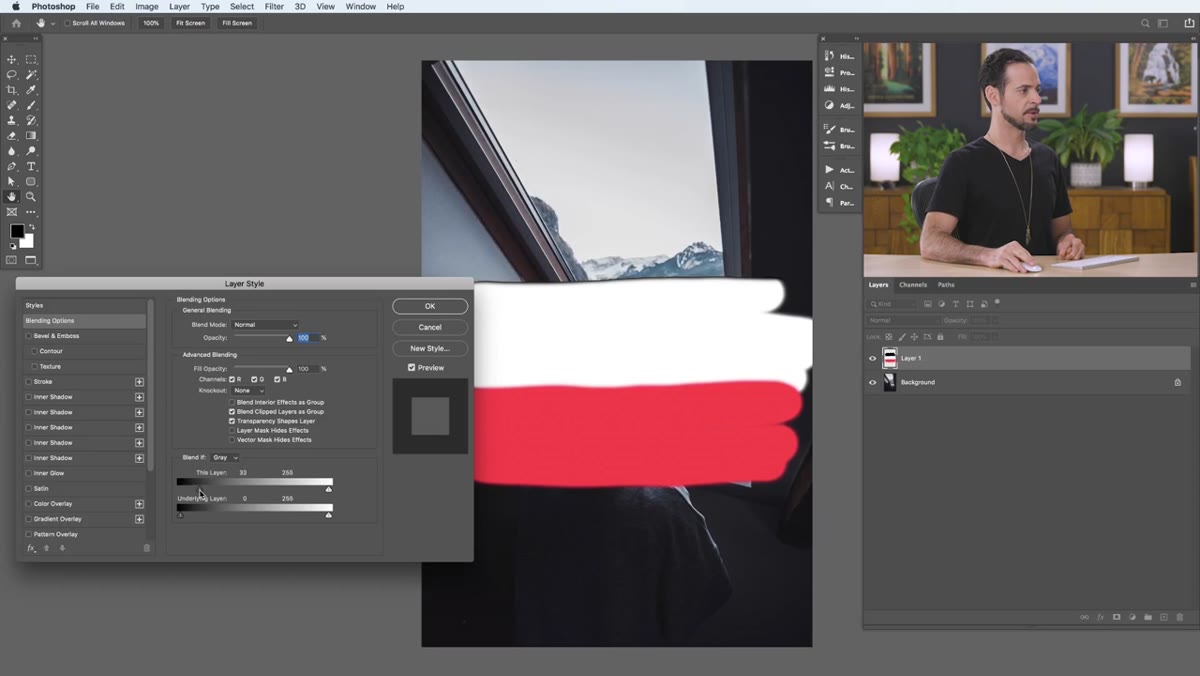
To access Blend If, double-click in the gray space next to a layer’s name in the Layers panel. That opens the Layer Style dialog. Don’t click the layer name itself or you’ll rename it. Alternatively, click the FX button at the bottom of the Layers panel and choose Blending Options. Once the dialog is open, scroll to the bottom. You’ll see a section labeled “Blend If” with two gradient bars. The top one is labeled “This Layer” and the bottom one is “Underlying Layer.” Each bar has a white slider on the right end and a black slider on the left.
Layer Style dialog with Blend If sliders visible at bottom
To access Blend If, double-click in the gray space next to a layer’s name in the Layers panel. That opens the Layer Style dialog. Don’t click the layer name itself or you’ll rename it. Alternatively, click the FX button at the bottom of the Layers panel and choose Blending Options. Once the dialog is open, scroll to the bottom. You’ll see a section labeled “Blend If” with two gradient bars. The top one is labeled “This Layer” and the bottom one is “Underlying Layer.” Each bar has a white slider on the right end and a black slider on the left.
Step 3: Try the “This Layer” Slider to See the Basic Effect
 Top Blend If slider being dragged, black paint disappearing from layer
To get a feel for how this works, Aaron paints a test layer with white and black paint first, which is a great teaching move. With the “This Layer” top slider, dragging the black triangle inward from the left causes the dark pixels on your layer to vanish. Dragging the white triangle inward from the right hides the bright pixels. You’re essentially telling Photoshop which tonal range on the current layer should remain visible. Drag the black handle right and dark paint disappears. Keep going and midtones drop out. It’s blunt at this stage, but useful for understanding the logic.
Top Blend If slider being dragged, black paint disappearing from layer
To get a feel for how this works, Aaron paints a test layer with white and black paint first, which is a great teaching move. With the “This Layer” top slider, dragging the black triangle inward from the left causes the dark pixels on your layer to vanish. Dragging the white triangle inward from the right hides the bright pixels. You’re essentially telling Photoshop which tonal range on the current layer should remain visible. Drag the black handle right and dark paint disappears. Keep going and midtones drop out. It’s blunt at this stage, but useful for understanding the logic.
Step 4: Use the “Underlying Layer” Slider to Control Where the Layer Appears
 Bottom Blend If slider dragged, layer appearing only in sky highlights
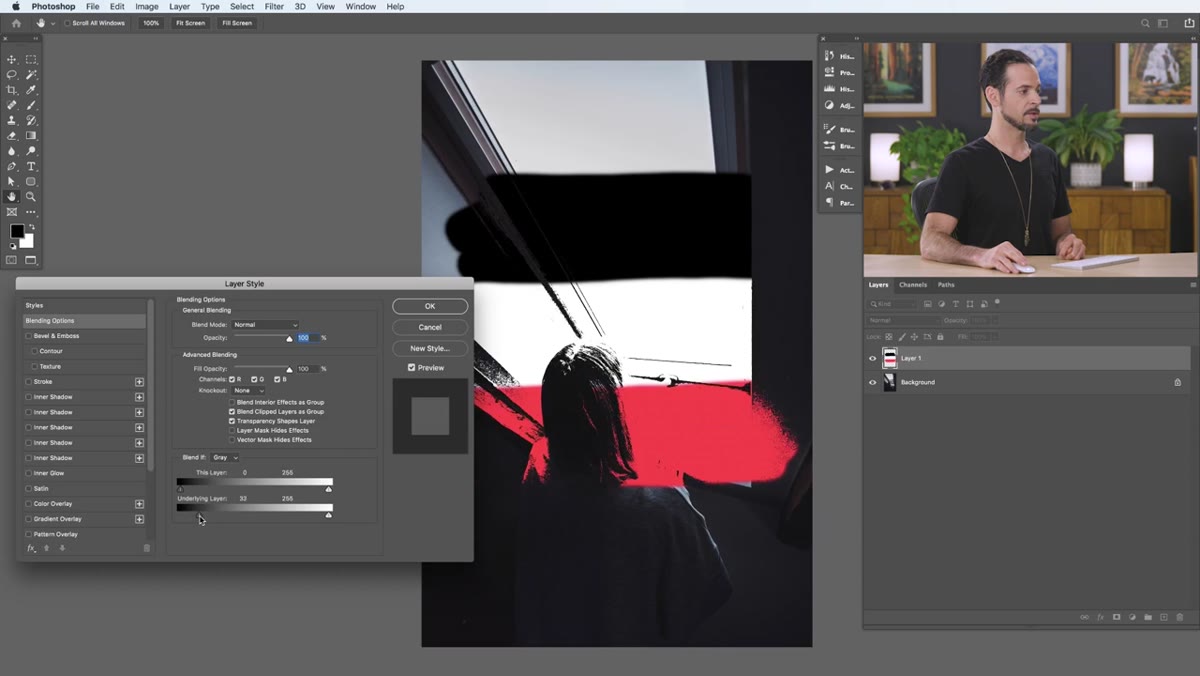
The bottom slider is where the real magic starts for exposure blending. This one controls visibility based on the tonal values in the image below your layer, not the layer itself. Drag the black triangle inward from the left, and your layer stops appearing in the dark areas of the underlying image. It becomes visible only in the lighter regions. Drag the white triangle in from the right and the opposite happens. Your layer disappears from highlights and only shows up in shadows. For a photo where you want to blend a brighter exposure into the sky, this is your slider.
Bottom Blend If slider dragged, layer appearing only in sky highlights
The bottom slider is where the real magic starts for exposure blending. This one controls visibility based on the tonal values in the image below your layer, not the layer itself. Drag the black triangle inward from the left, and your layer stops appearing in the dark areas of the underlying image. It becomes visible only in the lighter regions. Drag the white triangle in from the right and the opposite happens. Your layer disappears from highlights and only shows up in shadows. For a photo where you want to blend a brighter exposure into the sky, this is your slider.
Step 5: Split the Slider Handles to Add Feathering
 Alt-click splitting a slider handle into two, showing soft transition
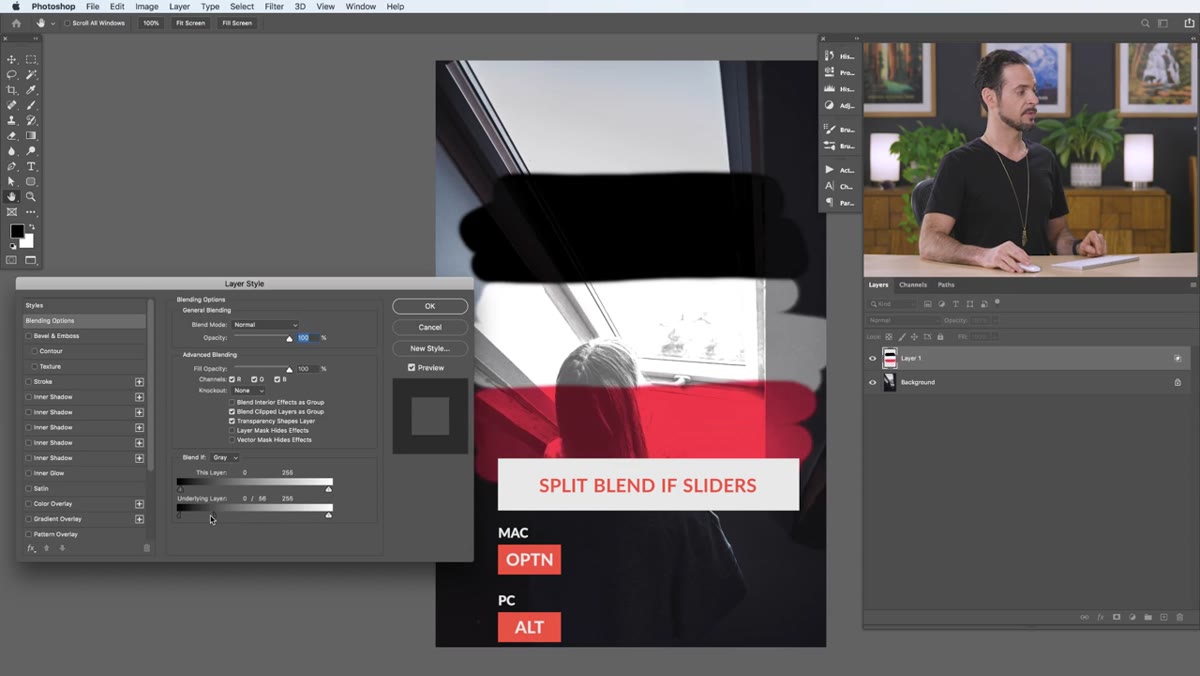
Here’s the part that separates a rough, ugly result from something actually usable. If you just drag a single slider handle, the transition between visible and invisible is completely hard. One pixel it’s there, the next it’s gone. To fix that, hold Alt (Option on Mac) and click directly on one of the slider handles. It splits into two halves. Now you can drag each half independently, and the gap between them creates a gradual fade. The wider the gap, the smoother the blend. This is the step most tutorials skip, and it’s the one that makes Blend If worth using. Without the split handles, the effect looks like a bad cutout. With them, it looks like a proper composite.
Alt-click splitting a slider handle into two, showing soft transition
Here’s the part that separates a rough, ugly result from something actually usable. If you just drag a single slider handle, the transition between visible and invisible is completely hard. One pixel it’s there, the next it’s gone. To fix that, hold Alt (Option on Mac) and click directly on one of the slider handles. It splits into two halves. Now you can drag each half independently, and the gap between them creates a gradual fade. The wider the gap, the smoother the blend. This is the step most tutorials skip, and it’s the one that makes Blend If worth using. Without the split handles, the effect looks like a bad cutout. With them, it looks like a proper composite.
Step 6: Apply This to Real Exposure Blending
 Original photo with dark foreground and bright background sky
For the actual practical use case, the workflow goes like this. You have a photo where the foreground is underexposed but the sky looks fine, or vice versa. Duplicate the layer, or bring in an alternate exposure of the same scene. Then open Blend If on the brighter version and use the “Underlying Layer” slider to limit where that bright layer is visible. Pull the white handle inward (and split it with Alt) so the bright layer only blends into the highlight regions of the base image. The dark foreground stays dark, the bright sky gets dialed in, and you didn’t paint a single mask.
Original photo with dark foreground and bright background sky
For the actual practical use case, the workflow goes like this. You have a photo where the foreground is underexposed but the sky looks fine, or vice versa. Duplicate the layer, or bring in an alternate exposure of the same scene. Then open Blend If on the brighter version and use the “Underlying Layer” slider to limit where that bright layer is visible. Pull the white handle inward (and split it with Alt) so the bright layer only blends into the highlight regions of the base image. The dark foreground stays dark, the bright sky gets dialed in, and you didn’t paint a single mask.
One Thing I’d Add From My Own Experience
The technique Aaron shows works brilliantly as a starting point, but I’ve found Blend If is even more powerful when you group your layers first. Put your exposure-blended layer inside a group, then apply a regular layer mask on the group to clean up edges or protect specific areas. Blend If handles the tonal logic automatically, the manual mask handles anything it gets wrong. I started doing this after a client photo had a complicated tree line where Blend If was blending correctly for the sky but also bleeding into some lighter bark on the trees. Two minutes of rough mask painting on the group fixed it without touching the Blend If settings at all. They work better as a team than either does alone.
Blend If is one of those features that sounds complicated until you use it once, and then it becomes the first thing you reach for whenever you’re dealing with exposure mismatches. The feathering trick with the split handles is genuinely the only thing you need to remember. Everything else is just dragging sliders until it looks right.
Watch the full tutorial on YouTube to follow along with Aaron’s example image and see the before and after on a real photo.
Comments (1)
Love how you break down complex stuff into manageable steps.
Leave a Comment