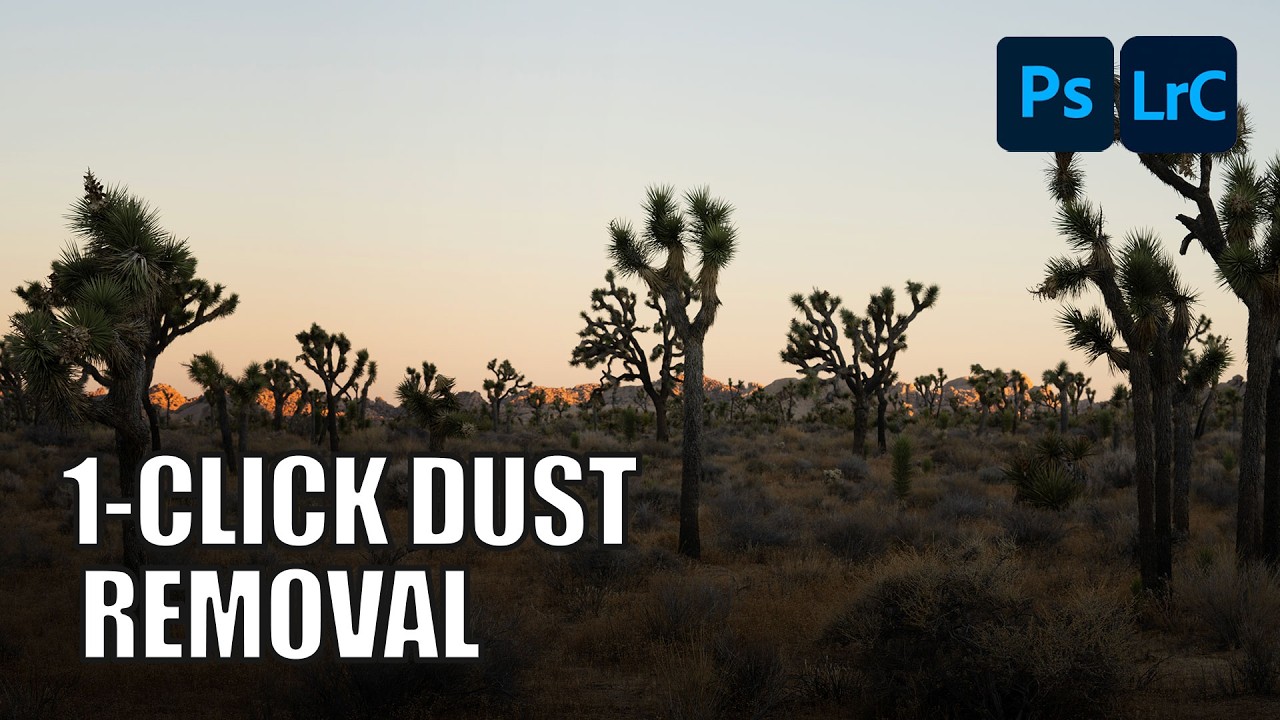
There’s a specific kind of freelance photographer pain that I only discovered after delivering a batch of landscape shots to a client and getting an email back asking about “all the little circles.” I had no idea what they were talking about. Zoomed in. Dust spots. Everywhere. On every single image. From a dirty sensor I hadn’t thought to clean. I spent the better part of an afternoon cloning them out one by one like some kind of medieval monk illuminating a manuscript, except less dignified and with more swearing.
That problem now has an actual solution, and it’s baked directly into the tools you’re already using. In this Aaron Nace (PHLEARN) tutorial, Watch the full tutorial on YouTube, Aaron walks through the brand new AI-powered dust removal feature that’s live across Lightroom Classic, Lightroom desktop, and Photoshop via Camera Raw 18. One click. The whole batch. I’m not being hyperbolic when I say this is the kind of update that quietly saves professionals real money in billable hours.
Here’s how the whole thing works, broken down so you can follow along without scrubbing through the video.
Step 1: Open Your Image in Lightroom Classic and Navigate to the Develop Module
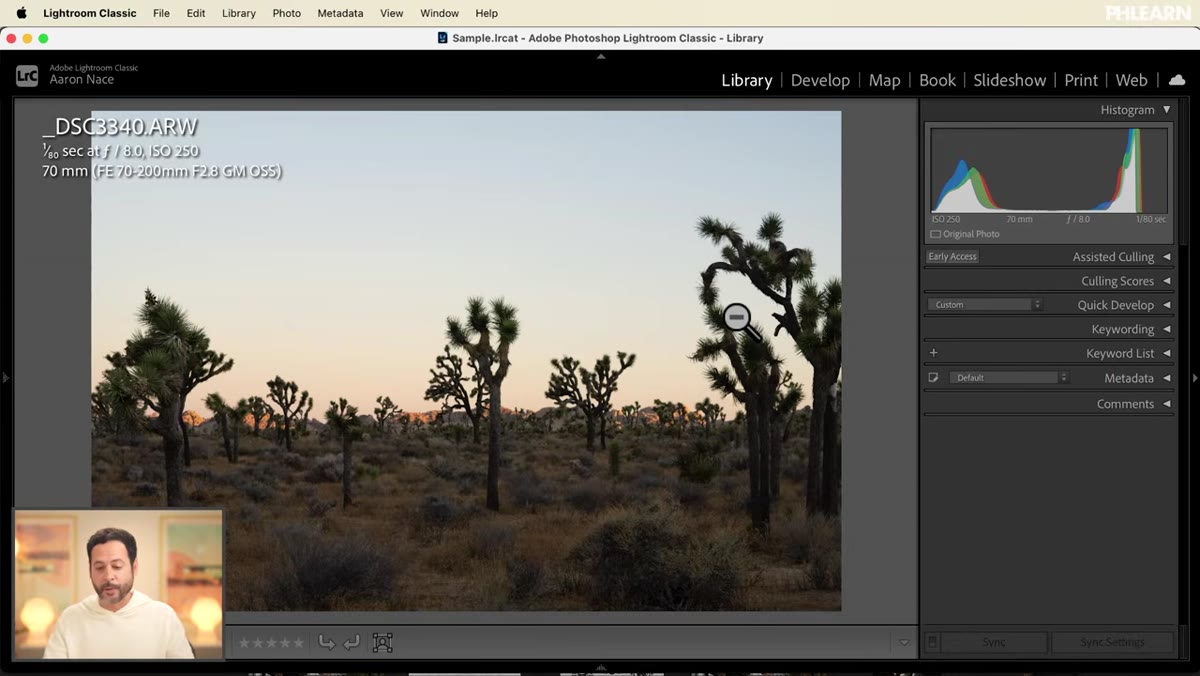 Lightroom Classic develop module open with photo loaded
Start in Lightroom Classic with a RAW file loaded. Head into the Develop module and look for the “Healing” or removal tool section in the right-hand panel. You’re looking specifically for “Distraction Removal,” which now has a new sub-option underneath it labeled “Dust.” This is the new addition. If you don’t see it yet, make sure your Lightroom Classic is fully updated because this is a recent rollout.
Lightroom Classic develop module open with photo loaded
Start in Lightroom Classic with a RAW file loaded. Head into the Develop module and look for the “Healing” or removal tool section in the right-hand panel. You’re looking specifically for “Distraction Removal,” which now has a new sub-option underneath it labeled “Dust.” This is the new addition. If you don’t see it yet, make sure your Lightroom Classic is fully updated because this is a recent rollout.
The fact that it works with both RAW and JPEG files is worth noting. RAW is obviously the preferred format since you preserve more detail for the AI to work with, but if you’re dealing with legacy JPEGs from a shoot, you’re not locked out.
Step 2: Apply the Dust Removal With One Click
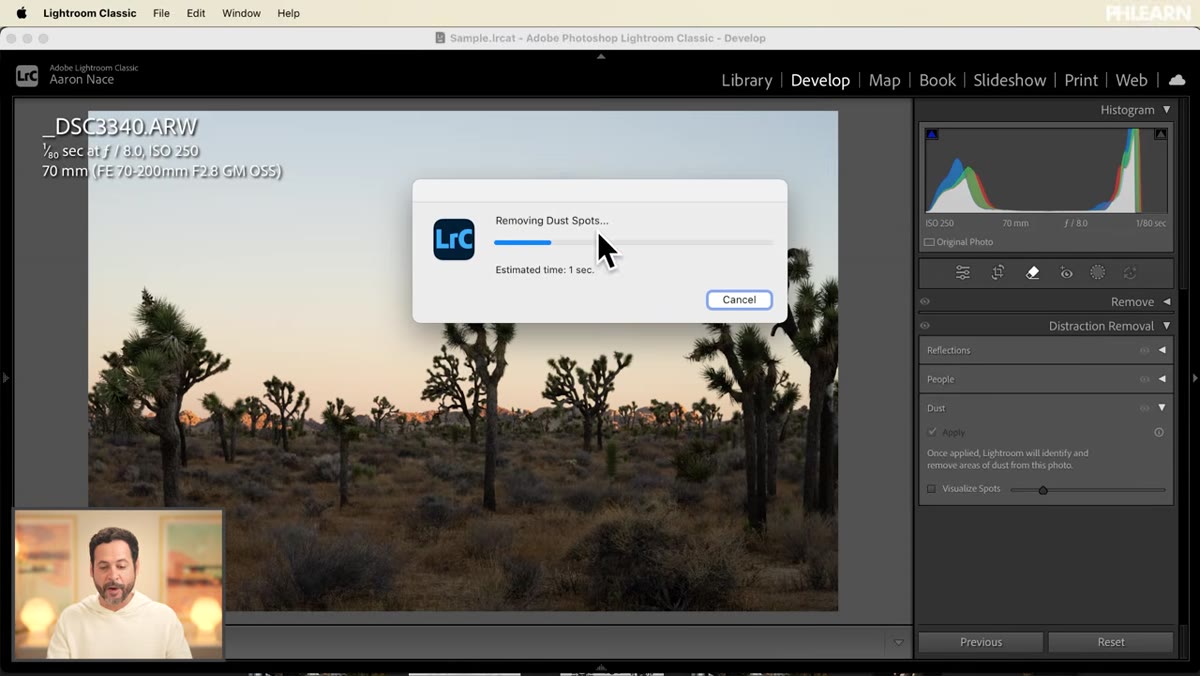 Dust removal panel with Apply button highlighted
Click “Apply” inside the Dust removal section. That’s it. Lightroom’s AI analyzes the image and automatically detects and removes dust spots without you having to paint over anything or manually identify problem areas. What appears next is an overlay showing you every single spot that was removed. This is genuinely useful because, as Aaron demonstrates, a lot of these spots are completely invisible at normal zoom levels and you’d never catch them in a standard review pass.
Dust removal panel with Apply button highlighted
Click “Apply” inside the Dust removal section. That’s it. Lightroom’s AI analyzes the image and automatically detects and removes dust spots without you having to paint over anything or manually identify problem areas. What appears next is an overlay showing you every single spot that was removed. This is genuinely useful because, as Aaron demonstrates, a lot of these spots are completely invisible at normal zoom levels and you’d never catch them in a standard review pass.
Toggle the before/after view to really see what the AI caught. You’ll probably be surprised, maybe even a little embarrassed, by how many spots were hiding in your sky gradients and open shadows.
Step 3: Batch Apply to an Entire Series in Lightroom Classic
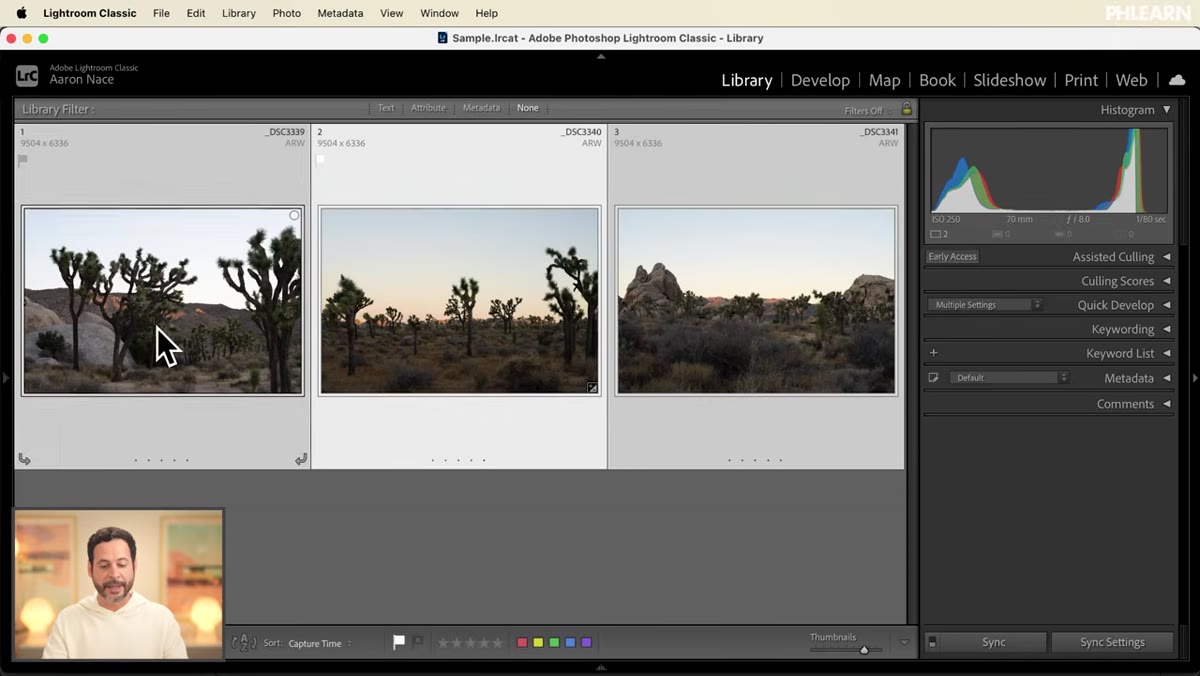 Library module with multiple images selected for sync
This is where the feature goes from useful to genuinely powerful. Jump back to the Library module and hold Ctrl (Windows) or Command (Mac) to select the other images from the same shoot. Then go to “Sync Settings.” When the sync dialog opens, click “Check None” first to deselect everything. Then manually tick the “Dust” option under the Removal section. Hit Synchronize.
Library module with multiple images selected for sync
This is where the feature goes from useful to genuinely powerful. Jump back to the Library module and hold Ctrl (Windows) or Command (Mac) to select the other images from the same shoot. Then go to “Sync Settings.” When the sync dialog opens, click “Check None” first to deselect everything. Then manually tick the “Dust” option under the Removal section. Hit Synchronize.
Lightroom now applies the same dust removal pass across your entire selected batch. For anyone who shoots landscapes, real estate, or any scenario where you’re firing dozens of frames with the same sensor, this is the feature that pays for your Adobe subscription in a single afternoon.
Step 4: Use the Same Feature in Lightroom Desktop (Non-Classic)
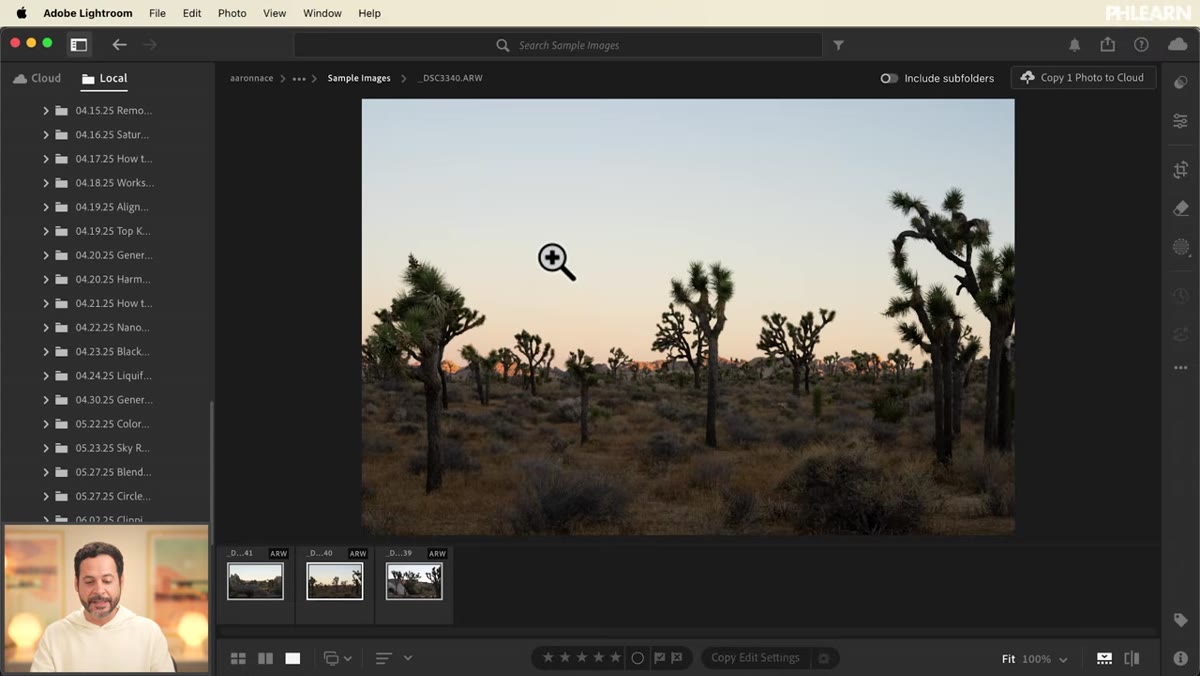 Lightroom desktop version with removal panel visible on right
The process in Lightroom desktop (the cloud-based version, not Classic) mirrors what you just did, with a slightly different UI. Open your image, look to the right-hand panel, and find the Removal section. Dust removal is right there. Hit Apply, wait a moment for processing, and the same overlay of removed spots appears.
Lightroom desktop version with removal panel visible on right
The process in Lightroom desktop (the cloud-based version, not Classic) mirrors what you just did, with a slightly different UI. Open your image, look to the right-hand panel, and find the Removal section. Dust removal is right there. Hit Apply, wait a moment for processing, and the same overlay of removed spots appears.
To batch apply in Lightroom desktop, right-click the corrected image and choose “Copy Edit Settings.” Then select your other images with Ctrl/Command click, right-click, and choose “Paste Edit Settings.” Same result, slightly different path. Both workflows land in the same place.
Step 5: Run Dust Removal Through Photoshop via Camera Raw
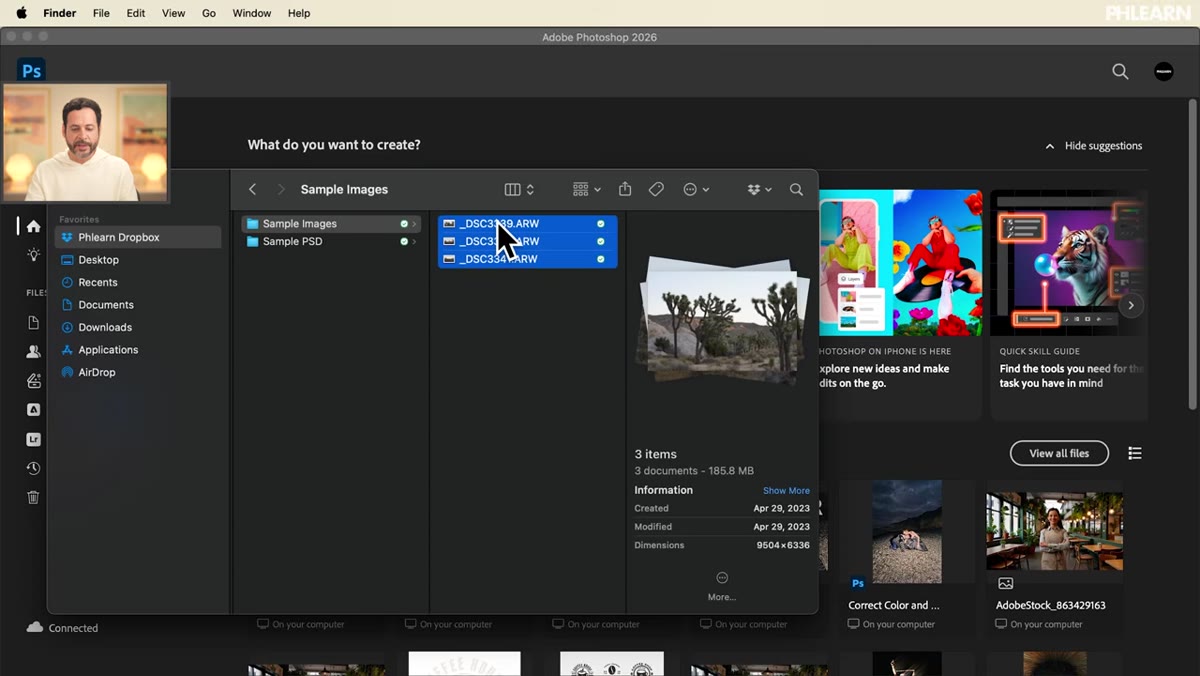 Camera Raw 18 open inside Photoshop 2026 with image loaded
If Photoshop is your home base rather than Lightroom, you’re not left out. Drag your RAW files directly into Photoshop 2026 and they’ll open automatically in Camera Raw 18. From there, navigate to the Removal panel and you’ll find the exact same Dust removal option sitting right where you’d expect it.
Camera Raw 18 open inside Photoshop 2026 with image loaded
If Photoshop is your home base rather than Lightroom, you’re not left out. Drag your RAW files directly into Photoshop 2026 and they’ll open automatically in Camera Raw 18. From there, navigate to the Removal panel and you’ll find the exact same Dust removal option sitting right where you’d expect it.
Click Apply, let it run, and hover over the undo button to see the before state compared to your cleaned image. The removal quality is consistent with what you get in Lightroom, which makes sense since Camera Raw and Lightroom share the same underlying processing engine. The UI just lives inside a different application.
Step 6: Batch Process and Export From Camera Raw
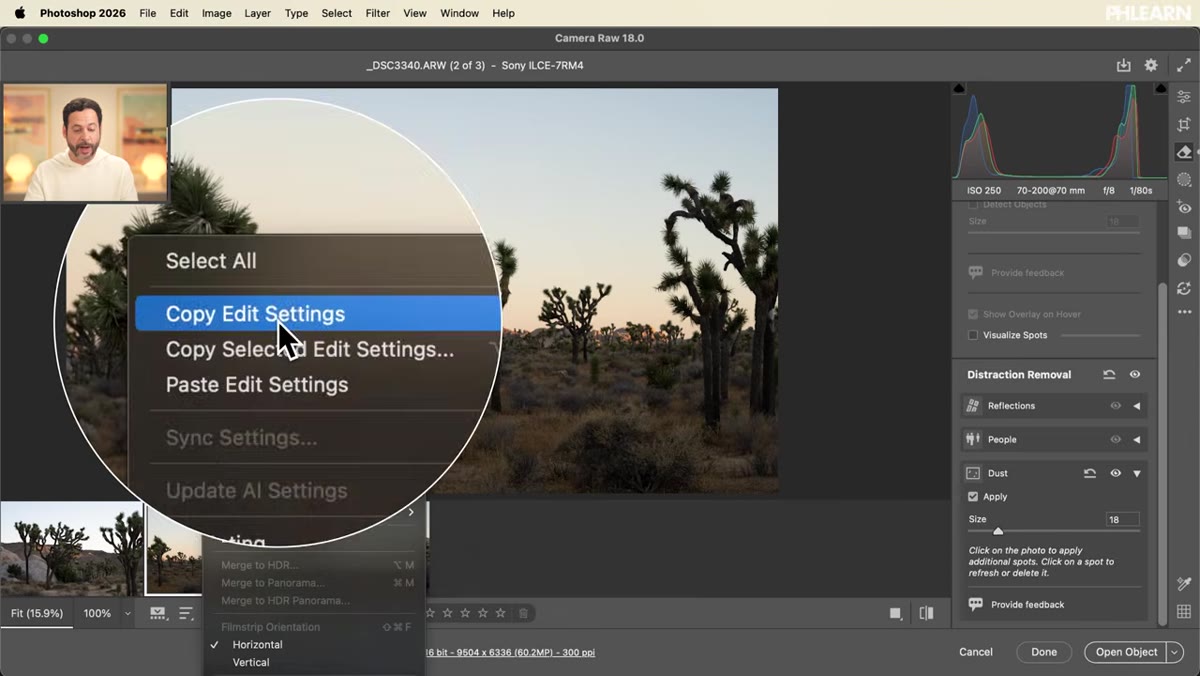 Camera Raw filmstrip with multiple images selected for paste settings
With your first image processed in Camera Raw, right-click it in the filmstrip and choose “Copy Edit Settings.” Select your other images, right-click, and hit “Paste Edit Settings.” From here you have three reasonable exit paths: open the files directly into Photoshop for further editing, hit Done to save the settings without opening, or export as JPEGs with the dust removal baked in.
Camera Raw filmstrip with multiple images selected for paste settings
With your first image processed in Camera Raw, right-click it in the filmstrip and choose “Copy Edit Settings.” Select your other images, right-click, and hit “Paste Edit Settings.” From here you have three reasonable exit paths: open the files directly into Photoshop for further editing, hit Done to save the settings without opening, or export as JPEGs with the dust removal baked in.
That last option is underrated. If you’re delivering processed files without doing any heavy compositing or retouching on top, you can clean an entire shoot and export without ever fully opening the files in Photoshop proper. That’s a significant time saver.
What I’d Add From My Own Workflow
I’ve been testing this on some older landscape shoots that I know had sensor issues, and my one honest caveat is this: the AI is excellent on clear skies and smooth gradients, which is exactly where dust spots are most obvious and most annoying. On heavily textured areas, like rough stone walls or dense foliage, the spots are already camouflaged and the AI sometimes makes slightly aggressive edits trying to find them. Worth a spot-check zoom at 100% on your most textured frames before you hand anything off.
That said, my standard move now is to run dust removal as the first step in any outdoor shoot batch before I even start culling. It takes about 30 seconds and saves me from the clone stamp purgatory I used to accept as just part of the job. I work from coffee shops almost exclusively, and nothing kills productivity like realizing mid-session that you’ve got 200 dusty frames waiting for manual cleanup.
The single most important thing Aaron’s tutorial made clear is that this isn’t just a convenience feature, it’s a batch workflow tool. The real value isn’t cleaning one image. It’s cleaning 200 images in the same time it used to take to clean five. If you shoot with a DSLR or mirrorless camera in outdoor conditions, your sensor has dust on it. This is now the fix.
Watch the full tutorial on YouTube to see Aaron walk through each application live, and grab the free RAW files he links in the description so you can follow along with the exact same images.
Comments
Leave a Comment