
I shoot a lot of work late in coffee shops. Bad lighting, available light, high ISO, the whole disaster. So noise has always been my nemesis, sitting there in my shadows like an uninvited guest who refuses to leave. For years I dealt with it through a mix of manual sliders in Lightroom and a third-party plugin that worked well but added time to every job. Then Adobe dropped their AI-powered Denoise feature in Lightroom Classic and Adobe Camera Raw, and suddenly a lot of photographers started asking whether the plugin era is over. In Watch the full tutorial on YouTube, Matt Kloskowski takes a proper deep dive into it, not just a features-reel overview but a real side-by-side comparison with a before, an after, and an honest take on whether it replaces what came before.
The short version is: this thing is legitimately impressive. The longer version involves some important caveats about file types, processing time, and where on the slider you should actually land. I went through the whole tutorial, tested it on my own high-ISO shots, and here’s everything you need to know to use it right.
Step 1: Make Sure You Have the Right File Type
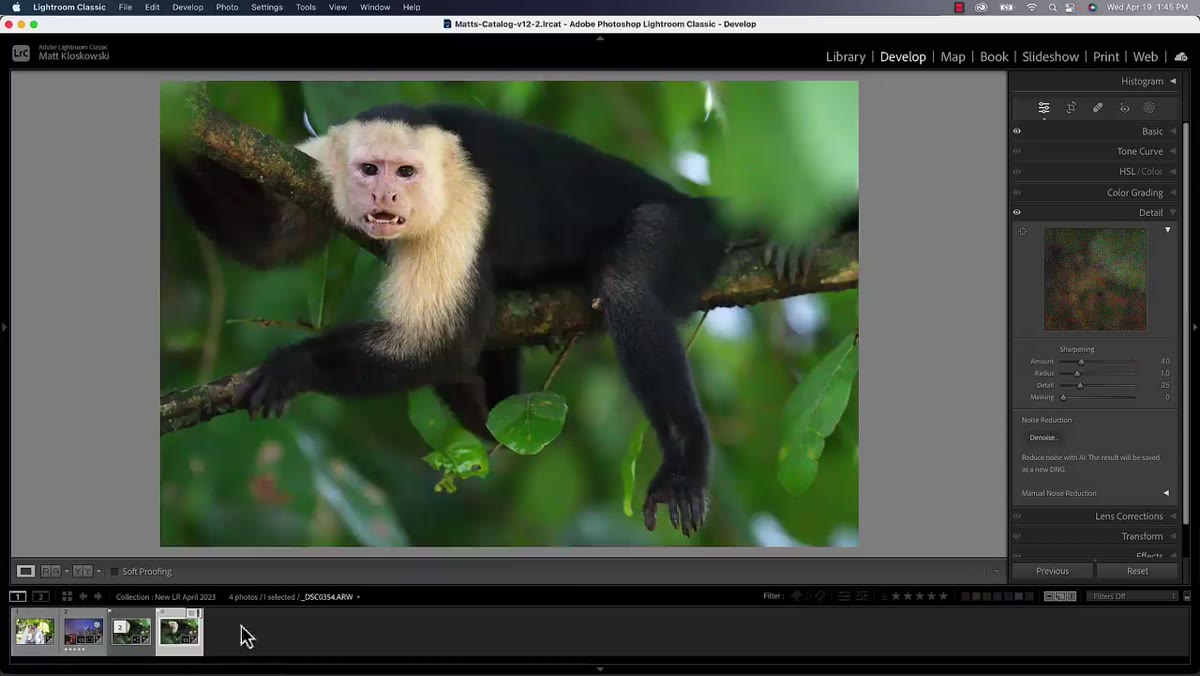 Raw photo open in Lightroom Develop module
This feature only works on raw files. Not JPEG. Not TIFF. Not PSD. If you try to run it on anything other than a raw file, the option simply won’t be available. Matt is clear about this upfront, and it’s worth knowing before you get excited and start dragging in everything from your archive. Make sure you’ve also updated your software. The Denoise feature shipped with Lightroom Classic 12.3 and Adobe Camera Raw 15.3. If you’re running an older version, go update now and come back.
Raw photo open in Lightroom Develop module
This feature only works on raw files. Not JPEG. Not TIFF. Not PSD. If you try to run it on anything other than a raw file, the option simply won’t be available. Matt is clear about this upfront, and it’s worth knowing before you get excited and start dragging in everything from your archive. Make sure you’ve also updated your software. The Denoise feature shipped with Lightroom Classic 12.3 and Adobe Camera Raw 15.3. If you’re running an older version, go update now and come back.
Step 2: Open the Detail Panel
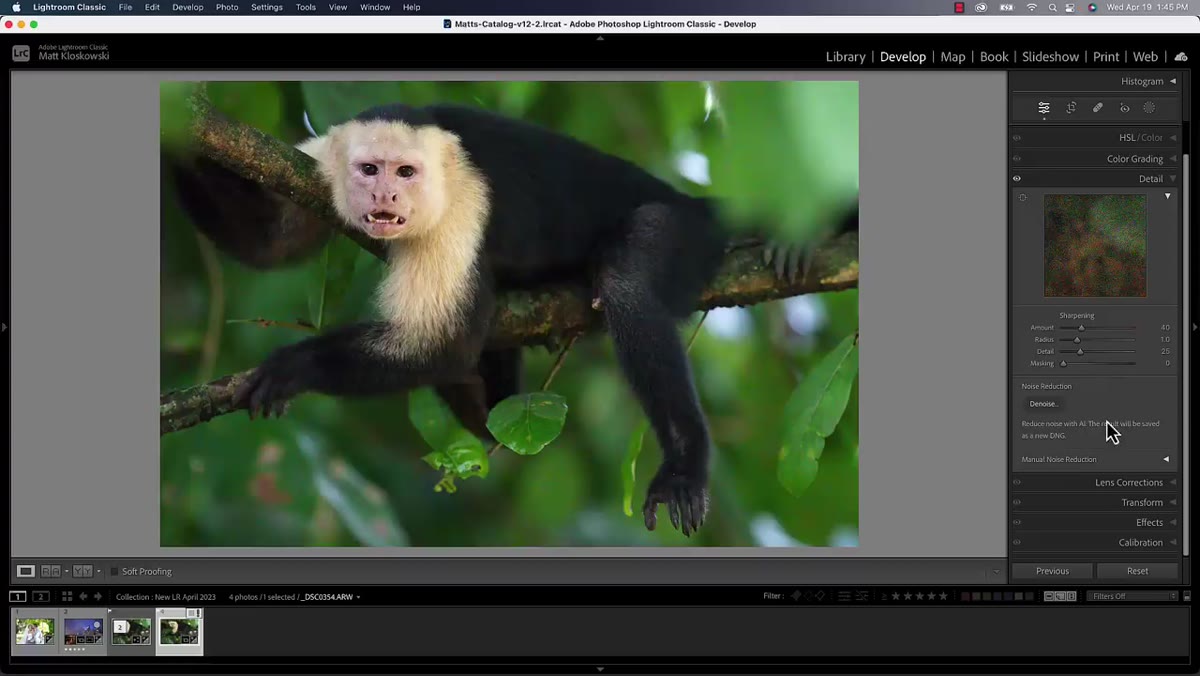 Detail panel open in Lightroom Classic Develop module
Once you have a raw file open in the Develop module, scroll down to the Detail panel. This is the same panel where your old manual noise reduction controls live, things like Luminance, Color, and Detail sliders. Those are all still there. Adobe didn’t remove them. What changed is that the manual controls are now tucked behind a small arrow you may need to click to expand. Right above that collapsed section, you’ll find the new Denoise button. It’s clean, it’s simple, and it means you no longer have to fiddle with six different sliders just to get a usable image.
Detail panel open in Lightroom Classic Develop module
Once you have a raw file open in the Develop module, scroll down to the Detail panel. This is the same panel where your old manual noise reduction controls live, things like Luminance, Color, and Detail sliders. Those are all still there. Adobe didn’t remove them. What changed is that the manual controls are now tucked behind a small arrow you may need to click to expand. Right above that collapsed section, you’ll find the new Denoise button. It’s clean, it’s simple, and it means you no longer have to fiddle with six different sliders just to get a usable image.
Step 3: Click Denoise and Set Your Amount
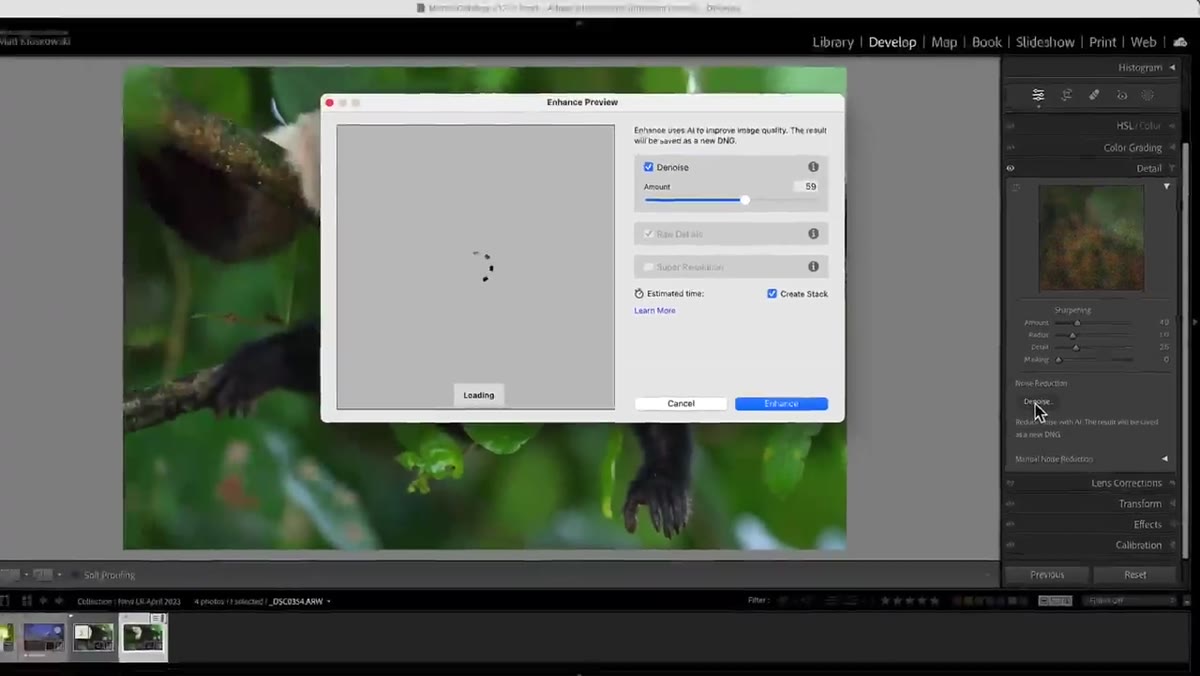 Enhance window open with Denoise slider visible
Clicking Denoise opens the Enhance window, which is the same dialog Adobe uses for Raw Details and Super Resolution. Those two features aren’t new, so ignore them for now. What you want is the Denoise slider. Before the preview renders you won’t have much to look at, but once it processes you can drag the slider around and see the results update in the preview window. The range goes from 0 to 100. A setting of 100 tends to look over-smoothed, almost like someone wrapped a plastic bag over your subject. Matt lands in the 50-60 range for most shots, and honestly that matches what I’ve found in my own tests. Enough reduction to clean up the worst of it, not so much that the image loses all texture.
Enhance window open with Denoise slider visible
Clicking Denoise opens the Enhance window, which is the same dialog Adobe uses for Raw Details and Super Resolution. Those two features aren’t new, so ignore them for now. What you want is the Denoise slider. Before the preview renders you won’t have much to look at, but once it processes you can drag the slider around and see the results update in the preview window. The range goes from 0 to 100. A setting of 100 tends to look over-smoothed, almost like someone wrapped a plastic bag over your subject. Matt lands in the 50-60 range for most shots, and honestly that matches what I’ve found in my own tests. Enough reduction to clean up the worst of it, not so much that the image loses all texture.
Step 4: Use the Preview Toggle to Compare Before and After
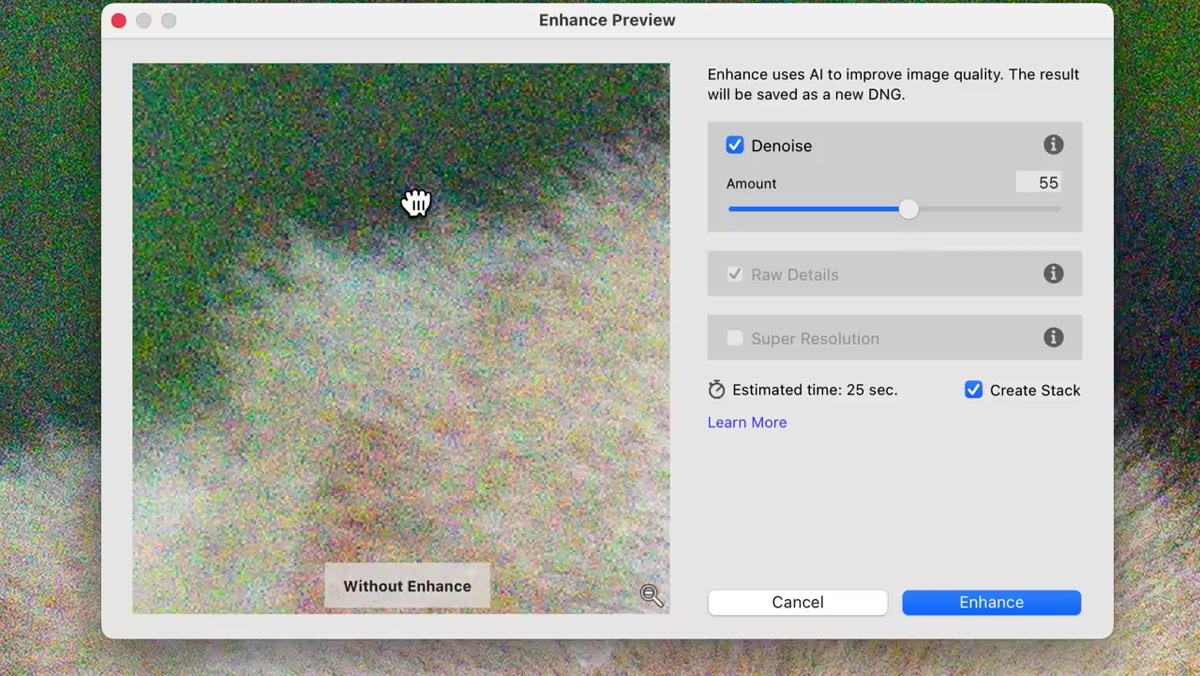 Preview toggle being clicked to show before and after
Inside the Enhance window there’s a small preview toggle. Click and hold it to see the before version. Release it to see the after. It’s a simple interaction but it’s genuinely useful because it lets you evaluate the effect in context rather than just eyeballing a slider number. Matt makes a good point here: a little noise, a little grain in the background isn’t always the enemy. It can make an image feel like a photograph rather than a render. Use the toggle to decide how aggressive you actually want to be, and don’t assume 100 is always better.
Preview toggle being clicked to show before and after
Inside the Enhance window there’s a small preview toggle. Click and hold it to see the before version. Release it to see the after. It’s a simple interaction but it’s genuinely useful because it lets you evaluate the effect in context rather than just eyeballing a slider number. Matt makes a good point here: a little noise, a little grain in the background isn’t always the enemy. It can make an image feel like a photograph rather than a render. Use the toggle to decide how aggressive you actually want to be, and don’t assume 100 is always better.
Step 5: Let It Render and Understand the DNG Output
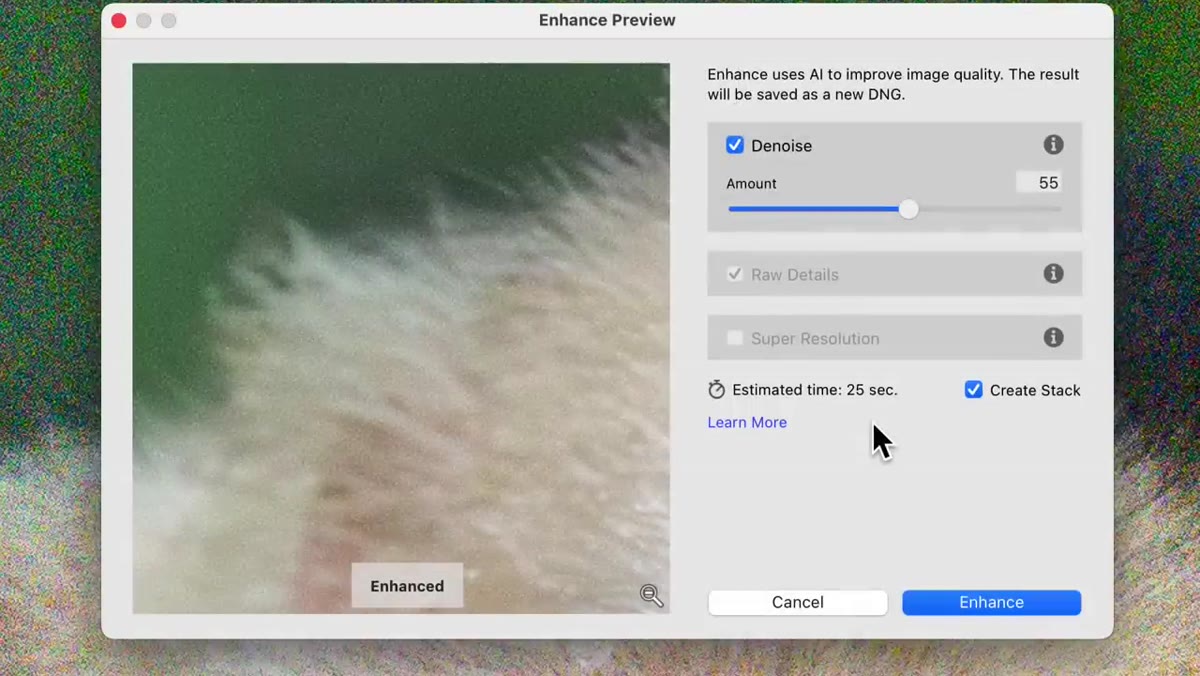 Estimated processing time shown at bottom of Enhance window
At the bottom of the Enhance window you’ll see an estimated processing time. On Matt’s M1 MacBook it was around 25 seconds. On older hardware it’ll be longer, so plan accordingly. More importantly, the Denoise feature does not edit your original raw file. It creates a new DNG file. If you’re the type who has actively avoided converting to DNG, this might feel a little jarring. Matt’s honest that he doesn’t love this either. But the DNG gets stacked with your original in Lightroom, which keeps things reasonably organized. Once you’re ready, click Enhance and let it run.
Estimated processing time shown at bottom of Enhance window
At the bottom of the Enhance window you’ll see an estimated processing time. On Matt’s M1 MacBook it was around 25 seconds. On older hardware it’ll be longer, so plan accordingly. More importantly, the Denoise feature does not edit your original raw file. It creates a new DNG file. If you’re the type who has actively avoided converting to DNG, this might feel a little jarring. Matt’s honest that he doesn’t love this either. But the DNG gets stacked with your original in Lightroom, which keeps things reasonably organized. Once you’re ready, click Enhance and let it run.
Step 6: Evaluate the Result Against Your Plugin Workflow
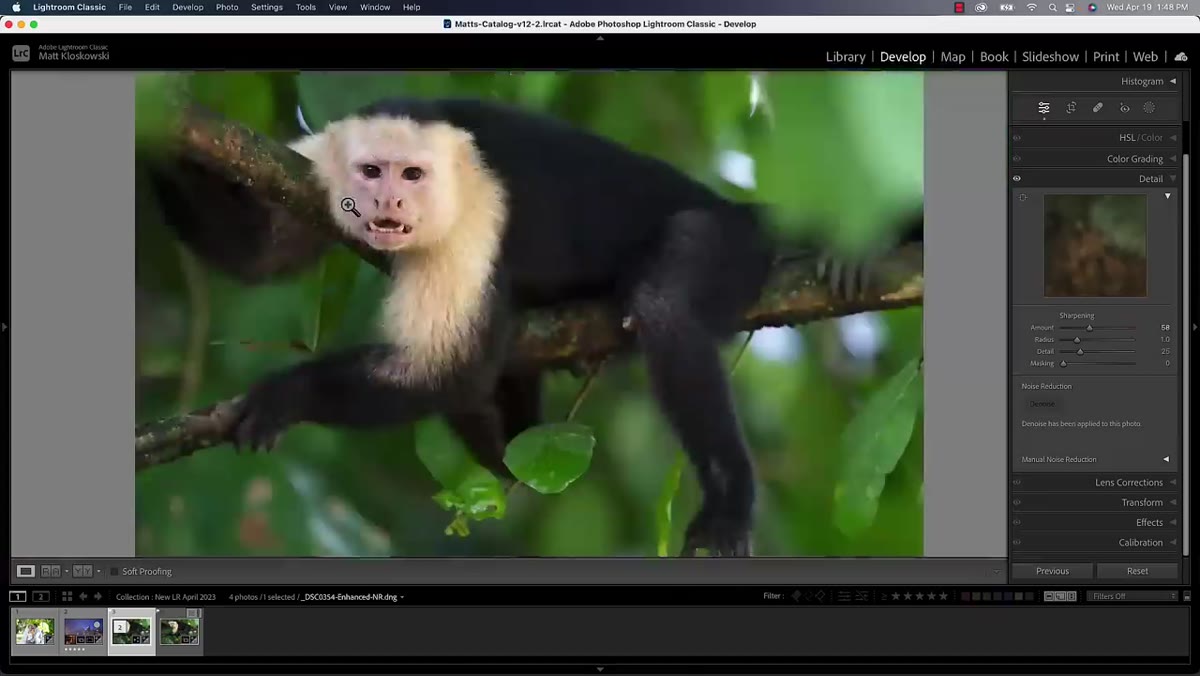 Comparison between plugin result and new Denoise output
This is where the tutorial gets genuinely interesting. Matt compares the new Adobe Denoise against a third-party plugin he’s been using, looking at real edges, real detail, real noise at 12,000 ISO. The results are close enough to have a real conversation about. His conclusion is nuanced: Adobe’s Denoise is very good, competitive with the dedicated tools, but not a clear knockout winner in every situation. For a lot of photographers, especially those who want to simplify their workflow and stay inside Lightroom, it’s more than good enough. For pixel-peeping perfectionists with specific edge cases, the plugin might still earn its place.
Comparison between plugin result and new Denoise output
This is where the tutorial gets genuinely interesting. Matt compares the new Adobe Denoise against a third-party plugin he’s been using, looking at real edges, real detail, real noise at 12,000 ISO. The results are close enough to have a real conversation about. His conclusion is nuanced: Adobe’s Denoise is very good, competitive with the dedicated tools, but not a clear knockout winner in every situation. For a lot of photographers, especially those who want to simplify their workflow and stay inside Lightroom, it’s more than good enough. For pixel-peeping perfectionists with specific edge cases, the plugin might still earn its place.
A Note From Someone Who Shoots at 6400 ISO Way Too Often
I’ve run this on maybe two dozen of my own shots since watching Matt’s tutorial. High ISO coffee shop stuff, a few outdoor portraits in bad light, some architecture interiors where I was pushing my camera further than I should have. The results are consistently solid. What I didn’t expect was how well it handles color noise specifically. The chroma splotching that makes shadows look like a watercolor gone wrong, that stuff cleans up beautifully.
The one thing I’d add is this: if you’re working on a client deadline and you have ten noisy selects to process, that DNG creation step adds up. Budget the time. It’s not slow for what it’s doing, but it’s not instant either. I’ve started batching my Denoise processing while I grab coffee, which is how all good Lightroom tasks should be handled anyway.
The single most important takeaway from this tutorial is that 50-60 on the slider is your starting point, not 100. It’s tempting to max it out and call it done, but you’ll almost always land on something that looks more natural if you pull back. Details, grain, and a tiny bit of texture are what separate a photograph from a CGI render.
Watch the full tutorial on YouTube to see Matt’s side-by-side comparisons with the plugin and his full honest verdict on whether Adobe has finally made dedicated noise reduction tools optional.
Comments (2)
Solid advice. Especially the part about taking your time with it.
This is going in my reference folder. Incredibly useful.
Leave a Comment