
There’s a specific kind of Photoshop frustration that doesn’t come from complicated techniques or steep learning curves. It comes from a checkbox. One tiny, innocent-looking checkbox that ships enabled by default and quietly drives people insane until they either stumble across the fix or give up and blame themselves. I’ve watched newer designers spin their wheels on this exact issue, convinced they were doing something fundamentally wrong. They weren’t. The checkbox was just doing its thing.
In this Matt Kloskowski tutorial, Watch the full tutorial on YouTube, Matt calls out the Auto Select option on the Move Tool as one of the worst checkboxes in all of Photoshop. Honestly? Hard to argue. The thing has probably cost the creative community thousands of collective hours of confusion. Once you see what it’s actually doing and why it misfires so easily, turning it off becomes one of the first things you do when setting up Photoshop on a new machine.
The core problem is this: when you’re building up a document with multiple layers, whether that’s a sky replacement, a sharpening layer, a logo, a texture pass, whatever, you expect the layer you clicked in the Layers panel to be the one that moves when you drag. Auto Select breaks that assumption. Instead of respecting your panel selection, it guesses which layer you intended to interact with based on where you click on the canvas. Sometimes it guesses right. Often it doesn’t. And in a complex document, “often it doesn’t” translates directly into accidental shifts, misaligned composites, and a mounting suspicion that Photoshop is somehow haunted.
Step 1: Select the Move Tool
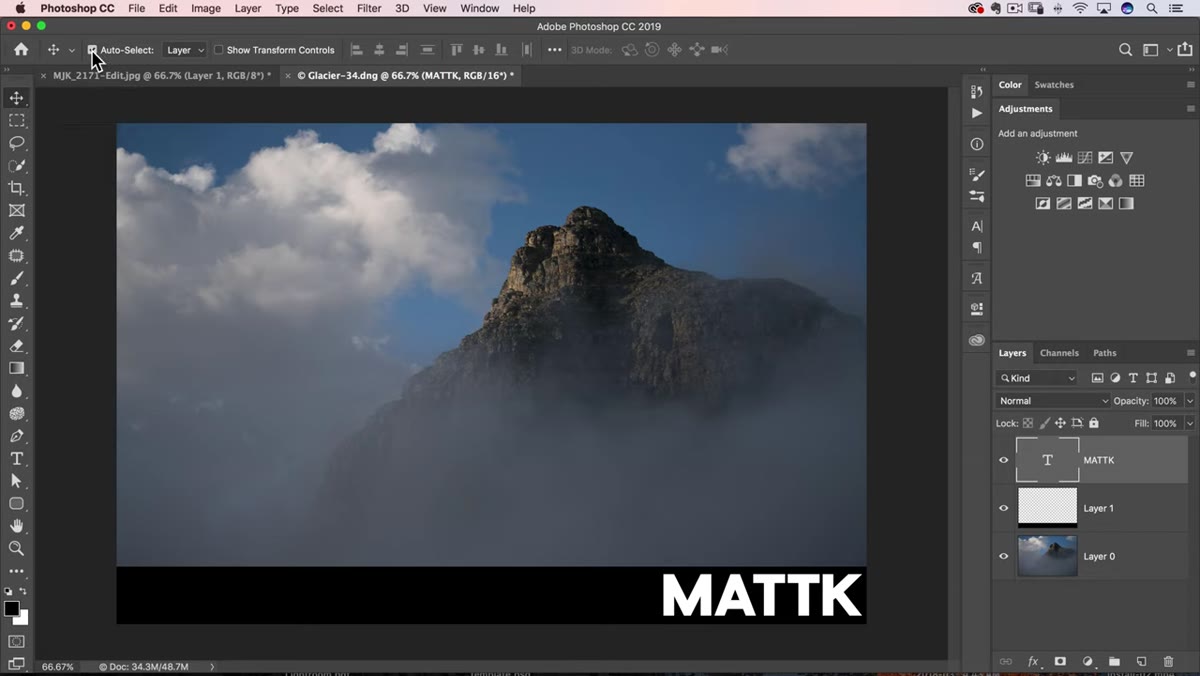 Move Tool selected, options bar visible at top of screen
Grab the Move Tool from the toolbar on the left side of the screen, or just tap V on your keyboard. Once it’s active, your attention goes straight to the options bar running along the top of the screen. This is where the offending checkbox lives.
Move Tool selected, options bar visible at top of screen
Grab the Move Tool from the toolbar on the left side of the screen, or just tap V on your keyboard. Once it’s active, your attention goes straight to the options bar running along the top of the screen. This is where the offending checkbox lives.
Step 2: Locate the Auto Select Checkbox
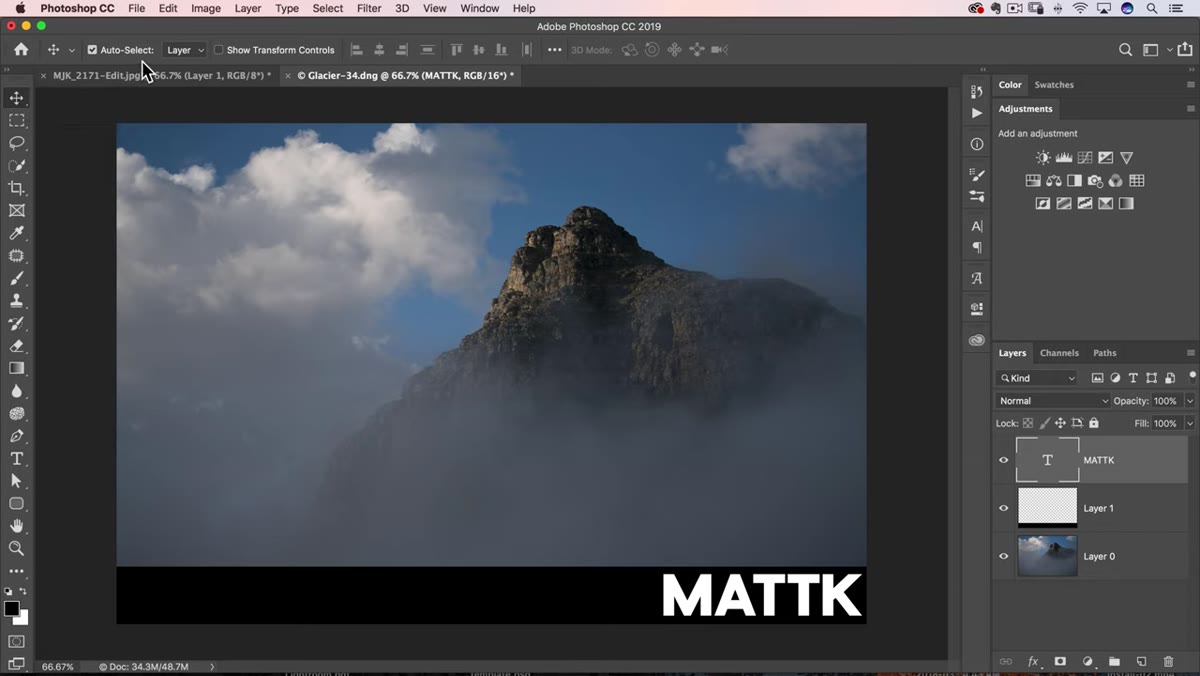 Auto Select checkbox highlighted in the options bar
Look to the far left of the options bar. You’ll see a checkbox labeled “Auto Select” next to a dropdown that probably says “Layer.” This is it. This is the one. If you’ve been using Photoshop for a while and never noticed it, that’s completely normal. It hides in plain sight.
Auto Select checkbox highlighted in the options bar
Look to the far left of the options bar. You’ll see a checkbox labeled “Auto Select” next to a dropdown that probably says “Layer.” This is it. This is the one. If you’ve been using Photoshop for a while and never noticed it, that’s completely normal. It hides in plain sight.
The dropdown next to it gives you the option to auto-select by Layer or by Group. Both modes have the same core behavior: clicking on the canvas overrides whatever you’ve selected in the Layers panel and targets a layer based on pixel content at the point you clicked.
Step 3: See What Auto Select Actually Does
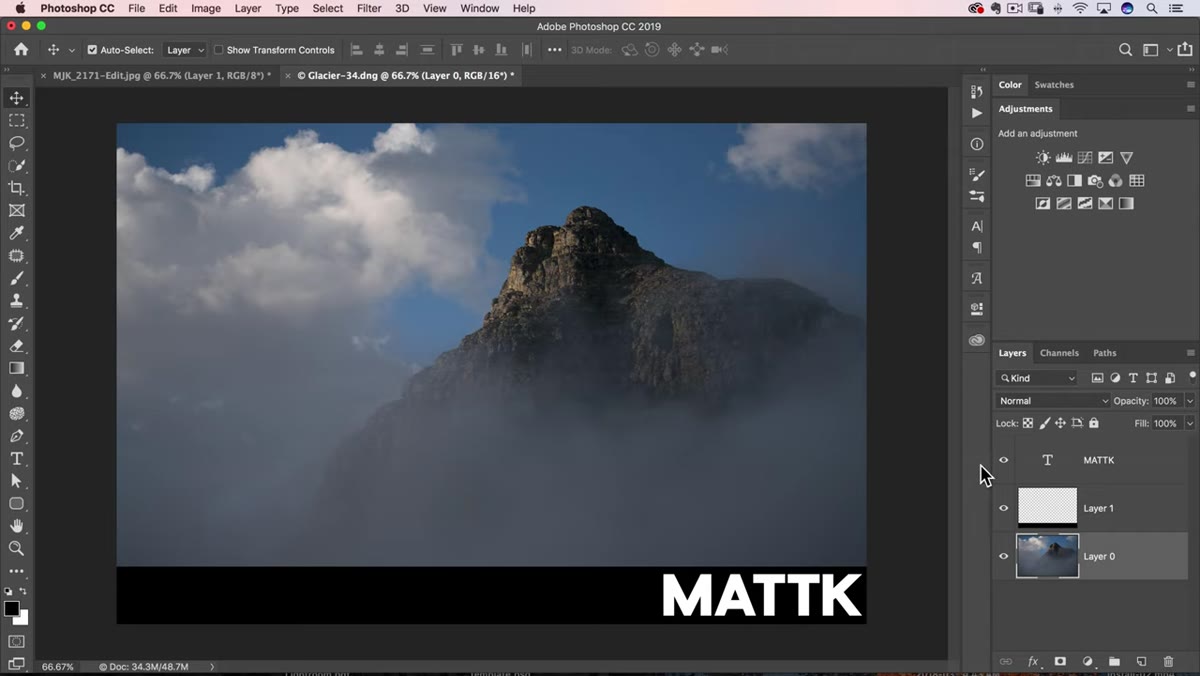 Clicking canvas causes unexpected layer to become selected and move
Before you turn it off, it’s worth actually watching it misbehave so you understand what you’ve been dealing with. With Auto Select enabled, click somewhere on your canvas that overlaps with a layer you didn’t intend to target. Photoshop will select that layer instead of the one you had active in the panel, and if you’re dragging at all, it’ll move it.
Clicking canvas causes unexpected layer to become selected and move
Before you turn it off, it’s worth actually watching it misbehave so you understand what you’ve been dealing with. With Auto Select enabled, click somewhere on your canvas that overlaps with a layer you didn’t intend to target. Photoshop will select that layer instead of the one you had active in the panel, and if you’re dragging at all, it’ll move it.
Matt demonstrates this with a simple document containing a background image and a logo element. Clicking slightly off-target onto a dark bar auto-selects the bar’s layer and drags it out of position. In a three-layer document that’s annoying. In a 20-layer composite, that’s a real problem. The layer you accidentally grabbed might not even be immediately visible, which means you can move something without realizing it until much later.
Step 4: Notice the Default-On Problem
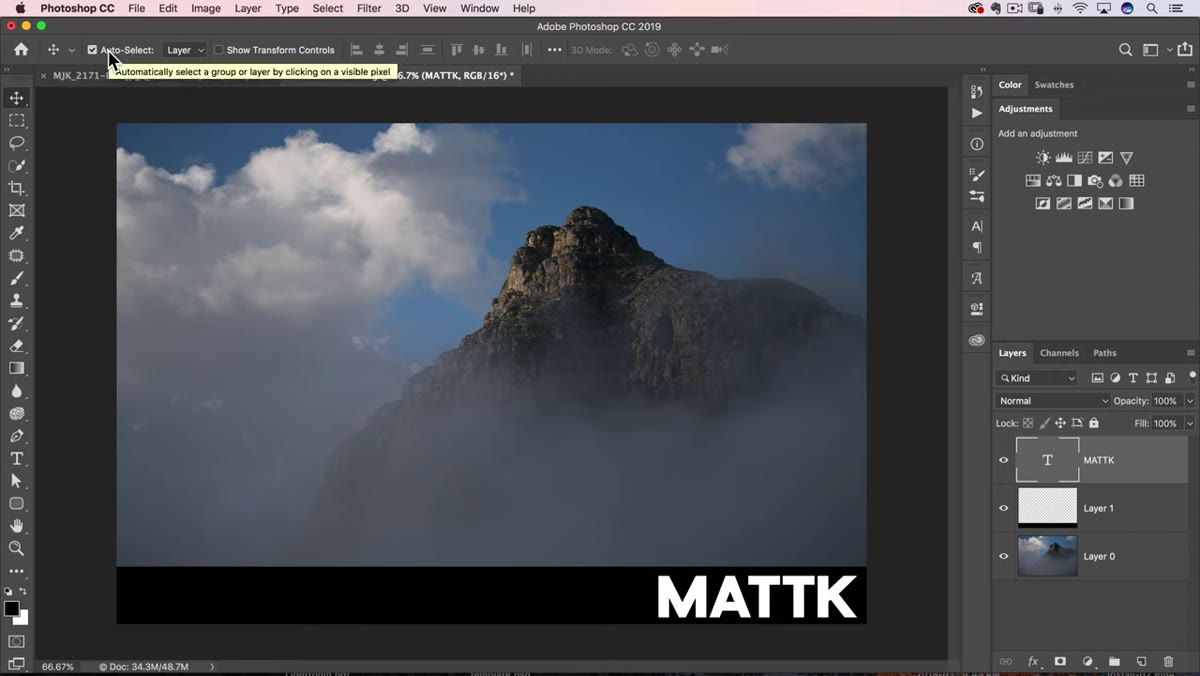 Auto Select checkbox shown checked/enabled by default
Here’s the part that should probably come with an apology from someone. Auto Select is turned on by default. You didn’t enable it. It was already there when you installed Photoshop, quietly waiting to undermine your layer workflow. Matt points this out specifically because the most common version of this frustration is someone who can’t figure out why their carefully selected layer isn’t the one that moves. The answer is almost always this checkbox.
Auto Select checkbox shown checked/enabled by default
Here’s the part that should probably come with an apology from someone. Auto Select is turned on by default. You didn’t enable it. It was already there when you installed Photoshop, quietly waiting to undermine your layer workflow. Matt points this out specifically because the most common version of this frustration is someone who can’t figure out why their carefully selected layer isn’t the one that moves. The answer is almost always this checkbox.
If you’ve ever clicked somewhere on a photo and had a completely different layer jump to the top of your Layers panel, now you know why. It wasn’t a bug. It wasn’t user error. It was Auto Select doing exactly what it’s designed to do, just not what you actually needed.
Step 5: Turn It Off
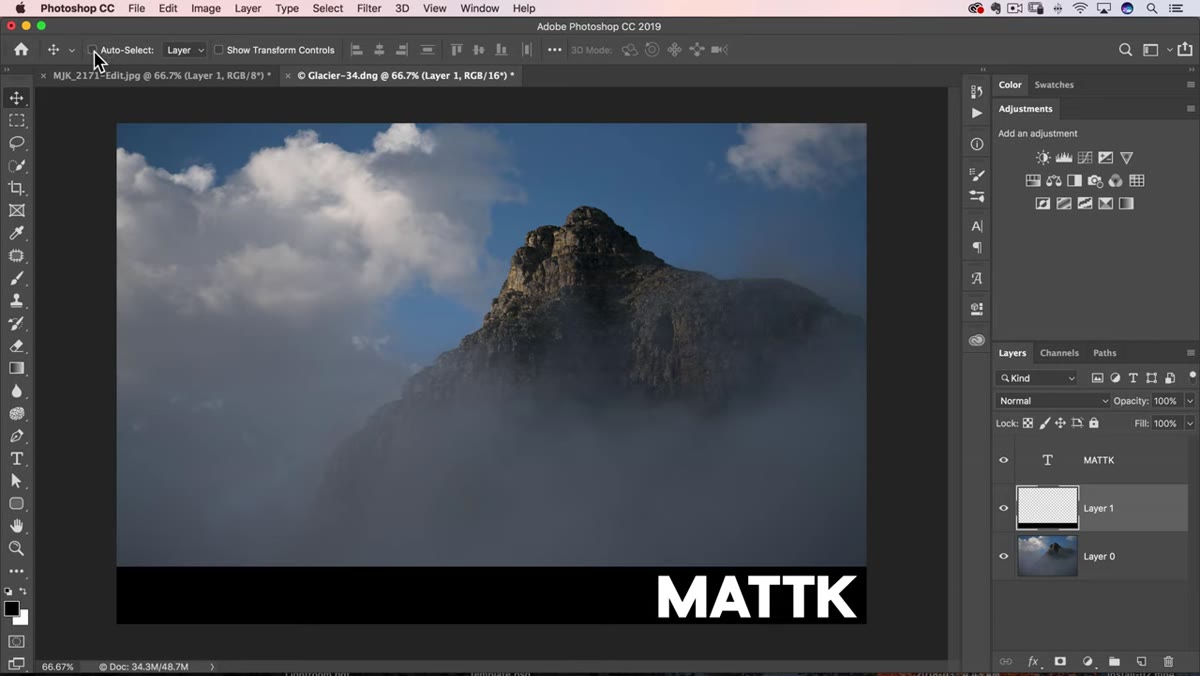 Auto Select checkbox being unchecked in the options bar
Click the checkbox to uncheck it. That’s the whole fix. One click. With Auto Select disabled, the Move Tool goes back to behaving the way most people intuitively expect: the active layer in your Layers panel is the layer that moves, regardless of where on the canvas you click or drag. You’re back in control of your own document.
Auto Select checkbox being unchecked in the options bar
Click the checkbox to uncheck it. That’s the whole fix. One click. With Auto Select disabled, the Move Tool goes back to behaving the way most people intuitively expect: the active layer in your Layers panel is the layer that moves, regardless of where on the canvas you click or drag. You’re back in control of your own document.
If you have multiple monitors or tend to work distracted (no judgment, I’m writing this from a coffee shop with three other browser tabs open), it’s also worth noting that this setting doesn’t persist in a way that’s visually obvious. Until it becomes muscle memory to check, you might find it has crept back on. Just build a habit of glancing at the options bar when the Move Tool is active.
Step 6: Understand the Keyboard Workaround
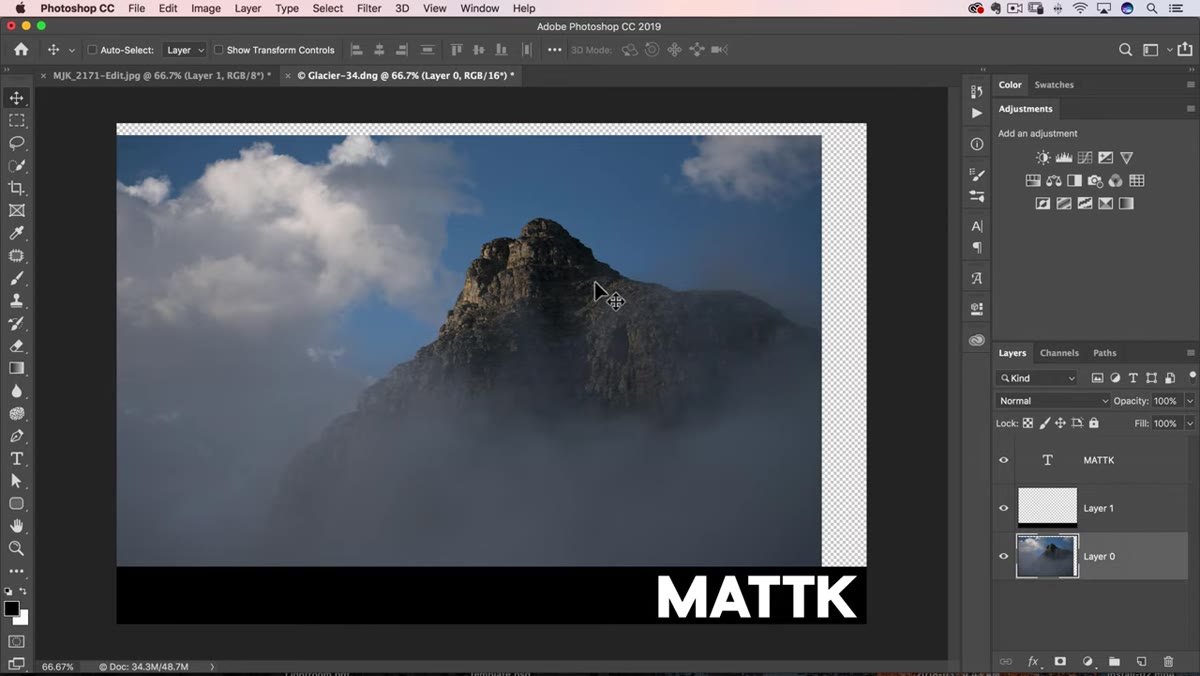 Move Tool active with Auto Select off, layer panel showing correct target
Even with Auto Select off, there are moments where you do want to quickly click-to-select a different layer without going to the panel. Photoshop has you covered. Hold Ctrl (Windows) or Cmd (Mac) while clicking on the canvas and you get a temporary Auto Select behavior. It grabs the topmost layer with pixel content at that click point. The moment you release the modifier key, you’re back to your normal, predictable layer behavior.
Move Tool active with Auto Select off, layer panel showing correct target
Even with Auto Select off, there are moments where you do want to quickly click-to-select a different layer without going to the panel. Photoshop has you covered. Hold Ctrl (Windows) or Cmd (Mac) while clicking on the canvas and you get a temporary Auto Select behavior. It grabs the topmost layer with pixel content at that click point. The moment you release the modifier key, you’re back to your normal, predictable layer behavior.
This is the best of both worlds. You get the manual targeting that keeps your composites from falling apart, with an on-demand override for when you genuinely want to click-select a layer fast.
A Note From Someone Who Learned This the Hard Way
I spent an embarrassing amount of time early in my freelance career blaming my own clumsiness for layers that seemed to teleport around my canvas. Someone hired me to put together a marketing composite, multiple layers, precise alignment, the whole deal, and I kept noticing that elements were slightly off position in ways I couldn’t explain. I thought I was accidentally nudging things with the arrow keys. I was not. Auto Select was doing its thing every time I clicked to check my work.
Turning this off didn’t just stop the problem. It changed how I thought about layer workflow in general. Your Layers panel is your source of truth. The canvas should respond to what you’ve selected there, not try to guess for you. Once I locked in that mental model, compositing got significantly less maddening.
The single most important thing to take away here: if you or someone you know is experiencing mysterious layer movement in Photoshop, check the Auto Select checkbox on the Move Tool before assuming anything else is wrong. It’s almost always that. Uncheck it, build the Ctrl/Cmd click habit for the rare moments you want it, and move on with your life.
Watch the full tutorial on YouTube - Matt walks through a live example that makes the problem immediately obvious, especially if you’re more of a visual learner.
Comments
Leave a Comment