I have strong opinions about keyboard shortcuts. Possibly too strong. Ask anyone who’s sat near me at a coffee shop while I’m working and they’ll tell you I mutter at my keyboard like it owes me money. So when I stumbled onto a Matt Kloskowski tutorial about the Shift key in Photoshop, I figured I’d skim it and move on. Instead I learned something that made me question six years of muscle memory, and honestly? I’m glad it happened.
The thing about Photoshop is that it’s been around long enough that a lot of us learned it in layers, picking up habits from whoever taught us and never really questioning them. The Shift key is one of those things. You use it constantly, you think you know what it does, and then someone like Matt points out there’s a whole preference buried in the settings that changes the behavior entirely. Watch the full tutorial on YouTube if you want to see all of this in action, but I’m going to walk you through each tip so you can follow along without pausing and rewinding every thirty seconds.
Step 1: Understand How Free Transform Changed (And How to Change It Back)
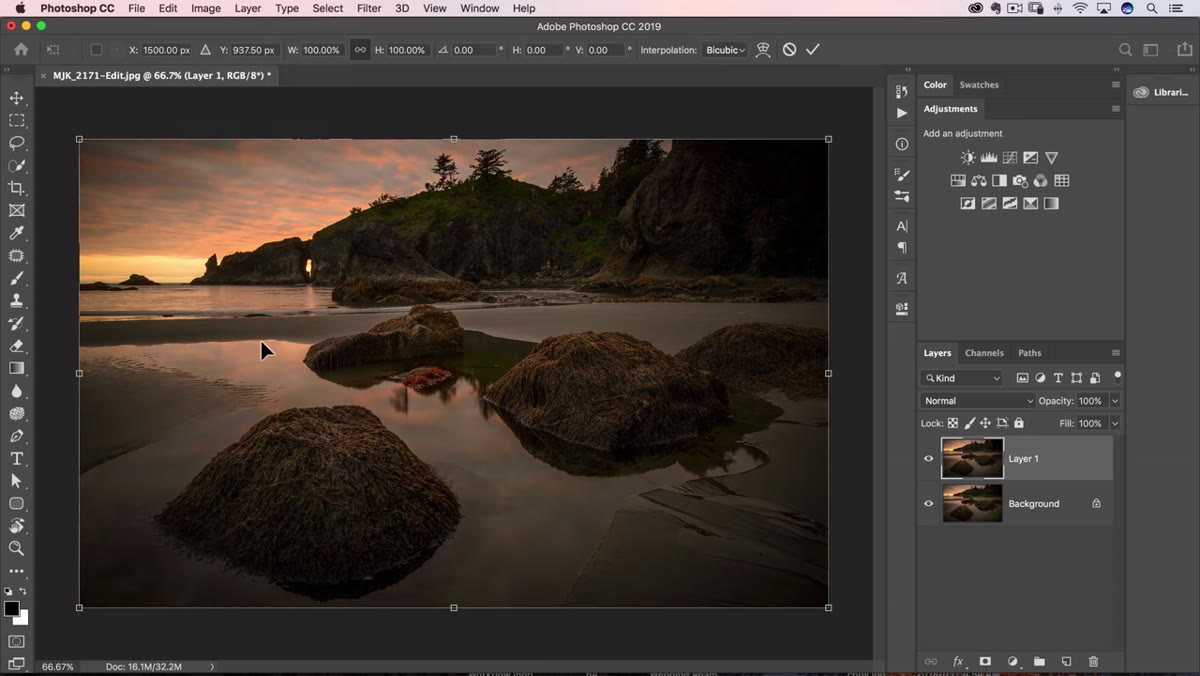 Free Transform handle being dragged without Shift key held
If you’ve updated Photoshop in the last couple of years and wondered why your images started squishing weirdly when you resized them, this is what happened. Adobe flipped the default behavior of the Shift key during Free Transform. In the old days, you had to hold Shift while dragging a corner handle to lock the proportions and keep your image from distorting. Now, proportions are constrained by default, no key held down. Holding Shift now does the opposite, it lets you distort freely.
Free Transform handle being dragged without Shift key held
If you’ve updated Photoshop in the last couple of years and wondered why your images started squishing weirdly when you resized them, this is what happened. Adobe flipped the default behavior of the Shift key during Free Transform. In the old days, you had to hold Shift while dragging a corner handle to lock the proportions and keep your image from distorting. Now, proportions are constrained by default, no key held down. Holding Shift now does the opposite, it lets you distort freely.
It’s a sensible change when you think about it. Most design apps work this way. Figma, Illustrator, even the transform tool in a dozen other programs don’t require you to hold a modifier just to resize something without wrecking it. But if your hands have been doing the Shift-drag dance since CS3, it feels completely wrong at first. Give it a week. It becomes natural.
Step 2: Switch Back to Legacy Behavior If You Need To
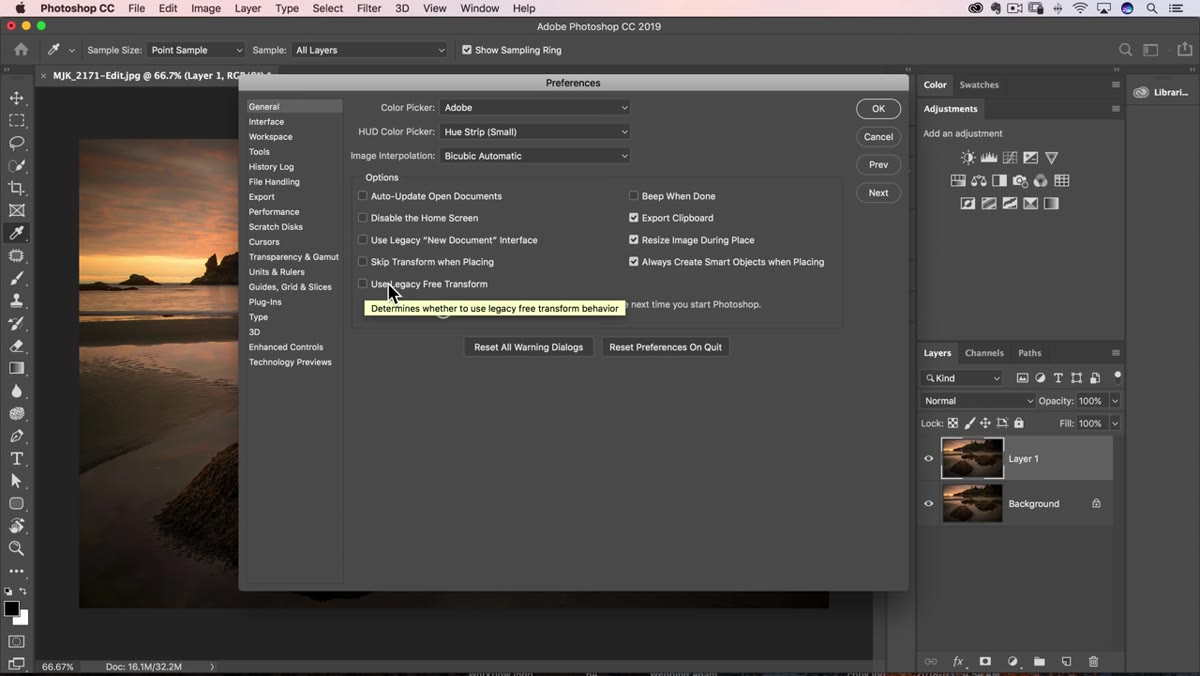 General Preferences panel with “Use Legacy Free Transform” checkbox visible
If the new default is genuinely messing with your workflow, especially if you’re working on a team where files move between people using different setups, there’s a clean fix inside Photoshop’s preferences. Go to Edit > Preferences > General (on Mac that’s Photoshop > Preferences > General) and look for the checkbox labeled “Use Legacy Free Transform.” Tick it, click OK, and you’re back to the old behavior where Shift constrains and no-Shift distorts.
General Preferences panel with “Use Legacy Free Transform” checkbox visible
If the new default is genuinely messing with your workflow, especially if you’re working on a team where files move between people using different setups, there’s a clean fix inside Photoshop’s preferences. Go to Edit > Preferences > General (on Mac that’s Photoshop > Preferences > General) and look for the checkbox labeled “Use Legacy Free Transform.” Tick it, click OK, and you’re back to the old behavior where Shift constrains and no-Shift distorts.
Matt mentions in the tutorial that he personally kept the new behavior because he’d already gotten used to it, and I’m in the same camp now. But I’ve recommended the legacy checkbox to a couple of older clients who run small design studios and couldn’t afford to retrain the muscle memory of their whole team. No shame in using it.
Step 3: Use Shift to Move Layers in Straight Lines
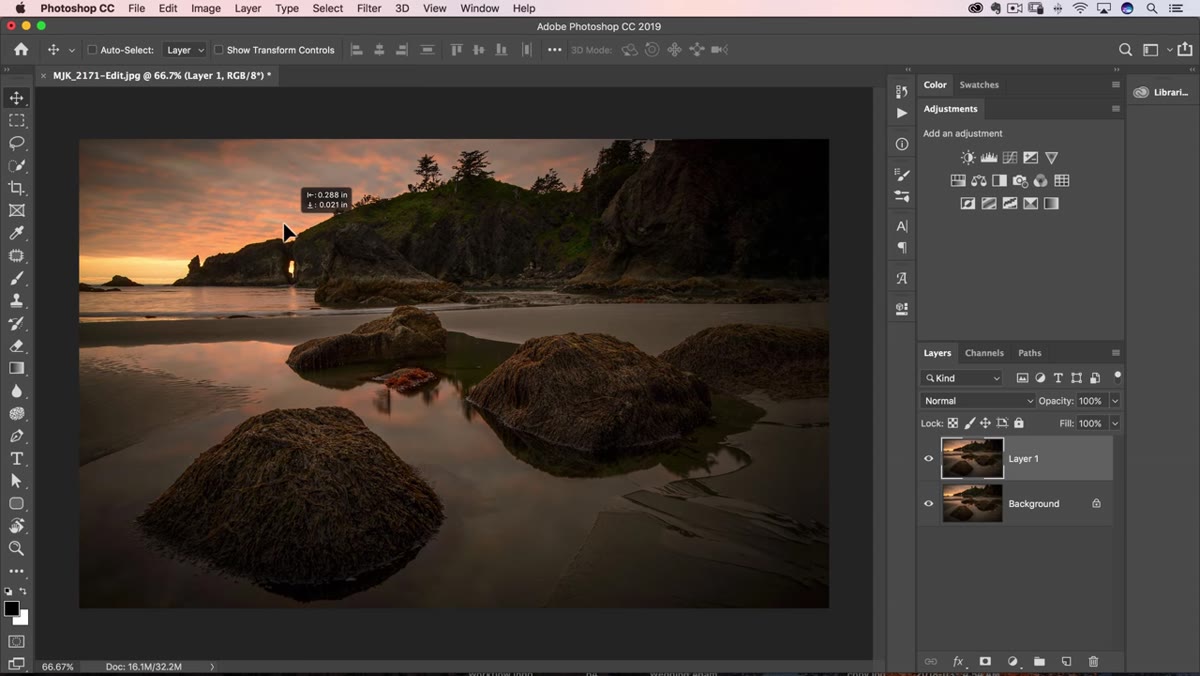 Layer being moved horizontally in a straight line with Shift held
This one isn’t new, but it’s the kind of thing that saves you from a lot of unnecessary nudging and eyeballing. When you’ve got the Move tool active and you’re dragging a layer around the canvas, holding Shift locks your movement to a straight horizontal or vertical axis. You can slide something perfectly left or right, or perfectly up or down, without it drifting even a pixel off course.
Layer being moved horizontally in a straight line with Shift held
This one isn’t new, but it’s the kind of thing that saves you from a lot of unnecessary nudging and eyeballing. When you’ve got the Move tool active and you’re dragging a layer around the canvas, holding Shift locks your movement to a straight horizontal or vertical axis. You can slide something perfectly left or right, or perfectly up or down, without it drifting even a pixel off course.
It works on anything you can move, including text layers. If you’ve ever tried to reposition a headline by dragging it and ended up with it sitting slightly crooked on the page, this is your fix. Grab the Move tool, hold Shift, drag. Perfectly straight every time. It’s one of those things that sounds minor until you realize how often you were overcompensating with the arrow keys afterward just to get things lined up.
Step 4: Try Shift-Moving With Duplicated Layers
 Two duplicate layers visible in the Layers panel before Shift-move demonstration
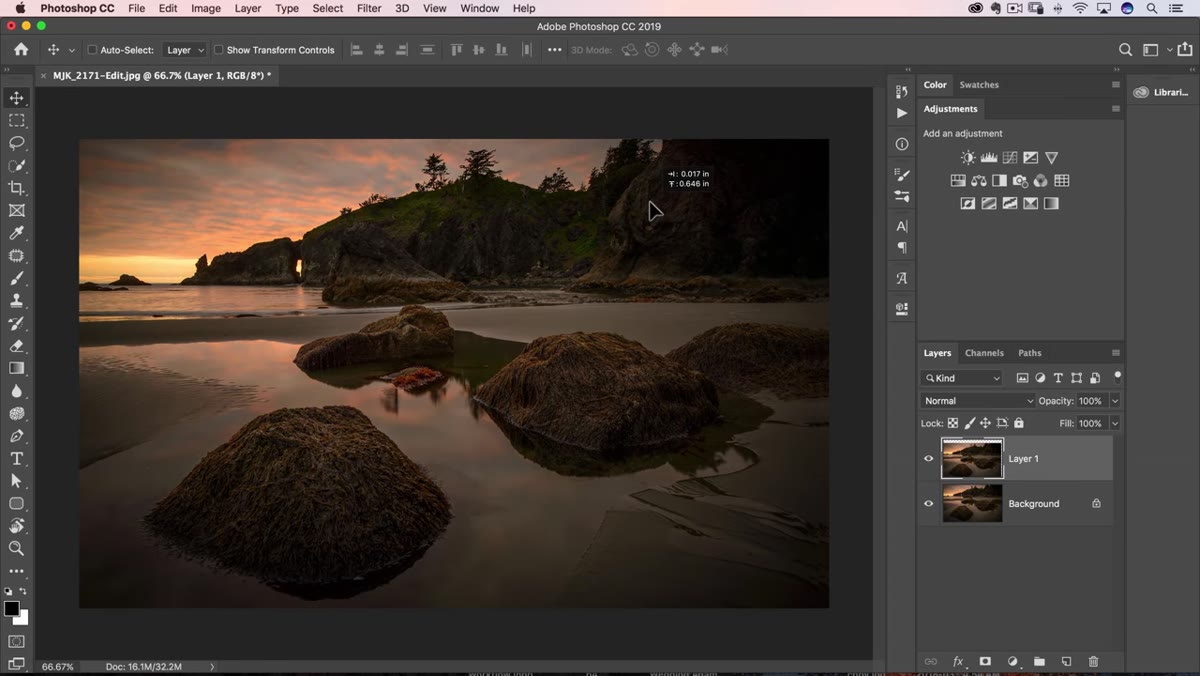
The Shift-to-constrain movement trick becomes especially useful when you’re working with duplicated layers. Say you’ve got a design element you need to place directly below the original, or you’re building a pattern that needs to repeat at a fixed horizontal interval. Duplicate your layer (Cmd/Ctrl + J), grab the Move tool, hold Shift, and drag. The copy moves in a clean straight line, making it much easier to line things up before you bring in guides or the Align tools.
Two duplicate layers visible in the Layers panel before Shift-move demonstration
The Shift-to-constrain movement trick becomes especially useful when you’re working with duplicated layers. Say you’ve got a design element you need to place directly below the original, or you’re building a pattern that needs to repeat at a fixed horizontal interval. Duplicate your layer (Cmd/Ctrl + J), grab the Move tool, hold Shift, and drag. The copy moves in a clean straight line, making it much easier to line things up before you bring in guides or the Align tools.
This is something I use almost daily when I’m building out social media graphics or ad sets where elements need to repeat at consistent positions across multiple artboards.
Step 5: Turn On “Use Shift Key for Tool Switch” in Preferences
 Tools Preferences panel showing “Use Shift Key for Tool Switch” option
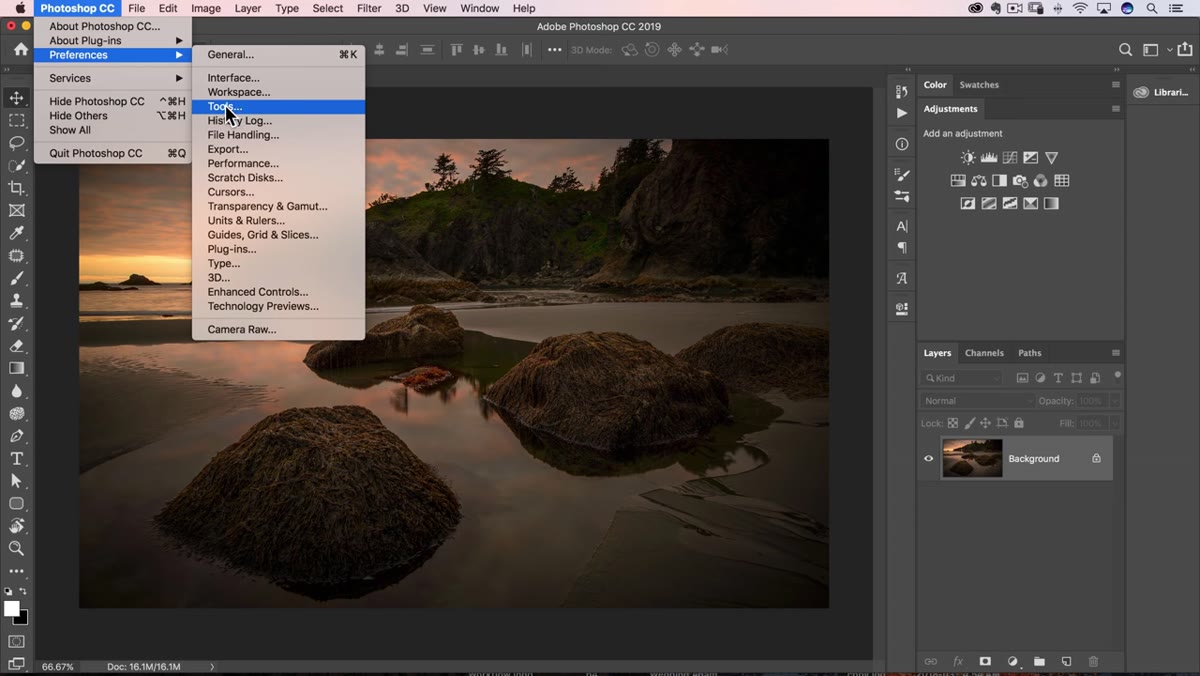
This is the one that Matt flags as the most overlooked, and he’s right. Head to Edit > Preferences > Tools (Photoshop > Preferences > Tools on Mac) and find the option called “Use Shift Key for Tool Switch.” Enable it.
Tools Preferences panel showing “Use Shift Key for Tool Switch” option
This is the one that Matt flags as the most overlooked, and he’s right. Head to Edit > Preferences > Tools (Photoshop > Preferences > Tools on Mac) and find the option called “Use Shift Key for Tool Switch.” Enable it.
Here’s why it matters. A lot of tools in Photoshop share a keyboard shortcut. The Brush tool and the Pencil tool both live under the B key. The Lasso, Polygonal Lasso, and Magnetic Lasso are all under L. Without this preference turned on, tapping that key repeatedly cycles through the tools in that group, which means if you’re painting and you absent-mindedly tap B again, you might suddenly find yourself using the Pencil tool and wondering why your brushstrokes look terrible. With the preference enabled, you have to hold Shift and tap the key to cycle through grouped tools. It adds one key to the action, but it prevents a lot of accidental tool-switching that wastes time and creates mistakes you have to undo.
One Thing I’d Add From My Own Workflow
The tool-switch preference in particular changed how I work, but it took me longer than it should have to find it because I was looking for the problem in the wrong place. For weeks I thought my brush settings were corrupting somehow because the tool behavior kept changing mid-session. Turns out I was just fat-fingering my keyboard and swapping tools without realizing it.
If you run into weird behavior in Photoshop, preferences are almost always worth checking before you go down the rabbit hole of resetting tools or reinstalling anything. There’s a lot in there that Adobe quietly changed or added without making a big announcement about it, and a lot of behavior that seems broken is actually just a setting you haven’t found yet. Make a habit of knowing what’s in your Preferences panels. It’s not glamorous advice, but it’s saved me more hours than any fancy technique.
The biggest takeaway here is simple: the Shift key in Photoshop does more than you think, and at least one of those behaviors probably changed without you noticing. Whether it’s the Free Transform flip, constrained movement, or the tool-switching preference, spending five minutes inside your settings to make sure Photoshop is working the way you expect is absolutely worth it. Watch the full tutorial on YouTube to see Matt walk through each of these live, especially if you’re a visual learner who needs to see the cursor moving to make it click.
Comments
Leave a Comment