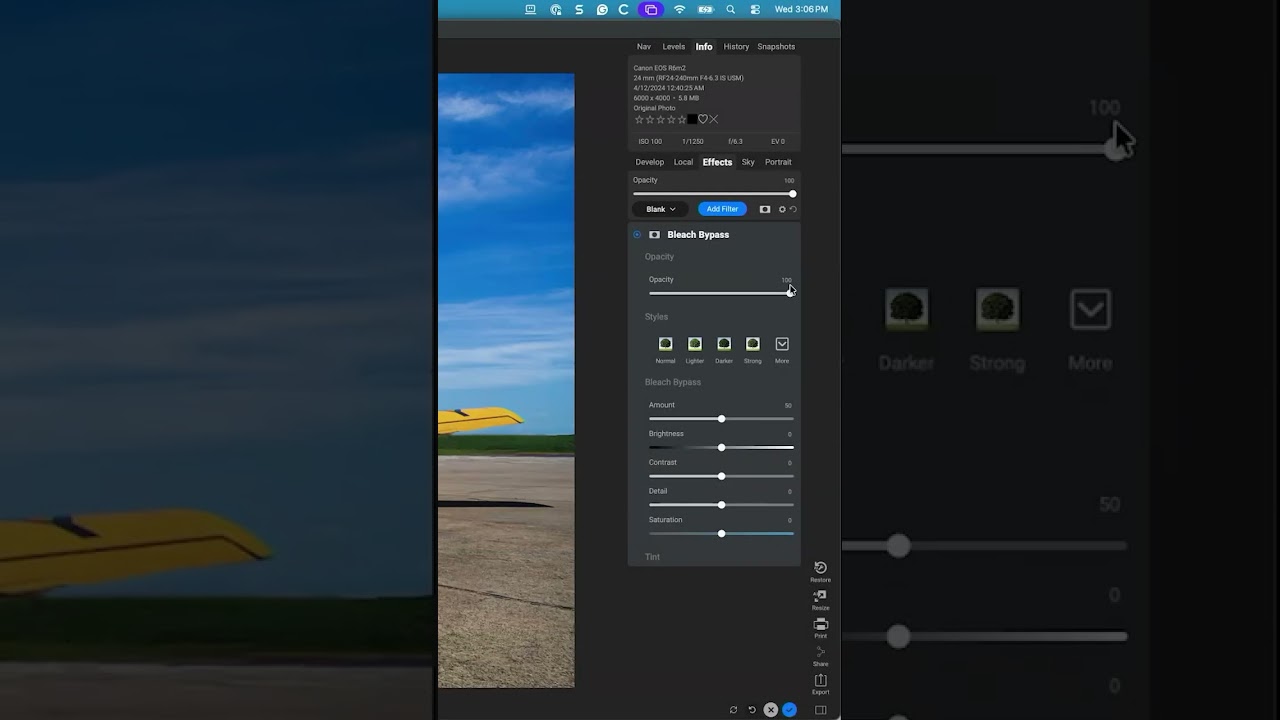
I have a complicated relationship with software updates. Half the time they add something genuinely useful. The other half, they quietly bury a tool I relied on and replace it with nothing, leaving me clicking around menus like I’m searching for my keys at 2am. That’s exactly what happened to me recently with ON1 Photo RAW MAX and the Bleach Bypass filter. I knew it existed. I’d used it before. And then one day it just… wasn’t in the filter list anymore. I assumed they’d killed it and moved on, slightly annoyed.
Turns out I was wrong, and I’m glad someone with more patience than me went looking. In this KelbyOne tutorial, Scott Kelby walks through a quick but genuinely useful tip: how to unhide the legacy filters in ON1 Photo RAW MAX, and then how to use the Bleach Bypass filter specifically to give aviation (and other dramatic) skies a desaturated, high-contrast cinematic look. Watch the full tutorial on YouTube — it’s under two minutes, but I’m going to unpack what’s actually happening and why it’s worth adding to your workflow.
The technique itself is focused on sky editing, which is where Bleach Bypass really shines. If you’re not familiar with bleach bypass as a concept, it’s a classic film processing effect that skips the bleaching stage, leaving silver in the image alongside the dye. The result is crushed blacks, reduced saturation, and a gritty, almost metallic quality. It was everywhere in war films and thrillers in the 90s and 2000s. Applied selectively to a sky, it looks less like a filter and more like the sky was just doing something that day.
Step 1: Open Your Image and Navigate to the Filter Panel
 Aviation image open in ON1 Photo RAW MAX interface
Start with your image open in ON1 Photo RAW MAX. Kelby uses an aviation shot here, something with a strong sky that will reward a more dramatic treatment. Head to the Effects panel, where you’d normally add filters to your image. Look for the “Add Filter” button. This is where the confusion starts for most people, because what you’re looking for won’t be here yet.
Aviation image open in ON1 Photo RAW MAX interface
Start with your image open in ON1 Photo RAW MAX. Kelby uses an aviation shot here, something with a strong sky that will reward a more dramatic treatment. Head to the Effects panel, where you’d normally add filters to your image. Look for the “Add Filter” button. This is where the confusion starts for most people, because what you’re looking for won’t be here yet.
Step 2: Discover That Bleach Bypass is Missing
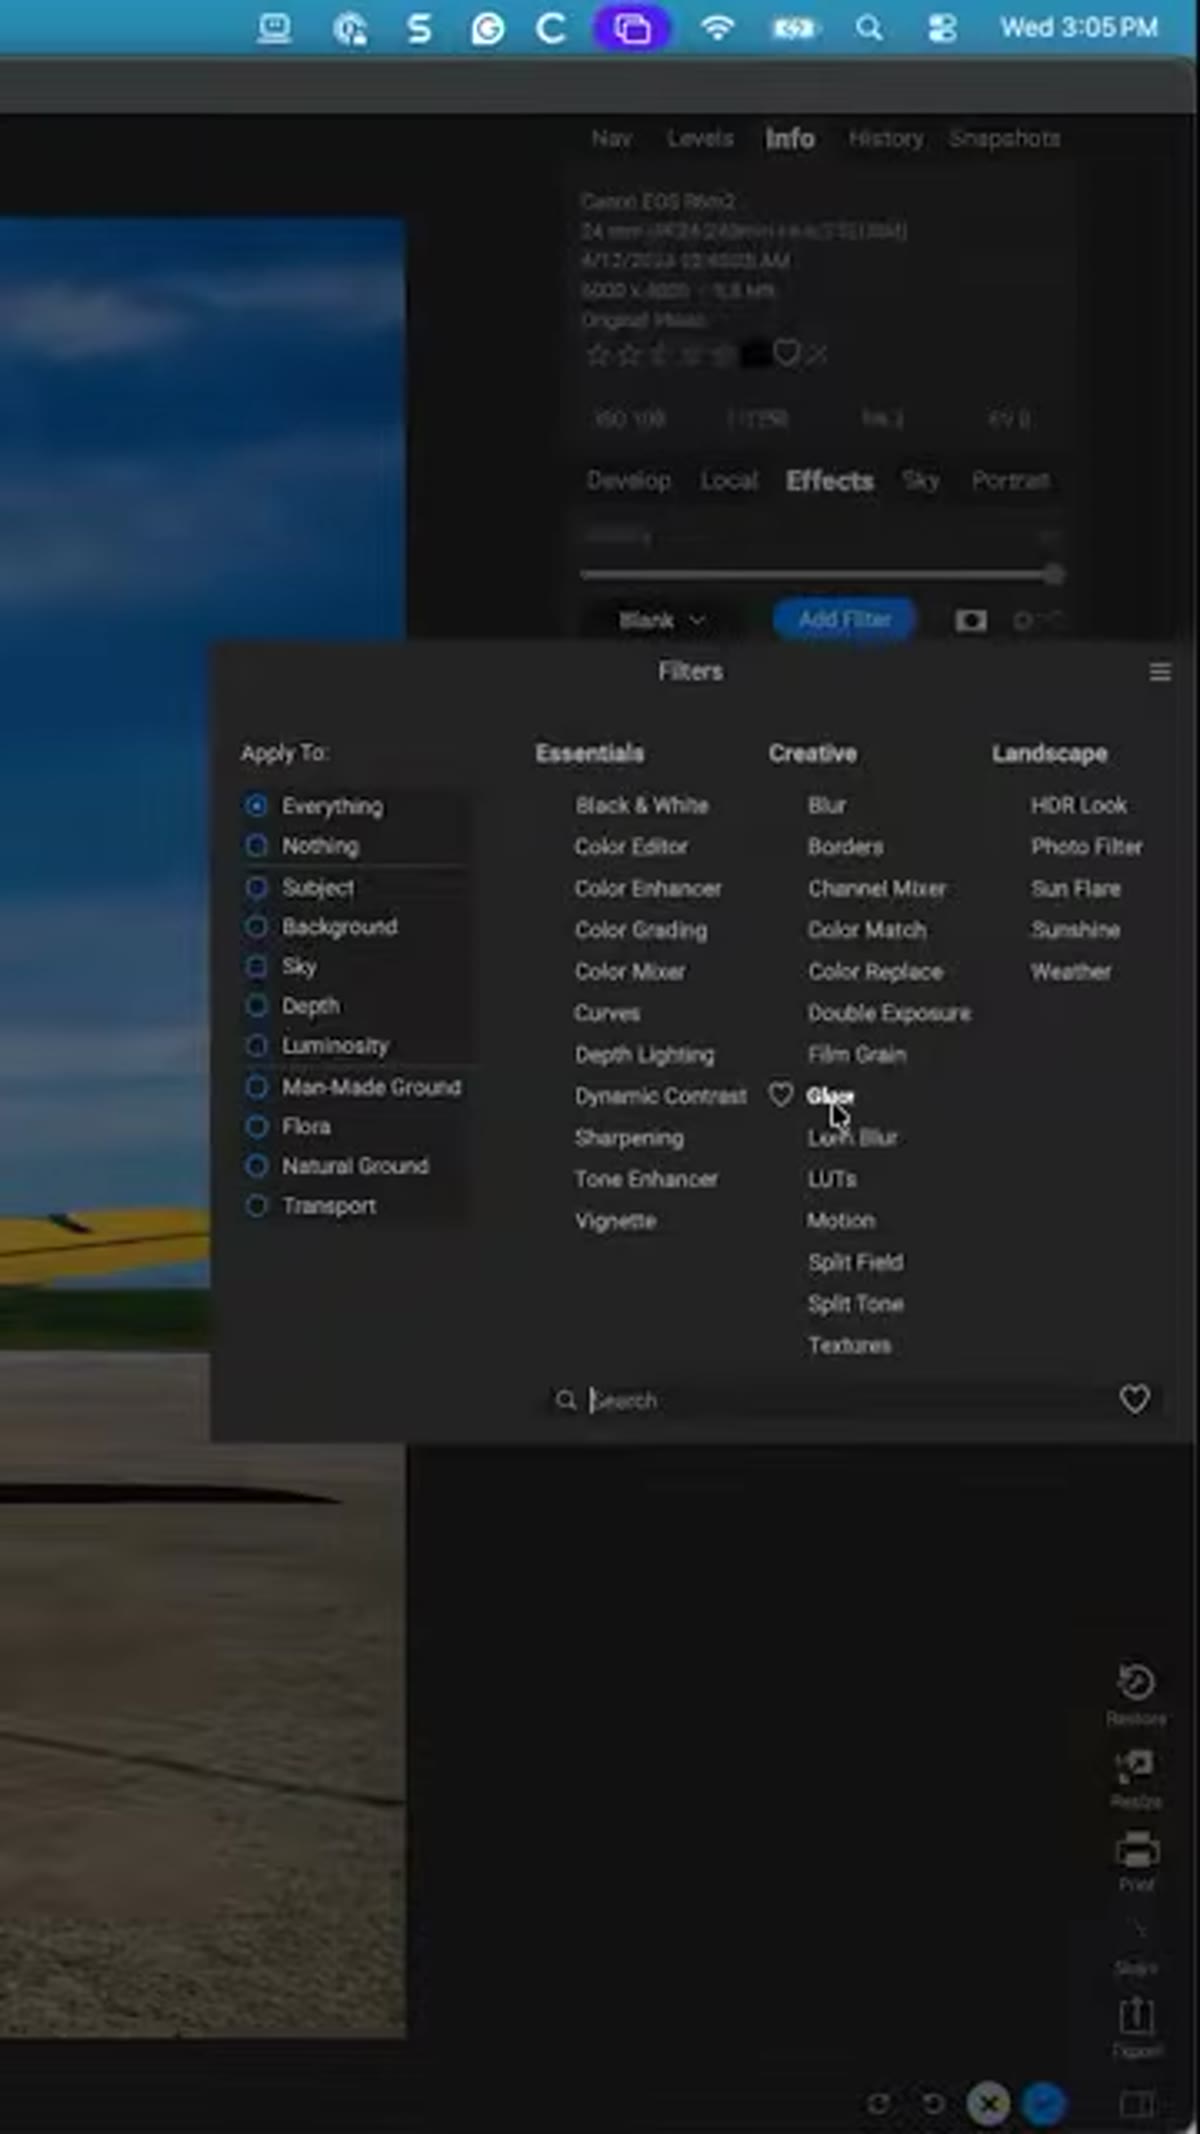 Add Filter menu open, Bleach Bypass not visible in list
Go ahead and scroll through the filter list looking for Bleach Bypass. It’s not there. This is the moment Kelby describes in the tutorial, that minor “wait, what?” panic when a tool you know should exist simply doesn’t appear. This isn’t a bug and it wasn’t removed. ON1 reclassified a group of older filters as “legacy” and hid them from the default view. You haven’t lost them, they’re just tucked away.
Add Filter menu open, Bleach Bypass not visible in list
Go ahead and scroll through the filter list looking for Bleach Bypass. It’s not there. This is the moment Kelby describes in the tutorial, that minor “wait, what?” panic when a tool you know should exist simply doesn’t appear. This isn’t a bug and it wasn’t removed. ON1 reclassified a group of older filters as “legacy” and hid them from the default view. You haven’t lost them, they’re just tucked away.
Step 3: Unhide the Legacy Filters via the Hamburger Menu
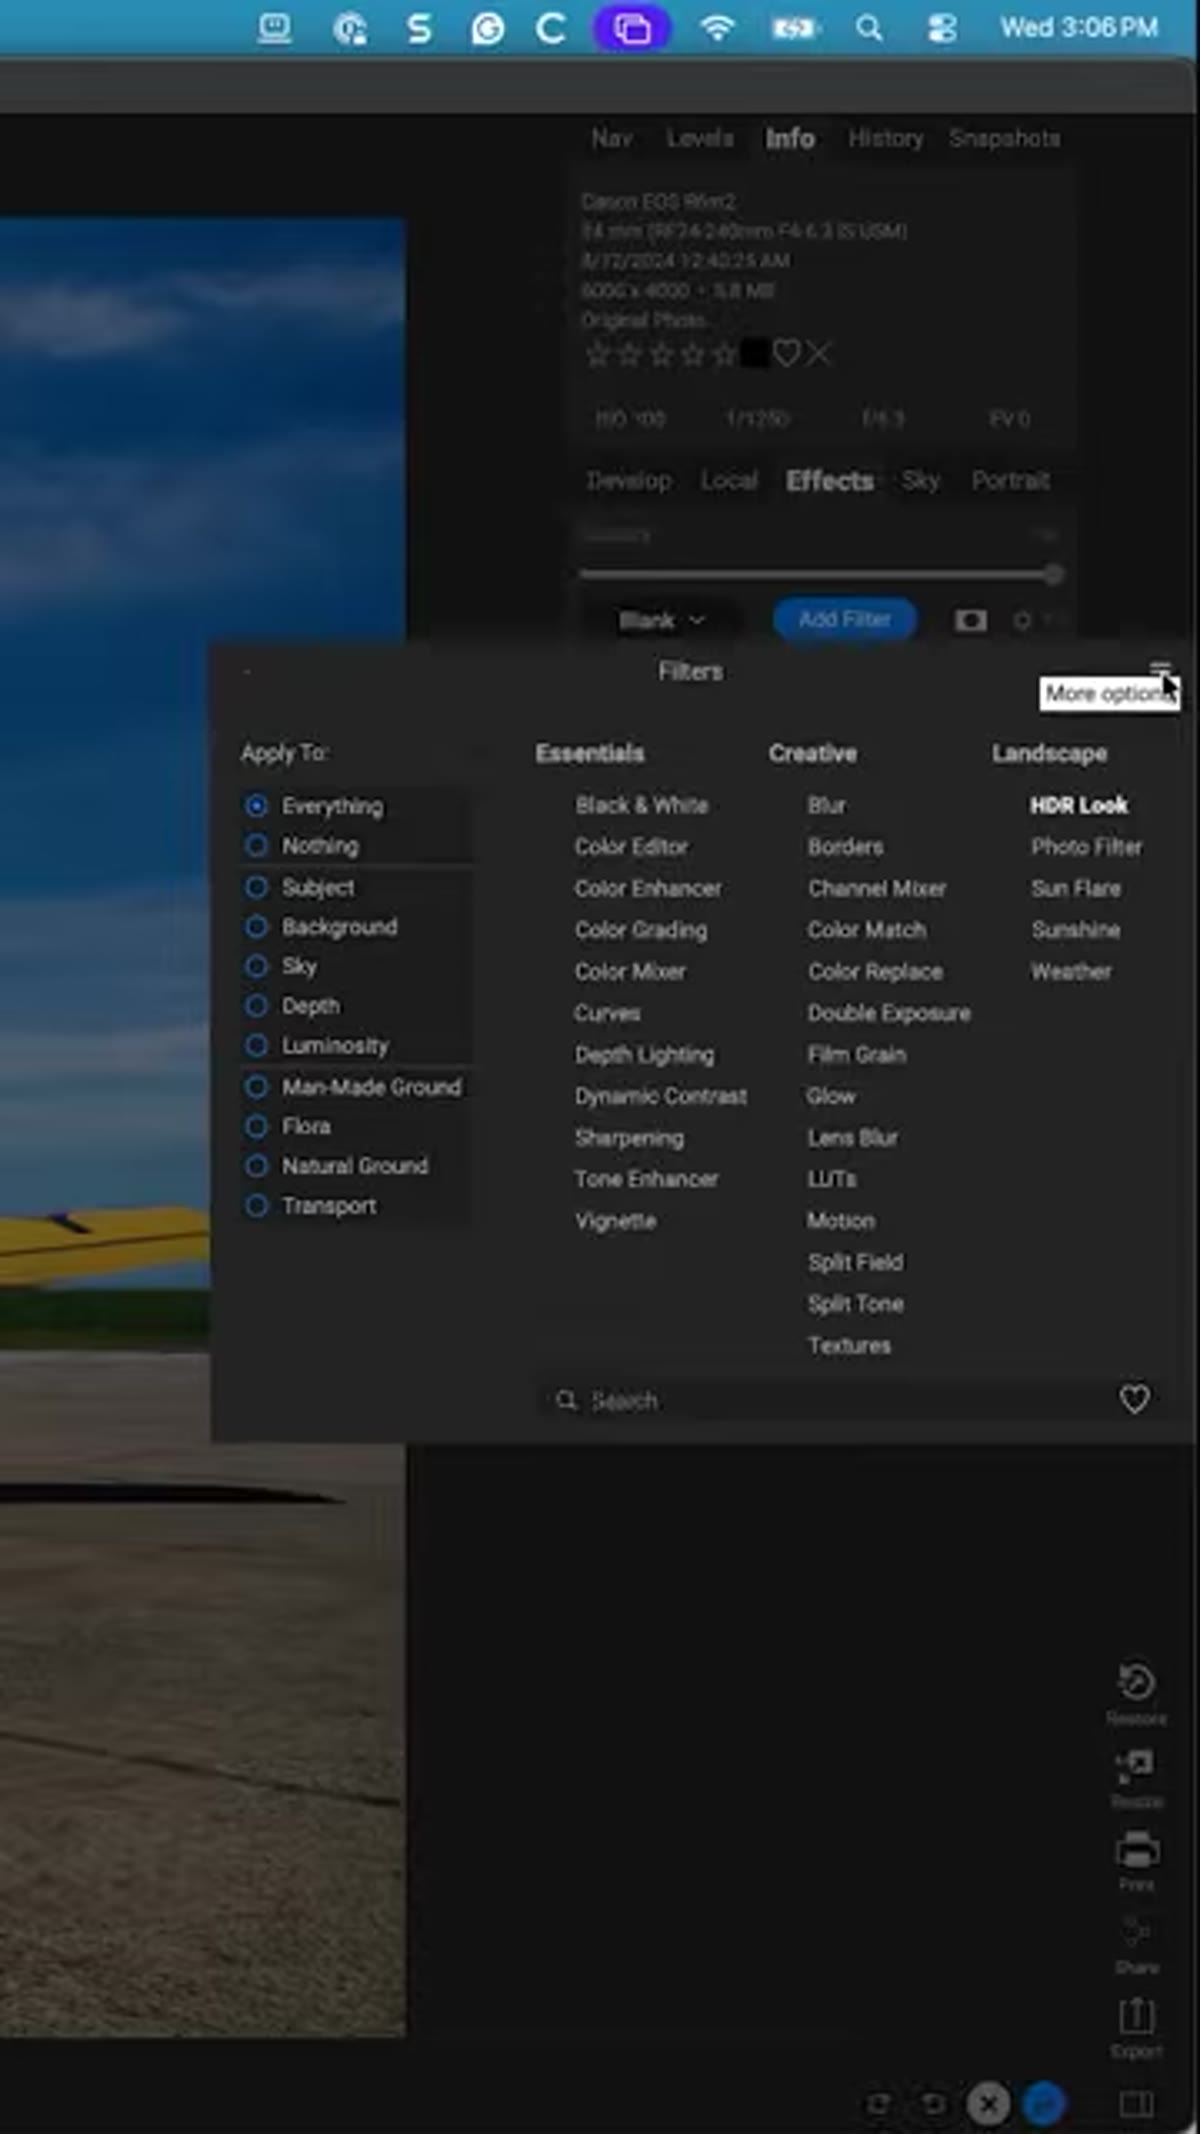 Hamburger menu open in top-right corner of Effects panel
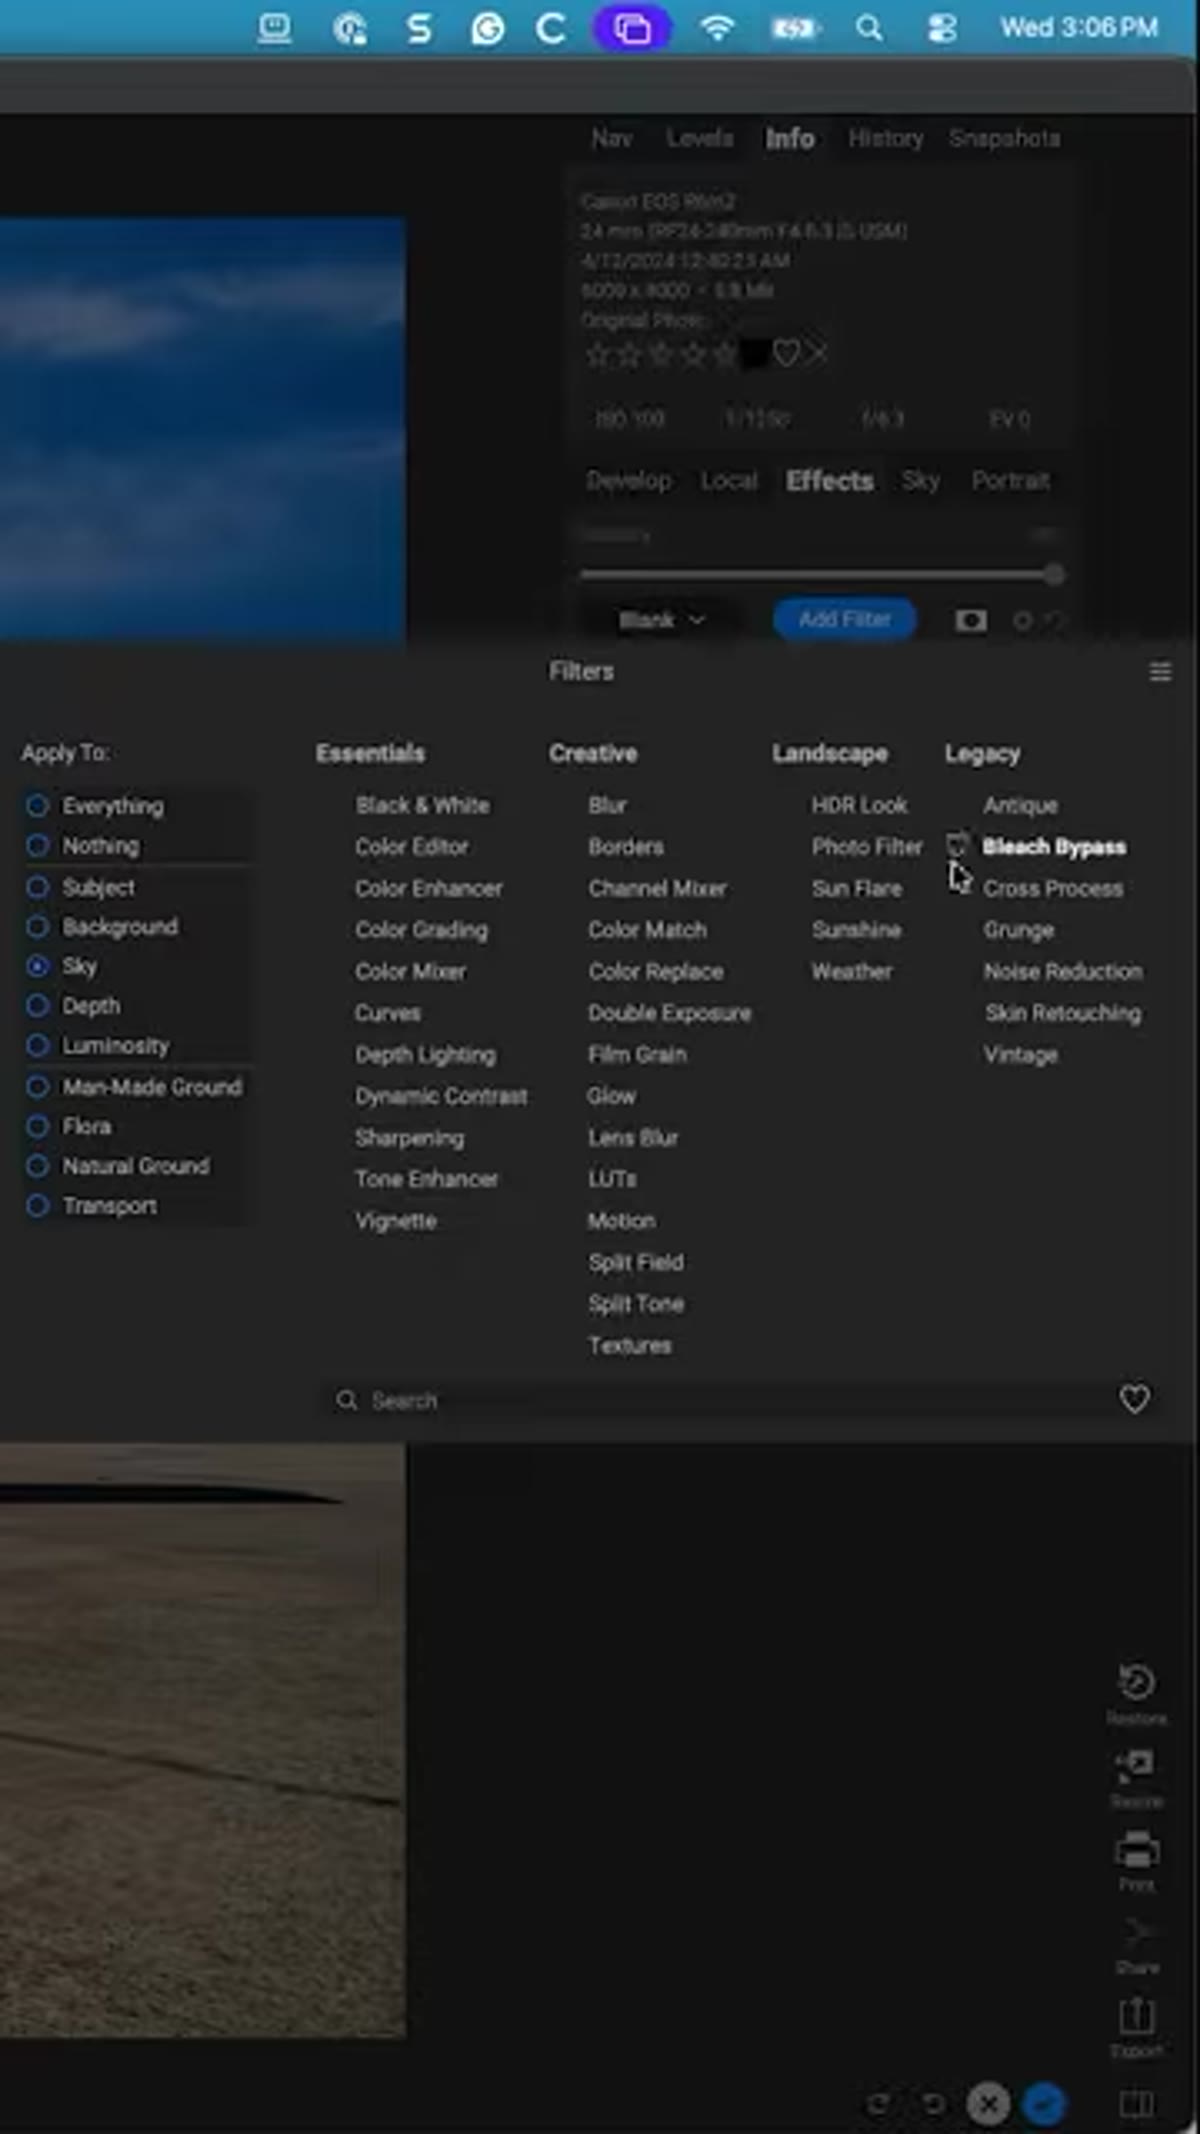
Here’s the fix, and it takes about three seconds. Look to the top-right corner of the Effects panel for a small icon with three horizontal lines, what most people call the hamburger menu. Click that. In the dropdown that appears, you’ll see an option that says “Show Legacy Filters.” Click it. The filter list will immediately expand to include the older filters that had been hidden, and Bleach Bypass will now be visible in the list.
Hamburger menu open in top-right corner of Effects panel
Here’s the fix, and it takes about three seconds. Look to the top-right corner of the Effects panel for a small icon with three horizontal lines, what most people call the hamburger menu. Click that. In the dropdown that appears, you’ll see an option that says “Show Legacy Filters.” Click it. The filter list will immediately expand to include the older filters that had been hidden, and Bleach Bypass will now be visible in the list.
This setting should stick between sessions once you enable it, so you only have to do this once. Worth noting: if you’ve updated ON1 recently and wondered where other familiar filters went, this is probably the answer to those too.
Step 4: Apply Bleach Bypass as a Filter
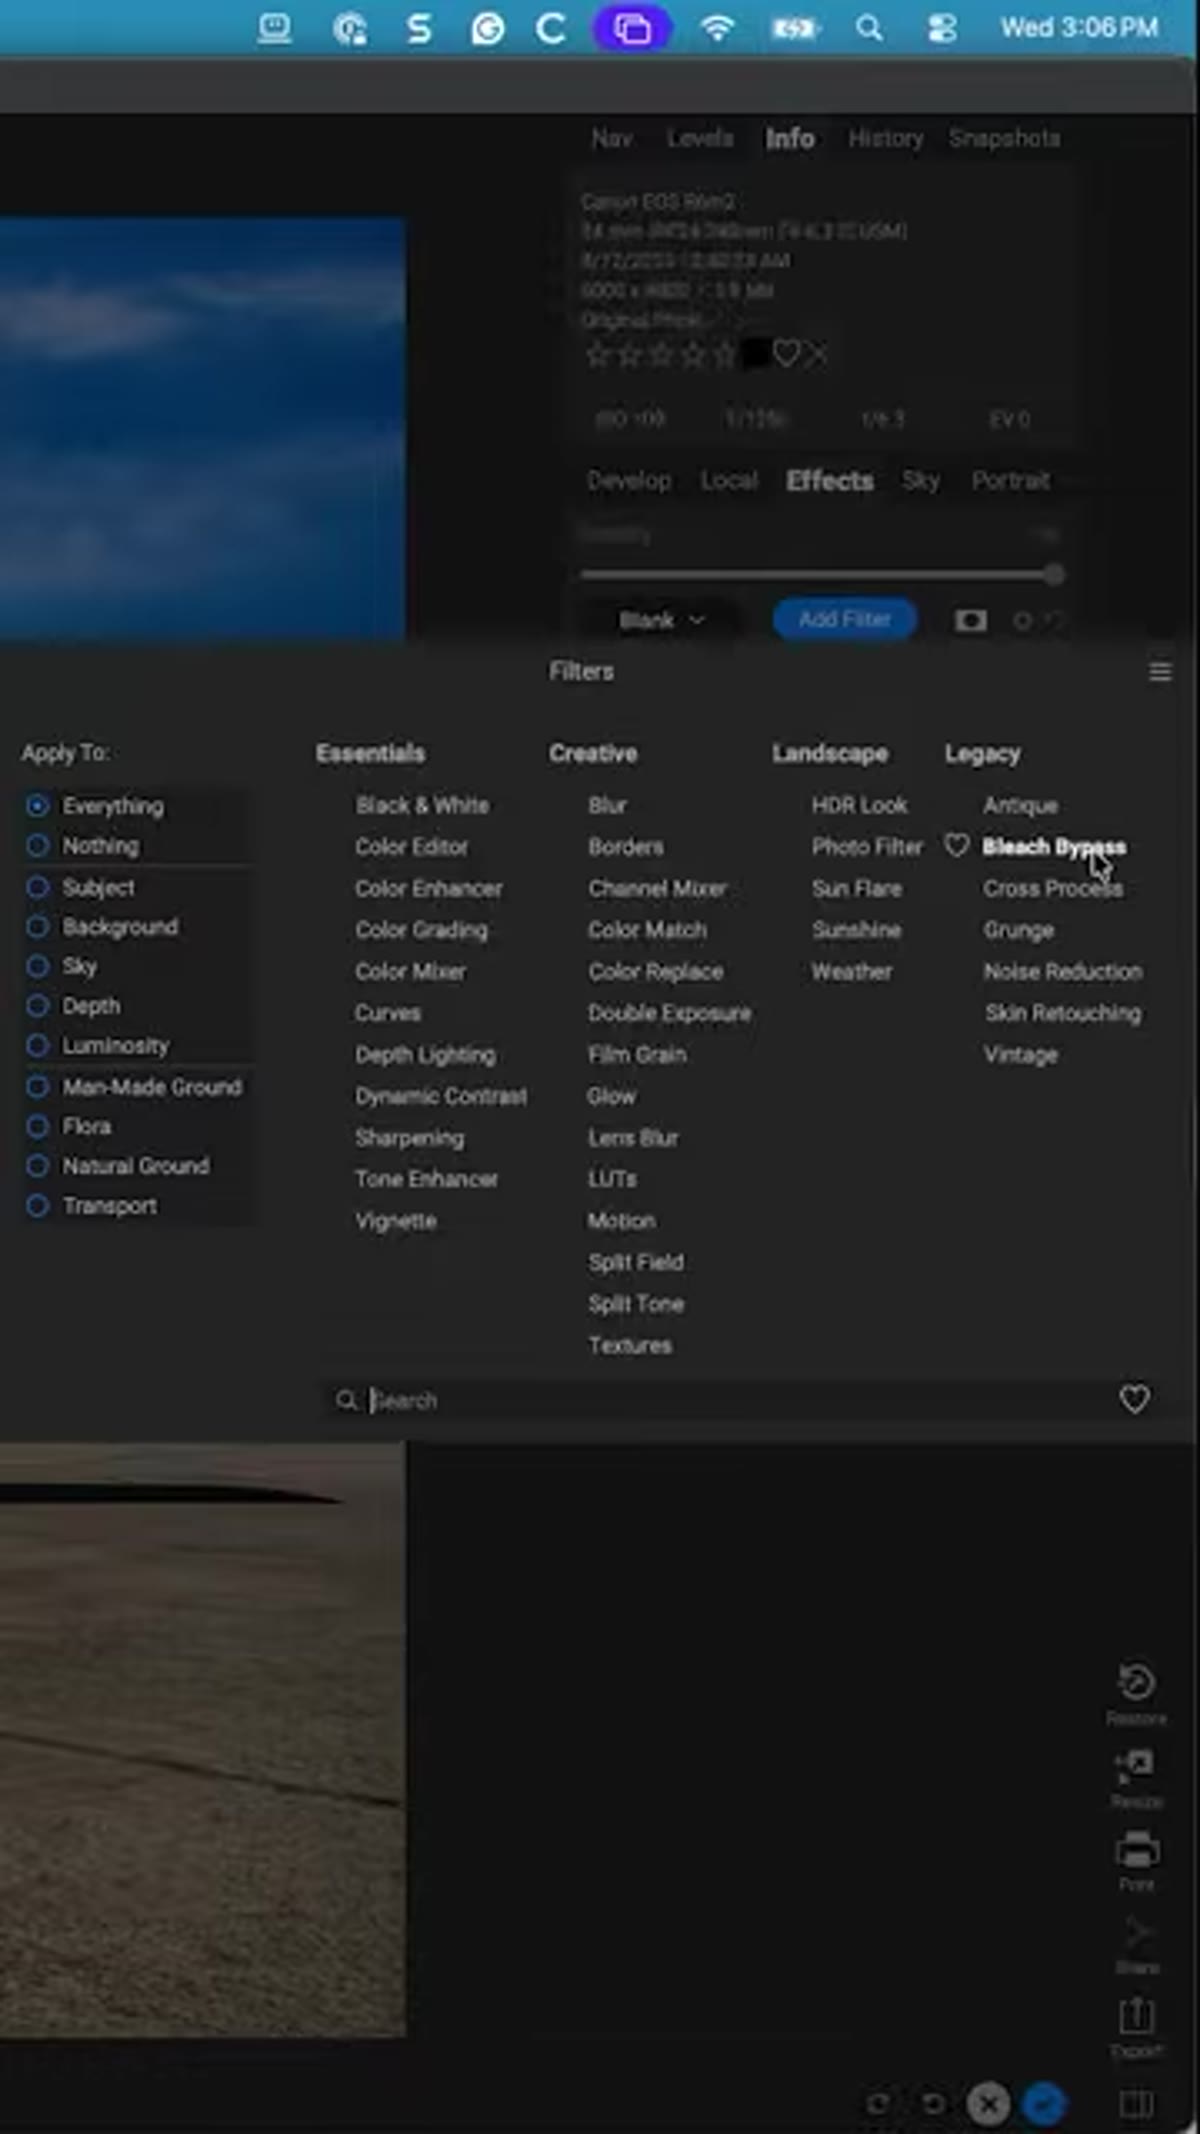 Bleach Bypass now visible and selected in the expanded filter list
With legacy filters now showing, select Bleach Bypass from the list and add it to your image. At this stage it applies globally, which is a pretty aggressive look across the whole frame. Kelby’s intent here is to isolate this effect to just the sky, so don’t worry about the full-image result yet. Adding the filter is just the first move.
Bleach Bypass now visible and selected in the expanded filter list
With legacy filters now showing, select Bleach Bypass from the list and add it to your image. At this stage it applies globally, which is a pretty aggressive look across the whole frame. Kelby’s intent here is to isolate this effect to just the sky, so don’t worry about the full-image result yet. Adding the filter is just the first move.
Step 5: Mask the Effect to the Sky Only
 Bleach Bypass filter applied with masking focused on sky area
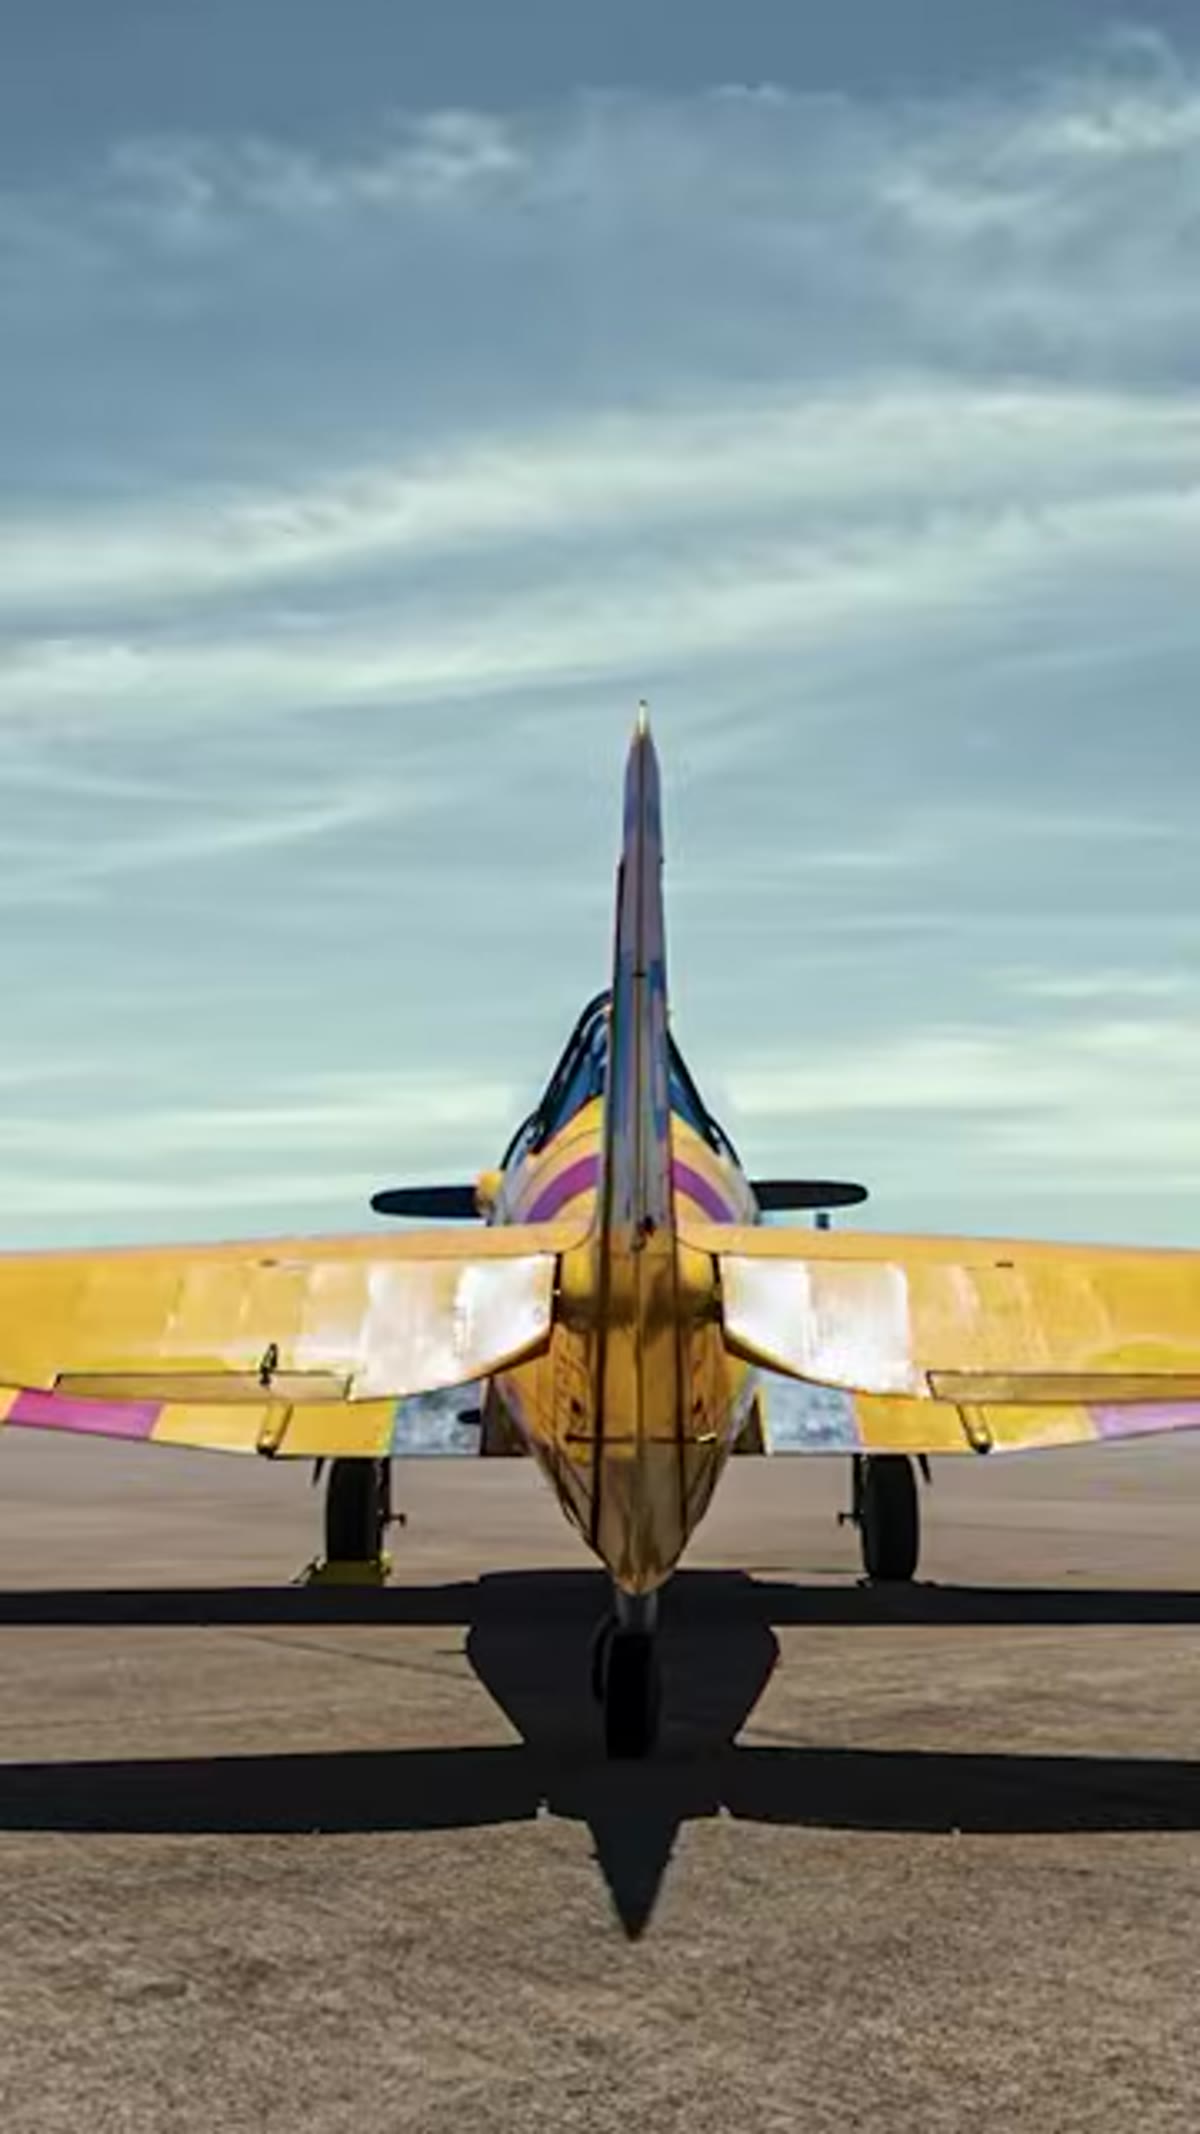
Inside the Bleach Bypass filter layer, use a mask to restrict the effect to the sky. Kelby keeps this tight and sky-specific, which is what makes the result feel intentional rather than like a blanket effect thrown over everything. If your image has a clear horizon line, a gradient mask or a luminosity mask targeting the brighter areas of the frame can do the work quickly. The goal is to keep the foreground looking natural while the sky gets the dramatic treatment.
Bleach Bypass filter applied with masking focused on sky area
Inside the Bleach Bypass filter layer, use a mask to restrict the effect to the sky. Kelby keeps this tight and sky-specific, which is what makes the result feel intentional rather than like a blanket effect thrown over everything. If your image has a clear horizon line, a gradient mask or a luminosity mask targeting the brighter areas of the frame can do the work quickly. The goal is to keep the foreground looking natural while the sky gets the dramatic treatment.
Step 6: Select the Omaha Beach Preset from the More Menu
 “More” menu open with Omaha Beach preset highlighted
With Bleach Bypass applied and masked to the sky, look for the “More” menu within the filter’s settings. Kelby selects a specific preset here called “Omaha Beach.” The name is a reference to the aesthetic of war photography and film, a gritty, washed-out palette that sits right in the wheelhouse of bleach bypass processing. This preset does a lot of the heavy lifting in terms of achieving the right tonal balance without you needing to dial in every slider manually.
“More” menu open with Omaha Beach preset highlighted
With Bleach Bypass applied and masked to the sky, look for the “More” menu within the filter’s settings. Kelby selects a specific preset here called “Omaha Beach.” The name is a reference to the aesthetic of war photography and film, a gritty, washed-out palette that sits right in the wheelhouse of bleach bypass processing. This preset does a lot of the heavy lifting in terms of achieving the right tonal balance without you needing to dial in every slider manually.
Step 7: Fine-Tune with Saturation
 Saturation slider being adjusted to restore blue tones in sky
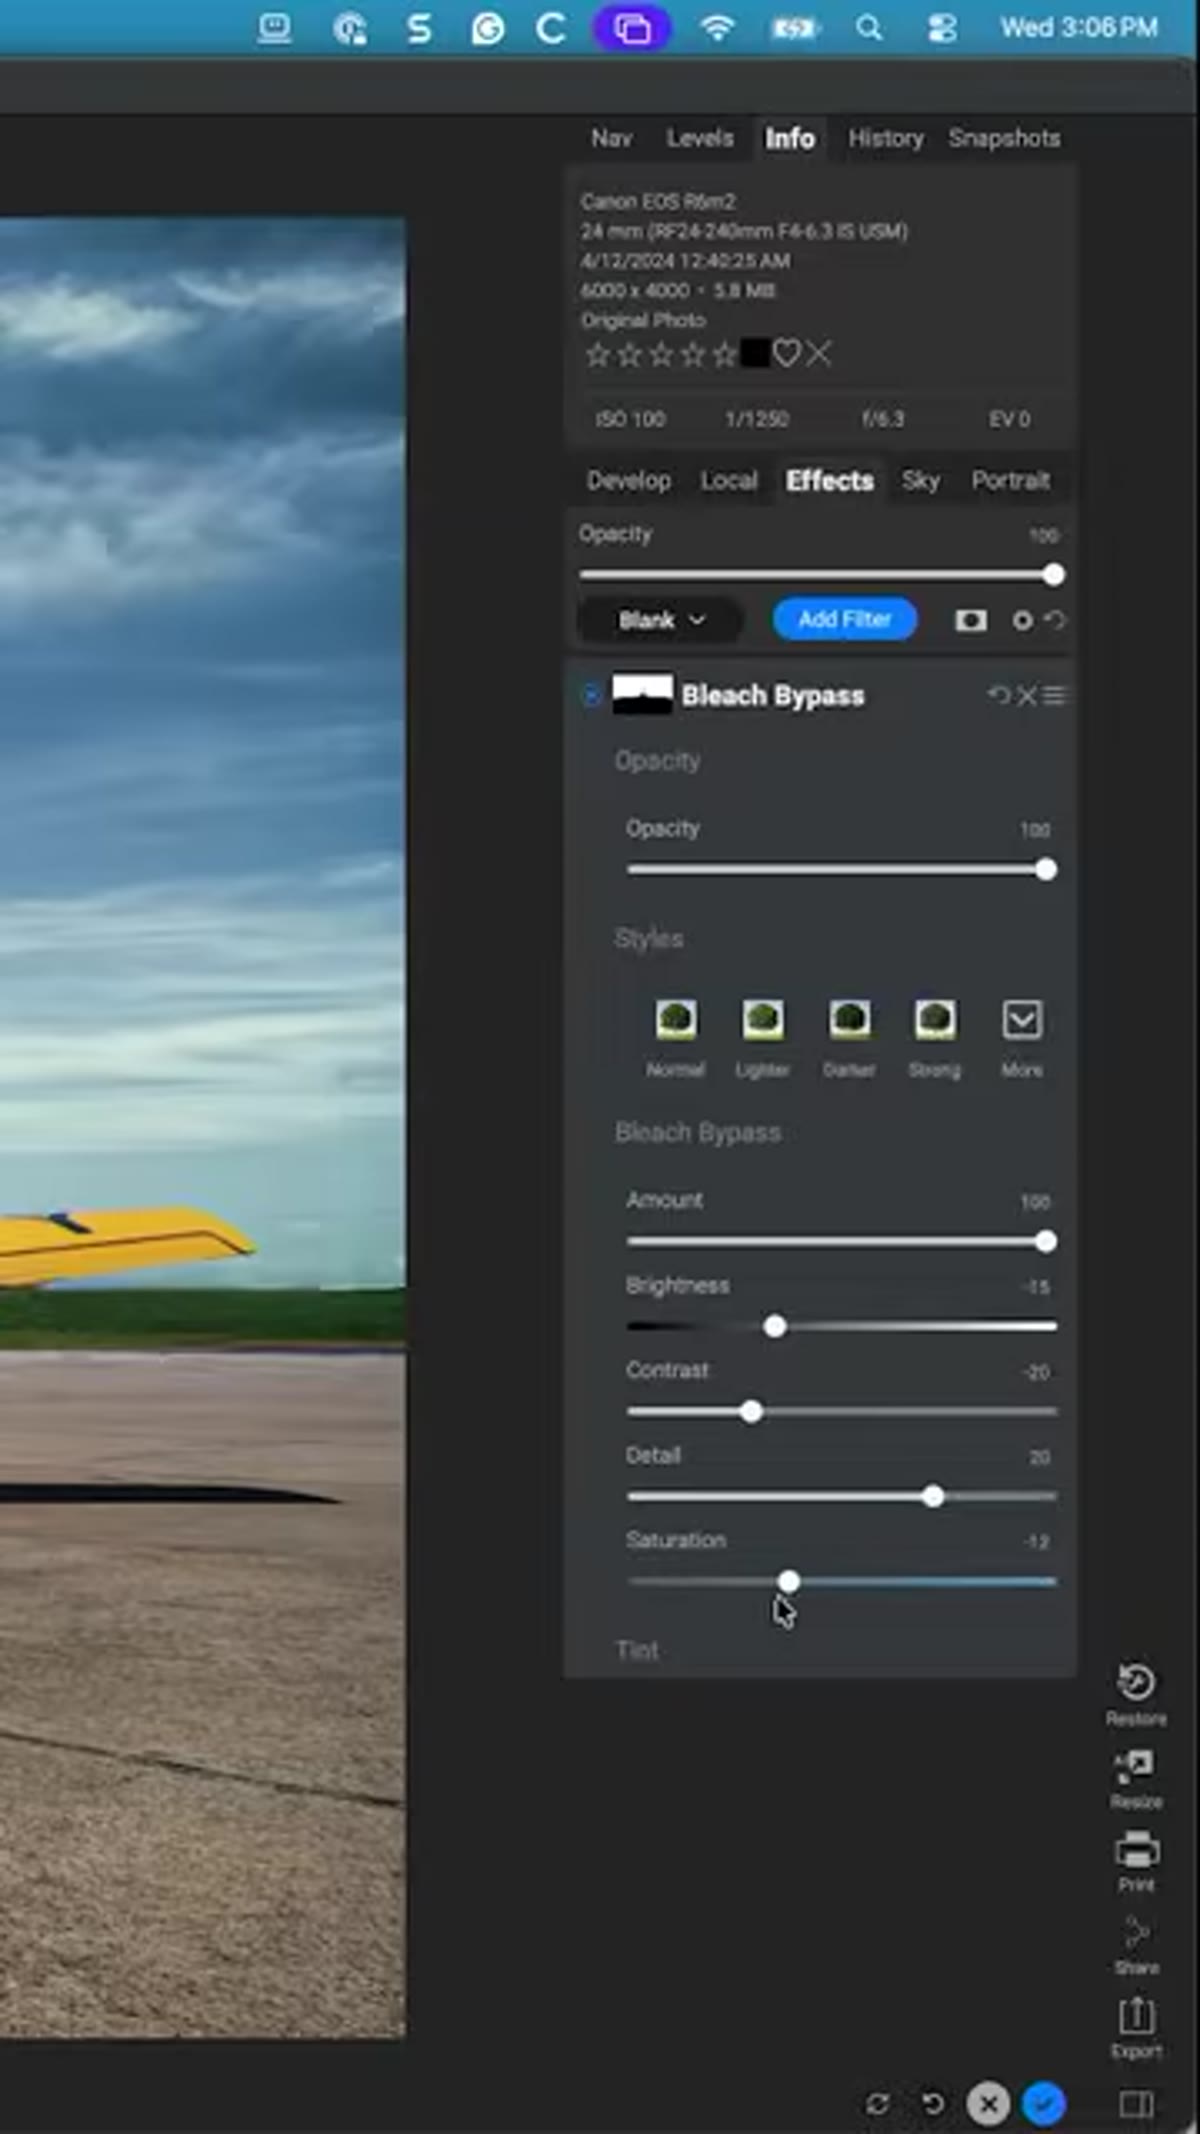
After applying the Omaha Beach preset, the sky will look close but slightly too drained of color for most uses. Kelby’s fix is simple: nudge the saturation up a little to bring some of the blue back into the sky. This is the adjustment that separates “cool effect I applied” from “this looks like a real photograph taken under unusual light.” You’re not going full-color, you’re just letting the sky breathe a little. The before-and-after difference is significant, and the after holds up as an actual edit rather than a stylistic stunt.
Saturation slider being adjusted to restore blue tones in sky
After applying the Omaha Beach preset, the sky will look close but slightly too drained of color for most uses. Kelby’s fix is simple: nudge the saturation up a little to bring some of the blue back into the sky. This is the adjustment that separates “cool effect I applied” from “this looks like a real photograph taken under unusual light.” You’re not going full-color, you’re just letting the sky breathe a little. The before-and-after difference is significant, and the after holds up as an actual edit rather than a stylistic stunt.
A Few Ways I’d Push This Further
The Omaha Beach preset is a solid starting point, but I’d encourage you to treat it as a floor rather than a ceiling. Once you’ve got Bleach Bypass applied and masked to the sky, experiment with the contrast and highlights sliders inside the filter before touching saturation. In my experience with high-key aviation images specifically, pulling the highlights down slightly before boosting saturation gives you a sky that looks overcast-dramatic rather than bleached-out-dramatic. It’s a subtle difference but it reads better in print.
Also: this workflow pairs well with a separate graduated filter darkening the top of the frame. Bleach Bypass changes the quality of the light in the sky. A subtle gradient adds direction to it. Together they can make a midday flat-light sky look like golden hour decided to show up late and in a bad mood, which is usually exactly what the image needed.
The biggest takeaway here isn’t even the Bleach Bypass technique itself, though that’s genuinely useful. It’s the reminder that “missing” tools in updated software are often just hidden, not gone. Before you write off a filter or feature as deprecated, check the settings menus. In ON1’s case, one click on the hamburger icon and a toggle brings back a whole category of filters that didn’t need to disappear in the first place.
Watch the full tutorial on YouTube and see Kelby’s before-and-after in action. If you want the full context of how this fits into a complete ON1 workflow, the description links to his Photo RAW MAX 2026 workflow, which was free at the time of posting.
Comments
Leave a Comment