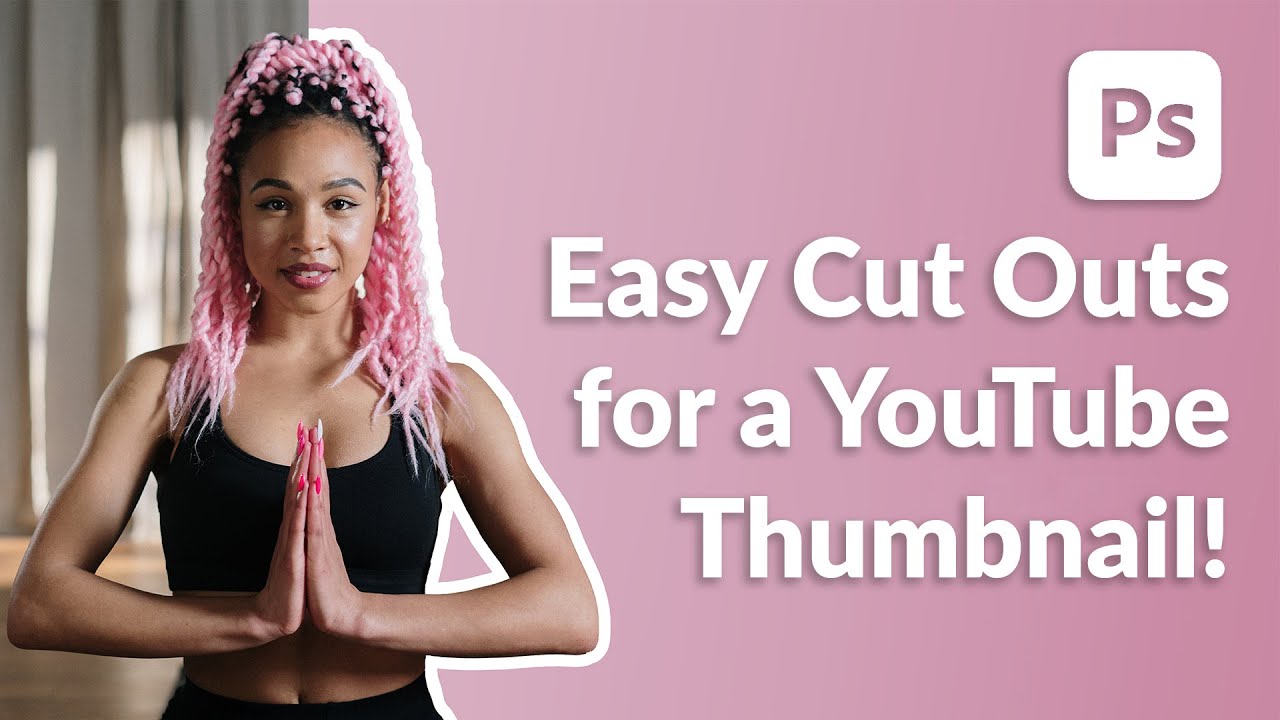
Thumbnails are one of those things I kept treating as an afterthought, right up until a client pointed out that my gorgeous composite was getting zero clicks because the preview image looked like a potato. Lesson learned. Since then I’ve been obsessive about figuring out the fastest, cleanest way to cut a subject out and make them pop against a background, which is exactly the problem this technique solves. In this Aaron Nace (PHLEARN) tutorial, he walks through a workflow that takes maybe three minutes once you’ve done it twice, and the results look polished enough that people assume you spent much longer on it. Watch the full tutorial on YouTube if you want to follow along with his sample files.
The core idea is simple: cut your subject out with a layer mask, drop them onto a background, and then use a white stroke layer style to create that bold outlined look you see on basically every high-performing thumbnail. Aaron uses a yoga-on-the-beach photo as his example, but this works for any subject against any background. I’ve used it for client promotional graphics, social media assets, and yes, the occasional meme. It’s one of those techniques that pays for itself in time saved every single week.
Step 1: Select Your Subject Automatically
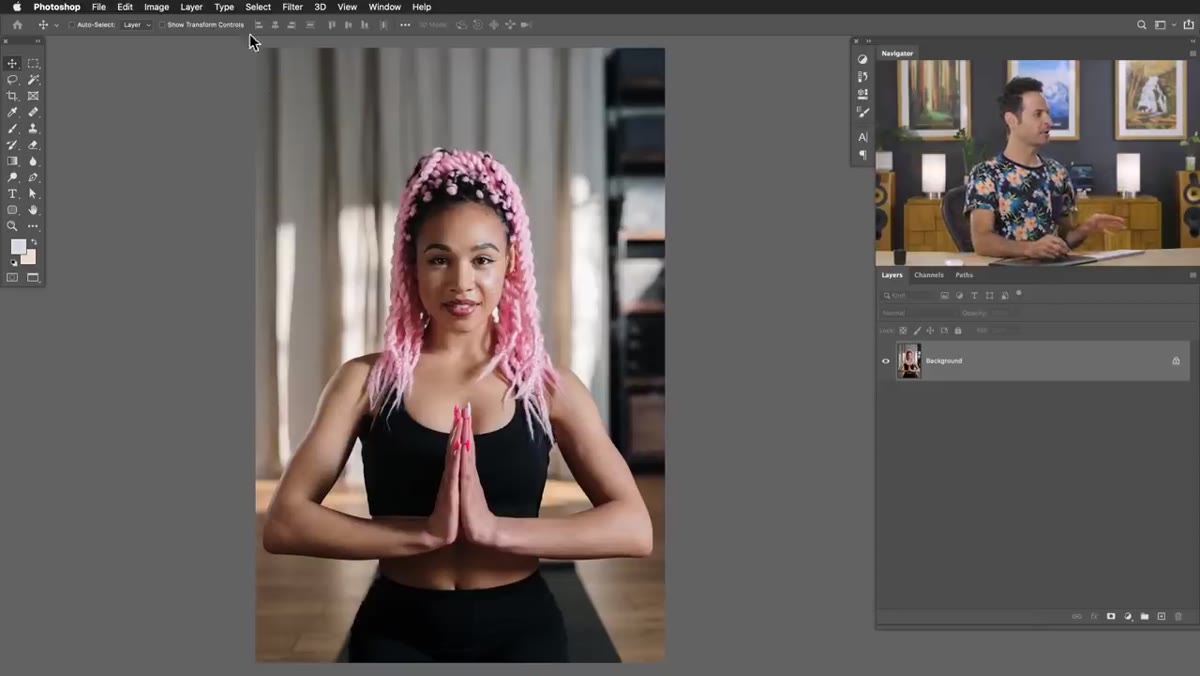 Photoshop Select menu open, Subject option highlighted
Open your image in Photoshop and head up to Select, then choose Subject. Photoshop’s AI-powered subject detection is genuinely impressive at this point, and for a person standing against a reasonably clean background it will get you 90% of the way there in about two seconds. You’ll see the marching ants selection appear around your subject automatically. Don’t stress if it’s not pixel-perfect at this stage, because you’ll clean it up later.
Photoshop Select menu open, Subject option highlighted
Open your image in Photoshop and head up to Select, then choose Subject. Photoshop’s AI-powered subject detection is genuinely impressive at this point, and for a person standing against a reasonably clean background it will get you 90% of the way there in about two seconds. You’ll see the marching ants selection appear around your subject automatically. Don’t stress if it’s not pixel-perfect at this stage, because you’ll clean it up later.
Step 2: Apply a Layer Mask
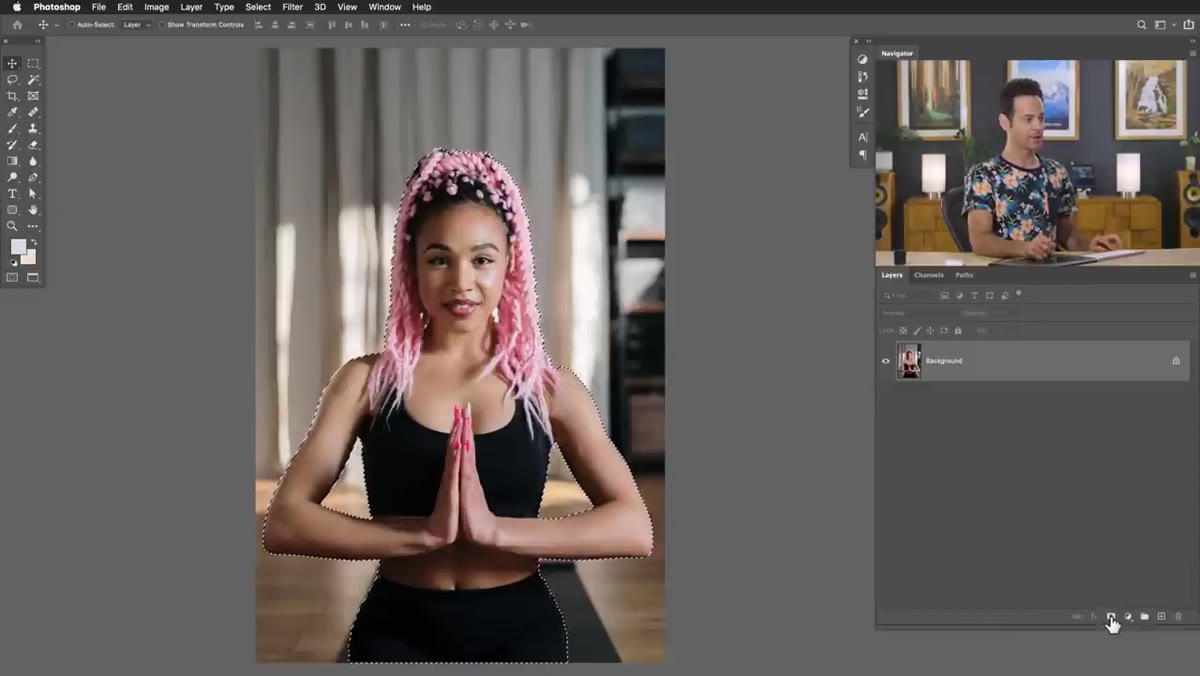 Layer mask icon being clicked in the Layers panel
With the selection active, click the Layer Mask icon at the bottom of the Layers panel. That’s the little rectangle with a circle inside it. Photoshop converts your selection into a mask, hiding the background and leaving only your subject. Your layer thumbnail should now show the subject image on the left and a black-and-white mask on the right. Again, rough edges are fine here. The technique has built-in fixes for that, which we’ll get to.
Layer mask icon being clicked in the Layers panel
With the selection active, click the Layer Mask icon at the bottom of the Layers panel. That’s the little rectangle with a circle inside it. Photoshop converts your selection into a mask, hiding the background and leaving only your subject. Your layer thumbnail should now show the subject image on the left and a black-and-white mask on the right. Again, rough edges are fine here. The technique has built-in fixes for that, which we’ll get to.
Step 3: Bring the Subject Into Your Background Document
 Subject being dragged from one document to another
Open your background image as a separate document, then grab the Move tool (keyboard shortcut V) and simply click and drag your masked subject from one document tab into the other. Drop them wherever they look good compositionally. At this point you’ve got a cut-out person sitting on a new background, which is already useful, but the magic is in the next step. If the scale feels off, use Ctrl+T (Cmd+T on Mac) to free transform and resize before moving on.
Subject being dragged from one document to another
Open your background image as a separate document, then grab the Move tool (keyboard shortcut V) and simply click and drag your masked subject from one document tab into the other. Drop them wherever they look good compositionally. At this point you’ve got a cut-out person sitting on a new background, which is already useful, but the magic is in the next step. If the scale feels off, use Ctrl+T (Cmd+T on Mac) to free transform and resize before moving on.
Step 4: Add a White Stroke With Layer Styles
 Layer Style dialog open with Stroke option selected
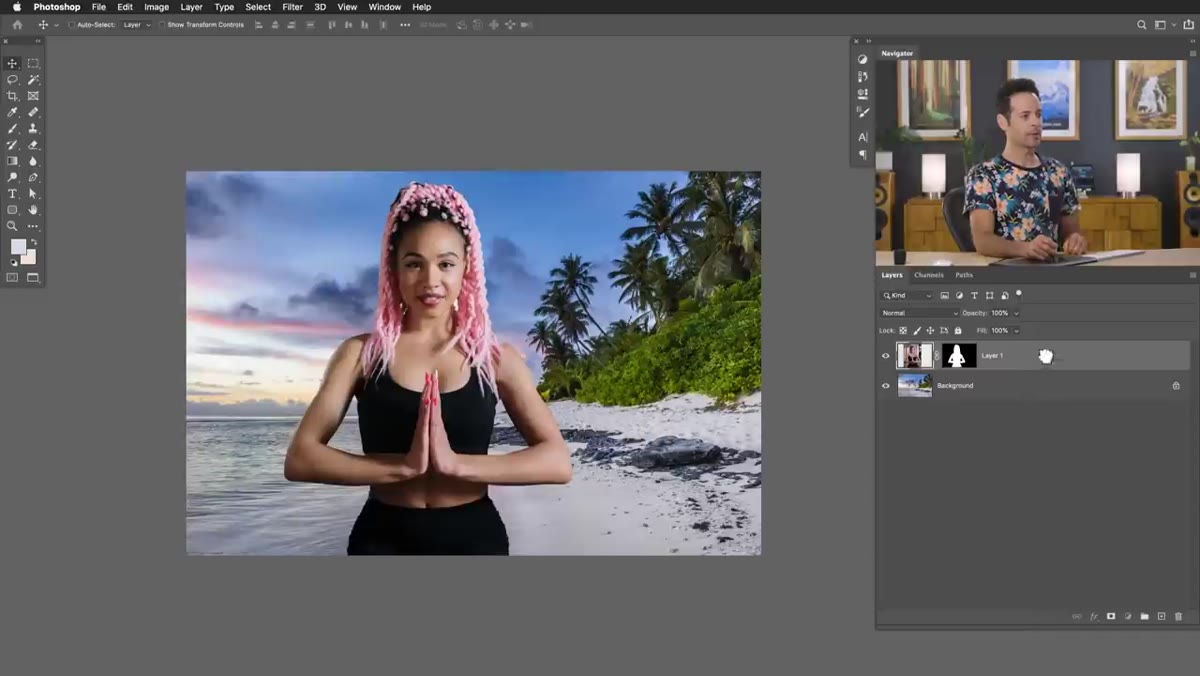
This is the step that makes thumbnails look like thumbnails. Double-click directly on your subject’s layer thumbnail in the Layers panel to open the Layer Style dialog. Click on Stroke in the left-hand list. Set the position to Outside, which keeps the stroke clean against the background rather than eating into your subject. Bump the size up to somewhere between 15 and 30 pixels depending on how large your canvas is, and set the color to white. Hit OK and you’ll immediately see that crisp white border that tells a viewer’s brain “this person is the important thing in this image.”
Layer Style dialog open with Stroke option selected
This is the step that makes thumbnails look like thumbnails. Double-click directly on your subject’s layer thumbnail in the Layers panel to open the Layer Style dialog. Click on Stroke in the left-hand list. Set the position to Outside, which keeps the stroke clean against the background rather than eating into your subject. Bump the size up to somewhere between 15 and 30 pixels depending on how large your canvas is, and set the color to white. Hit OK and you’ll immediately see that crisp white border that tells a viewer’s brain “this person is the important thing in this image.”
The size value here is not precious. I usually go bigger than feels comfortable the first time, because thumbnails get viewed at tiny sizes and you want that outline to read clearly even at 120 pixels wide. You can always reopen the Layer Style dialog and adjust the stroke size non-destructively at any time.
Step 5: Add a Solid Color Background Layer
 Solid Color adjustment layer being moved below the subject layer
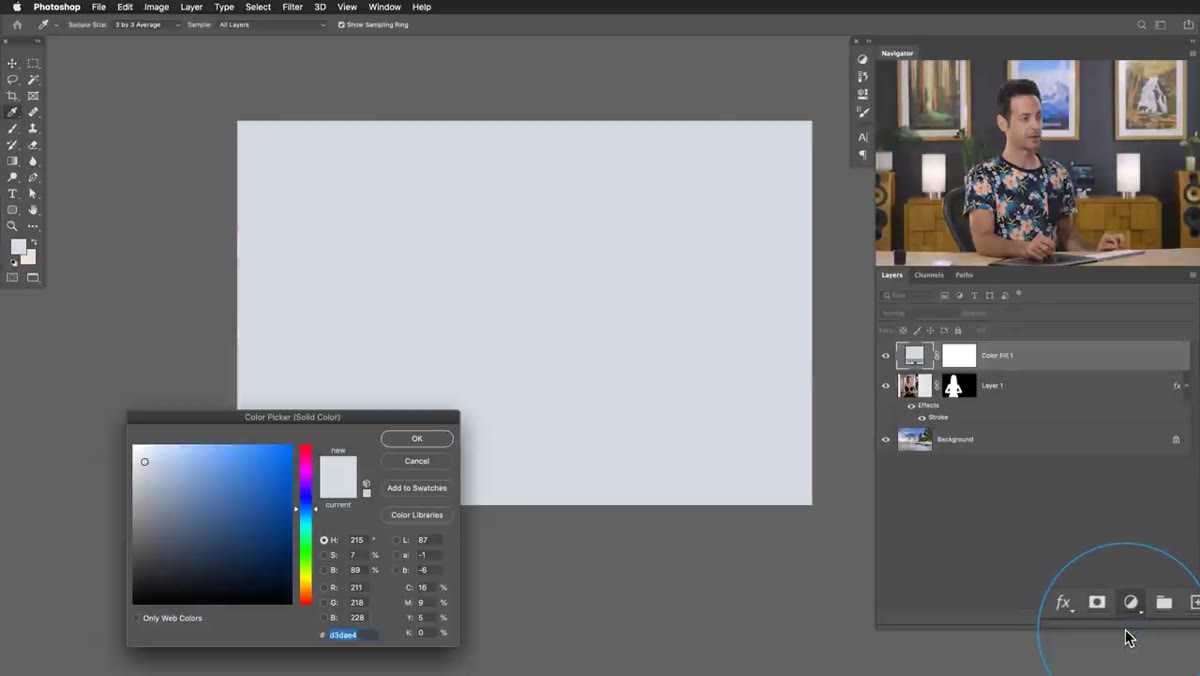
For a clean, graphic look, go to the Adjustment Layers menu at the bottom of the Layers panel and add a Solid Color layer. It’ll drop in above everything else and cover your subject, so drag it down in the layer stack until it sits just below the subject layer but above your background. Now double-click the color swatch on that adjustment layer to reopen the color picker, and use the eyedropper to sample a color directly from your subject. Aaron samples a pink from his subject’s hair, and the result is an instantly cohesive graphic. Skin tones, clothing colors, and hair all work well for this. It ties the whole thing together without any design degree required.
Solid Color adjustment layer being moved below the subject layer
For a clean, graphic look, go to the Adjustment Layers menu at the bottom of the Layers panel and add a Solid Color layer. It’ll drop in above everything else and cover your subject, so drag it down in the layer stack until it sits just below the subject layer but above your background. Now double-click the color swatch on that adjustment layer to reopen the color picker, and use the eyedropper to sample a color directly from your subject. Aaron samples a pink from his subject’s hair, and the result is an instantly cohesive graphic. Skin tones, clothing colors, and hair all work well for this. It ties the whole thing together without any design degree required.
Step 6: Refine the Layer Mask With the Brush Tool
 Brush tool painting black on the layer mask to remove rough edges
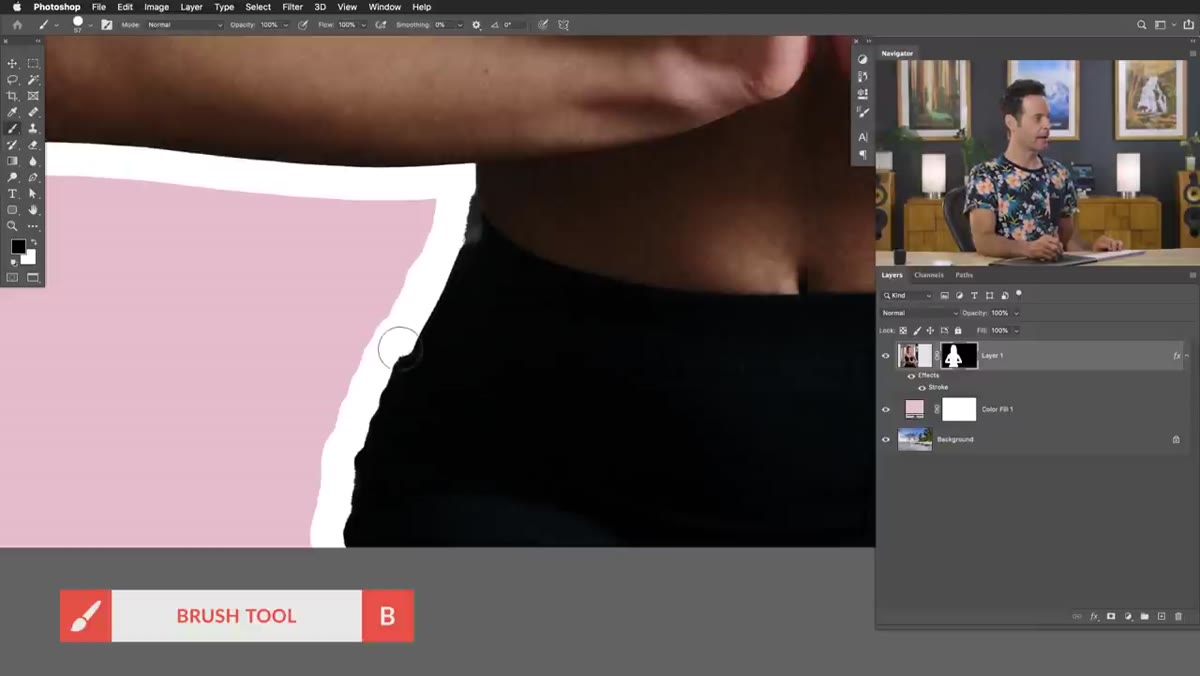
Here’s where you clean up those imperfect edges from the automatic selection. Click on the layer mask thumbnail in the Layers panel to make sure you’re painting on the mask and not the image. Grab the Brush tool (B), set hardness to around 80-90%, and paint with black to hide areas of the mask that are too rough or have background bleed. Paint with white to bring areas back. The smart part of this workflow is that the white stroke layer style follows the mask automatically, so as you refine the edges the outline updates in real time. You can see exactly what you’re getting as you work.
Brush tool painting black on the layer mask to remove rough edges
Here’s where you clean up those imperfect edges from the automatic selection. Click on the layer mask thumbnail in the Layers panel to make sure you’re painting on the mask and not the image. Grab the Brush tool (B), set hardness to around 80-90%, and paint with black to hide areas of the mask that are too rough or have background bleed. Paint with white to bring areas back. The smart part of this workflow is that the white stroke layer style follows the mask automatically, so as you refine the edges the outline updates in real time. You can see exactly what you’re getting as you work.
Step 7: Use the Pen Tool for Precise Edges
 Pen tool creating smooth path along the subject’s arm
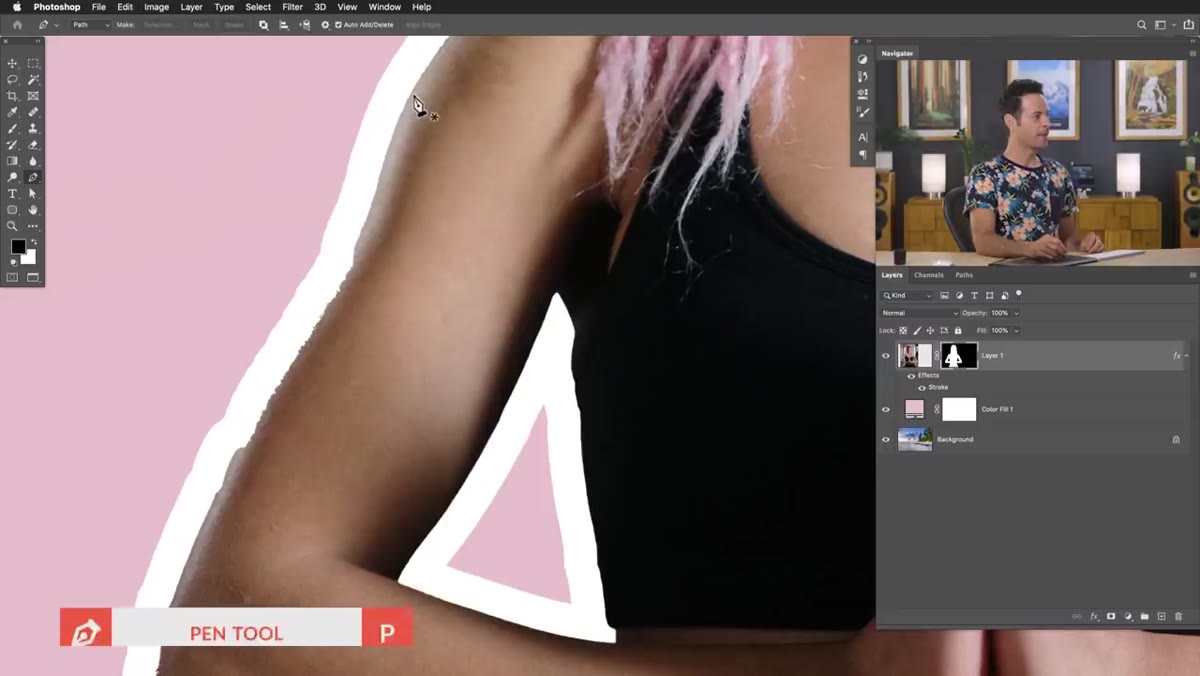
If your subject has clean geometric lines, like a straight arm or a sharp shoulder, the Pen tool will give you a much cleaner result than the brush alone. Click and drag with the Pen tool to create smooth bezier curves along your subject’s edge. When you’ve traced the section you want, right-click and choose Make Selection, then paint white on your mask inside that selection to cleanly reveal the edge. It sounds more complicated than it is, and for areas like arms, jawlines, and straight clothing edges it genuinely looks better than any automatic tool.
Pen tool creating smooth path along the subject’s arm
If your subject has clean geometric lines, like a straight arm or a sharp shoulder, the Pen tool will give you a much cleaner result than the brush alone. Click and drag with the Pen tool to create smooth bezier curves along your subject’s edge. When you’ve traced the section you want, right-click and choose Make Selection, then paint white on your mask inside that selection to cleanly reveal the edge. It sounds more complicated than it is, and for areas like arms, jawlines, and straight clothing edges it genuinely looks better than any automatic tool.
One Thing Aaron Doesn’t Mention (That’s Tripped Me Up)
Keep your subject on a Smart Object before you start any of this. If you drag your subject into the background document as a regular layer and then later decide you need to scale them up, you’ll lose quality. Convert to Smart Object first (right-click the layer, Convert to Smart Object) and you can scale freely without any degradation. I learned this the hard way on a rush project where I had to rebuild the whole thing from scratch after upscaling turned my subject’s face into a smudge. The stroke layer style works perfectly on Smart Objects, so there’s really no downside.
The single most important thing to take from this technique is that the white stroke does most of the visual heavy lifting. A rough cutout with a clean white border still reads as professional at thumbnail size, while a perfect cutout with no border can disappear completely into a busy background. Prioritize the border, then refine.
Watch the full tutorial on YouTube to see Aaron work through it with his sample files, which you can download from the PHLEARN site and use to practice the exact steps above.
Comments (3)
Quality content like this is rare. Keep it up.
The before and after really sells it. Incredible difference.
Great article! I actually covered something related on my site — the retouching angle is really complementary to this.
Leave a Comment