
There’s a specific kind of frustration that hits when you spend forty-five minutes painstakingly masking around wisps of smoke or fog, and the result still looks like you cut it out with safety scissors. I’ve been there more times than I’d like to admit. Smoke, steam, fog, fire – any texture with soft, semi-transparent edges – is a nightmare to mask cleanly. Which is why the moment I watched Aaron Nace walk through his steam-from-ears composite, I felt that specific mix of relief and mild annoyance that comes from learning something you wish you’d known years ago.
In this Aaron Nace (PHLEARN) tutorial, the goal is simple and ridiculous in the best way: take a photo of a visibly irritated man and add steam billowing out of his ears. But the real lesson hiding inside the absurdity is a foundational Photoshop concept that changes how you approach compositing: knowing when a blending mode solves your problem faster than any mask ever could. Once you internalize this, you start seeing masking as a last resort rather than a default.
The tutorial uses professional steam textures photographed against a black background, which is actually the key to the whole trick. Black backgrounds aren’t a problem. They’re an opportunity.
Step 1: Move Your Textures Into the Working Document
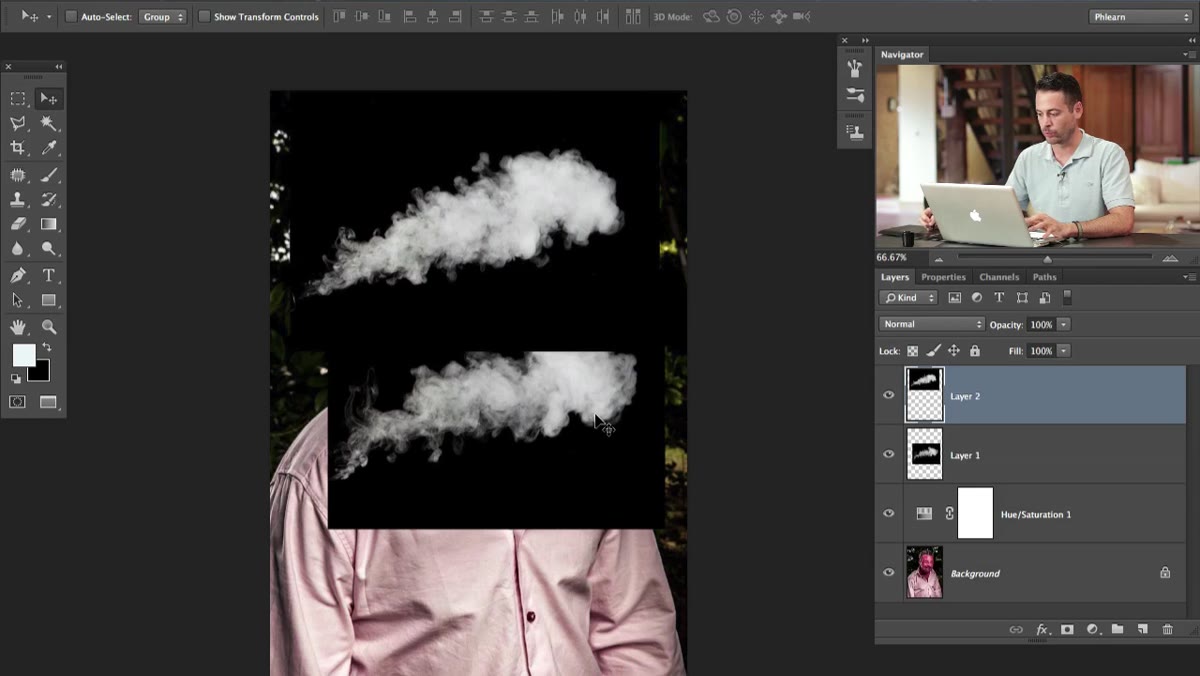
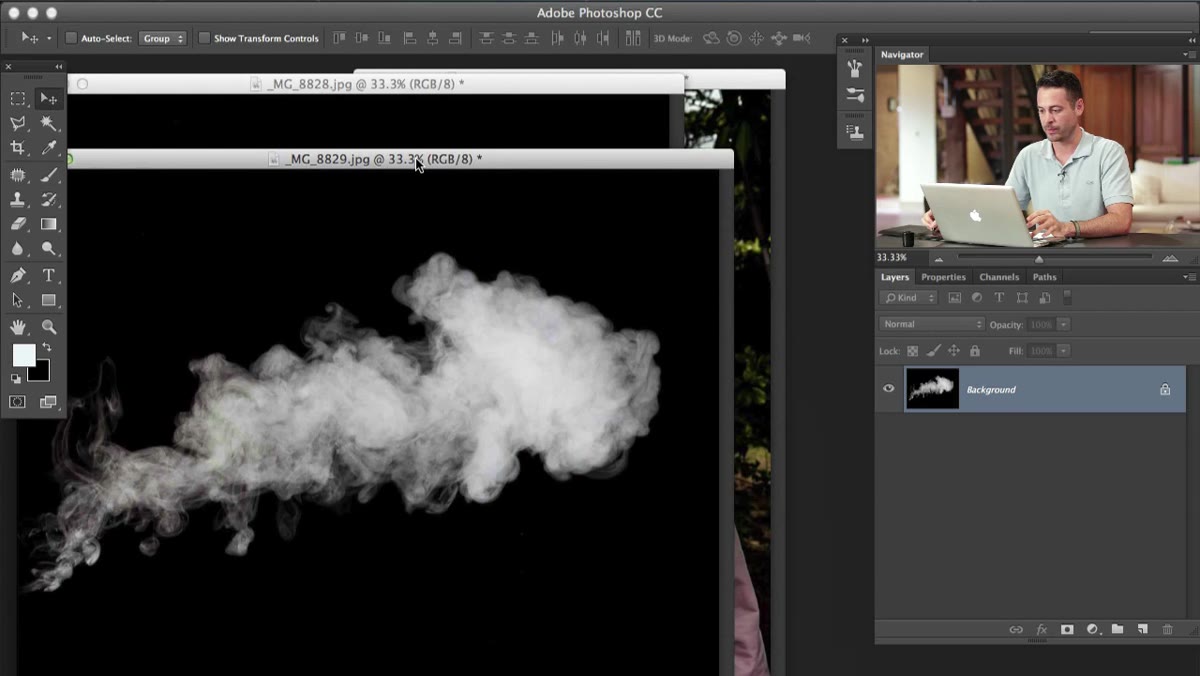 Moving steam texture from source document into portrait
Open your base photo and your texture files as separate documents. Grab the Move tool (V), hold Shift, and drag the texture from its document window into your portrait document. Holding Shift drops it centered on the canvas, which saves you some nudging. Do this for each texture layer, then close the source documents with Command+W (Ctrl+W on PC). Press F to go full screen and get a clean look at what you’re working with.
Moving steam texture from source document into portrait
Open your base photo and your texture files as separate documents. Grab the Move tool (V), hold Shift, and drag the texture from its document window into your portrait document. Holding Shift drops it centered on the canvas, which saves you some nudging. Do this for each texture layer, then close the source documents with Command+W (Ctrl+W on PC). Press F to go full screen and get a clean look at what you’re working with.
At this point your textures are probably enormous relative to the portrait. Don’t panic. That’s what the next step is for.
Step 2: Scale the Textures Down With Free Transform
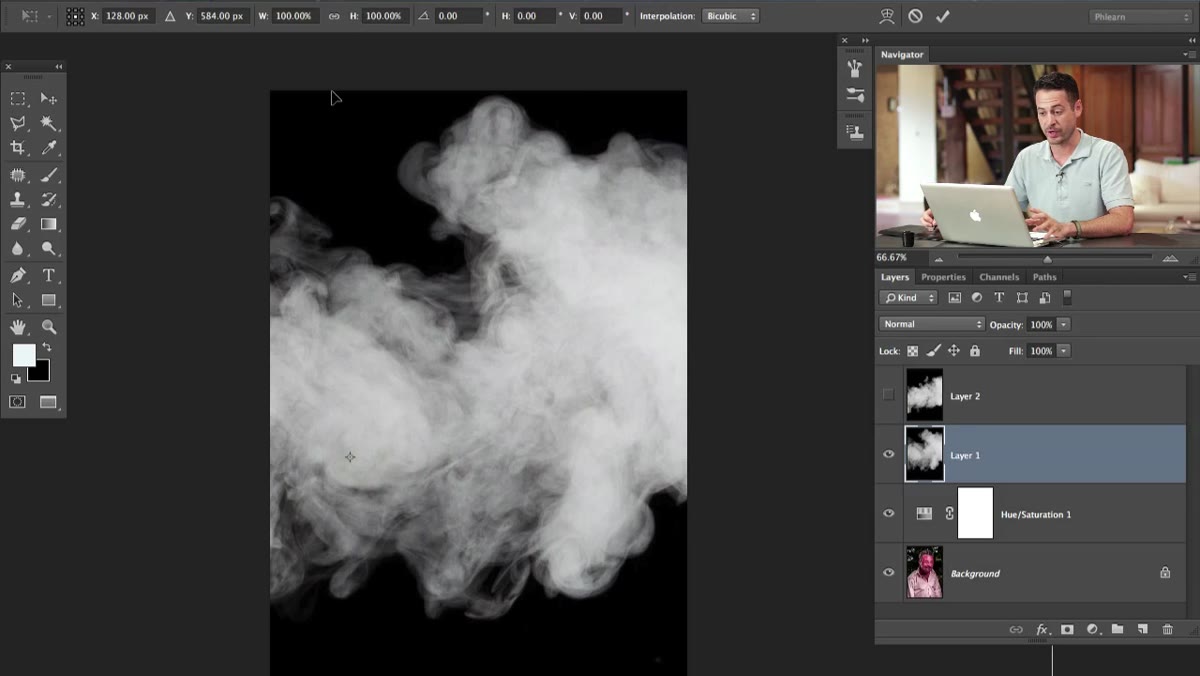 Free Transform handles visible around oversized steam texture
Hit Command+T (Ctrl+T) to open Free Transform on your first texture layer. In the options bar at the top, click the chain-link icon to lock the aspect ratio – this stops you from accidentally squashing the texture when you scale. Then drag a corner handle inward until the texture feels proportionally right relative to the ears. You want it large enough to read clearly but not so big it swamps the whole image.
Free Transform handles visible around oversized steam texture
Hit Command+T (Ctrl+T) to open Free Transform on your first texture layer. In the options bar at the top, click the chain-link icon to lock the aspect ratio – this stops you from accidentally squashing the texture when you scale. Then drag a corner handle inward until the texture feels proportionally right relative to the ears. You want it large enough to read clearly but not so big it swamps the whole image.
Repeat this for each texture layer. At this stage, rough placement is fine. You’re just getting the textures into the right ballpark before the blending mode does its thing.
Step 3: Apply a Hue/Saturation Adjustment to Sell the Emotion
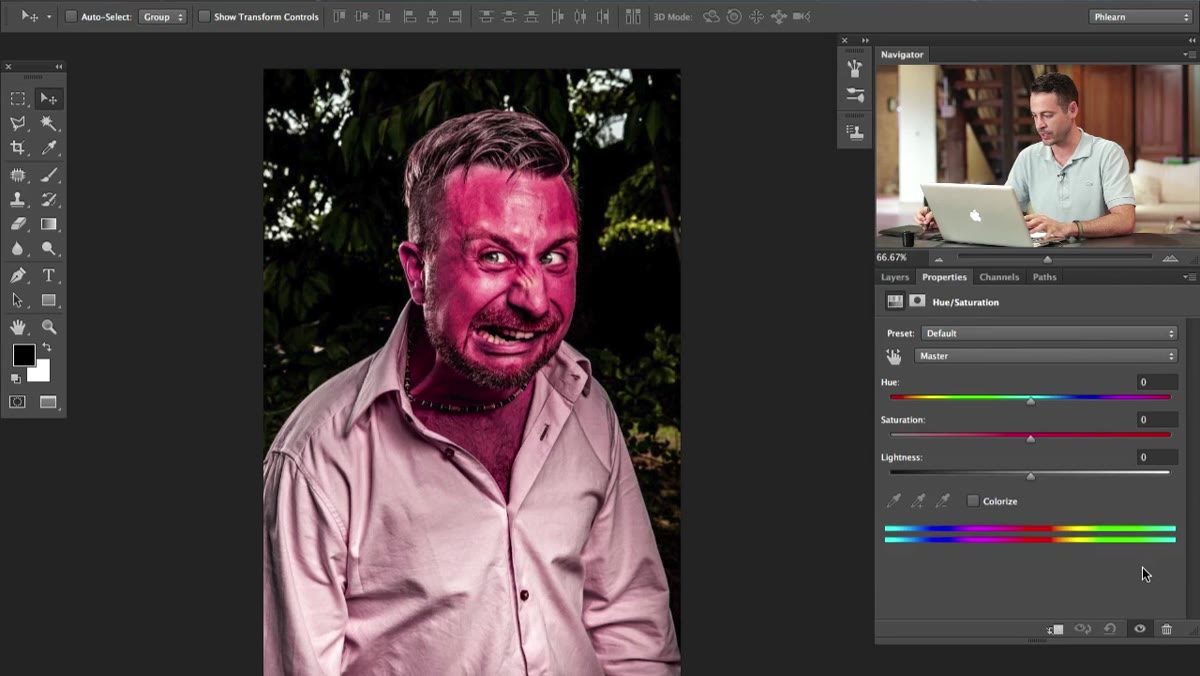 Hue/Saturation panel open with red channel selected
Before dealing with the textures, Aaron makes a smart detour: he adjusts the skin tone to support the emotional story. A slightly magenta or cool-toned skin reads as someone oxygen-deprived or sick. For anger, you want to push the reds toward orange and yellow. Add a Hue/Saturation adjustment layer above your base portrait, drop down from “Master” to “Reds,” then use the eyedropper to click directly on the skin in the image. From there, nudge the Hue slider slightly toward warmer tones.
Hue/Saturation panel open with red channel selected
Before dealing with the textures, Aaron makes a smart detour: he adjusts the skin tone to support the emotional story. A slightly magenta or cool-toned skin reads as someone oxygen-deprived or sick. For anger, you want to push the reds toward orange and yellow. Add a Hue/Saturation adjustment layer above your base portrait, drop down from “Master” to “Reds,” then use the eyedropper to click directly on the skin in the image. From there, nudge the Hue slider slightly toward warmer tones.
This is a small change with a big payoff. Compositing is only half technical – the other half is making the viewer believe the scenario. Warming up the skin by even a few degrees makes the steam feel like a logical consequence rather than a random texture slapped on top.
Step 4: Use Screen Blending Mode to Eliminate the Black Background
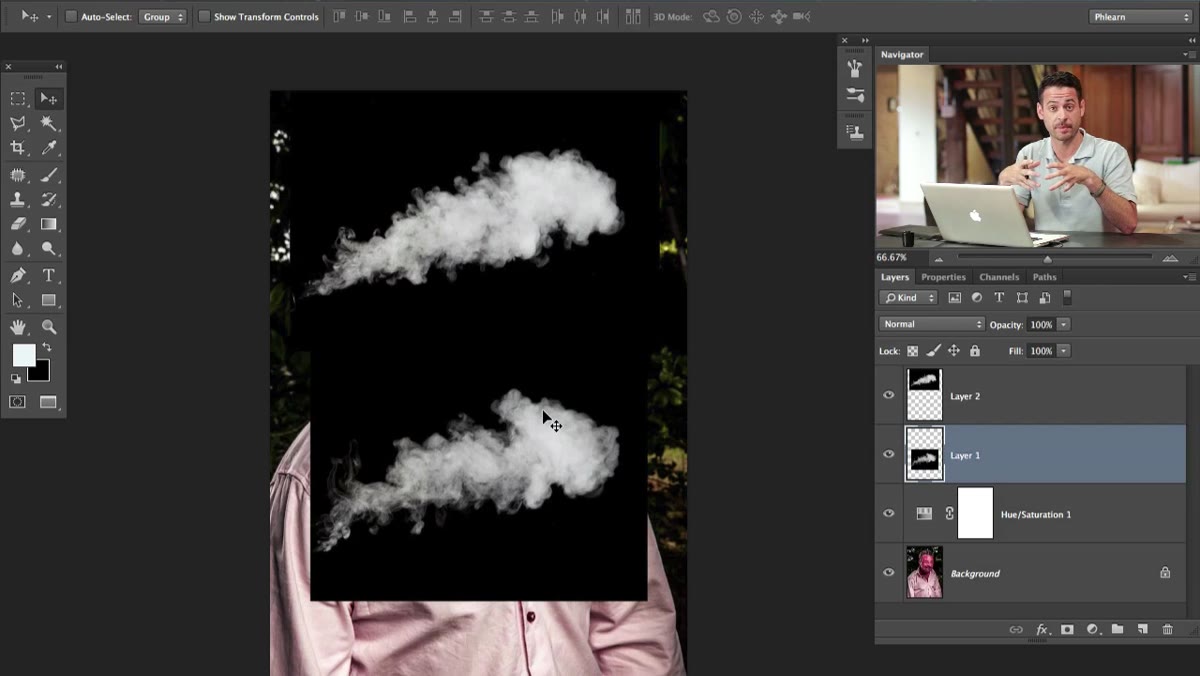 Blend mode dropdown open showing Screen option selected
Here’s the part that used to take me half an hour with a mask. With your texture layer selected, go to the blending mode dropdown in the Layers panel (it defaults to “Normal”) and switch it to Screen. The black disappears instantly. Completely. What’s left is only the lighter steam texture, composited naturally into the image.
Blend mode dropdown open showing Screen option selected
Here’s the part that used to take me half an hour with a mask. With your texture layer selected, go to the blending mode dropdown in the Layers panel (it defaults to “Normal”) and switch it to Screen. The black disappears instantly. Completely. What’s left is only the lighter steam texture, composited naturally into the image.
Screen mode works on a simple principle: black (value 0) becomes invisible, and white (value 255) stays fully opaque. Everything in between is semi-transparent based on its brightness. For textures shot against a pure black background, this is a perfect solution every single time. No masks required, no edge fringing, no manual cleanup.
Step 5: Position Each Steam Layer Over the Ears
 Steam texture repositioned and scaled near subject’s ear area
With Screen mode applied, move each texture layer so the steam appears to originate from the ears. Use the Move tool and nudge things around until the placement feels natural. Because the black is now fully transparent, you can see your portrait through the texture the entire time, which makes positioning much more intuitive than working with a visible black rectangle.
Steam texture repositioned and scaled near subject’s ear area
With Screen mode applied, move each texture layer so the steam appears to originate from the ears. Use the Move tool and nudge things around until the placement feels natural. Because the black is now fully transparent, you can see your portrait through the texture the entire time, which makes positioning much more intuitive than working with a visible black rectangle.
If one texture overlaps an area it shouldn’t, this is where a simple layer mask comes back into play – but now you’re using it for minor cleanup on edges rather than trying to cut out the entire texture by hand. That’s a much more manageable task.
My Own Extension: Duplicate and Vary for More Depth
Here’s something the tutorial doesn’t explicitly cover, but that I’ve started doing every time I use this technique. Once your blending mode is set, duplicate each texture layer (Command+J) and apply a slight offset, scale change, or Opacity reduction to the copy. Stacking two versions of the same steam texture at slightly different sizes and positions creates a sense of volume and movement that a single flat layer can’t replicate.
You can also try Free Transform’s flip options – right-click inside the transform box and choose Flip Horizontal – to reuse one texture on both ears without them looking identical. Real steam doesn’t repeat symmetrically, and this quick flip breaks the pattern convincingly.
One more thing worth knowing: Screen mode works equally well for fire, light leaks, lens flares, and any element photographed against black. Once you have this in your toolkit, you’ll start collecting black-background textures specifically because they’re so fast to work with.
The single biggest takeaway here is that blending modes are problem-solvers, not just aesthetic options. Before you reach for a mask, ask yourself what the background color of your texture is. If it’s black, Screen mode handles it in one click. If it’s white, Multiply does the same thing in reverse. Learning to match the right blending mode to the right situation is what separates working fast from just working.
Watch the full tutorial on YouTube and see Aaron walk through the whole composite from start to finish. The steam effect itself is fun, but the underlying logic is what you’ll actually use every week.
Comments
Leave a Comment