I’ll be straight with you: I came up through design, not photography. My whole career started with making graphics in Photoshop, and the camera stuff came later, mostly out of necessity when clients started asking for “the full package.” So exposure modes were always the thing I’d half-understood, nodded through, and quietly Googled afterward. The Canon R1 showed up on my radar recently because a few photographers I work with on composite projects swear by it, and I wanted to understand what I was getting from their raw files. That sent me down a rabbit hole that ended with John Greengo’s full R1 course.
Watch the full tutorial on YouTube
In this John Greengo tutorial, section three of a 21-part series, Greengo walks through every exposure mode the Canon R1 offers, plus ISO, metering, and the camera’s histogram tools. This isn’t a shallow overview. The man goes granular in a way that actually made things click for me. What follows is my breakdown of the key steps, written for anyone who wants to actually understand their camera instead of just setting it to Auto and hoping for the best.
Step 1: Find the Mode Button (The Dial Is Gone)
 Mode button location on Canon R1 body
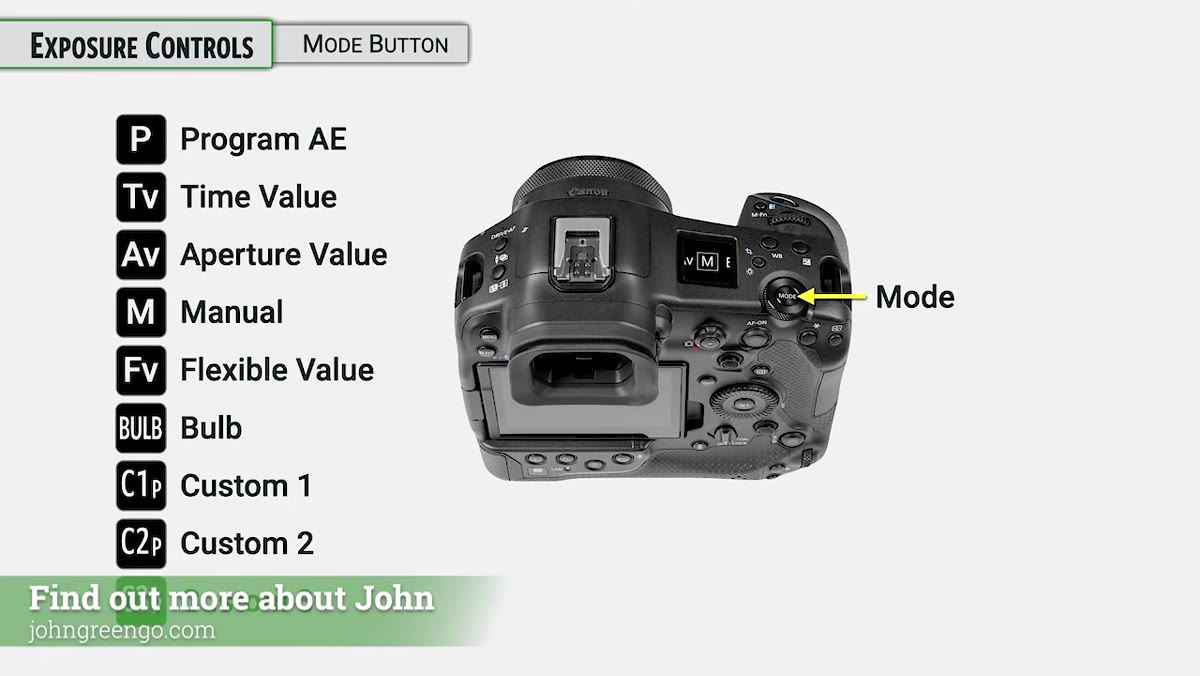
If you’re coming from a mid-range Canon body, your first instinct will be to reach for a mode dial. There isn’t one on the R1. Canon replaced it with a dedicated Mode button, which you hold down and then turn any of the three main control dials to switch modes. It sounds like a small change, but it’s genuinely more fluid once you’re used to it. Greengo points out that the R1 strips away the beginner-friendly scene modes you’d find on lower-end bodies, keeping only the modes that working photographers actually reach for.
Mode button location on Canon R1 body
If you’re coming from a mid-range Canon body, your first instinct will be to reach for a mode dial. There isn’t one on the R1. Canon replaced it with a dedicated Mode button, which you hold down and then turn any of the three main control dials to switch modes. It sounds like a small change, but it’s genuinely more fluid once you’re used to it. Greengo points out that the R1 strips away the beginner-friendly scene modes you’d find on lower-end bodies, keeping only the modes that working photographers actually reach for.
Step 2: Understand Program AE and Program Shift
 Program AE mode active in viewfinder display
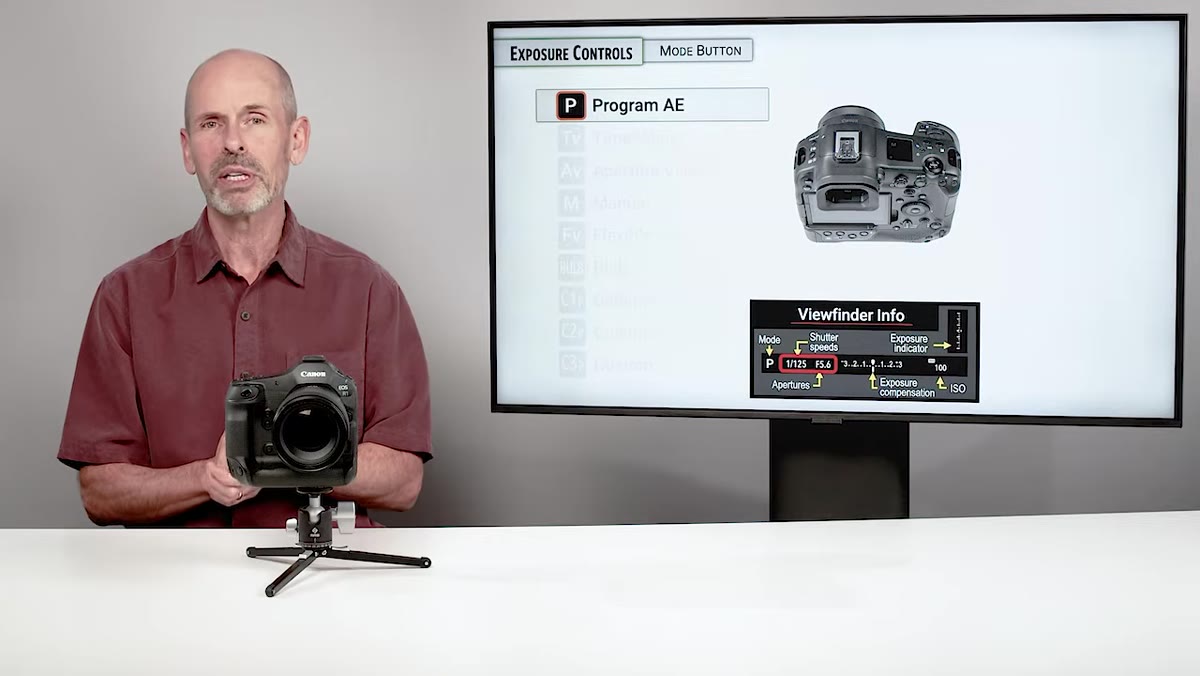
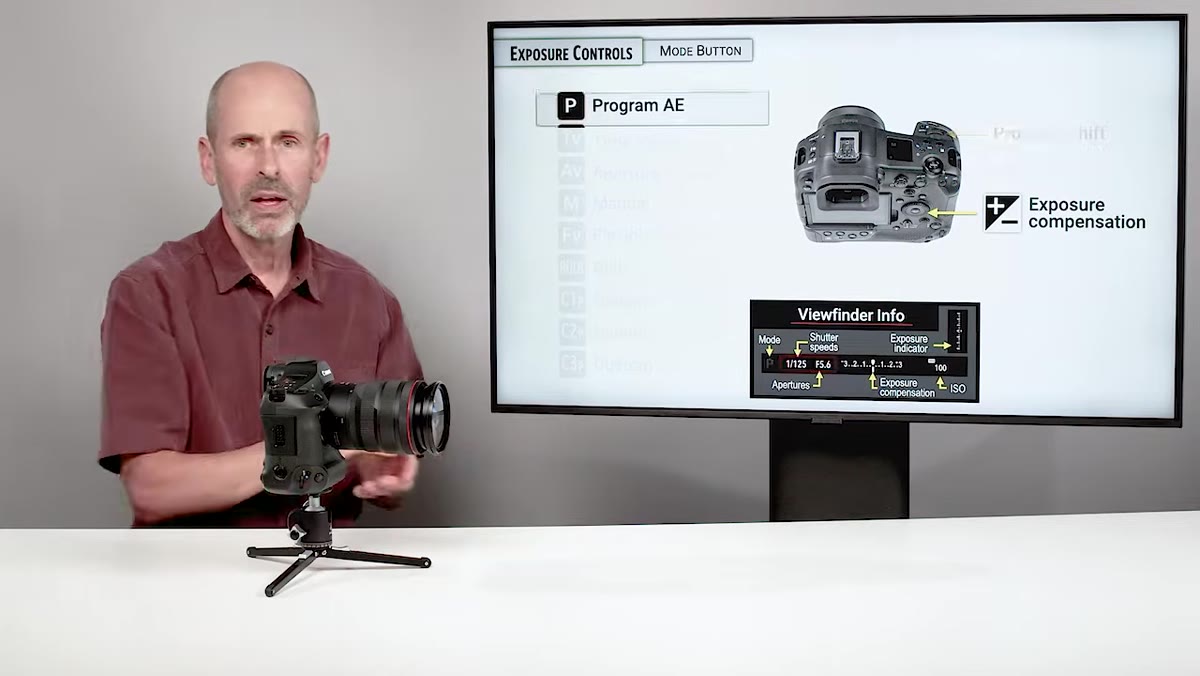
Program AE (the P mode) lets the camera pick both shutter speed and aperture automatically. What most people miss is Program Shift, which lets you slide along equivalent exposures by turning the main dial. Spin it one way and you get a faster shutter with a wider aperture. Spin it the other and you get a slower shutter with a narrower aperture. The exposure value stays the same, but you’re steering the creative outcome. This is genuinely useful when you’re shooting fast and need to nudge depth of field without stopping to think through the math.
Program AE mode active in viewfinder display
Program AE (the P mode) lets the camera pick both shutter speed and aperture automatically. What most people miss is Program Shift, which lets you slide along equivalent exposures by turning the main dial. Spin it one way and you get a faster shutter with a wider aperture. Spin it the other and you get a slower shutter with a narrower aperture. The exposure value stays the same, but you’re steering the creative outcome. This is genuinely useful when you’re shooting fast and need to nudge depth of field without stopping to think through the math.
Step 3: Use Tv and Av When You Need to Own One Variable
 Time Value mode shown with shutter speed adjustment
Time Value (Tv) mode lets you lock in your shutter speed while the camera handles aperture. Aperture Value (Av) does the reverse. Greengo’s framing here is practical: Tv is for anything that moves, Av is for anything where depth of field is the priority. In both modes, exposure compensation is available via the back dial, which adjusts brightness by nudging the camera-controlled variable. These two modes cover the vast majority of real-world shooting situations, and if you’re only ever shooting in full Manual, you might actually be making more work for yourself than necessary.
Time Value mode shown with shutter speed adjustment
Time Value (Tv) mode lets you lock in your shutter speed while the camera handles aperture. Aperture Value (Av) does the reverse. Greengo’s framing here is practical: Tv is for anything that moves, Av is for anything where depth of field is the priority. In both modes, exposure compensation is available via the back dial, which adjusts brightness by nudging the camera-controlled variable. These two modes cover the vast majority of real-world shooting situations, and if you’re only ever shooting in full Manual, you might actually be making more work for yourself than necessary.
Step 4: Manual Mode and the Exposure Indicator
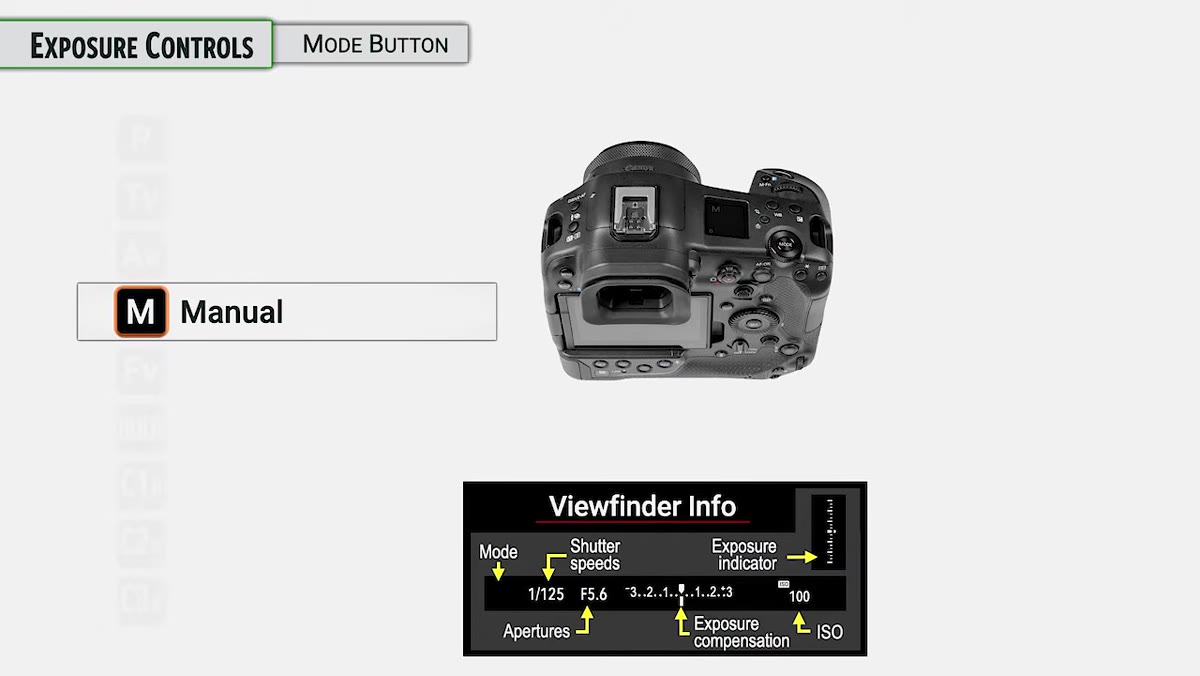 Manual mode with exposure level indicator visible
Manual mode on the R1 works the way you’d expect: you set shutter speed and aperture independently, and the camera shows you an exposure indicator in the viewfinder so you can see how far off from “correct” you are. What Greengo emphasizes here is that “correct” just means what the meter thinks is correct based on its metering mode. In practice, the indicator is a guide, not a verdict. When you’re shooting in controlled lighting, this mode gives you total consistency across a series of frames, which matters enormously when you’re handing files off for post-processing.
Manual mode with exposure level indicator visible
Manual mode on the R1 works the way you’d expect: you set shutter speed and aperture independently, and the camera shows you an exposure indicator in the viewfinder so you can see how far off from “correct” you are. What Greengo emphasizes here is that “correct” just means what the meter thinks is correct based on its metering mode. In practice, the indicator is a guide, not a verdict. When you’re shooting in controlled lighting, this mode gives you total consistency across a series of frames, which matters enormously when you’re handing files off for post-processing.
Step 5: Flexible Value (Fv) Mode - The One You’ll Either Love or Ignore
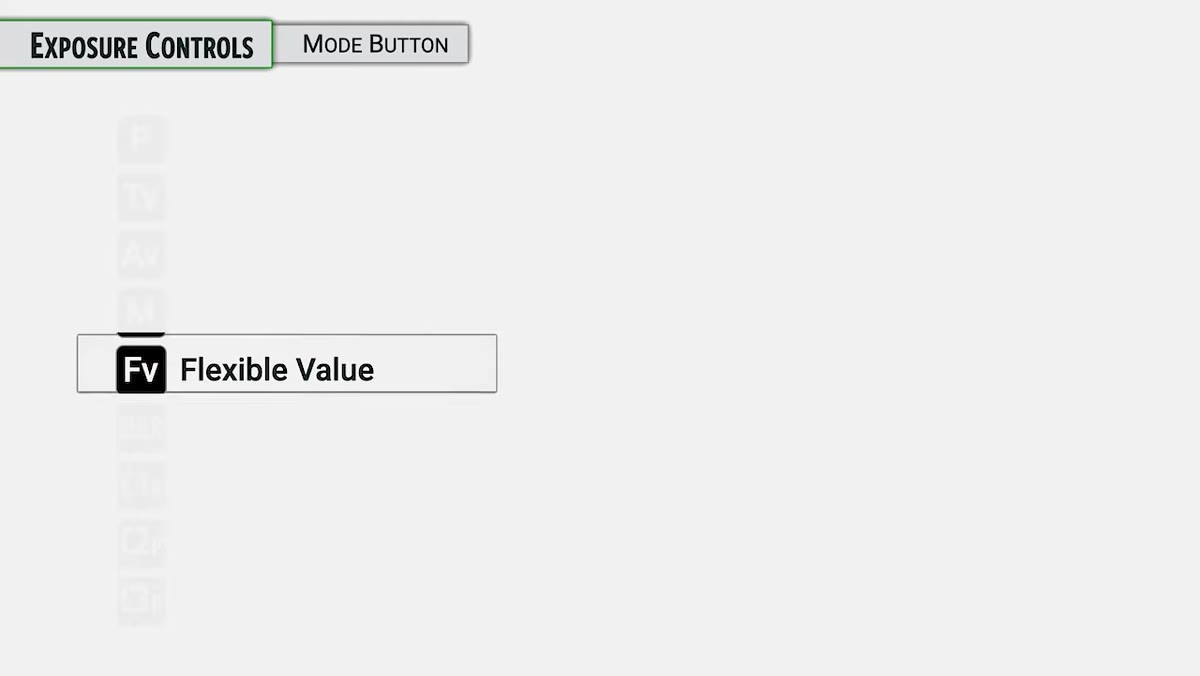 Flexible Value mode with all three parameters displayed
Fv mode is Canon’s hybrid option, and it genuinely surprised me. You can lock or unlock shutter speed, aperture, and ISO independently, letting the camera auto-manage whichever variables you leave open. In practice, it means you can shoot like you’re in Manual when you want to, and punch out to semi-auto when conditions change fast. Greengo is honest that this mode has a learning curve, and some photographers never warm up to it. But if you shoot in unpredictable lighting conditions (weddings, events, documentary work), this is worth spending an hour with before dismissing it.
Flexible Value mode with all three parameters displayed
Fv mode is Canon’s hybrid option, and it genuinely surprised me. You can lock or unlock shutter speed, aperture, and ISO independently, letting the camera auto-manage whichever variables you leave open. In practice, it means you can shoot like you’re in Manual when you want to, and punch out to semi-auto when conditions change fast. Greengo is honest that this mode has a learning curve, and some photographers never warm up to it. But if you shoot in unpredictable lighting conditions (weddings, events, documentary work), this is worth spending an hour with before dismissing it.
Step 6: Bulb Mode and C1/C2/C3 Custom Modes
 Bulb mode timer display on camera screen
Bulb mode keeps the shutter open for as long as you hold the button down, making it the go-to for long exposures, astrophotography, and light painting. The R1 adds a built-in timer function for Bulb so you can set a specific duration without standing there counting. The Custom modes (C1, C2, C3) are worth setting up early. They let you save a complete camera configuration and call it back instantly. Greengo’s suggestion is to treat these like presets: one for your typical action setup, one for low-light, one for studio. The time you spend configuring them once pays dividends every shoot.
Bulb mode timer display on camera screen
Bulb mode keeps the shutter open for as long as you hold the button down, making it the go-to for long exposures, astrophotography, and light painting. The R1 adds a built-in timer function for Bulb so you can set a specific duration without standing there counting. The Custom modes (C1, C2, C3) are worth setting up early. They let you save a complete camera configuration and call it back instantly. Greengo’s suggestion is to treat these like presets: one for your typical action setup, one for low-light, one for studio. The time you spend configuring them once pays dividends every shoot.
Step 7: ISO, Auto ISO, and the Quirk You Need to Know About
 ISO settings menu with Auto ISO behavior shown
ISO on the R1 is controlled by the second quick control dial. Here’s the thing Greengo flags that most people don’t expect: if you manually set an ISO and then leave the camera alone for about eight seconds, it reverts to Auto ISO. That’s the default behavior. It’s not a bug, but it will absolutely catch you off guard the first time it happens mid-shoot. You can change this behavior in the customization menus, and Greengo says he’ll cover that later in the course. For now, know it exists so you don’t spend twenty minutes wondering why your ISO keeps resetting.
ISO settings menu with Auto ISO behavior shown
ISO on the R1 is controlled by the second quick control dial. Here’s the thing Greengo flags that most people don’t expect: if you manually set an ISO and then leave the camera alone for about eight seconds, it reverts to Auto ISO. That’s the default behavior. It’s not a bug, but it will absolutely catch you off guard the first time it happens mid-shoot. You can change this behavior in the customization menus, and Greengo says he’ll cover that later in the course. For now, know it exists so you don’t spend twenty minutes wondering why your ISO keeps resetting.
Step 8: Metering Modes and the Histogram
 Metering mode options displayed in camera menu
The R1 offers the standard metering options including evaluative, center-weighted, and spot, plus a “Detect Priority AE while AF” setting that ties metering to whatever subject the autofocus system is tracking. That last one is interesting for portrait and sports work because the exposure tracks the subject rather than the overall scene. The camera’s histogram is available as a live display and gives you a real-time read on exposure without relying on the LCD brightness, which can lie to you in bright sunlight.
Metering mode options displayed in camera menu
The R1 offers the standard metering options including evaluative, center-weighted, and spot, plus a “Detect Priority AE while AF” setting that ties metering to whatever subject the autofocus system is tracking. That last one is interesting for portrait and sports work because the exposure tracks the subject rather than the overall scene. The camera’s histogram is available as a live display and gives you a real-time read on exposure without relying on the LCD brightness, which can lie to you in bright sunlight.
What I’d Add From the Composite Side
I spend most of my time in Photoshop rather than behind a lens, but the way Greengo explains exposure modes reframed something for me about working with other photographers’ files. When I get a raw file that’s weirdly inconsistent across a series, it’s almost always because someone was shooting in Program mode without realizing Program Shift was engaged. The camera was giving equivalent exposures, but aperture was drifting all over the place, which means depth of field was inconsistent across what was supposed to be a matched set. If you’re shooting for compositing work specifically, Manual or Av with locked aperture will save your retoucher (and maybe yourself) a lot of grief later.
The single most important thing I took from this tutorial is that the R1’s exposure system rewards photographers who understand what each mode is actually controlling. The camera is powerful enough that you can hide behind Auto and still get decent results, but you’ll cap out fast. Greengo explains this stuff in a way that’s direct and genuinely useful without being condescending about it.
Watch the full tutorial on YouTube and find the full 21-part Canon R1 course at jgp.world/CanonR1.
Comments
Leave a Comment