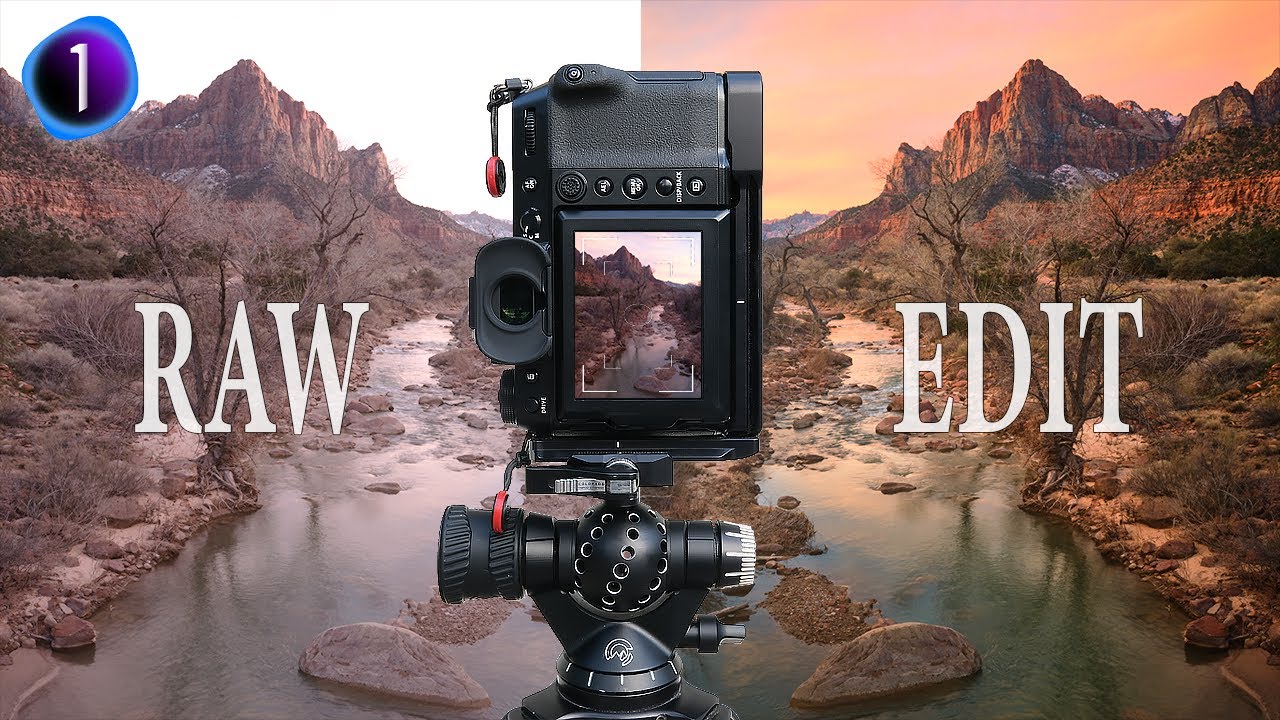
There’s a specific kind of editing frustration I’ve felt more times than I’d like to admit. You pull a radial gradient over a blown-out sky, drop the exposure, and then watch in mild horror as the adjustment also swallows half the mountain range you were trying to protect. You either live with it, or you spend the next 45 minutes painting a mask by hand like it’s 2009. Neither option is great when you’re billing hourly and your coffee is going cold.
That’s the exact problem that Watch the full tutorial on YouTube from landscape photographer Mark Denney addresses head-on. In this tutorial, Denney walks through how he uses Capture One’s Luma Range tool to refine local adjustment masks based on luminosity values rather than painted selections. The short version: you draw a rough mask, then tell Capture One to only apply it where the tones are actually bright enough to belong to the sky. It’s the kind of technique that sounds obvious once you see it, and then makes you slightly annoyed you didn’t know about it sooner.
The photo he’s working with is a landscape shot from Zion National Park, a classic composition with a bright sky and a significantly darker foreground. It’s a perfect test case because it’s exactly the tonal split that makes global adjustments useless and manual masking tedious. Here’s the full breakdown of what he does.
Step 1: Make Your Global Corrections First
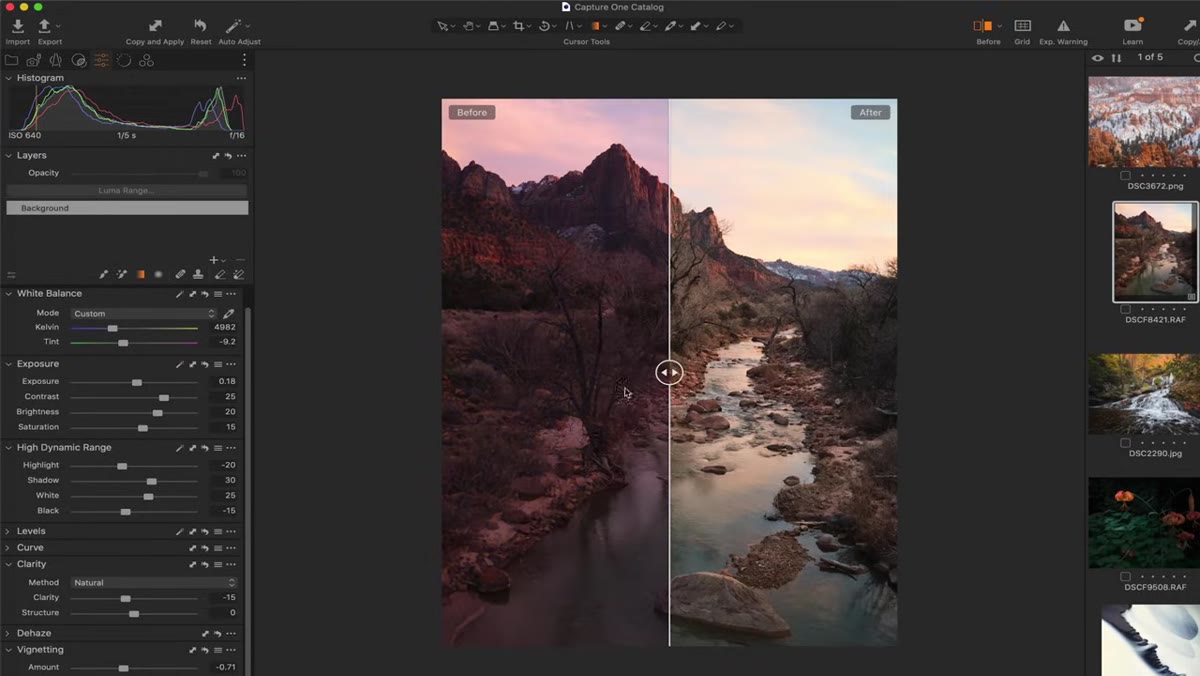 Raw file open in Capture One with visible magenta color cast
Before touching any local adjustments, Denney corrects the color cast and white balance on the global level. The raw file has a magenta shift and uneven exposure across the scene. He deals with all of that first so the local work starts from a clean, balanced baseline.
Raw file open in Capture One with visible magenta color cast
Before touching any local adjustments, Denney corrects the color cast and white balance on the global level. The raw file has a magenta shift and uneven exposure across the scene. He deals with all of that first so the local work starts from a clean, balanced baseline.
This matters more than it sounds. If you’re trying to mask based on luminosity and your overall tones are still off from a color cast, your Luma Range selections are going to behave unpredictably. Get the global corrections out of the way, then go local.
Step 2: Add a New Filled Adjustment Layer with a Radial Filter
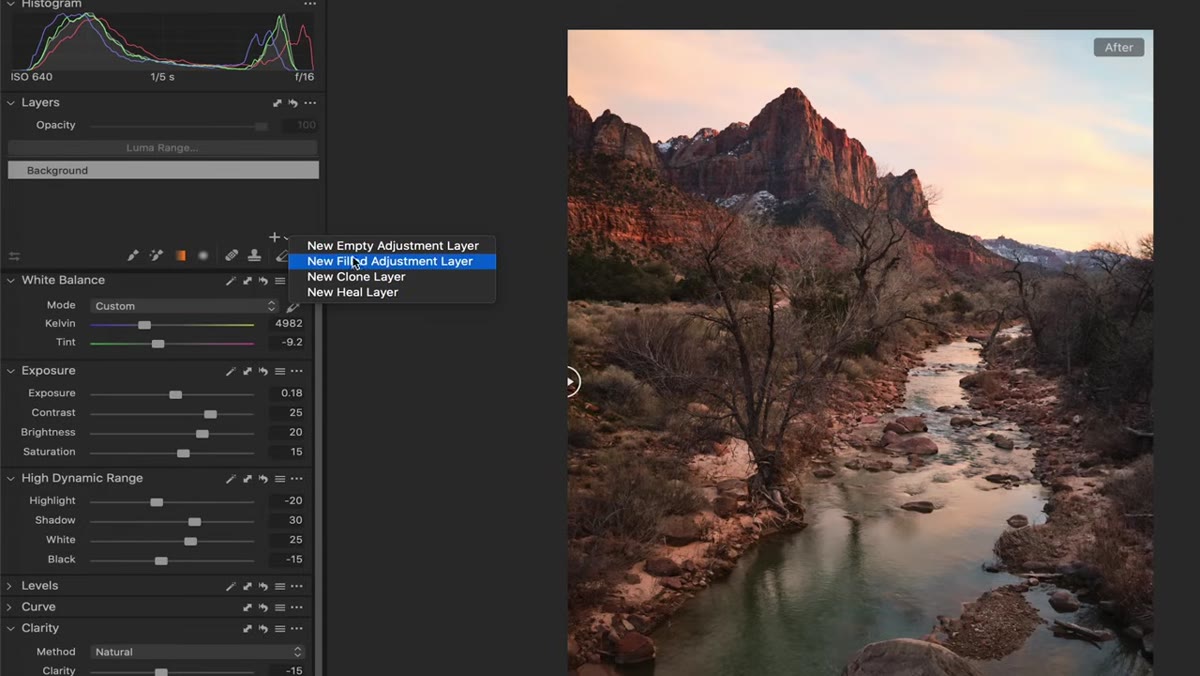 Layers panel open, New Filled Adjustment Layer option highlighted
In the Layers panel, Denney creates a new filled adjustment layer and selects the Radial Filter as his masking tool. He drags it out across the sky in a wide arc, covering the bright upper portion of the image. The goal here is not precision. It’s coverage. He wants the adjustment to exist roughly where the sky is, knowing he’ll refine it in the next step.
Layers panel open, New Filled Adjustment Layer option highlighted
In the Layers panel, Denney creates a new filled adjustment layer and selects the Radial Filter as his masking tool. He drags it out across the sky in a wide arc, covering the bright upper portion of the image. The goal here is not precision. It’s coverage. He wants the adjustment to exist roughly where the sky is, knowing he’ll refine it in the next step.
This is the part where most people either try to be too precise with the initial draw or give up when the mask bleeds onto the mountains. Denney’s whole point is that you don’t have to nail the edges manually. That’s the Luma Range’s job.
Step 3: Preview the Mask in Grayscale
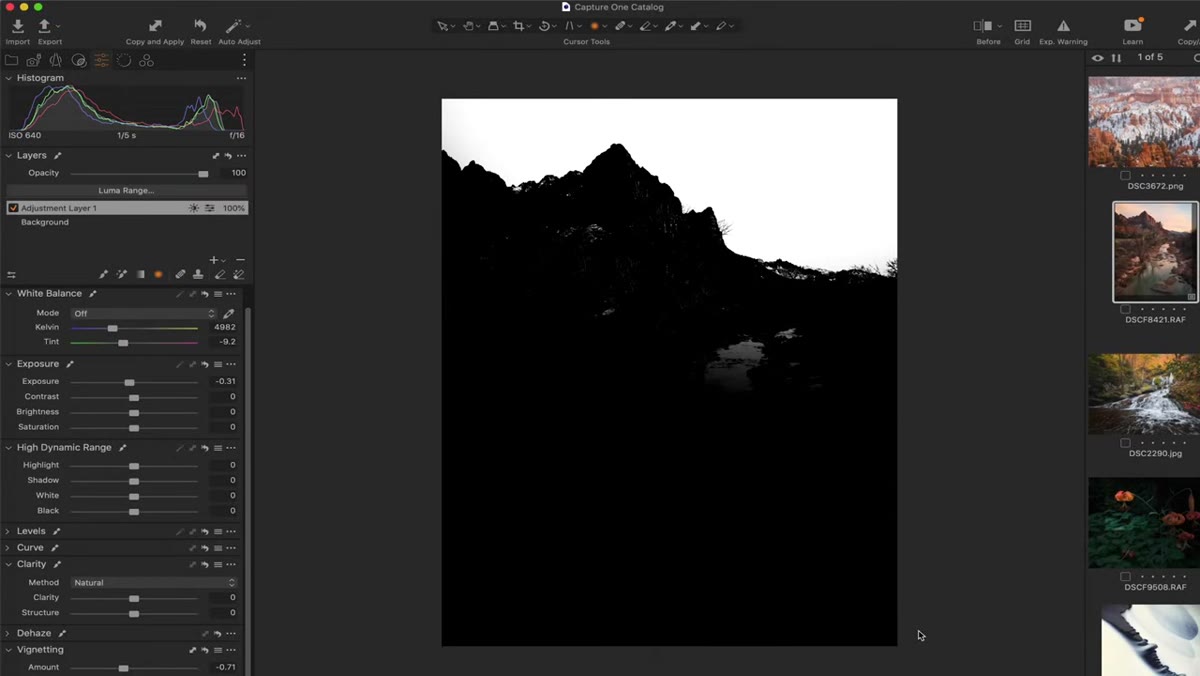
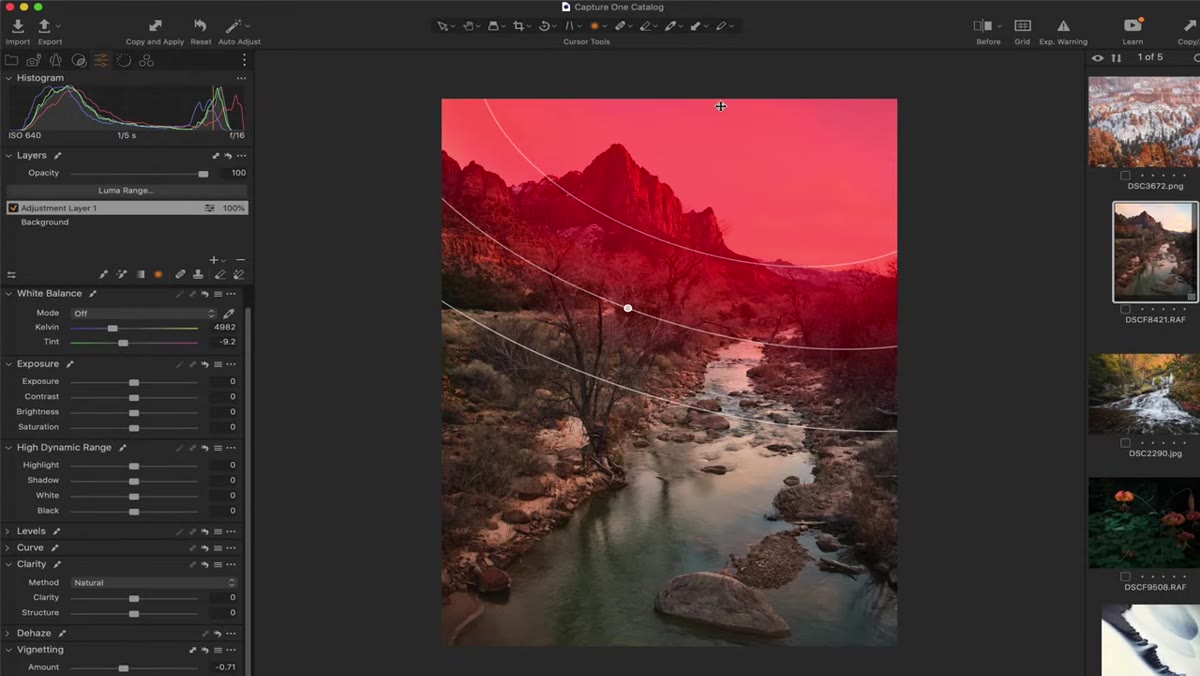 Grayscale mask overlay visible on the image, sky shown in white
To see exactly what’s happening with the mask, Denney enables the grayscale mask display. In this view, white areas will receive the adjustment and black areas won’t. It’s a much cleaner way to evaluate and refine a mask than eyeballing the effect on the actual image.
Grayscale mask overlay visible on the image, sky shown in white
To see exactly what’s happening with the mask, Denney enables the grayscale mask display. In this view, white areas will receive the adjustment and black areas won’t. It’s a much cleaner way to evaluate and refine a mask than eyeballing the effect on the actual image.
If you haven’t used this view before, turn it on before you start editing your Luma Range settings. Trying to dial in luminosity masking while looking at the photo itself is like trying to tune a guitar in a loud bar. Technically possible, practically miserable.
Step 4: Open the Luma Range Tool and Target the Bright Tones
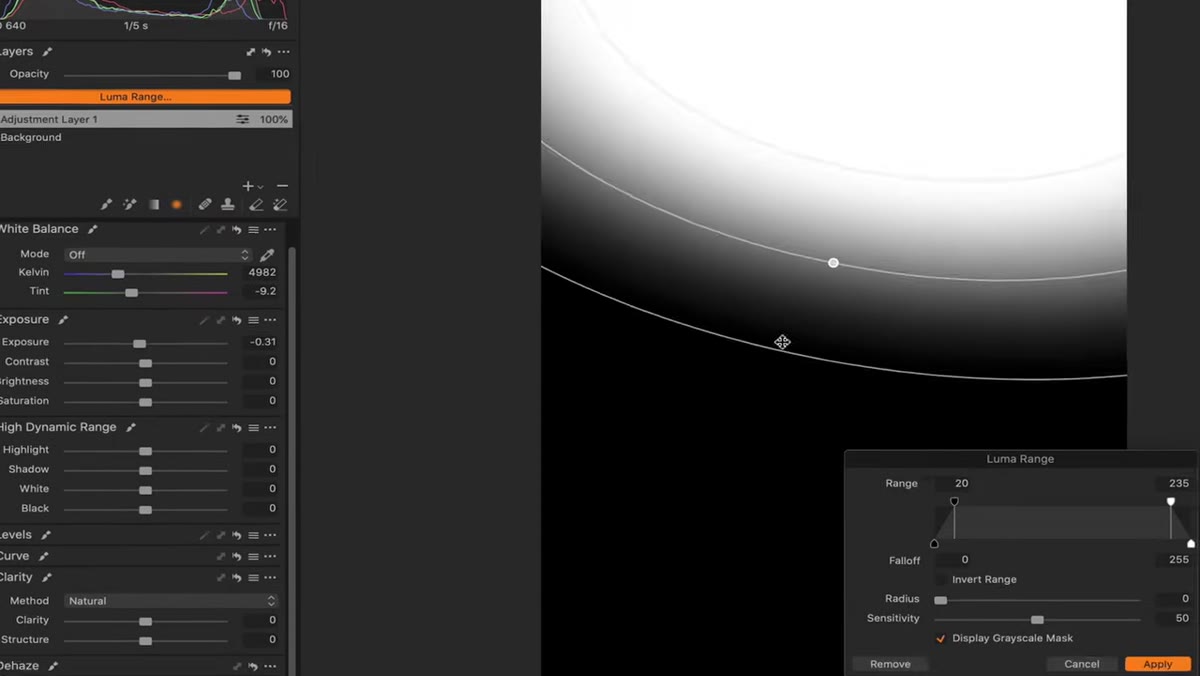 Luma Range panel open, slider pulled toward bright end of range
Here’s the core of the whole technique. With the grayscale mask visible, Denney opens the Luma Range panel and drags the selector toward the right, targeting the brighter luminosity values in the image. The mask updates in real time, pulling back from the darker mountain and foreground areas and concentrating itself on the bright sky tones.
Luma Range panel open, slider pulled toward bright end of range
Here’s the core of the whole technique. With the grayscale mask visible, Denney opens the Luma Range panel and drags the selector toward the right, targeting the brighter luminosity values in the image. The mask updates in real time, pulling back from the darker mountain and foreground areas and concentrating itself on the bright sky tones.
He slides the left edge of the range in from the far right to find the point where the sky tones are captured without grabbing too much of the midtones in the terrain. The goal is to find the tonal split that naturally separates sky from landscape, because in a well-exposed image, that split almost always exists in the histogram.
Step 5: Add a Feather to the Luma Range Falloff
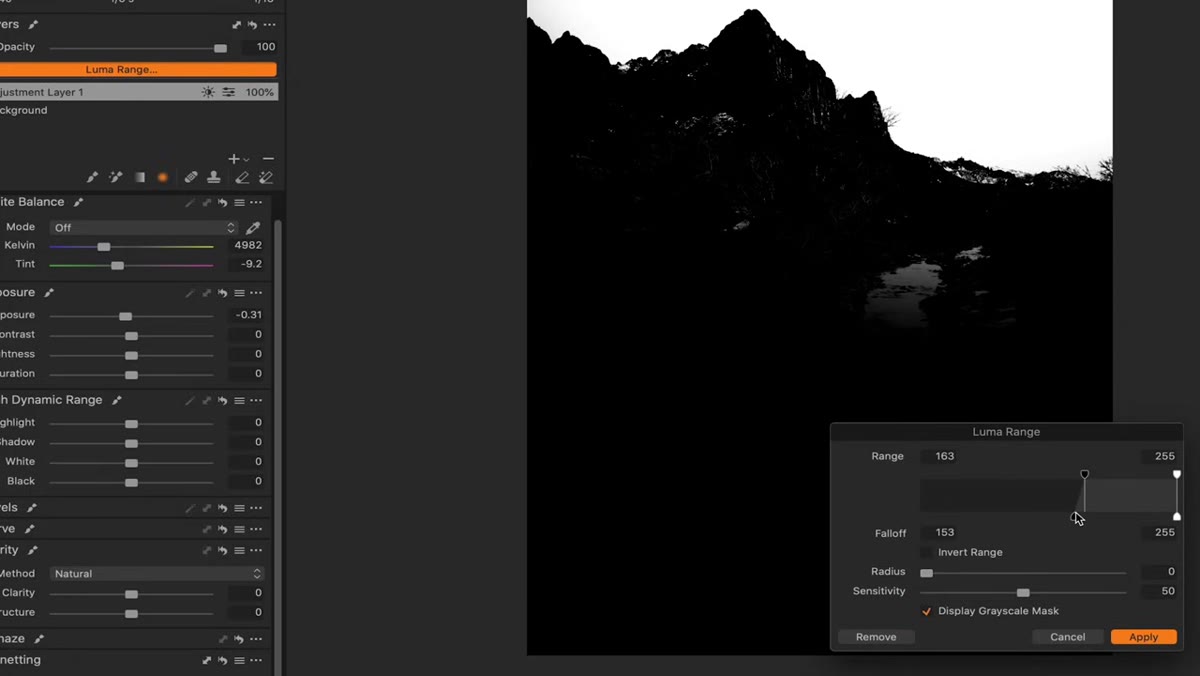 Luma Range falloff handle being adjusted, soft mask edge visible
Once he has the core luminosity range dialed in, Denney adjusts the falloff handle on the Luma Range control. This softens the edge of the mask rather than creating a hard cutoff at a specific brightness value. He’s deliberate about this point: a perfectly hard edge almost always looks artificial because real light bleeds and spills across surfaces.
Luma Range falloff handle being adjusted, soft mask edge visible
Once he has the core luminosity range dialed in, Denney adjusts the falloff handle on the Luma Range control. This softens the edge of the mask rather than creating a hard cutoff at a specific brightness value. He’s deliberate about this point: a perfectly hard edge almost always looks artificial because real light bleeds and spills across surfaces.
A little feathering here mimics the way light actually behaves. The mask transitions softly from “fully on” in the brightest sky tones to “fully off” in the darker terrain. This is the difference between a mask that looks like it was cut out with scissors and one that looks like the light just happened that way.
Step 6: Apply the Exposure and Color Adjustments
 Exposure and white balance sliders being adjusted on the masked layer
With the refined mask in place, Denney turns off the grayscale preview and gets into the actual adjustments. He pulls down the exposure on the sky layer, then warms up the white balance specifically in that area and adds a touch of magenta. Because the Luma Range is doing the heavy lifting on the mask, these adjustments stay confined to the sky tones without bleeding into the foreground.
Exposure and white balance sliders being adjusted on the masked layer
With the refined mask in place, Denney turns off the grayscale preview and gets into the actual adjustments. He pulls down the exposure on the sky layer, then warms up the white balance specifically in that area and adds a touch of magenta. Because the Luma Range is doing the heavy lifting on the mask, these adjustments stay confined to the sky tones without bleeding into the foreground.
The result is a sky that feels balanced with the rest of the image rather than artificially darkened. The mountains don’t go muddy. The foreground doesn’t shift warm. The edit lives exactly where it’s supposed to.
One Thing I’d Add: This Translates Directly to Luminosity Masking in Photoshop
If you’re primarily a Photoshop user reading this and wondering whether any of it applies to you, it does. Capture One’s Luma Range is essentially a non-destructive, interactive luminosity mask generator. In Photoshop, you’d build something similar using Calculations or the Luminosity Masks panel if you’re using a plugin like Lumenzia or TK Actions.
The underlying logic is identical: isolate a tonal range, apply adjustments only within that range, feather the transition. The Capture One implementation is just faster to iterate because it’s live and slider-driven rather than requiring channel math. If you’re comfortable with luminosity masks in Photoshop already, this will feel immediately familiar. If you’re not, this tutorial is actually a great introduction to the concept before you go build the Photoshop equivalent.
The single most important thing Denney demonstrates here is that your initial mask doesn’t have to be perfect because Luma Range lets you refine it after the fact based on the actual tones in the image. That shifts the whole workflow from “carefully draw the right shape” to “draw approximately the right shape, then let luminosity do the precision work.” For anyone who’s ever spent way too long painting sky masks by hand, that’s a genuinely useful change in approach.
Watch the full tutorial on YouTube to see Denney walk through the whole edit, including the before and after on the Zion shot.
Comments (3)
Simple but effective. Sometimes that's all you need.
Simple but effective. Sometimes that's all you need.
I've watched a dozen tutorials on this and yours is the clearest by far.
Leave a Comment