
If you’ve ever shot a wedding or any multi-camera event and then stared at a folder of 3,000 images trying to figure out what’s happening when, you already know the pain. Camera A is an hour ahead. Camera B is three seconds behind. Nothing lines up. You’re essentially trying to read a story where someone shuffled the pages. The selection process becomes guesswork, and guesswork leads to missed moments, bad edits, and a client who wonders why you left out the one photo where grandma cried.
This is exactly the problem that Watch the full tutorial on YouTube tackles head-on. In this CreativeLive tutorial, the instructor walks through a deceptively simple workflow inside Adobe Bridge that syncs the capture times across multiple cameras before you ever touch the culling process. It sounds like housekeeping. It is actually the difference between selecting photos like a storyteller and selecting them like someone reading a ransom note. I’ve been doing event work long enough to have wasted entire afternoons doing this wrong, and watching this clicked a few things into place for me.
The core idea is that you find one anchor image you can identify across cameras, calculate the time difference, and push all the images from the out-of-sync camera forward or backward to match. The math is minimal. The payoff is massive.
Step 1: Identify the Anchor Image Across Both Cameras
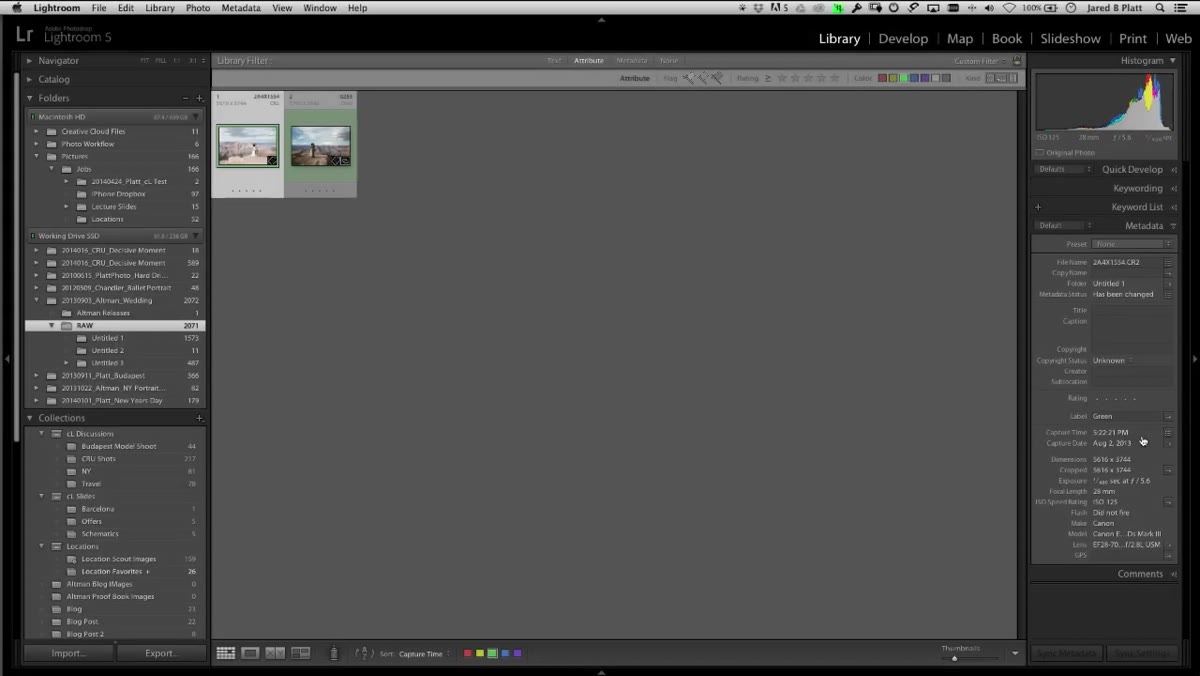 Comparing capture times across two image files in Bridge
Start by finding a moment that both cameras captured simultaneously. A clock in the frame works. So does the moment a flash fired, or any split-second action you can identify in both sets of images. In the tutorial, the instructor finds an image at 5:22:21 PM on one camera. That becomes the reference point. Everything else gets measured against it. The goal is not precision for its own sake. It is giving all your images a shared timeline so Bridge can sort them together correctly.
Step 2: Note the Time Discrepancy
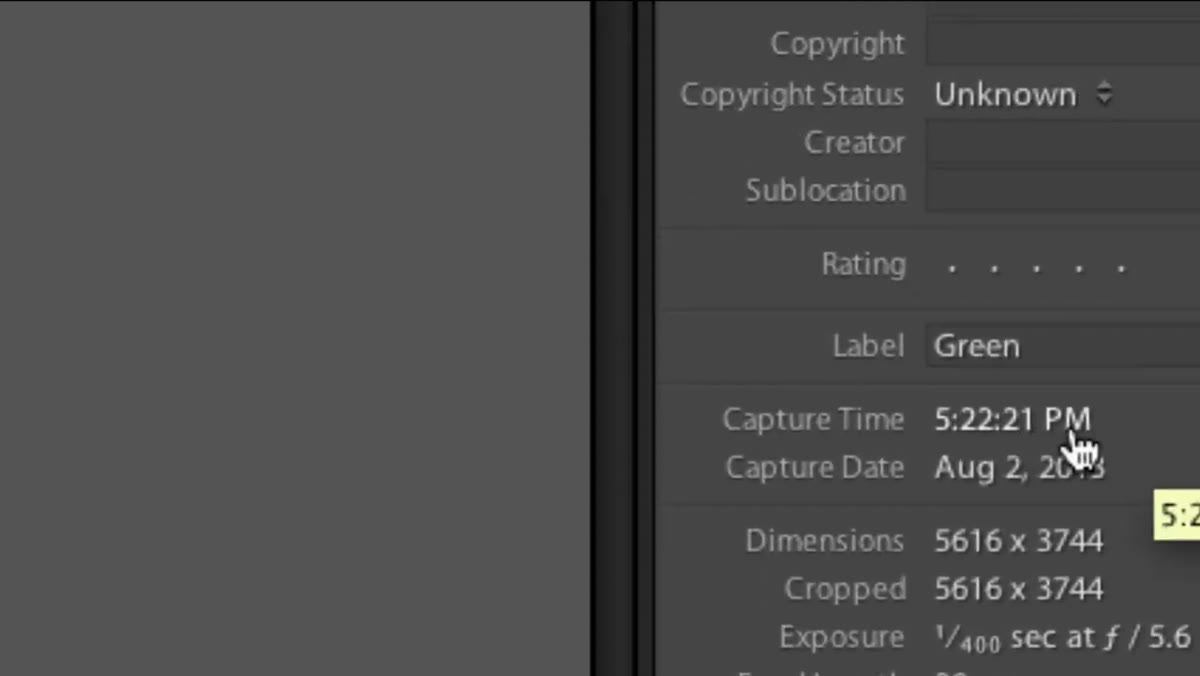 Capture time visible in metadata panel for anchor image
Once you have your anchor image identified on both cameras, compare the capture times. The instructor finds a three-second difference between the two files. It sounds trivial, but in a fast-moving event, three seconds can mean an image shows up in the wrong moment entirely when you’re viewing all cameras together. Write down the exact difference. You will enter this manually in a later step, and getting it wrong by even a second will misalign every image in that camera’s batch.
Step 3: Filter by Camera in the Metadata Panel
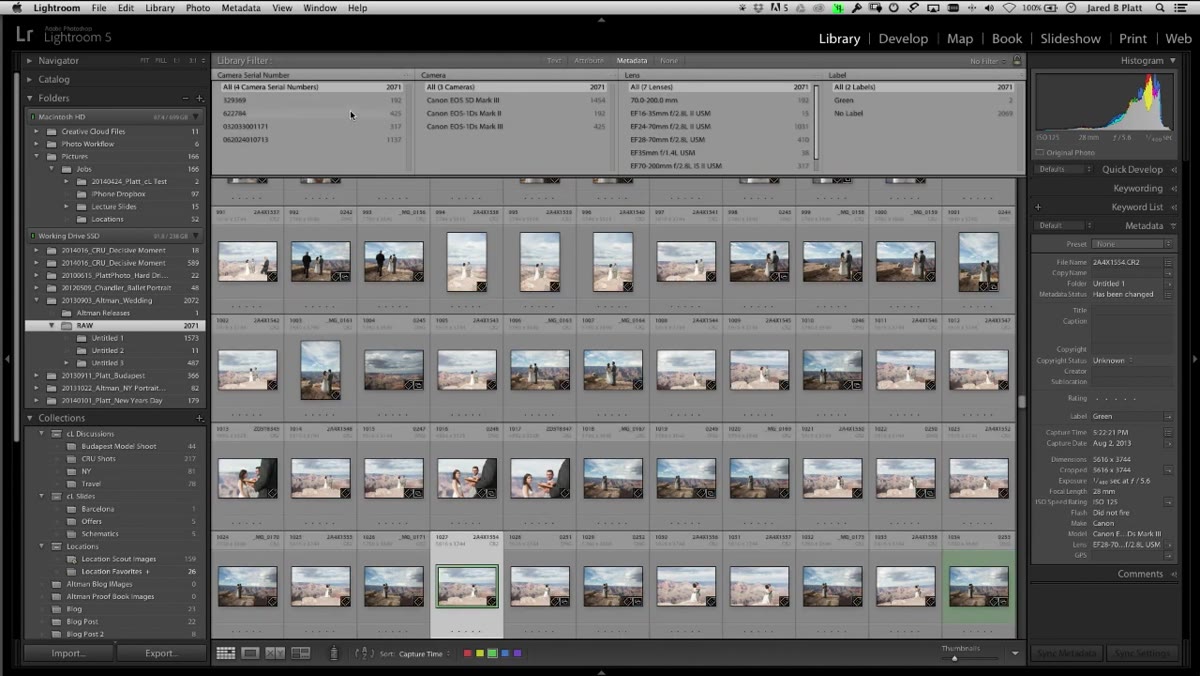 Metadata panel filtering images by specific camera model
In Bridge, go to the Metadata panel and use it to filter your view down to just the images from the camera you need to correct. The instructor navigates to the specific camera body in question using the metadata filter, which isolates that camera’s files without you having to physically separate them into folders. This is cleaner than folder-sorting because you can flip between filtered and unfiltered views quickly. Toggle the filter on, confirm you’re seeing only the right camera’s images, and move on.
Step 4: Select All Images from the Offending Camera
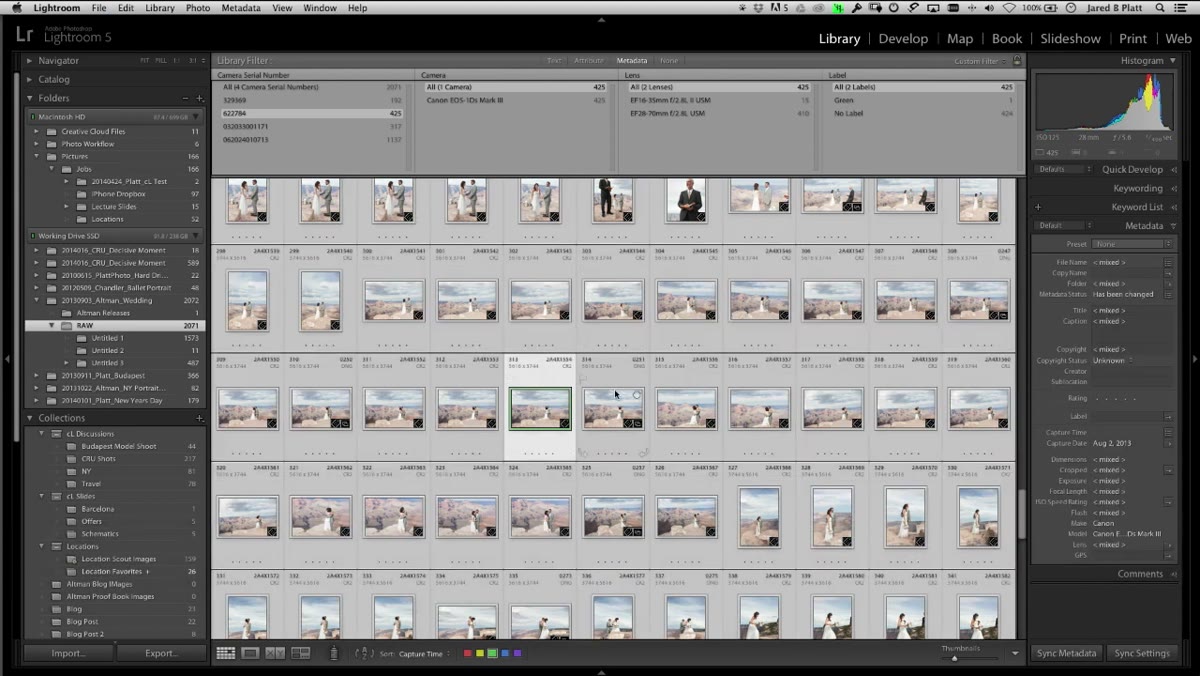 All images selected in Bridge shown as lighter gray thumbnails
With your filtered view active, hit Command-A (Ctrl-A on Windows) to select every image from that camera. The tutorial points out something worth knowing: in Bridge, selected images shift to a lighter gray thumbnail border, while a single active image shows a brighter highlight. It is a subtle distinction and easy to miss. If you are not sure all images are selected, deselect and reselect. You want every file in that camera’s batch moving together, because if even one gets left behind, your timeline will have a ghost.
Step 5: Open the Capture Time Dialog
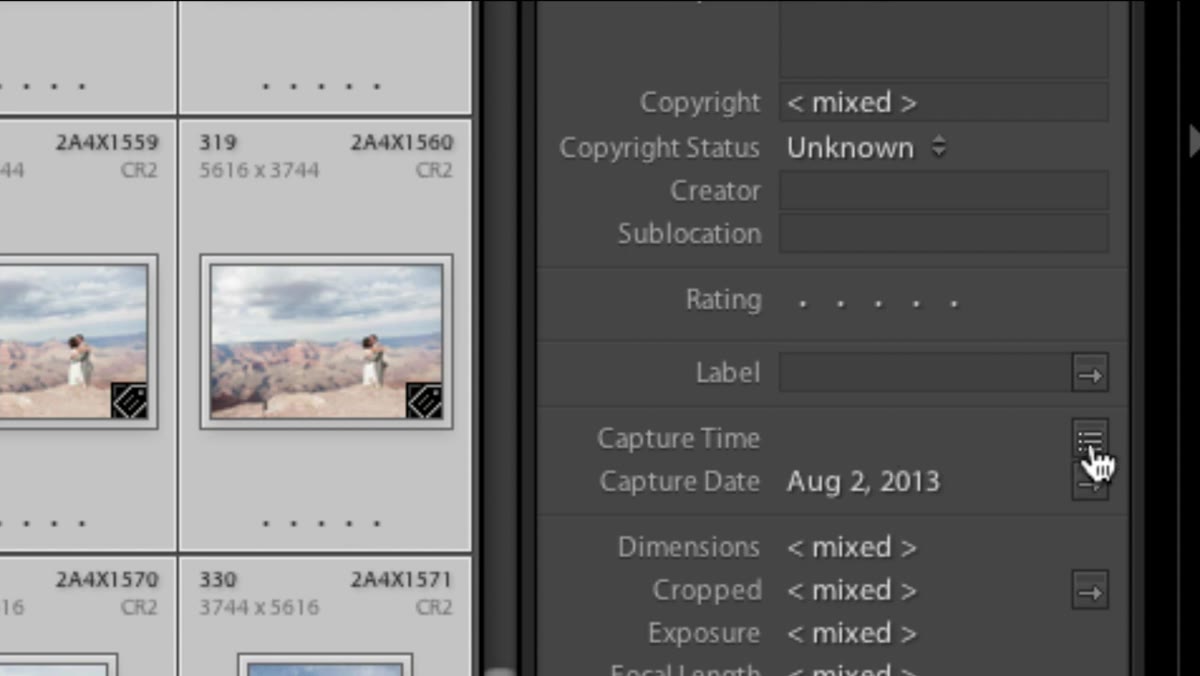 Bullet point button clicked to open capture time dialog box
With all images selected, look at the Capture Time field in the metadata panel. It will show nothing, because Bridge recognizes that multiple different times are selected. Do not panic. There is a small button next to that field that looks like a bullet point. Click it. A dialog box appears that lets you set a new capture time for the entire selection. This is the control center for the whole operation.
Step 6: Adjust the Time and Apply the Change
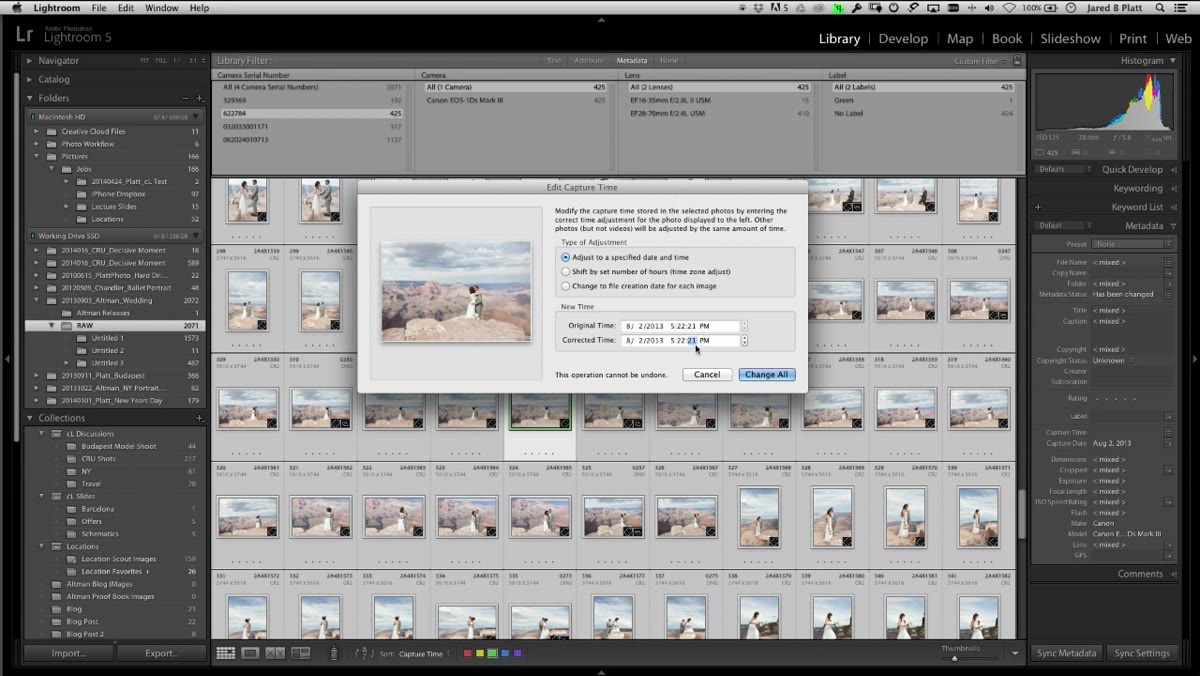 Capture time dialog open with seconds field being edited
Inside the dialog, change the timestamp to match what you calculated in Step 2. In the tutorial, the instructor bumps the seconds from 21 to 24, a three-second correction. Type in the corrected time, then hit Change. Bridge applies the offset to every selected image, moving them all forward (or backward) by the same amount. The individual differences between frames stay intact. Only the global offset shifts. Once applied, go back to your unfiltered view of all cameras combined and confirm the images are now interleaved correctly by time.
One Thing I’d Add: Do This Before You Import, Not After
The tutorial demonstrates this inside Bridge post-import, which works. But if you are shooting tethered or ingesting via something like Photo Mechanic, the ideal moment to fix timestamps is the second the cards come off the cameras. I have made the mistake of building a whole preliminary cull before realizing one camera was 47 minutes off because a photographer had never updated their timezone after a trip. Rebuilding a cull with corrected timestamps is not the end of the world, but it is absolutely the kind of thing that makes you mutter at your laptop in a coffee shop while everyone around you pretends not to notice.
The other thing worth flagging is that this approach shines most at weddings and events because of converging storylines. When you can see the groom’s room and the bride’s room in chronological order, side by side, you stop selecting individual great shots and start selecting great narrative sequences. That is a meaningful upgrade in the quality of what you deliver.
The single most important takeaway from this tutorial is that photo selection is not a photography problem, it is a data organization problem. Fix the data first, and the selection almost does itself. Synchronized timestamps let you cull with context, and context is what separates a folder of nice photos from a story worth telling.
Watch the full tutorial on YouTube to see the instructor walk through the full workflow, including the visual cues in Bridge that confirm everything is aligned correctly.
Comments (2)
My workflow just got 10x faster. Not even kidding.
Wow, I had no idea you could do this. Mind blown.
Leave a Comment