
I have a complicated relationship with keyboard shortcuts. On one hand, I genuinely believe they’re the single biggest factor separating a fast Photoshop workflow from a slow one. On the other hand, I spent the first two years of my freelance career almost entirely ignoring them, clicking through nested menus like some kind of digital archaeologist hunting for buried commands. It cost me real time, real money, and real embarrassment when a client watched me do it over a screen share.
The thing is, Photoshop’s default shortcuts don’t cover everything. There are commands you might use constantly, like Gaussian Blur, that don’t come pre-loaded with any shortcut at all. So you’re stuck. Either you memorize the menu path (Filter > Blur > Gaussian Blur, every single time), or you do something smarter. In this Aaron Nace tutorial from PHLEARN, Watch the full tutorial on YouTube, Aaron walks through exactly how to build, modify, and manage your own shortcuts inside Photoshop. It’s one of those videos that seems almost too simple, until you realize how much friction it removes from your day.
The core idea is straightforward: Photoshop lets you assign keyboard shortcuts to virtually any menu command. Not just the ones that ship with defaults. Any of them. Once you understand the system, you can remap your entire workflow around how your brain actually works, not around what Adobe decided a decade ago.
Step 1: Identify the Command You Use Most Without a Shortcut
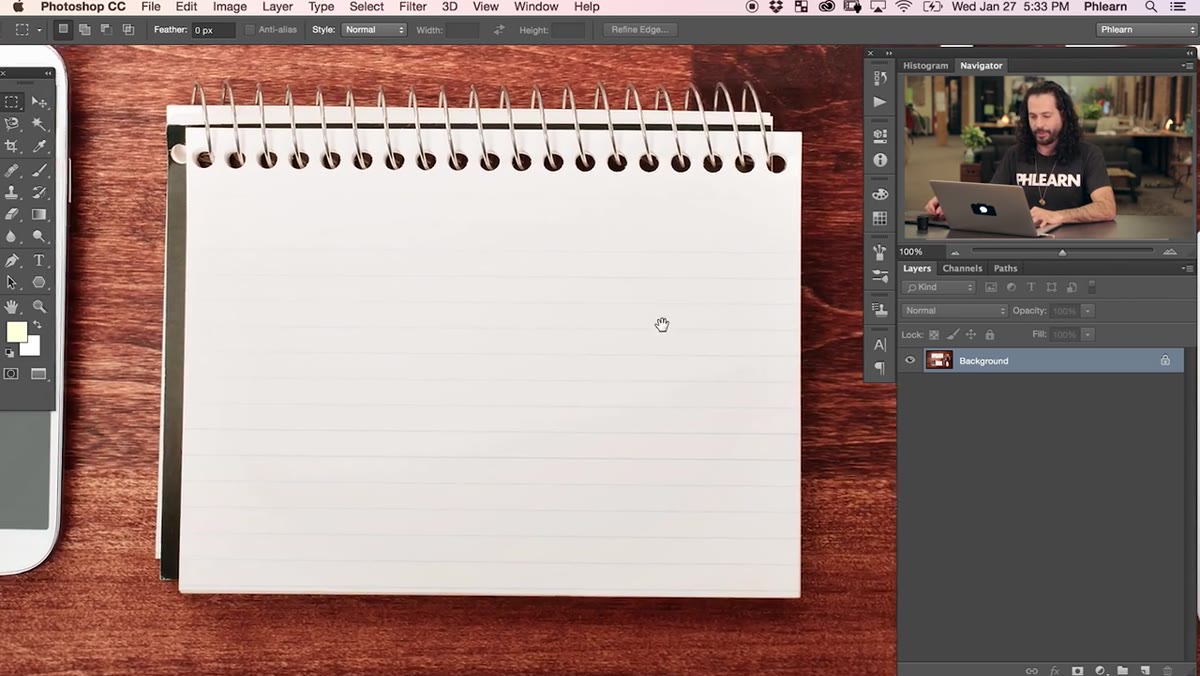 Aaron navigating to Filter > Blur > Gaussian Blur in menus
Before you open the shortcuts editor, figure out what’s actually slowing you down. Aaron uses Gaussian Blur as his example, and it’s a good one because it’s a command most retouchers and compositors reach for constantly. But it has no default shortcut. You’re forced to go to Filter, hover over Blur, then slide over to Gaussian Blur every time.
Aaron navigating to Filter > Blur > Gaussian Blur in menus
Before you open the shortcuts editor, figure out what’s actually slowing you down. Aaron uses Gaussian Blur as his example, and it’s a good one because it’s a command most retouchers and compositors reach for constantly. But it has no default shortcut. You’re forced to go to Filter, hover over Blur, then slide over to Gaussian Blur every time.
Think about your own workflow. What commands do you execute more than a few times per editing session? Anything you’re navigating to through two or more menu levels is a candidate. Make a mental note of one or two before you proceed.
Step 2: Open the Keyboard Shortcuts Editor
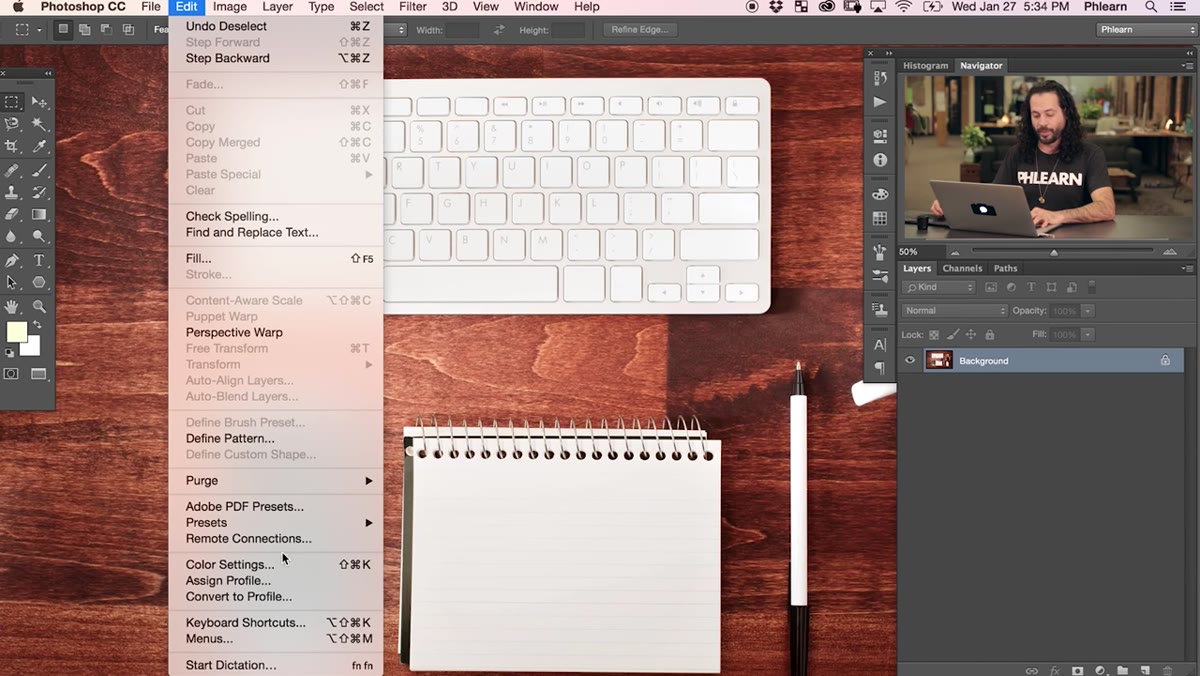 Edit menu open with Keyboard Shortcuts option highlighted
Go to Edit in the top menu bar and scroll down toward the bottom. You’ll find “Keyboard Shortcuts” listed there. Click it. This opens a dedicated dialog box that gives you full control over shortcut assignments across three categories: Application Menus, Panel Menus, and Tools.
Edit menu open with Keyboard Shortcuts option highlighted
Go to Edit in the top menu bar and scroll down toward the bottom. You’ll find “Keyboard Shortcuts” listed there. Click it. This opens a dedicated dialog box that gives you full control over shortcut assignments across three categories: Application Menus, Panel Menus, and Tools.
For most workflow customizations, you’ll be working in Application Menus, which is the default view when the dialog opens. This covers everything you access through the top menu bar. Panel Menus handles shortcuts for things inside floating panels, and Tools covers the toolbar. We’re staying in Application Menus for this walkthrough.
Step 3: Navigate the Menu Tree to Find Your Command
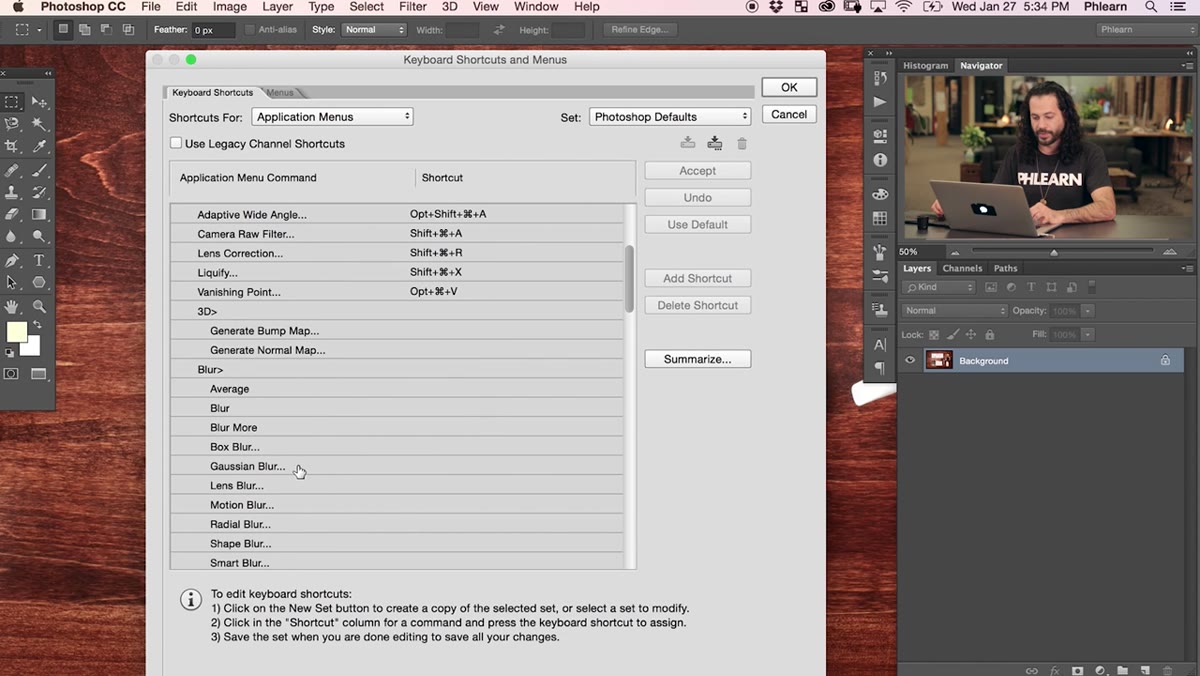 Keyboard Shortcuts dialog showing Filter > Blur expanded in the menu tree
The shortcuts editor mirrors Photoshop’s actual menu structure as a collapsible tree. To find Gaussian Blur, click on “Filter” in the list to expand it, then scroll down until you see “Blur,” and expand that too. Gaussian Blur will be listed inside it, with an empty field in the shortcut column next to it indicating no shortcut is currently assigned.
Keyboard Shortcuts dialog showing Filter > Blur expanded in the menu tree
The shortcuts editor mirrors Photoshop’s actual menu structure as a collapsible tree. To find Gaussian Blur, click on “Filter” in the list to expand it, then scroll down until you see “Blur,” and expand that too. Gaussian Blur will be listed inside it, with an empty field in the shortcut column next to it indicating no shortcut is currently assigned.
This layout makes it easy to browse what shortcuts already exist across the entire application, which is genuinely useful on its own. You can spot redundancies, find gaps, or just remind yourself what’s already available without hunting through menus.
Step 4: Click the Shortcut Field and Press Your Key Combination
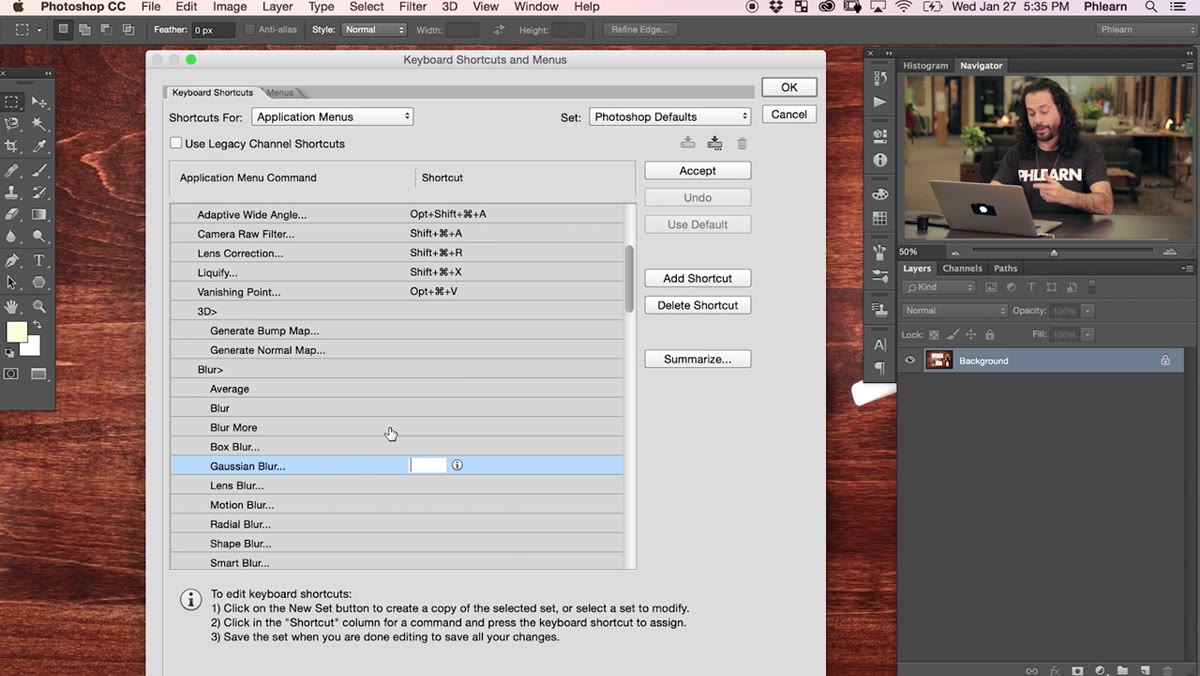 Clicking Gaussian Blur shortcut field and typing a key combination
Click directly in the empty shortcut field next to Gaussian Blur. The field becomes active and waits for your input. Just press the key combination you want. Aaron tries pressing just “G” first, and Photoshop flags it immediately as invalid, because all shortcut keys need to include at least the Command key (Ctrl on Windows).
Clicking Gaussian Blur shortcut field and typing a key combination
Click directly in the empty shortcut field next to Gaussian Blur. The field becomes active and waits for your input. Just press the key combination you want. Aaron tries pressing just “G” first, and Photoshop flags it immediately as invalid, because all shortcut keys need to include at least the Command key (Ctrl on Windows).
He then tries Command+G, which Photoshop accepts as a valid format but warns is already in use for “Group Layers.” This is where it gets practical: you don’t want to accidentally break a shortcut you rely on. Aaron settles on Shift+Option+Command+G (Shift+Alt+Ctrl+G on Windows), which is unoccupied. Yes, it’s three modifier keys plus a letter, but in practice your left hand lands on all three modifiers naturally, and you tap G with your right. It’s faster than it sounds.
Step 5: Accept and Apply the Shortcut
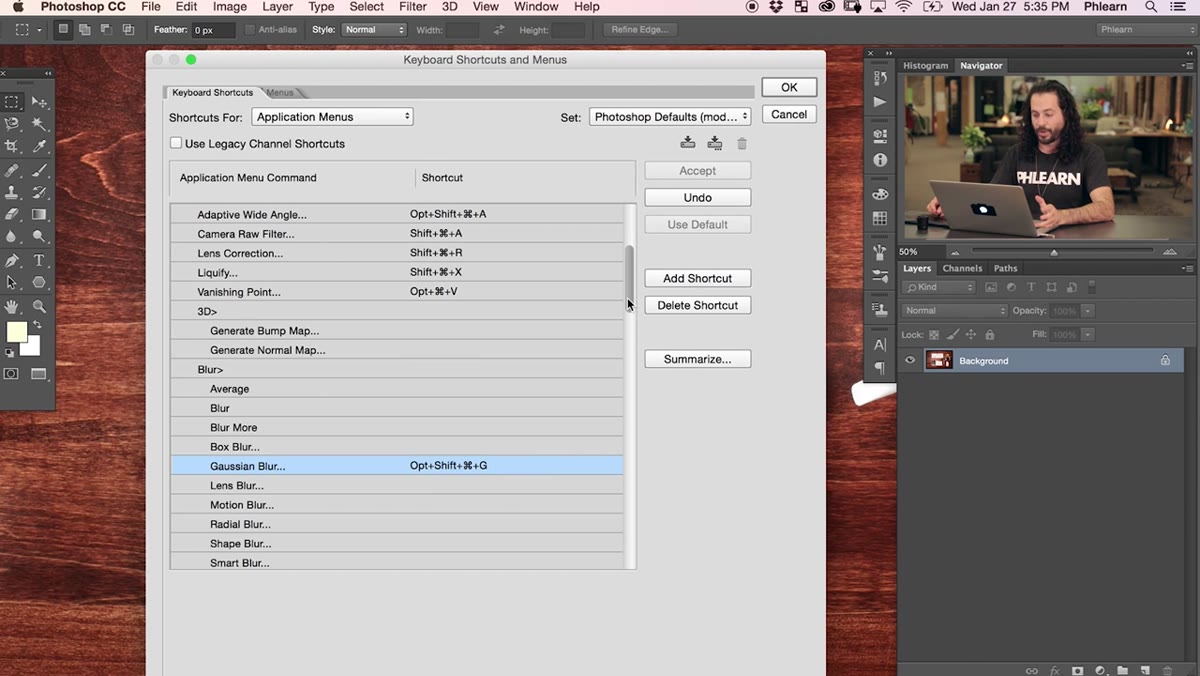 Clicking Accept button in Keyboard Shortcuts dialog to confirm assignment
Once you’ve entered a key combination that isn’t flagged as a conflict, click “Accept” to confirm that assignment, then click “OK” to close the dialog and apply everything. Photoshop saves the shortcut to your current keyboard shortcut set.
Clicking Accept button in Keyboard Shortcuts dialog to confirm assignment
Once you’ve entered a key combination that isn’t flagged as a conflict, click “Accept” to confirm that assignment, then click “OK” to close the dialog and apply everything. Photoshop saves the shortcut to your current keyboard shortcut set.
To verify it worked, go back to Filter > Blur > Gaussian Blur in the actual menu. You should now see your new shortcut displayed next to the command name, the same way native shortcuts like Ctrl+Z appear next to Undo. That visual confirmation matters. It means Photoshop has registered it.
Step 6: Test It in a Real Edit
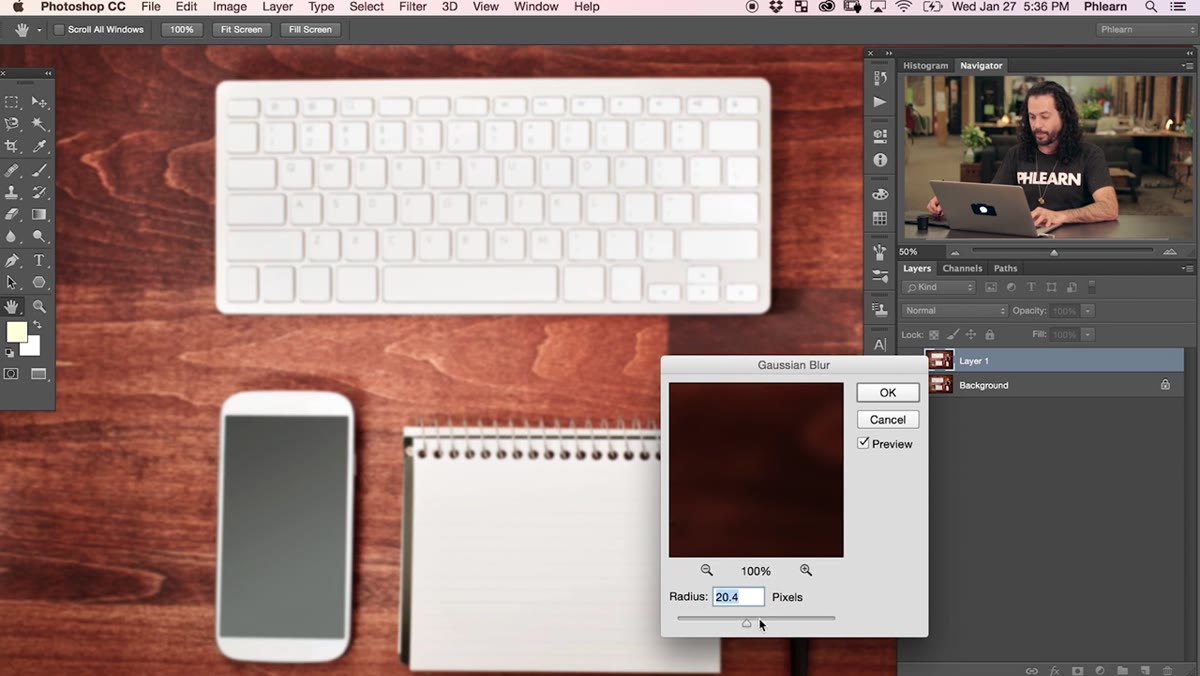 Using the new shortcut to trigger Gaussian Blur dialog during editing
This is the part Aaron makes look satisfying, and it is. With a layer selected, he hits his new shortcut combination and the Gaussian Blur dialog pops up immediately. No menus, no hovering, no clicking through subfolders. Just the dialog, ready to go.
Using the new shortcut to trigger Gaussian Blur dialog during editing
This is the part Aaron makes look satisfying, and it is. With a layer selected, he hits his new shortcut combination and the Gaussian Blur dialog pops up immediately. No menus, no hovering, no clicking through subfolders. Just the dialog, ready to go.
Test yours the same way. Make a selection on your image, trigger the shortcut, and confirm the right dialog opens. Do it three or four times in a row. Muscle memory doesn’t build from a single use, but a handful of deliberate repetitions right after setup goes a long way toward making it stick.
One Thing I’d Add: Generate and Print the Full Shortcut List
Aaron briefly mentions you can generate a summary of all your shortcuts, and I want to expand on that because it’s criminally underused. Inside the Keyboard Shortcuts dialog, there’s a “Summarize” button. Click it, and Photoshop exports a complete HTML document listing every assigned shortcut across all three categories. You can open it in a browser and print it.
I keep a printed copy next to my laptop when I’m at a coffee shop. New shortcuts don’t stick in my head immediately, and having a physical reference sheet means I actually use them instead of reverting to mouse habits when I forget. It also gives you a clean audit of your setup so you can spot gaps, the commands you reach for constantly but still haven’t assigned a key.
Custom keyboard shortcuts are one of those Photoshop features that sounds like a minor quality-of-life thing until you actually set them up and realize how much cognitive friction they were adding to every single session. The time you save on any one keystroke is small. Multiplied across hundreds of edits, it’s significant, and more importantly, it keeps you in flow instead of hunting through menus.
Watch the full tutorial on YouTube to follow along with Aaron’s walkthrough, including his second example of assigning a shortcut to the Add Layer Mask command, which is equally worth setting up.
Comments (4)
Printing this out and pinning it next to my monitor. That good.
The tip about stop clicking through menus li was the missing piece for me. Thank you.
I keep coming back to this article. It's that useful.
Wow, I had no idea you could do this. Mind blown.
Leave a Comment